In today’s hyper-connected world, a stable and efficient network connection is not just a convenience; it’s a necessity. Whether you’re a remote worker relying on constant communication, a gamer seeking uninterrupted gameplay, or a student accessing online resources, a properly functioning network driver is the unsung hero of your digital experience. This guide delves deep into the process of installing and troubleshooting network drivers, ensuring you can navigate the digital landscape with confidence and speed.
The term “network driver” might sound technical, but its function is straightforward. Think of it as a translator between your computer’s hardware (like your Wi-Fi card or Ethernet port) and its operating system (Windows, macOS, Linux). Without the correct driver, your computer simply won’t know how to communicate with the network hardware, leaving you offline or with a sluggish connection. Installing or updating these drivers is a fundamental skill for anyone who wants to maximize their tech setup and avoid frustrating connectivity issues.
This article will equip you with the knowledge to tackle network driver installations, covering everything from identifying the right driver to performing the installation smoothly. We’ll explore the different methods available, from automated solutions to manual downloads, and provide essential troubleshooting tips to get you back online if something goes awry.
Understanding Your Network Hardware and Drivers
Before embarking on the installation process, it’s crucial to understand what you’re working with. Your computer can connect to a network in a few primary ways:
- Wired Ethernet: This utilizes an Ethernet port and cable to establish a physical connection to your router or modem. The driver responsible for this is your Ethernet driver.
- Wireless Wi-Fi: This uses a Wi-Fi adapter (often built into your motherboard or a separate USB dongle) to connect wirelessly to a Wi-Fi network. The driver for this is your Wi-Fi driver.
- Bluetooth: While primarily for short-range device connections, Bluetooth can also be used for limited network tethering.
The specific driver you need will correspond to the type of network hardware you have installed. Most modern computers come with these drivers pre-installed, but they can become outdated, corrupted, or even missing after an operating system update or a hardware change.
Identifying Your Network Hardware
Knowing the exact make and model of your network adapter is the first step to finding the correct driver. This information is readily available within your operating system.
On Windows:
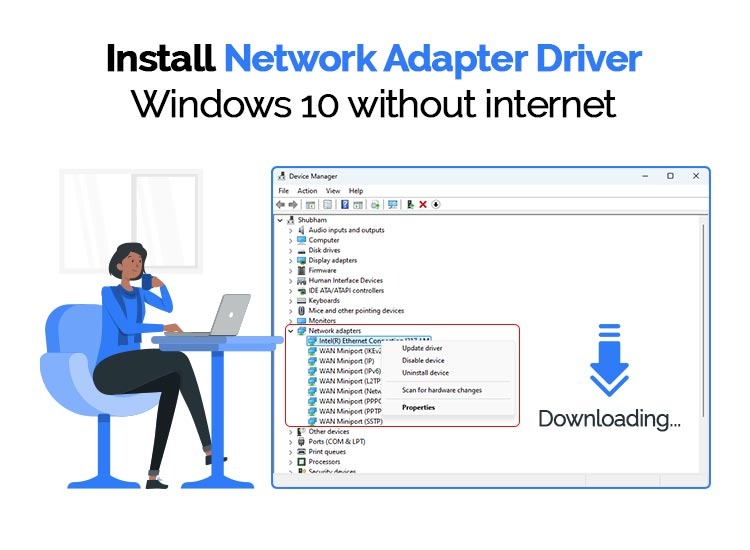
- Open Device Manager:
- Press the
Windows key + Xand select “Device Manager” from the menu. - Alternatively, search for “Device Manager” in the Windows search bar.
- Press the
- Locate Network Adapters:
- In the Device Manager window, expand the “Network adapters” category.
- You will see a list of your installed network hardware. Look for entries that include “Wi-Fi,” “Wireless,” “Ethernet,” or “Realtek,” “Intel,” “Qualcomm” (common manufacturers).
- Note Down Details:
- Right-click on your network adapter and select “Properties.”
- In the “General” tab, the “Device name” will give you the model.
- For more specific information, go to the “Details” tab and select “Hardware Ids” from the dropdown menu. This will show you a string of codes that uniquely identifies your hardware, which is invaluable for searching for drivers online.
On macOS:
- Open System Information:
- Click the Apple logo in the top-left corner of your screen.
- Select “About This Mac.”
- Click the “System Report…” button.
- Navigate to Network Hardware:
- In the System Information window, under the “Hardware” section, select “Network.”
- Here, you’ll find details about your Wi-Fi and Ethernet hardware.
On Linux:
The method can vary slightly depending on your distribution (e.g., Ubuntu, Fedora). Generally, you can:
- Use the Terminal: Open a terminal and type
lspci | grep Networkfor PCI devices orlsusb | grep Networkfor USB devices. - Graphical Tools: Many distributions have a “System Information” or “Hardware” utility that can display this information.
Once you have identified your network adapter, you can proceed to find the appropriate driver.
Methods for Installing Network Drivers
There are several approaches to installing network drivers, ranging from simple automated processes to more involved manual steps. It’s important to choose the method that best suits your comfort level and the situation at hand.
Automated Driver Installation and Updates
Often, the easiest way to get your network drivers installed or updated is through your operating system’s built-in tools or the manufacturer’s software.
Using Windows Update
Windows Update is designed to automatically detect and install drivers for your hardware. If your network adapter is recognized, Windows will often download and install the most compatible driver.
- Access Windows Update:
- Go to “Settings” > “Update & Security” > “Windows Update.”
- Check for Updates:
- Click “Check for updates.”
- Install Optional Updates (if necessary):
- Sometimes, drivers are listed under “Optional updates.” Click on “View optional updates” and look for driver updates related to your network adapter.
- Select the relevant driver and click “Download and install.”
Note: While convenient, Windows Update might not always provide the latest or most optimized driver. For critical updates or performance enhancements, manual installation might be preferred.
Manufacturer’s Driver Utility Software
Many hardware manufacturers, such as Intel, Realtek, and Broadcom, provide their own utility software that scans your system and offers driver updates.
- Intel Driver & Support Assistant: For Intel Wi-Fi and Ethernet adapters.
- Realtek Driver & App Center: For Realtek network adapters.
- NVIDIA GeForce Experience / AMD Radeon Software: While primarily for graphics cards, these often include network drivers if they are integrated into the graphics chipset or motherboard.
These utilities are usually downloaded from the manufacturer’s official website. Once installed, they can automatically detect your hardware and guide you through the driver update process.
Manual Driver Installation
Manual installation offers the most control and ensures you’re getting the specific driver intended for your hardware and operating system version. This is particularly useful when automated methods fail or when you need a specific driver version.
Downloading Drivers from Manufacturer Websites
This is the most reliable method for obtaining the correct driver.
- Identify Your Hardware (as described in the previous section).
- Visit the Manufacturer’s Website:
- Laptop Manufacturer: If you have a laptop (e.g., Dell, HP, Lenovo, Asus), go to their support website. You’ll typically need to enter your laptop’s model number or service tag to find specific drivers for your device.
- Motherboard Manufacturer: If you’re using a custom-built PC or an all-in-one, find the motherboard manufacturer’s website (e.g., ASUS, Gigabyte, MSI) and locate drivers for your specific motherboard model.
- Network Adapter Manufacturer: If you have a separate add-in network card or USB adapter, go directly to the website of the adapter’s manufacturer (e.g., Intel, TP-Link, D-Link).
- Navigate to the Drivers/Downloads Section: Look for a “Support,” “Downloads,” or “Drivers” section.
- Select Your Product and Operating System: Choose your specific hardware model and the correct version of your operating system (e.g., Windows 10 64-bit, Windows 11, macOS Ventura).
- Download the Driver: Download the driver package. It will usually be an executable file (
.exeon Windows) or a compressed archive (.zip,.rar).
Installing Drivers Manually via Device Manager (Windows)
This method is used when you have downloaded the driver files but they don’t have an installer, or when you want to force an update.
- Download the Driver Package: Ensure you have the driver files extracted to a known location on your computer.
- Open Device Manager: As described earlier.
- Locate Your Network Adapter: Expand “Network adapters.”
- Update Driver:
- Right-click on your network adapter.
- Select “Update driver.”
- Choose Driver Installation Method:
- “Search automatically for drivers”: This will try to find drivers on your computer and online.
- “Browse my computer for drivers”: This is the option to use if you’ve downloaded the drivers. Click this.
- Specify Driver Location:
- Click “Browse…” and navigate to the folder where you extracted the driver files.
- If the driver files include an
.inffile, select that folder. Windows will scan it for compatible driver files. - Ensure “Include subfolders” is checked.
- Install: Click “Next.” Windows will attempt to install the driver. You might see a security warning; if you’ve downloaded from a trusted source, proceed.
- Restart: After the installation is complete, you will likely be prompted to restart your computer for the changes to take effect.
Troubleshooting Common Network Driver Issues
Even with the correct driver installed, you might encounter problems. Here are some common issues and their solutions:
No Internet Connection After Driver Installation
This is a frustrating but often fixable problem.
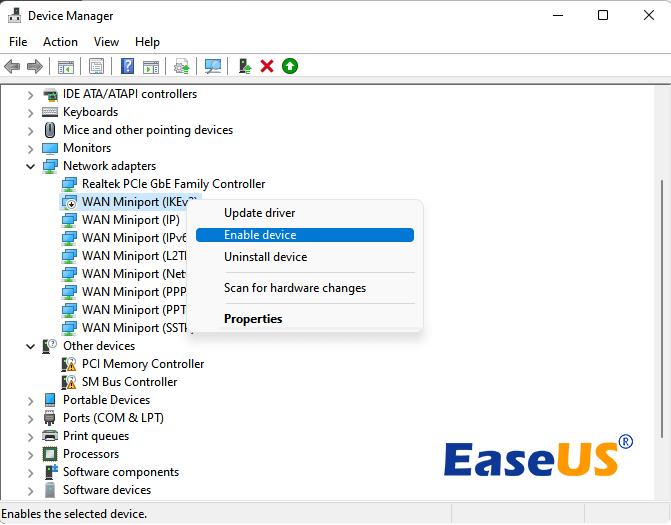
- Verify Driver Installation:
- Go back to Device Manager. Check if your network adapter has a yellow exclamation mark or a red ‘X’ next to it. This indicates a problem.
- Right-click the adapter and select “Properties.” Look at the “Device status” for error messages.
- Roll Back Driver: If the issue occurred immediately after an update, you might have a faulty driver.
- In Device Manager, right-click the network adapter, select “Properties.”
- Go to the “Driver” tab.
- Click “Roll Back Driver” if the option is available.
- Uninstall and Reinstall: Sometimes, a clean reinstallation is needed.
- In Device Manager, right-click the network adapter and select “Uninstall device.”
- Crucially, check the box that says “Delete the driver software for this device” if it appears.
- Restart your computer. Windows will try to reinstall a generic driver, or you can then manually install the driver you downloaded.
- Check Network Adapter Status: Ensure the adapter is enabled. In Device Manager, right-click the adapter and select “Enable device” if it’s disabled.
Slow Internet Speeds
If you have a connection but it’s sluggish, the driver might be outdated or not optimized.
- Update to the Latest Driver: Go to the manufacturer’s website and download the newest driver version.
- Check Driver Settings: Some network drivers have advanced settings that can impact performance. Open the properties of your network adapter in Device Manager, and look for a “Advanced” tab. Be cautious when changing these settings; consult your hardware’s documentation if unsure.
- Scan for Malware: Malicious software can consume bandwidth and slow down your connection.
- Test with a Different Cable/Router: Rule out other hardware as the source of the problem.
Wi-Fi Network Not Visible
If your computer can’t see any Wi-Fi networks, the Wi-Fi driver is likely the culprit.
- Ensure Wi-Fi is Enabled: On laptops, check for a physical switch or a function key combination (e.g.,
Fn + F2orFn + F5). In Windows, check the Network & Internet settings. - Reinstall Wi-Fi Driver: Follow the uninstall and reinstall steps mentioned above.
- Check Country Code Settings: In some regions, specific Wi-Fi channels are restricted. Ensure your driver’s country code is set correctly. This is usually found in the driver’s advanced properties.
- Update BIOS/UEFI: Occasionally, a BIOS/UEFI update can resolve hardware compatibility issues, including Wi-Fi detection.
Driver Not Found During Installation
If Windows or a driver installer can’t find the driver:
- Double-Check Hardware ID: Use the Hardware Ids from Device Manager to search online. Sometimes a generic search for the ID yields more specific results than the model number.
- Correct Operating System Version: Ensure you downloaded the driver for the exact version and architecture (32-bit or 64-bit) of your Windows.
- Administrator Privileges: Make sure you are running the installer with administrator rights. Right-click the installer file and select “Run as administrator.”
By systematically following these steps, you can confidently install and maintain your network drivers, ensuring a stable, fast, and reliable internet experience. Remember that keeping your drivers up-to-date is an integral part of good digital hygiene, contributing to overall system performance and security.
aViewFromTheCave is a participant in the Amazon Services LLC Associates Program, an affiliate advertising program designed to provide a means for sites to earn advertising fees by advertising and linking to Amazon.com. Amazon, the Amazon logo, AmazonSupply, and the AmazonSupply logo are trademarks of Amazon.com, Inc. or its affiliates. As an Amazon Associate we earn affiliate commissions from qualifying purchases.