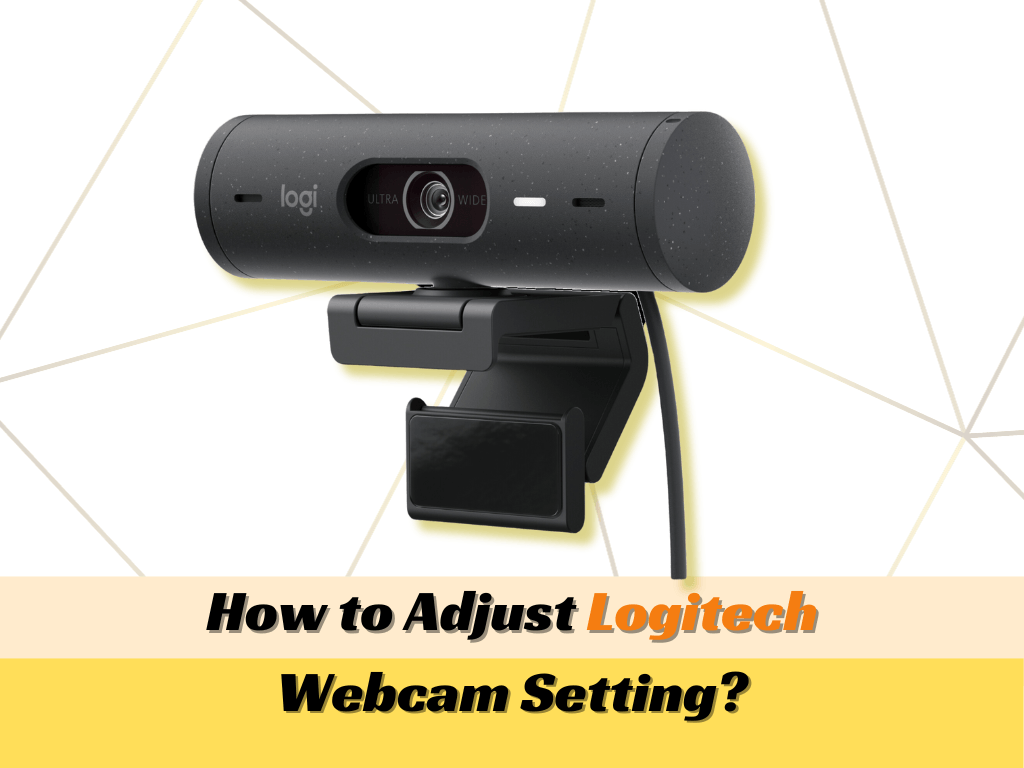
In an era where digital presence is synonymous with professional identity, the hardware we use to project ourselves matters more than ever. Logitech has long been the industry standard for webcams, offering a range of devices from the entry-level C270 to the ultra-high-definition Brio 4K. However, simply plugging a camera into a USB port is only the first step in a much larger process of technical optimization.
Whether you are a remote professional attending high-stakes board meetings, a content creator building an audience, or a student engaging in virtual classrooms, the way you install and configure your Logitech camera dictates the quality of your output. This guide provides an exhaustive technical walkthrough of the installation process, software ecosystem management, and advanced troubleshooting to ensure your hardware performs at its peak potential.
1. Hardware Setup: Establishing a Solid Physical Foundation
The installation process begins long before you touch your keyboard. The physical placement and connectivity of your Logitech camera are critical for both stability and data transmission integrity.
Unboxing and Physical Inspection
Before proceeding with the installation, inspect the device for any shipping damage. Most Logitech cameras, such as the C920 or the StreamCam, feature a glass or high-grade plastic lens. Ensure the protective film is removed. Check the integrated mounting clip; most Logitech models feature a universal clip designed to sit atop monitors or laptops, but they also include a 1/4-inch tripod thread at the base for more versatile positioning.
Strategic Mounting and Positioning
Placement is the cornerstone of professional video. For the best ergonomic and visual results, the camera should be positioned at eye level. This prevents the “looking down” effect common with laptop-integrated cameras. If your monitor is too high or too low, consider using a desktop tripod.
Logitech’s “RightLight” technology helps with lighting, but the physical orientation of the camera relative to your primary light source is paramount. Avoid placing the camera directly opposite a bright window, as this will result in a silhouetted “witness protection” effect, regardless of how well the software is installed.
Connectivity: USB Protocols and Power Requirements
Modern Logitech cameras, particularly 4K models like the Brio, require significant bandwidth.
- Direct Connection: Always prioritize a direct USB port on your motherboard or laptop over a non-powered USB hub.
- USB 3.0 vs. 2.0: While many Logitech cameras are backward compatible with USB 2.0, high-definition models (1080p/60fps or 4K) perform significantly better on USB 3.0 ports. Using a legacy port can lead to frame drops or compressed image quality.
- USB-C Considerations: Devices like the Logitech StreamCam use a native USB-C connection. If your computer only has USB-A ports, ensure you use a high-quality, data-sync-capable adapter to avoid connectivity failures.
2. Software Integration: The Logitech Ecosystem
While Windows and macOS are “plug-and-play” compatible with Logitech devices using UVC (USB Video Class) drivers, relying solely on generic drivers limits the camera’s functionality. To unlock advanced features, you must install the appropriate software suite.
Choosing the Right Software: G HUB, Logi Tune, or Logitech Capture
Logitech offers several software packages tailored to different user niches:
- Logi Tune: Ideal for enterprise users. It allows for quick adjustments to zoom, field of view, and color presets. It is lightweight and sits in the taskbar, making it perfect for Zoom or Microsoft Teams users.
- Logitech G HUB: Designed for gamers and streamers. If you use a Logitech G-series mouse or keyboard, this software centralizes control, allowing you to sync lighting and create specific camera profiles for different games.
- Logitech Capture: A powerful tool for content creators. It allows for multi-source recording, text overlays, and vertical video transitions (perfect for TikTok or Instagram Reels).
Manual Driver Installation and Firmware Updates
Sometimes, the operating system fails to recognize the device correctly. In such cases, a manual installation via the Device Manager (Windows) or System Report (macOS) is necessary.
- Navigate to the Logitech Support website.
- Search for your specific model.
- Download the “Firmware Update Tool.”
Firmware updates are crucial as they often resolve hardware-level bugs, improve autofocus algorithms, and enhance compatibility with the latest OS versions (such as Windows 11 or macOS Sonoma).
OS-Level Permissions and Privacy Settings
Modern operating systems have stringent privacy controls that may block a newly installed camera by default.
- On Windows: Go to Settings > Privacy & Security > Camera. Ensure that “Camera access” is toggled ON and that specific apps are granted permission.
- On macOS: Go to System Settings > Privacy & Security > Camera. You must manually check the box for apps like Chrome, Zoom, or Slack to allow them to access the Logitech hardware.
3. Fine-Tuning for Professional Video Quality
Once the drivers are active, the “installation” shifts from connectivity to optimization. Out-of-the-box settings are rarely ideal for every environment.
Adjusting Exposure, Gain, and White Balance
The most common mistake is leaving the camera on “Auto” everything. In fluctuating light, auto-exposure can cause the video to “pulse” or flicker.
- Exposure: Manually set your exposure to ensure your face is clearly visible without blowing out the highlights.
- White Balance: If your skin looks too orange or too blue, disable “Auto White Balance” and manually slide the Kelvin scale until the colors appear natural.
- Gain: Keep gain as low as possible. High gain introduces “noise” or graininess into the shadows of your video.
Managing Field of View (FOV) and Autofocus
Higher-end Logitech cameras offer adjustable FOV (typically 65, 78, or 90 degrees).
- 65 Degrees: Best for headshots and minimizing background distractions.
- 90 Degrees: Ideal for showing off a white-board or if multiple people are in the frame.
- Autofocus vs. Fixed Focus: If you move a lot, autofocus is helpful. However, if the camera “hunts” for focus frequently, it can be distracting. Using Logi Tune to set a fixed focus point on your seat is often a more professional choice.
Audio Configuration: Using the Integrated Mic
Most Logitech cameras feature dual omnidirectional microphones. While a dedicated XLR or USB condenser mic is always better, the integrated mics are capable if configured correctly.
- In your system’s “Sound Settings,” ensure the Logitech camera is selected as the Input Device.
- Disable “Exclusive Mode” in Windows to prevent one app from hijacking the microphone, which often causes the audio to fail in other applications.
4. Troubleshooting Common Installation Hurdles
Even with a premium brand like Logitech, technical glitches can occur. Understanding how to diagnose these issues is essential for maintaining a seamless workflow.
Resolving the “Camera Not Detected” Error
If your computer refuses to see the camera:
- Swap Ports: Move the cable to a port directly on the motherboard.
- Power Cycle: Unplug the camera, restart the computer, and plug it back in once the OS has fully loaded.
- Check Device Manager: In Windows, look for “Imaging Devices.” If there is a yellow exclamation mark, right-click and select “Update Driver.”
Fixing Flickering and Banding
Video flickering is often caused by a mismatch between the camera’s frame rate and the frequency of the room’s artificial lighting (50Hz in Europe/Asia, 60Hz in North America).
- Access your Logitech software settings.
- Locate the “Anti-Flicker” or “NTSC/PAL” toggle.
- Switch between 50Hz and 60Hz until the banding disappears.
Correcting Low Frame Rates in Low Light
If your video looks “choppy” or “laggy,” it is likely because the camera is slowing down the shutter speed to compensate for a dark room. This is a common issue with the Logitech C920.
- Solution: Increase the physical light in your room or manually lower the exposure and increase the gain slightly. This forces the camera to maintain a consistent 30 or 60 frames per second.
Conclusion: Maximizing Your Digital Image
Installing a Logitech camera is a multi-layered process that spans from physical cable management to nuanced software calibration. By moving beyond the basic plug-and-play functionality and engaging with the Logitech software ecosystem, you ensure that your investment pays off in the form of crystal-clear, professional-grade video.
The tech landscape is constantly evolving, with new software updates and OS patches being released regularly. Periodically checking for firmware updates and revisiting your settings will keep your Logitech camera performing as a reliable tool in your professional arsenal. With the right setup, your camera becomes more than just a peripheral; it becomes a seamless window into your digital world.
aViewFromTheCave is a participant in the Amazon Services LLC Associates Program, an affiliate advertising program designed to provide a means for sites to earn advertising fees by advertising and linking to Amazon.com. Amazon, the Amazon logo, AmazonSupply, and the AmazonSupply logo are trademarks of Amazon.com, Inc. or its affiliates. As an Amazon Associate we earn affiliate commissions from qualifying purchases.