In the dynamic world of digital content creation, the ability to personalize and enhance your work is paramount. Fonts, often overlooked, play a crucial role in shaping the aesthetic and impact of your projects. Whether you’re a graphic designer crafting a compelling brand identity, a writer working on a report with a specific stylistic requirement, or simply someone who wants to express themselves more vividly, knowing how to install new fonts on your Mac is an essential skill. This guide will walk you through the straightforward process, ensuring you can effortlessly expand your typographic toolkit.
The operating system macOS, known for its user-friendly interface and robust features, makes font management a breeze. You’ll discover that installing fonts on your Mac is not just about aesthetics; it can also improve your workflow and allow for greater creative expression across various applications, from word processors and design software to presentation tools. We’ll delve into different methods, explore where to find free and premium fonts, and touch upon how font choices can influence brand perception – a key aspect in the “Brand” category of our website.
Understanding Font Management on macOS
Before diving into the installation process, it’s beneficial to understand how macOS handles fonts. The core of this system is the Font Book application. Font Book acts as your central hub for all installed fonts, allowing you to preview, organize, activate, deactivate, and even validate them. This built-in utility is the primary tool you’ll use for managing your font library.
What is Font Book?
Font Book is more than just an installer. It’s a comprehensive font manager that comes pre-installed on every Mac. Think of it as your personal library for all the typefaces available to your system. When you install a new font, Font Book is where it gets registered, making it accessible to all applications on your Mac.
- Previewing Fonts: Font Book allows you to see exactly how a font looks before you install it. You can type in sample text and choose different sizes and styles to get a clear idea of its appearance.
- Organizing Fonts: As your font collection grows, Font Book helps you keep it organized. You can create collections to group fonts by project, style, or any other criteria you prefer. This is particularly useful for designers working on multiple projects with specific typographic needs.
- Validating Fonts: Sometimes, font files can become corrupted, leading to display issues or crashes in applications. Font Book has a built-in validation tool that can identify and sometimes even fix minor font problems, ensuring a smooth user experience.
- Activating and Deactivating Fonts: Not all fonts need to be active all the time. You can deactivate fonts you don’t frequently use to reduce system load and speed up application performance. This is especially helpful if you have a very large font library.
Font File Types
Macs support a variety of font file formats. The most common ones you’ll encounter are:
- TrueType Fonts (.ttf): A widely used format that has been around for a long time.
- OpenType Fonts (.otf): An advanced format that offers more features, such as ligatures, stylistic alternates, and extended character sets. OpenType is generally preferred for its versatility and scalability.
- TrueType Collections (.ttc): A collection of TrueType fonts packaged into a single file.
- Datafork TrueType Fonts (.dfont): An older format primarily used on macOS. While still supported, .ttf and .otf are more common now.
Regardless of the file type, the installation process on macOS remains largely the same.
Methods for Installing Fonts on Your Mac
There are several ways to install fonts on your Mac, ranging from the simplest drag-and-drop to more integrated approaches. We’ll cover the most common and effective methods.
Method 1: Double-Click and Install (The Easiest Way)
This is by far the most straightforward method and works for most font files.
- Locate Your Font File: First, download the font file(s) you want to install. These are usually found in a zipped folder. Unzip the folder if necessary by double-clicking it.
- Open the Font File: Navigate to the unzipped font file. You’ll typically see files with extensions like
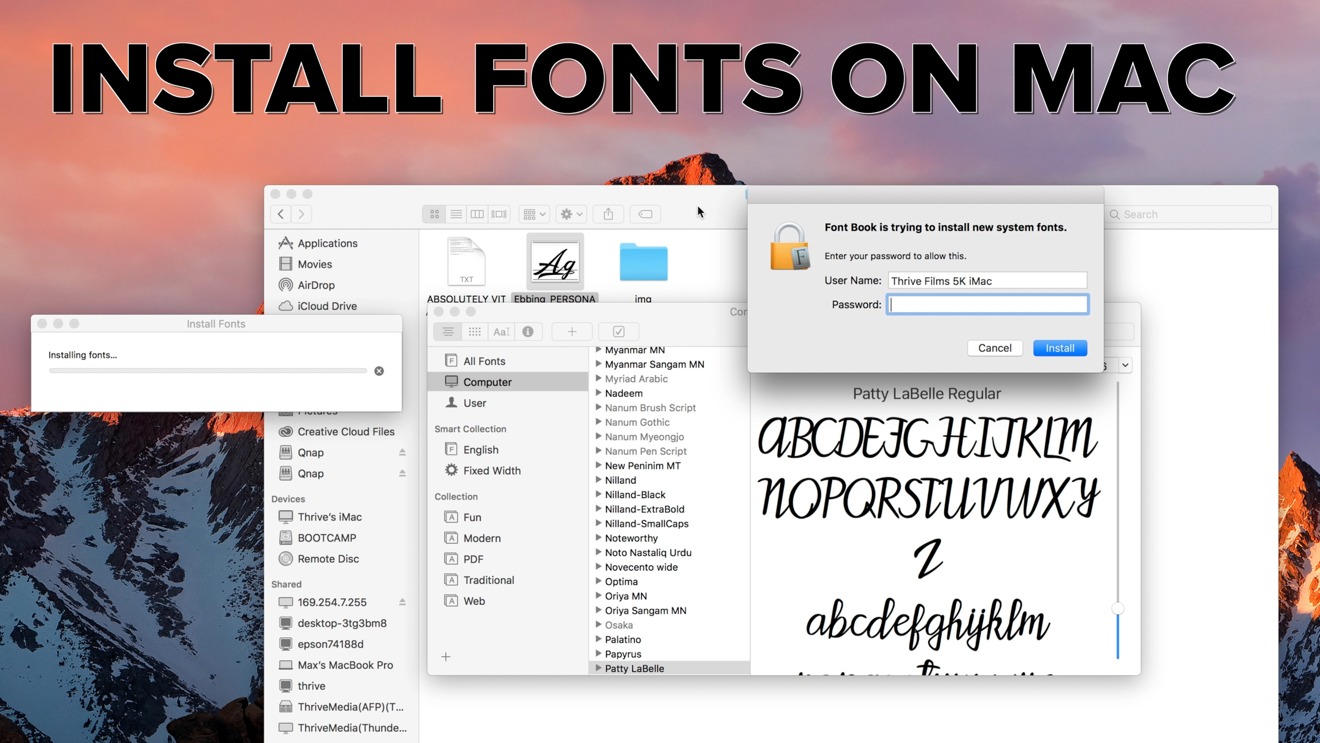
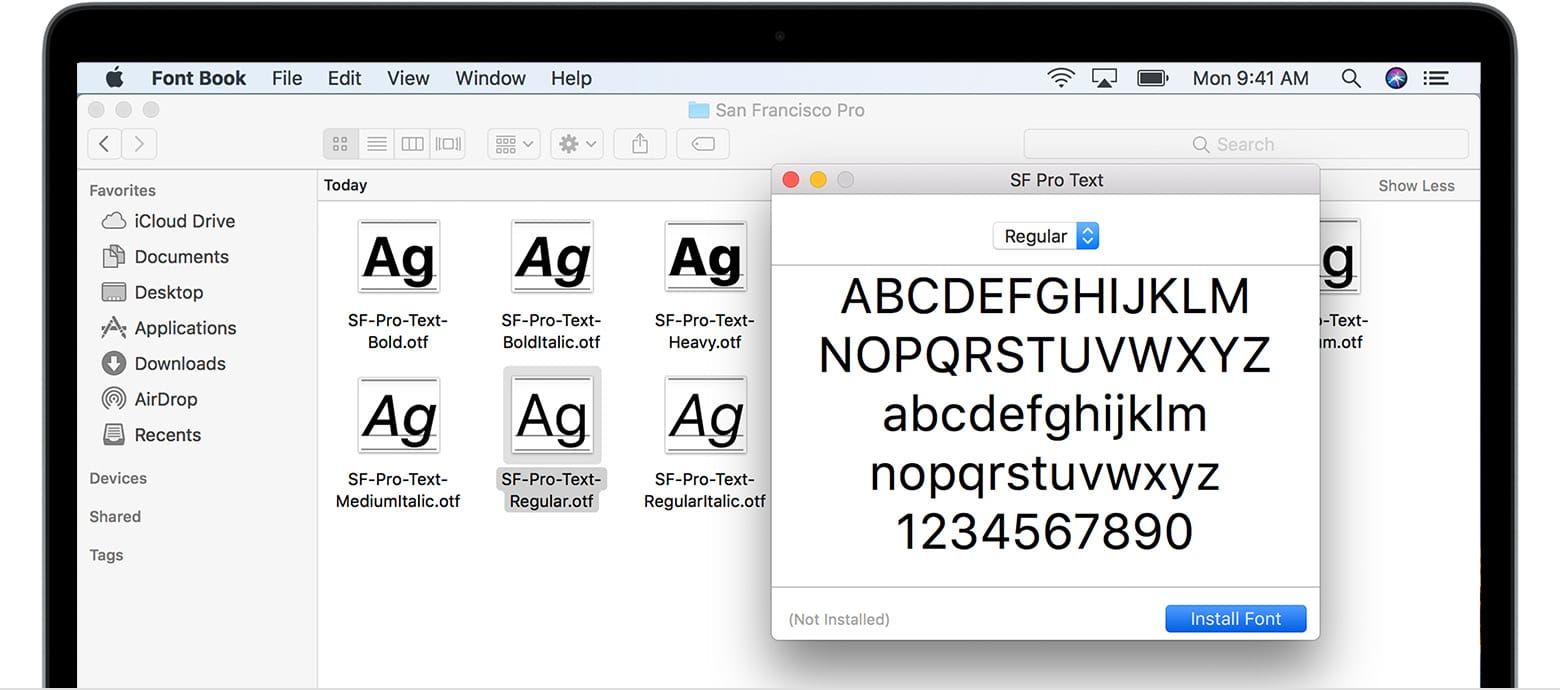
.ttf,.otf, or.ttc. Double-click on the font file. - Font Book Preview: This action will automatically open the Font Book application and display a preview of the font.
- Install the Font: At the top of the Font Book preview window, you’ll see an “Install Font” button. Click this button.
Font Book will then install the font, making it available for use in all your applications. You can verify the installation by opening Font Book and searching for the newly installed font.
Method 2: Drag and Drop into Font Book
If you have multiple font files or prefer a more manual approach, you can drag and drop them directly into Font Book.
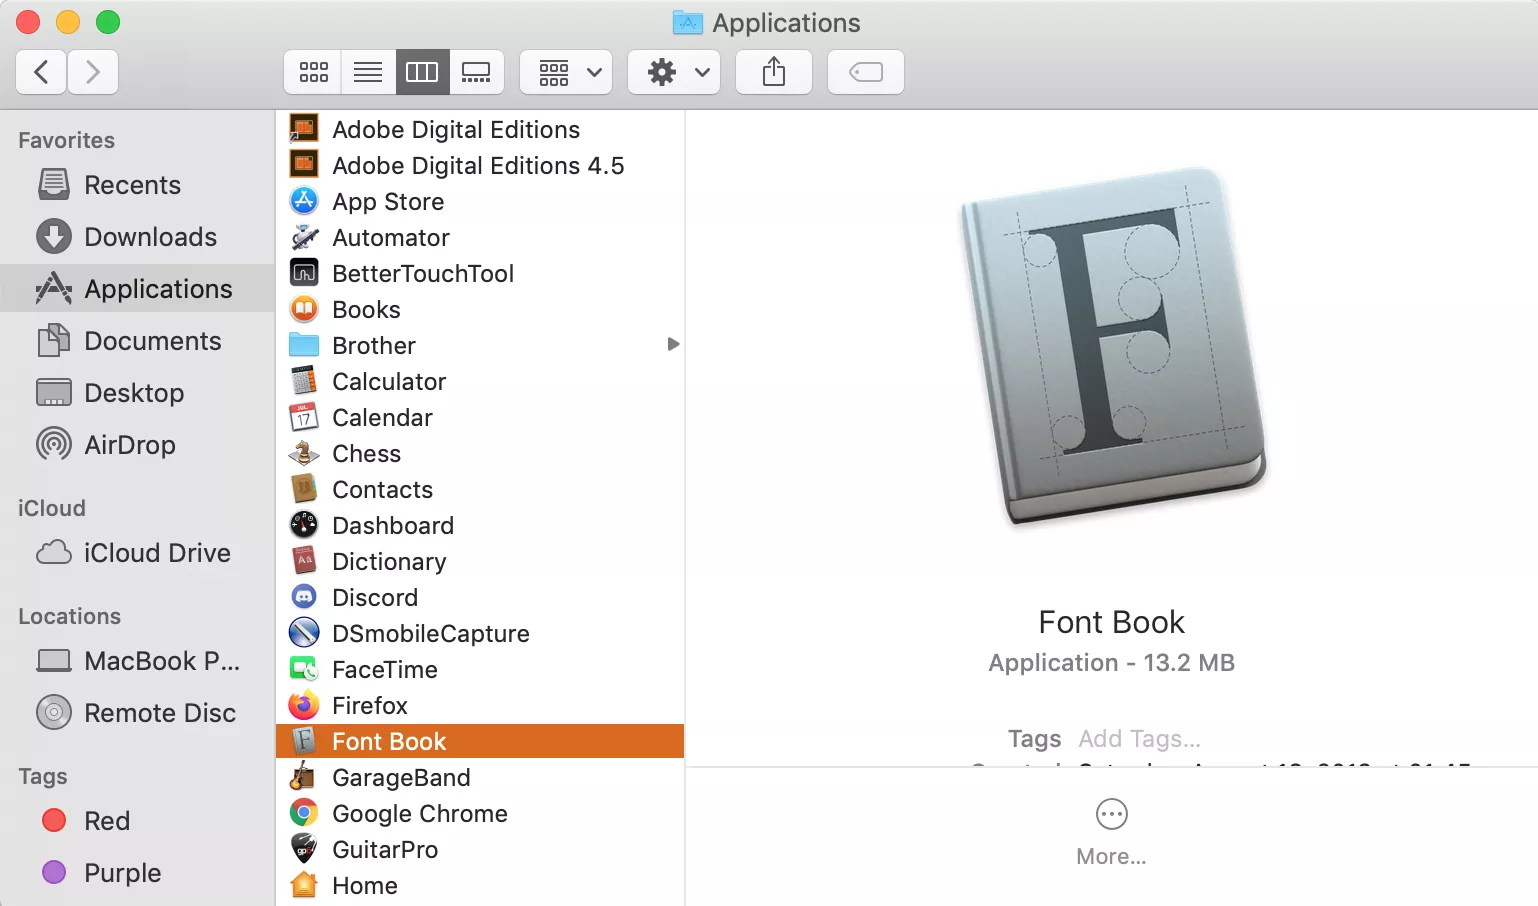
- Open Font Book: Launch the Font Book application. You can find it in your Applications folder or by searching with Spotlight (Command + Spacebar, then type “Font Book”).
- Locate Your Font Files: Open a Finder window and navigate to the folder containing your font files.
- Drag and Drop: Select the font files you wish to install and drag them directly into the main Font Book window. You can drag them onto the “All Fonts” list or into a specific collection you’ve created.
Font Book will then process and install the fonts. This method is efficient when dealing with a batch of fonts.
Method 3: Installing Fonts for Specific Users
By default, fonts installed on your Mac are available to all user accounts on that computer. However, you can choose to install fonts for only your specific user account. This is useful in shared computer environments or if you want to maintain a cleaner system-wide font library.
- Open Font Book: Launch Font Book.
- Change Installation Location: In Font Book, go to the menu bar and select Font Book > Preferences.
- Set Default Install Location: In the Preferences window, under the “Default Install Location” setting, choose “User.” This will ensure that any subsequently installed fonts are installed only for your user account.
- Install Your Font: Now, use either Method 1 (double-click) or Method 2 (drag and drop) to install your fonts. They will be placed in your user’s font library (
~/Library/Fonts).
To revert to installing fonts for all users, simply change the “Default Install Location” back to “Computer” in Font Book Preferences.
Where to Find Fonts: Expanding Your Typographic Palette
The availability of unique and expressive fonts can significantly elevate your design projects. Fortunately, there’s a vast ecosystem of font resources, catering to every budget and aesthetic. Understanding where to find them is the first step to unlocking new creative possibilities.
Free Font Resources
For those on a budget or looking for quick additions to their font library, numerous websites offer high-quality free fonts. These are excellent for personal projects, testing out new styles, or even for commercial use, provided you check the licensing terms.
- Google Fonts: A fantastic and reliable resource offering a vast library of open-source fonts. All Google Fonts are free for commercial and personal use. They are well-optimized for web and print.
- Font Squirrel: Curates free fonts that are specifically licensed for commercial use. They often provide additional information about font families and their suitability for different design contexts.
- DaFont: A popular repository with a huge collection of fonts, categorized by style. While many fonts are free for personal use, always check the license for commercial applications.
- 1001 Free Fonts: Similar to DaFont, this site offers a wide array of free fonts, with a clear indication of their licensing.
When using free fonts, it’s crucial to pay attention to the licensing. Some are free for personal use only, while others allow for commercial use without attribution. Always read the license agreement associated with the font to avoid any legal issues.
Premium Font Marketplaces
For professional designers and businesses seeking unique, high-quality, and often exclusive typefaces, premium font marketplaces offer a curated selection of professionally designed fonts. These fonts typically come with more comprehensive licensing options.
- MyFonts: One of the largest marketplaces for commercial fonts, offering a massive selection from numerous foundries. You can find everything from classic serifs to cutting-edge display fonts.
- Adobe Fonts: If you’re an Adobe Creative Cloud subscriber, you have access to a vast library of high-quality fonts that can be activated directly through the Creative Cloud app. These are perfect for seamless integration into Adobe’s suite of design tools.
- Fontspring: Known for its customer-friendly licensing and a good selection of fonts, Fontspring is a popular choice for designers.
- Creative Market: A marketplace for independent creatives, offering fonts alongside other design assets like graphics, templates, and photos. You can often find unique, handcrafted fonts here.
Investing in premium fonts can make a significant difference in the professionalism and distinctiveness of your brand. The attention to detail, glyph coverage, and extensive features often found in commercial fonts are invaluable for sophisticated design work.
Best Practices for Font Management and Usage
Installing fonts is only one part of the equation. Effectively managing and using your font library can significantly impact your productivity and the overall quality of your work. This section touches upon how font choices tie into broader branding strategies, a key element in the “Brand” category of our website.
Organizing Your Font Library
As your font collection expands, it can become overwhelming. Implementing a good organizational strategy from the start will save you time and frustration.
- Create Collections: Use Font Book’s collection feature to group fonts by project, client, style (e.g., Serif, Sans-Serif, Script), or intended use (e.g., Web, Print).
- Consistent Naming: When downloading fonts, especially from less organized sources, consider renaming them to something more descriptive if the original names are ambiguous.
- Regular Review: Periodically review your font library. Remove duplicates, deactivate unused fonts, and archive old projects’ fonts if they are no longer needed system-wide.
Font Pairing and Brand Identity
The fonts you choose are a critical component of your brand’s visual identity. They communicate personality, tone, and professionalism.
- Hierarchy and Readability: Use different fonts to establish a clear typographic hierarchy. A common practice is to pair a distinctive display font for headings with a highly readable font for body text.
- Brand Personality: A serif font might convey tradition, elegance, and trustworthiness, while a sans-serif font can communicate modernity, simplicity, and approachability. A script font might evoke a sense of artistry or personal touch. Choose fonts that align with your brand’s core values and target audience.
- Consistency is Key: Once you’ve established your brand’s typographic palette, stick to it consistently across all your marketing materials, website, and digital presence. This reinforces brand recognition and builds a cohesive identity. This is a fundamental aspect of “Corporate Identity” and “Marketing” on our site.
Avoiding Font Conflicts and Performance Issues
While rare, installing too many fonts or encountering corrupted font files can sometimes lead to issues.
- Validate Fonts: Regularly use Font Book’s validation feature, especially after installing new fonts, to catch potential problems early.
- Deactivate Unused Fonts: If you notice applications running slowly or experiencing crashes, try deactivating a large number of fonts you’re not actively using. This can free up system resources and improve performance.
- Backup Your Fonts: It’s always a good idea to back up your font library, especially if you’ve invested in premium fonts. Store them on an external drive or a cloud storage service.
By mastering the art of installing and managing fonts on your Mac, you gain a powerful tool for enhancing your creative output and strengthening your brand’s visual communication. Whether you’re a seasoned professional or just beginning your design journey, these techniques will empower you to express your ideas with clarity and style.
aViewFromTheCave is a participant in the Amazon Services LLC Associates Program, an affiliate advertising program designed to provide a means for sites to earn advertising fees by advertising and linking to Amazon.com. Amazon, the Amazon logo, AmazonSupply, and the AmazonSupply logo are trademarks of Amazon.com, Inc. or its affiliates. As an Amazon Associate we earn affiliate commissions from qualifying purchases.