
Windows 10, despite its robust design, can sometimes feel sluggish, accumulate digital clutter, or develop persistent issues that standard troubleshooting can’t resolve. Much like spring cleaning for your home, a clean installation of Windows 10 offers a digital refresh, wiping away accumulated digital dust, lingering software conflicts, and potential performance bottlenecks. This comprehensive guide will walk you through every step of performing a clean install, transforming your machine into a streamlined, high-performance powerhouse once more. Whether you’re dealing with stubborn malware, unexpected crashes, or simply craving that “brand new PC” feel, this process is an invaluable skill for any tech enthusiast or professional.

Why Opt for a Clean Install of Windows 10?
Before diving into the technicalities, it’s crucial to understand why a clean install is often the most effective solution for various computer woes. It’s more than just a quick fix; it’s a complete overhaul that addresses the root causes of many common PC problems, offering long-term benefits for your system’s health and your productivity.
Enhanced Performance and Responsiveness
Over time, even the most powerful computers can experience a noticeable slowdown. This degradation in performance is often due to a multitude of factors: residual files from uninstalled programs, fragmented data across the hard drive, conflicting background processes, or even registry errors that accumulate over months or years of use. Each software installation, update, and deletion leaves behind traces that can subtly impact your system’s speed. A clean install obliterates all these remnants, starting with a pristine operating system. This means your computer boots faster, applications launch quicker, and multitasking becomes smoother, allowing you to harness your hardware’s full potential without unnecessary drag. It’s akin to resetting a cluttered workspace; with everything organized and unnecessary items removed, your workflow becomes significantly more efficient.
Eradicating Malware and Software Glitches
One of the most compelling reasons for a clean install is its unparalleled effectiveness in dealing with persistent malware infections or deeply embedded software glitches. While antivirus software is essential, some sophisticated viruses, rootkits, or adware can be incredibly difficult to remove entirely, often leaving behind components that can reinfect your system or continue to cause issues. Similarly, software conflicts, corrupted system files, or driver problems can lead to frequent crashes, blue screens of death (BSODs), or inexplicable application behavior. A clean install acts as the ultimate digital disinfectant. By formatting your primary drive and reinstalling Windows from scratch, you ensure that no malicious code or corrupted system files remain, providing a genuinely fresh and secure foundation for your computing activities. This drastic measure guarantees peace of mind, knowing your system is free from hidden threats and structural flaws that could compromise your data or privacy.
A Fresh Start, Free from Digital Clutter
Think about the sheer volume of applications you’ve installed, tried, and perhaps uninstalled over the years. Each of these actions, even with thorough uninstallation tools, can leave behind registry entries, temporary files, and hidden folders that consume disk space and contribute to system bloat. This digital clutter not only eats away at your valuable storage but can also impact performance by making your system work harder to sift through irrelevant data. A clean install is the ultimate decluttering exercise. It provides you with a blank slate, allowing you to selectively reinstall only the applications you genuinely need and use. This minimalist approach not only frees up significant disk space but also creates a more organized and efficient computing environment. It offers an opportunity to re-evaluate your software needs, discard redundant programs, and optimize your digital workspace for maximum productivity, making your Windows 10 experience feel truly tailored and responsive to your specific demands.
Essential Preparations Before You Begin
Embarking on a clean install is a significant step that involves erasing all data on your primary drive. Therefore, thorough preparation is not just recommended; it’s absolutely critical. Skipping these preliminary steps can lead to data loss, frustrating delays, or a less-than-optimal installation experience. Treat this preparation phase as your checklist for a smooth and successful transition.
The Critical Step: Backing Up Your Data
This cannot be stressed enough: BACK UP ALL YOUR IMPORTANT DATA. When you perform a clean install, you will format your primary hard drive, which means everything on it – documents, photos, videos, music, applications, browser bookmarks, and game saves – will be permanently deleted. Do not proceed until you are absolutely certain that every file you wish to keep is safely stored elsewhere.
Consider these backup strategies:
- External Hard Drive: This is often the most straightforward and reliable method for large volumes of data. Simply copy and paste your essential folders (Documents, Pictures, Videos, Downloads, Desktop) to an external drive.
- Cloud Storage: Services like OneDrive, Google Drive, Dropbox, or iCloud are excellent for syncing and storing important documents, photos, and smaller files. Ensure your files are fully synchronized before wiping your drive.
- Network Attached Storage (NAS): If you have a home server or NAS, utilize it for large-scale backups.
- USB Drives: Suitable for smaller, critical files you need to access quickly.
Don’t forget less obvious data: browser bookmarks, email archives (PST files for Outlook), game save files (often hidden in AppData folders), and any customized application settings. It’s often helpful to create a dedicated “Backup” folder on your external drive and organize everything logically.
Securing Your Windows 10 Product Key
While many modern Windows 10 installations are digitally licensed and automatically reactivate after a clean install (especially if you’ve previously upgraded from Windows 7/8 or bought a PC with Windows 10 pre-installed), it’s always wise to have your product key on hand as a contingency.
- Digital License: If your Windows 10 license is linked to your Microsoft account, reactivation is usually automatic once you sign in during setup.
- Pre-installed Windows: For OEM machines, the product key is often embedded in the motherboard’s firmware and will be detected automatically during installation.
- Retail Purchase: If you bought a retail copy of Windows 10, the key will be on a sticker, card, or in your purchase confirmation email.
- Windows 7/8 Upgrade: If you upgraded from an activated Windows 7 or 8 license, your Windows 10 license is likely digital.
You can often retrieve your current product key using third-party tools (like ProduKey) if you can still boot into your existing Windows installation. Write it down and keep it in a safe place.
Creating Your Windows 10 Installation Media
To perform a clean install, you need a bootable device containing the Windows 10 installation files. The easiest and most recommended method is using Microsoft’s official Media Creation Tool.
- Requirements:
- An empty USB flash drive with at least 8GB of space.
- A stable internet connection to download the Windows 10 ISO.
- Another working computer if your current one is non-functional.
- Steps:
- Go to Microsoft’s official Windows 10 download page.
- Download the “Media Creation Tool.”
- Run the tool, accept the terms, and select “Create installation media (USB flash drive, DVD, or ISO file) for another PC.”
- Choose your language, edition (Windows 10, not N or K editions unless you specifically need them), and architecture (64-bit is most common).
- Select “USB flash drive” as the media type and choose your USB drive from the list.
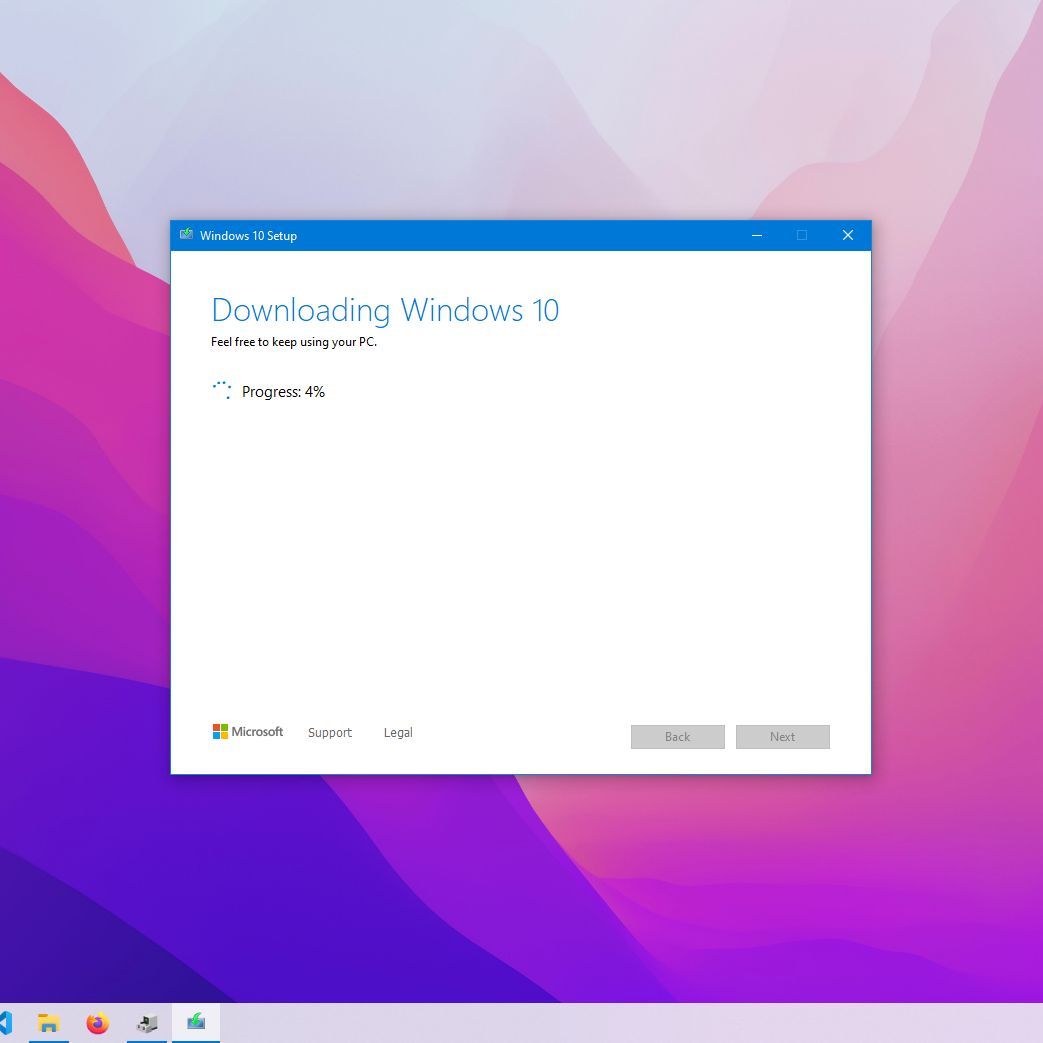
- The tool will then download the necessary files and create the bootable USB drive. This process can take some time depending on your internet speed.
Alternatively, you can burn the ISO file to a blank DVD if your computer has an optical drive, but USB is generally faster and more convenient.
Gathering Essential Drivers and System Requirements
While Windows 10 has excellent built-in driver support, it’s a good practice to proactively download critical drivers before starting the installation, especially if your network driver isn’t recognized automatically. Without a network driver, you won’t be able to connect to the internet to download others.
- Critical Drivers to Download (from your PC manufacturer’s support website):
- Network Adapter Drivers: Both wired (Ethernet) and wireless (Wi-Fi) drivers are crucial.
- Chipset Drivers: For your motherboard.
- Graphics Card Drivers: For optimal display performance and gaming (NVIDIA, AMD, Intel).
- Storage: Save these drivers to your backup drive or another USB drive, so they’re accessible after the clean install.
System Requirements Check:
Ensure your PC meets the minimum requirements for Windows 10:
- Processor: 1 GHz or faster compatible processor
- RAM: 1 GB for 32-bit or 2 GB for 64-bit
- Hard disk space: 32 GB for 64-bit or 16 GB for 32-bit
- Graphics card: DirectX 9 or later with WDDM 1.0 driver
- Display: 800×600 resolution
Most modern PCs will far exceed these, but it’s good to confirm. Also, ensure your laptop is charged or your desktop is connected to a stable power source to prevent interruptions during installation.

Step-by-Step Guide to the Clean Installation Process
With all preparations complete, you are now ready to embark on the core process of installing Windows 10. This section will guide you through each stage, from booting your computer from the installation media to the initial setup of your fresh operating system. Follow these steps carefully to ensure a smooth and successful installation.
Booting from Your Installation Media
The first hurdle is to instruct your computer to start from the USB drive or DVD you created, rather than its internal hard drive.
- Insert Media: Plug your bootable USB drive into an available port or insert the DVD into your optical drive.
- Restart Your PC: Reboot your computer.
- Access Boot Menu/BIOS/UEFI: As your computer starts, you’ll need to press a specific key repeatedly to enter the BIOS/UEFI settings or a dedicated Boot Menu. Common keys include
Del,F2,F10,F12, orEsc. The exact key often flashes on the screen during startup. If you miss it, restart and try again.- Boot Menu: If you can access a Boot Menu, simply select your USB drive (it might be listed as “USB-HDD,” “Removable Device,” or by its brand name) or DVD drive from the list and press Enter.
- BIOS/UEFI Settings: If you enter the BIOS/UEFI, navigate to the “Boot” or “Boot Options” tab. You’ll need to change the boot order to prioritize your USB drive or DVD drive above your internal hard drive. Save changes (usually
F10) and exit. Your computer will then restart and boot from the chosen media.
- “Press any key to boot from CD or DVD” / USB: Once your computer successfully boots from the installation media, you might see a message like “Press any key to boot from CD or DVD…” or a similar prompt for USB. Press any key quickly to proceed. If you miss it, the computer might boot from your old Windows installation or restart the process, so you’ll need to try again.
Navigating the Windows Setup Wizard
Once booted from the installation media, the Windows Setup wizard will appear, guiding you through the initial configuration steps.
- Language and Region Settings: The first screen will ask you to select your language to install, time and currency format, and keyboard or input method. Make your selections and click “Next.”
- Install Now: On the next screen, click “Install now.”
- Product Key Activation: You’ll be prompted to enter your product key.
- If you have a digital license linked to your Microsoft account or an OEM key embedded in your motherboard, you can usually click “I don’t have a product key” and Windows will activate automatically once you’re online after installation.
- If you have a retail product key, enter it here.
- Operating System Version: If your product key supports multiple versions of Windows 10 (e.g., Home and Pro), you’ll be asked to choose which one to install. Select the appropriate version for your license.
- License Terms: Read the Microsoft Software License Terms, check “I accept the license terms,” and click “Next.”
Partitioning Your Drive for a Fresh Start
This is the most crucial step for a “clean” install, as it involves deleting existing partitions and creating new ones. Proceed with caution.
- Choose Installation Type: You’ll be presented with two options: “Upgrade: Install Windows and keep files, settings, and applications” or “Custom: Install Windows only (advanced).” Select “Custom: Install Windows only (advanced)” for a clean install.
- Select Drive and Delete Partitions: You’ll now see a list of drives and partitions. This screen requires careful attention to avoid deleting the wrong drive (e.g., your backup drive if it’s still connected).
- Identify the drive where you want to install Windows (usually “Drive 0”).
- Select each partition associated with your old Windows installation (e.g., “Recovery,” “System,” “Primary,” “MSR”) and click “Delete.” Be absolutely sure you are deleting partitions only from the correct drive. This is the step that irrevocably erases your old data.
- After deleting, your drive will show “Unallocated Space.”
- Create New Partition:
- Select the “Unallocated Space” on your target drive.
- Click “New” to create a new partition. Windows will suggest using the maximum available space, which is usually what you want. Click “Apply.”
- Windows will inform you that it needs to create additional partitions for system files (recovery, system, MSR). Click “OK.”
- You should now see several small system partitions and a larger “Primary” partition on “Drive 0.”
- Select Primary Partition and Format:
- Select the largest “Primary” partition (the one you just created for Windows).
- Click “Format.” Confirm the format if prompted. This ensures the partition is ready for a fresh installation.
- Begin Installation: With the primary partition selected and formatted, click “Next.” Windows will now begin copying files and installing the operating system. This process involves several restarts and can take anywhere from 15 minutes to an hour or more, depending on your system’s speed.
Completing the Installation and Initial Configuration
After the file copying and initial installation phases, your computer will restart multiple times. Eventually, you’ll be greeted with the Out-of-Box Experience (OOBE) setup.
- Region and Keyboard Layout: Select your region and keyboard layout. You can add a second keyboard layout if needed.
- Network Connection: Connect to a Wi-Fi network or an Ethernet cable. If your network driver wasn’t automatically detected, you might not be able to connect until you install the driver later. If you can’t connect, you might have the option to proceed with limited setup (though this is increasingly rare in recent Windows versions).
- Microsoft Account vs. Local Account:
- Microsoft Account (Recommended): Sign in with your Microsoft account (or create one). This links your digital license, syncs settings, and provides access to OneDrive, Microsoft Store, and other services.
- Local Account: If you prefer not to use a Microsoft account, look for an option like “Offline account” or “Domain join instead” (the wording changes with updates). This will allow you to create a traditional local user account.
- Create PIN: Windows will prompt you to create a PIN for faster sign-ins.
- Privacy Settings: Review and adjust your privacy settings (location, diagnostic data, tailored experiences, etc.). Turn off anything you’re uncomfortable with.
- Cortana Setup: Decide if you want to enable Cortana as your digital assistant.
- Finalizing: Windows will go through some final setup screens (“Hi,” “Getting things ready,” etc.). This might take a few more minutes.
Eventually, you’ll arrive at your brand-new, clean Windows 10 desktop!
Post-Installation: What to Do Next
Congratulations, you’ve successfully performed a clean install of Windows 10! The journey isn’t quite over, however. To ensure your system is fully functional, secure, and personalized, there are several crucial steps to take after you reach the desktop. This post-installation phase is about transforming your bare-bones OS into a robust and productive environment.
Installing Essential Drivers and System Updates
This is the very first thing you should tackle. Correct drivers are fundamental for your hardware to function correctly and efficiently.
- Connect to the Internet: If you weren’t able to connect during the initial setup (e.g., due to missing Wi-Fi drivers), now is the time to install the critical network drivers you saved to your backup drive. Once connected, proceed.
- Install Graphics, Chipset, and Other Drivers:
- Access the drivers you downloaded earlier. Start with Chipset drivers, then Graphics drivers (from NVIDIA, AMD, or Intel, depending on your hardware), followed by any other specific drivers from your motherboard or PC manufacturer (e.g., audio, webcam, touchpad, card reader).
- Restart your PC after installing major drivers if prompted.
- Run Windows Update: Even with a fresh install, Windows Update is essential. It will download the latest security patches, feature updates, and often many missing drivers that Windows can automatically detect.
- Go to
Settings > Update & Security > Windows Update. - Click “Check for updates” and install all available updates. This might involve several restarts and repeat checks until no more updates are found. It’s common for this to take a significant amount of time, sometimes hours, due to accumulated updates since the ISO was last refreshed.
- Go to
- Device Manager Check: After installing drivers and running Windows Update, open Device Manager (right-click the Start button and select “Device Manager”). Look for any yellow exclamation marks or unknown devices. If you see any, it means a driver is still missing, and you’ll need to manually locate and install it from your hardware manufacturer’s website.
Reinstalling Your Favorite Applications
With your system fully updated and drivers in place, you can now begin reinstalling your essential software. Take this opportunity to be selective and only install what you truly need, avoiding unnecessary bloatware.
- Web Browser: Start with your preferred web browser (Chrome, Firefox, Edge, Brave, etc.).
- Security Software: Even though Windows Defender is built-in, if you prefer a third-party antivirus solution, install it now.
- Productivity Suites: Reinstall your office suite (Microsoft Office, LibreOffice, Google Workspace desktop apps).
- Creative Tools: Photoshop, video editors, CAD software, etc.
- Communication Tools: Slack, Discord, Zoom, etc.
- Utilities: Any essential utility software (file archivers like 7-Zip, PDF readers, disk management tools).
- Gaming Platforms: Steam, Epic Games Launcher, GOG Galaxy.
- Ninite: Consider using services like Ninite.com, which allows you to select multiple popular free applications and install them all at once, automatically skipping bundled toolbars and installers. This can save a lot of time.
- Bookmark Synchronization: Once your browser is reinstalled, log in to sync your bookmarks, passwords, and browsing history.
Restoring Your Personal Data
This is the moment your diligent backup efforts pay off.
- Connect Backup Drive: Plug in your external hard drive or access your cloud storage.
- Copy Data Back: Systematically copy your backed-up documents, photos, videos, music, and other personal files back into their respective folders (e.g., My Documents, My Pictures).
- Be Organized: Resist the urge to dump everything onto your C: drive. Maintain the structure you had before, or even improve it, to keep your new system tidy.
- Hidden Files: Remember to restore any specific application data, like email archives or game saves, to their correct locations if you backed them up.
Optimizing Your Fresh Windows 10 Environment
Now that everything is back in place, you can fine-tune your new Windows 10 installation for optimal performance and user experience.
- Personalization:
- Change your desktop background, theme, lock screen, and accent colors (
Settings > Personalization). - Customize your Start Menu and Taskbar. Pin frequently used applications.
- Change your desktop background, theme, lock screen, and accent colors (
- Privacy Settings Review: Revisit
Settings > Privacyand adjust settings for app permissions, diagnostic data, activity history, and advertising ID to your comfort level. - Default Apps: Set your preferred default applications for web browsing, email, photos, video playback, etc. (
Settings > Apps > Default apps). - Power Options: For desktops or high-performance laptops, consider adjusting your power plan to “High Performance” (
Settings > System > Power & sleep > Additional power settings). - Storage Sense: Enable Storage Sense (
Settings > System > Storage) to automatically free up space by deleting temporary files and content in your recycle bin and downloads folder. - Windows Defender Firewall: Ensure your firewall is enabled and configured correctly (
Settings > Update & Security > Windows Security > Firewall & network protection). - System Restore Points: Create a system restore point now that your system is in a pristine, functional state. This will allow you to roll back to this point if future issues arise (
Search "Create a restore point").
By diligently following these post-installation steps, your clean install of Windows 10 will be transformed into a highly efficient, secure, and personalized computing environment, ready to support your daily tasks with renewed speed and reliability. This fresh start not only enhances your productivity but also extends the life and enjoyment of your PC.
aViewFromTheCave is a participant in the Amazon Services LLC Associates Program, an affiliate advertising program designed to provide a means for sites to earn advertising fees by advertising and linking to Amazon.com. Amazon, the Amazon logo, AmazonSupply, and the AmazonSupply logo are trademarks of Amazon.com, Inc. or its affiliates. As an Amazon Associate we earn affiliate commissions from qualifying purchases.