
In the vast and ever-evolving landscape of technology, Java stands as a foundational pillar, powering everything from enterprise-level applications and Android mobile development to big data solutions and complex web servers. For users, developers, and system administrators alike, knowing whether Java is installed on your system – and which version – is a critical piece of information. This isn’t just a technical detail; it impacts the functionality of countless software applications, your digital security, and even your overall productivity.
Whether you’re trying to run a specific application, troubleshoot a software issue, or simply maintain an updated and secure system, verifying your Java installation is often the first step. This comprehensive guide will walk you through the various methods to check for Java across different operating systems, explain the significance of your findings, and provide essential next steps.
Understanding Java and Its Importance
Before diving into the “how-to,” it’s crucial to grasp what Java is and why its presence (or absence) is so impactful. This understanding ties directly into the broader “Tech” aspects of our website, encompassing software, digital security, and productivity.
What is Java?
Java is more than just a programming language; it’s a computing platform first released by Sun Microsystems (now owned by Oracle) in 1995. Its core principle is “Write Once, Run Anywhere” (WORA), meaning that compiled Java code can run on any platform that supports Java without the need for recompilation. This cross-platform compatibility is achieved through the Java Virtual Machine (JVM), which interprets Java bytecode for the underlying operating system.
When we talk about “Java installed,” we typically refer to one of two components:
- Java Runtime Environment (JRE): This is what end-users need to run Java applications. It includes the JVM, Java core classes, and supporting files.
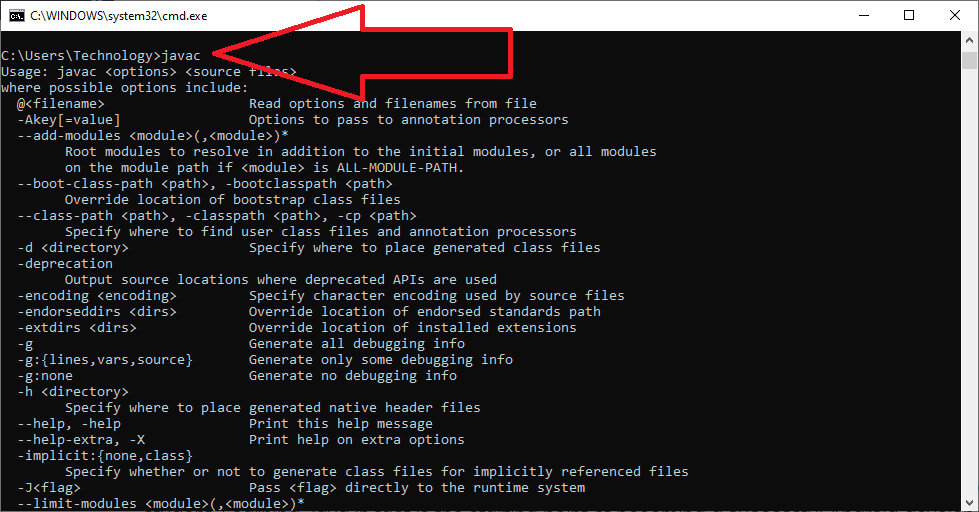
- Java Development Kit (JDK): This is for Java developers. It includes the JRE, along with development tools like the compiler (javac), debugger, and other utilities necessary to write and compile Java applications. Most users only need the JRE, but if you’re developing or working with certain developer tools, the JDK might be required.
Why is Java Installation Crucial?
The pervasive nature of Java means that a vast array of software relies on it. From productivity tools and online gaming to sophisticated business applications and government systems, Java is often working silently in the background. Here’s why its correct installation is paramount:
- Application Functionality: Many popular applications, especially those developed for cross-platform compatibility or legacy systems, require Java to run. Without it, or with an incompatible version, these applications will simply fail to launch or operate correctly. This directly impacts your productivity if you rely on such software.
- Digital Security: An outdated or improperly configured Java installation can be a significant security vulnerability. Malicious actors often target known exploits in older Java versions to gain unauthorized access to systems. Ensuring you have an updated, secure version of Java (or removing it if not needed) is a vital part of your digital security strategy.
- Performance and Stability: The right Java version can ensure applications run optimally. Incompatibility or issues with environment variables can lead to performance degradation, crashes, or unpredictable behavior. For businesses, this can translate into lost time and resources.
- Web-Based Content: While less common now, some older web applets and browser-based tools still leverage Java. Ensuring Java is properly configured can be essential for accessing such content, though modern web standards have largely moved away from browser plugins.
Understanding these points underscores why checking your Java installation isn’t just a technical chore, but a fundamental aspect of maintaining a functional, secure, and efficient computing environment.
Step-by-Step Guides to Verify Java Installation
The method for checking Java varies slightly depending on your operating system. We’ll cover the most common platforms: Windows, macOS, and Linux, providing clear, actionable steps for each.
Checking Java on Windows
Windows users have a couple of primary methods to determine if Java is installed and which version is present.
Using Command Prompt
This is the most direct and universally applicable method for Windows users.
-
Open Command Prompt:
- Press the
Windows key + Rto open the Run dialog. - Type
cmdand pressEnter. - Alternatively, search for “Command Prompt” in the Windows search bar and click on the result.
- For some advanced scenarios, you might need to run it as an administrator (right-click -> “Run as administrator”).
- Press the
-
Execute the Java Version Command:
- In the Command Prompt window, type the following command:
bash

java -version
- Press
Enter.
- In the Command Prompt window, type the following command:
-
Interpret the Output:
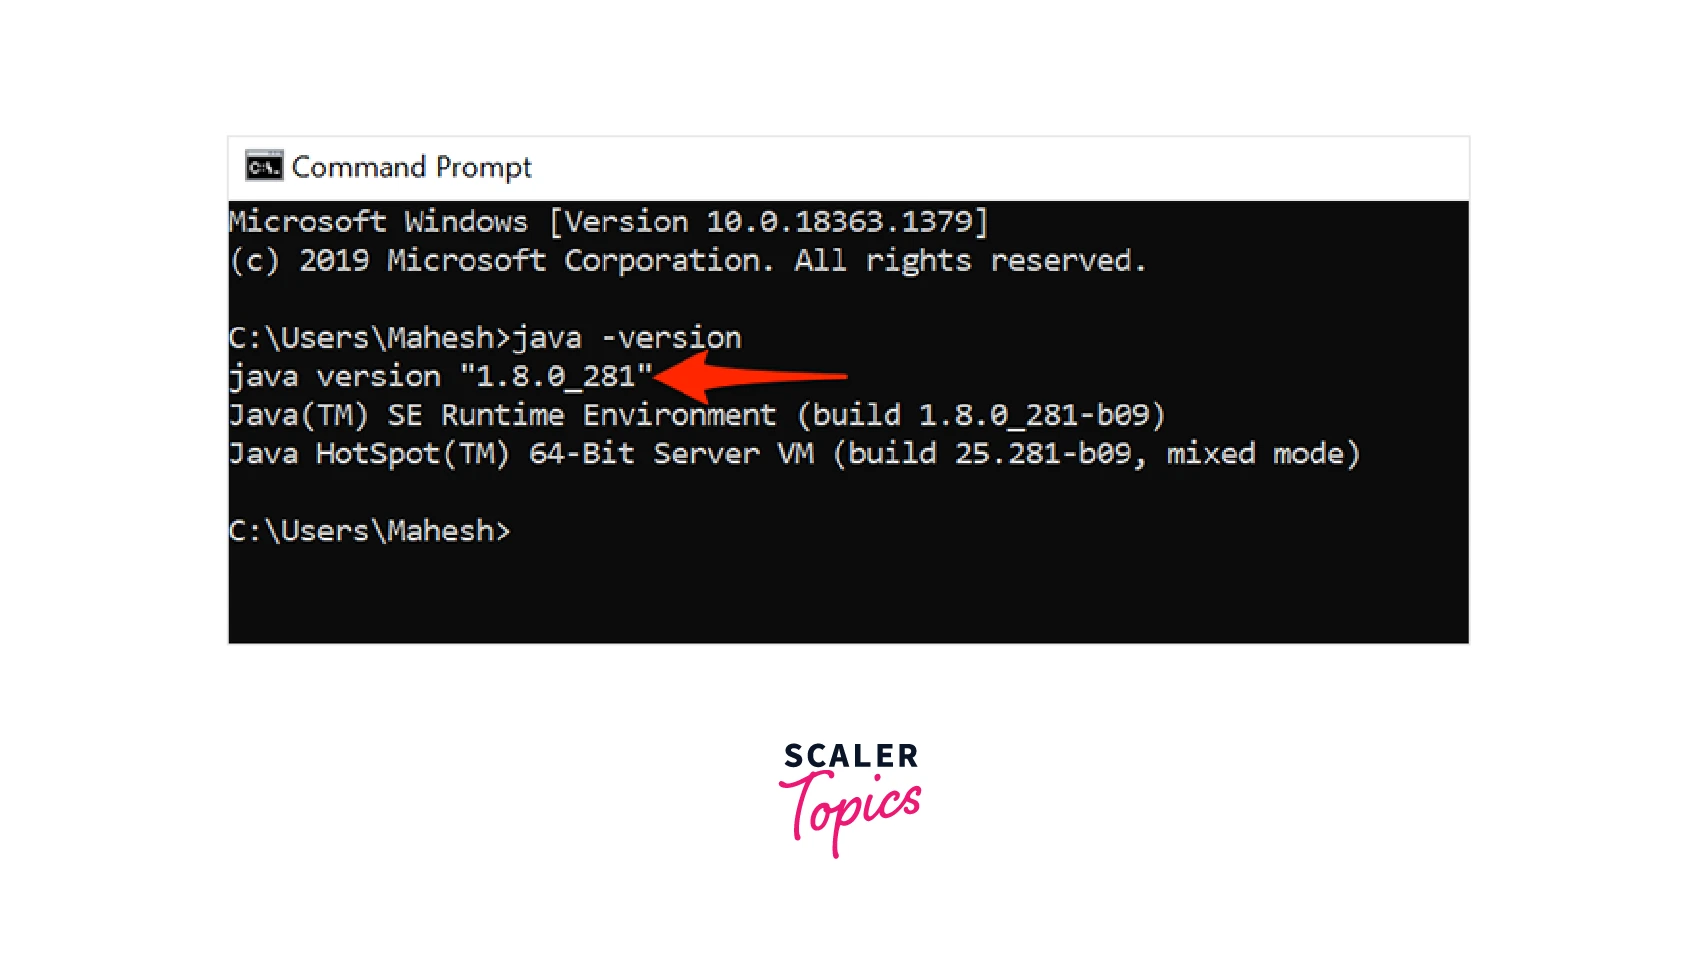
- If Java is installed correctly: You will see output similar to this (the version numbers will vary):
java version "1.8.0_301"

Java(TM) SE Runtime Environment (build 1.8.0_301-b09)

Java HotSpot(TM) 64-Bit Server VM (build 25.301-b09, mixed mode)
This indicates that Java is installed, specifies its version (e.g., “1.8.0_301” refers to Java 8 Update 301), and details about the runtime environment. - If Java is not installed or not configured in PATH: You will likely see an error message such as:
'java' is not recognized as an internal or external command,

operable program or batch file.
This usually means Java is either not installed, or its executable path is not included in your system’sPATHenvironment variable, preventing the command prompt from finding it.
- If Java is installed correctly: You will see output similar to this (the version numbers will vary):
Using Control Panel or System Settings
This method provides a visual confirmation and allows you to uninstall or modify Java installations.
-
Open Control Panel:
- For Windows 10/11: Right-click the Start button and select “Settings” > “Apps” > “Apps & features”.
- For older Windows versions (or an alternative for newer ones): Search for “Control Panel” in the Windows search bar and open it.
- In Control Panel, select “Programs” then “Programs and Features” (or “Uninstall a program”).
-
Look for Java Entries:
- Scroll through the list of installed programs.
- Look for entries that begin with “Java,” “Java SE Development Kit,” “JRE,” or “OpenJDK.”
- The entries will usually indicate the version number (e.g., “Java 8 Update 301,” “OpenJDK 17”).
This method confirms Java’s physical presence on your system but doesn’t necessarily confirm its accessibility via the command line (which is governed by the PATH environment variable).
Checking Java on macOS
For macOS users, the Terminal is the primary tool for verifying Java installations, supplemented by System Preferences for the Java Control Panel.
Using Terminal
Similar to Windows Command Prompt, the macOS Terminal provides a quick and reliable way.
-
Open Terminal:
- Go to
Applications>Utilities>Terminal. - Alternatively, use Spotlight Search (Cmd + Space) and type “Terminal.”
- Go to
-
Execute the Java Version Command:
- In the Terminal window, type:
bash

java -version
- Press
Enter.
- In the Terminal window, type:
-
Interpret the Output:
- If Java is installed: You will see output resembling:
openjdk version "17.0.4.1" 2022-08-12

OpenJDK Runtime Environment (build 17.0.4.1+1)

OpenJDK 64-Bit Server VM (build 17.0.4.1+1, mixed mode)
Or, for Oracle Java:
java version "1.8.0_341"

Java(TM) SE Runtime Environment (build 1.8.0_341-b10)

Java HotSpot(TM) 64-Bit Server VM (build 25.341-b10, mixed mode)
This confirms Java’s presence and its specific version. - If Java is not installed or configured: You might see:
The operation couldn’t be completed. Unable to locate a Java Runtime that supports java.
Or, for older macOS versions, it might prompt you to install Java or direct you to the Oracle website.
- If Java is installed: You will see output resembling:

Using System Preferences (Java Control Panel)
If you have Oracle Java installed, it often includes a Java Control Panel in System Preferences.
-
Open System Preferences:
- Click on the Apple menu in the top-left corner and select “System Preferences.”
- For newer macOS versions (Ventura and later), it’s called “System Settings.”
-
Look for Java Icon:
- Locate the “Java” icon, usually found in the bottom row.
- Clicking it opens the Java Control Panel, which provides detailed information about your Java installation(s), security settings, and update options. Note that this panel might not be present for OpenJDK installations.
Checking Java on Linux
Linux distributions offer similar command-line verification methods, with slight variations depending on the package manager and distribution.
Using Terminal
The Terminal is your primary interface for interacting with Java on Linux.
-
Open Terminal:
- Typically found in your applications menu under “Utilities” or by pressing
Ctrl + Alt + T.
- Typically found in your applications menu under “Utilities” or by pressing
-
Execute the Java Version Command:
- Type the standard command:
bash

java -version
- Press
Enter.
- Type the standard command:
-
Interpret the Output:
- If Java (typically OpenJDK) is installed: You’ll see output like:
openjdk version "11.0.16" 2022-07-19

OpenJDK Runtime Environment (build 11.0.16+8-Ubuntu-1ubuntu22.04)

OpenJDK 64-Bit Server VM (build 11.0.16+8-Ubuntu-1ubuntu22.04, mixed mode, sharing)
This indicates the OpenJDK version. - If Java is not found: You might get an error message like:
Command 'java' not found, but can be installed with:

sudo apt install openjdk-11-jre-headless
This is helpful, as it often suggests the command to install Java if it’s missing.
- If Java (typically OpenJDK) is installed: You’ll see output like:
-
Checking for Specific Java Implementations (Optional):
- If you know you might have OpenJDK specifically, you can also try:
bash

openjdk --version
This command is often synonymous withjava -versionfor OpenJDK installations but can sometimes provide slightly different output depending on how the symlinks are set up. - For managing multiple Java versions or setting the default, tools like
update-alternativeson Debian/Ubuntu systems (sudo update-alternatives --config java) can be very useful.
- If you know you might have OpenJDK specifically, you can also try:
Interpreting the Results and Next Steps
Once you’ve run the commands, the output (or lack thereof) tells an important story. Understanding what these results mean is crucial for deciding your next course of action.
Java is Installed: What Does the Version Mean?
Congratulations, Java is on your system! However, the version number is key.
- Version Numbers: Java versions are typically denoted as
1.x.y_z(for Java 8 and older) or simplyx(for Java 9 and newer). For example,1.8.0_301refers to Java 8, Update 301.OpenJDK 17.0.4.1refers to OpenJDK version 17. - JDK vs. JRE: The output often specifies “Runtime Environment” or “Development Kit.” If you only see “Runtime Environment,” you have the JRE. If it mentions “Development Kit,” you have the JDK, which includes the JRE. Ensure you have the correct one for your needs.
- Multiple Versions: It’s common to have multiple Java versions installed, especially on developer machines. While this can be managed, it can also lead to confusion if the wrong version is being invoked by an application or the command line.
Next Steps if Java is Installed:
- Check Compatibility: Verify if the installed version meets the requirements of the application you intend to run. Some older applications might require Java 8, while modern applications often demand Java 11 or 17 (LTS versions).
- Update if Outdated: If your Java version is significantly old, consider updating it. Outdated Java poses security risks. For Oracle Java, check their official website for the latest JRE/JDK. For OpenJDK, use your system’s package manager (
apt,yum,dnf) to update. - Environment Variables (Advanced): If you have multiple Java versions and need to switch between them, or if an application isn’t picking up the correct one, you might need to adjust your system’s
JAVA_HOMEenvironment variable andPATH.
Java is Not Installed or Incorrectly Configured: How to Proceed
If your commands resulted in an error or no Java entry was found, Java is either missing or not properly set up for command-line access.
Next Steps if Java is Missing/Configured Incorrectly:
- Install Java: The most straightforward solution.
- For general users (JRE): Visit the official Oracle Java website (java.com) to download the latest JRE, or consider OpenJDK (e.g., from Adoptium’s Temurin builds) for a free, open-source alternative.
- For developers (JDK): Download the appropriate JDK version from Oracle (oracle.com/java/technologies/downloads) or a reputable OpenJDK provider like Adoptium.
- For Linux users: Use your distribution’s package manager (e.g.,
sudo apt install default-jreorsudo yum install java-1.8.0-openjdk).
- Set Environment Variables (if needed): After installing Java, especially the JDK, you might need to configure the
JAVA_HOMEenvironment variable to point to your Java installation directory and add thebindirectory of your Java installation to your system’sPATHvariable. This allows the system to find thejavaexecutable from any directory in the command line. Detailed guides for setting environment variables are readily available online for each OS. - Re-test: After installation and potential environment variable configuration, repeat the
java -versioncommand to confirm everything is working as expected.
Common Issues and Troubleshooting
Even with clear instructions, you might encounter specific hurdles. Addressing these common problems ensures a smooth Java experience and enhances your productivity.
“Java not recognized as an internal or external command”
This is the most frequent error, especially on Windows and Linux. It means your system cannot find the java executable in the directories listed in your system’s PATH environment variable.
- Solution:
- Verify Installation: Double-check that Java is indeed installed (e.g., by looking in “Programs and Features” on Windows or the
/usr/lib/jvmdirectory on Linux). - Set
JAVA_HOME: Create an environment variable namedJAVA_HOMEand set its value to the root directory of your Java installation (e.g.,C:Program FilesJavajdk-17on Windows, or/usr/lib/jvm/java-11-openjdk-amd64on Linux). - Add to
PATH: Append%JAVA_HOME%bin(on Windows) or$JAVA_HOME/bin(on Linux/macOS) to your system’sPATHenvironment variable. - Restart Terminal/Command Prompt: Environment variable changes usually require a new shell session to take effect.
- Verify Installation: Double-check that Java is indeed installed (e.g., by looking in “Programs and Features” on Windows or the
Multiple Java Versions
Having multiple JDKs or JREs can be problematic if applications or the command line pick up the wrong one.
- Solution:
- Prioritize PATH: Ensure the desired Java version’s
bindirectory appears first in yourPATHenvironment variable. - Explicit
JAVA_HOME: SetJAVA_HOMEto the specific version you want to use for most applications. - Version Managers: For developers, tools like SDKMAN! (Linux/macOS) or
jenv(macOS) allow easy switching between Java versions without manually editing environment variables. - Linux
update-alternatives: On Debian/Ubuntu, usesudo update-alternatives --config javato select your default Java.
- Prioritize PATH: Ensure the desired Java version’s
Outdated Java Versions
Running an old Java version is a significant digital security risk and can lead to compatibility issues with newer applications.
- Solution:
- Update: Regularly check for and install updates for your Java runtime. For Oracle Java, the Java Control Panel often has an “Update” tab. For OpenJDK, rely on your system’s package manager.
- Uninstall Unused Versions: If you have multiple outdated versions that are no longer needed, uninstall them to reduce your attack surface and avoid conflicts.
- Security Patches: Be aware that certain older Java versions might no longer receive security patches. Upgrading to a currently supported Long-Term Support (LTS) version (like Java 11 or Java 17) is highly recommended for security and stability.
Conclusion
Understanding how to check your Java installation is a fundamental skill for anyone interacting with modern computing systems. From ensuring your favorite applications run smoothly to safeguarding your digital security, a properly configured and updated Java environment is indispensable. By following the clear, step-by-step guides provided for Windows, macOS, and Linux, you can quickly ascertain your Java status.
Remember, technology trends emphasize not just powerful tools, but also the informed and secure use of them. Whether you’re a tech enthusiast, a professional managing software, or simply someone trying to get an application to work, mastering these basic checks empowers you to maintain a more stable, secure, and productive digital workspace. Always strive to keep your software, including Java, up-to-date to benefit from the latest features, performance enhancements, and crucial security patches.
aViewFromTheCave is a participant in the Amazon Services LLC Associates Program, an affiliate advertising program designed to provide a means for sites to earn advertising fees by advertising and linking to Amazon.com. Amazon, the Amazon logo, AmazonSupply, and the AmazonSupply logo are trademarks of Amazon.com, Inc. or its affiliates. As an Amazon Associate we earn affiliate commissions from qualifying purchases.