
Windows 11 represents a significant evolution in Microsoft’s operating system, offering a refreshed user interface, enhanced security features, and a host of improvements designed to boost productivity and elevate the digital experience. Whether you’re looking to upgrade an existing Windows 10 machine or perform a clean installation on new hardware, the process can seem daunting. However, with the right preparation and a step-by-step guide, you can seamlessly transition to Microsoft’s latest operating system. This comprehensive tutorial will walk you through everything you need to know, from checking compatibility to optimizing your post-installation setup, ensuring a smooth and successful deployment of Windows 11.
Beyond just a visual facelift, Windows 11 brings tangible benefits relevant to the Tech landscape, from improved multitasking with Snap Layouts and Desktops, to the integration of AI tools like Copilot, and robust digital security measures such as TPM 2.0 and Secure Boot. Embracing Windows 11 isn’t just about having the latest software; it’s about future-proofing your digital workspace, enhancing your personal Brand through a modern, efficient setup, and potentially saving Money by improving workflow efficiency and reducing the risks associated with outdated systems.
Essential Preparations Before Installation
Before embarking on the installation journey, meticulous preparation is key. This stage is critical for preventing common installation pitfalls and ensuring your data remains safe. Neglecting these steps can lead to frustrating delays, data loss, or even an unsuccessful installation.
Checking System Compatibility: The Foundation of a Smooth Upgrade
Windows 11 has specific hardware requirements that are stricter than its predecessors, primarily focused on enhancing security and performance. The most talked-about requirements include a Trusted Platform Module (TPM) version 2.0 and Secure Boot capability. These are not merely arbitrary gates but fundamental security features designed to protect your system from sophisticated threats, aligning perfectly with modern digital security best practices.
- Processor (CPU): 1 Gigahertz (GHz) or faster with 2 or more cores on a compatible 64-bit processor or System on a Chip (SoC). This ensures that your system can handle the demands of modern applications and the Windows 11 interface efficiently.
- RAM: 4 Gigabytes (GB) or greater. Sufficient RAM is crucial for multitasking and running resource-intensive applications without slowdowns.
- Storage: 64 GB or larger storage device. While 64GB is the minimum, we recommend more for better performance and future updates. This requirement directly impacts how many applications and files you can store without encountering performance issues.
- System Firmware: UEFI, Secure Boot capable. UEFI (Unified Extensible Firmware Interface) offers a more secure and faster boot experience compared to the older BIOS. Secure Boot prevents malicious software from loading during startup.
- TPM: Trusted Platform Module version 2.0. TPM is a cryptoprocessor that provides hardware-level security functions, such as storing cryptographic keys and authenticating boot processes. It’s a cornerstone of Windows 11’s enhanced security architecture.
- Graphics Card: Compatible with DirectX 12 or later with WDDM 2.0 driver. This ensures your system can render the modern graphical interface and support advanced gaming or multimedia applications.
- Display: High definition (720p) display that is greater than 9” diagonally, 8 bits per color channel. A decent display is essential for enjoying the visual enhancements of Windows 11.
- Internet Connection and Microsoft Account: For Windows 11 Home edition, internet connectivity and a Microsoft account are required to complete device setup on first use. This allows for seamless cloud integration and access to Microsoft services.
To quickly check your system’s compatibility, Microsoft offers the PC Health Check App. Download and run it, and it will give you a clear report on whether your computer meets the requirements or pinpoint specific areas that need attention. This tool saves you from manually sifting through your hardware specifications and is an invaluable first step.
Safeguarding Your Digital Life: The Importance of Backups
Installing a new operating system, whether an upgrade or a clean install, always carries a slight risk of data loss. This risk, while small with modern installers, is amplified if there are unexpected power outages, hardware failures, or user errors during the process. Therefore, backing up your essential files is not just recommended; it’s absolutely mandatory. Think of it as an insurance policy for your digital life, an investment in your peace of mind that aligns with responsible Money and Tech management.
Consider what you cannot afford to lose: personal documents, photos, videos, important work files, financial records, and software licenses.
- External Hard Drive: This is a classic and reliable method. Simply copy and paste your critical files to an external drive. For an added layer of protection, consider using backup software that creates a system image, allowing you to restore your entire drive if needed.
- Cloud Storage Services: Services like Microsoft OneDrive, Google Drive, Dropbox, or Apple iCloud offer convenient automatic syncing and off-site storage. These are excellent for active documents and files that you need to access from multiple devices. Many services offer generous free tiers, with affordable upgrades for more storage, making them a wise Money investment for data security.
- Network Attached Storage (NAS): For those with extensive data or multiple computers, a NAS provides a centralized, secure, and accessible backup solution within your home network.
Whatever method you choose, verify that your backup is complete and accessible before proceeding with the Windows 11 installation. This simple step can save you countless hours of stress and potential data recovery costs.
Gathering Your Installation Arsenal: Product Key and Internet Access
Beyond your hardware and data backups, there are a few practical items to have at hand:
- Windows 11 Product Key (if applicable): If you are performing a clean installation and do not have a digital license tied to your Microsoft account, or if you’re installing a retail version, you will need your 25-character product key. For upgrades from Windows 10, Windows 11 typically inherits the digital license, so a product key might not be explicitly needed during installation but good to have handy.
- Stable Internet Connection: While not strictly necessary for the core installation files, an internet connection is vital during and after the process. It allows for driver downloads, critical Windows updates, and the initial setup of a Microsoft account (if required). Many modern systems rely on online drivers to function optimally post-installation.
- Enough Time: A Windows installation can take anywhere from 30 minutes to a few hours, depending on your system’s speed, the installation method, and whether you’re performing an upgrade or a clean install. Allocate ample time and avoid starting the process if you have immediate deadlines.
Choosing Your Installation Path: Upgrade or Clean Install?
Once your preparations are complete, the next decision is how you want to install Windows 11. This choice largely depends on your current operating system, your computer’s performance, and your desired outcome.
The Seamless Transition: Upgrading from Windows 10
For most users currently running Windows 10 on a compatible PC, upgrading is the simplest and recommended path. This method preserves your existing files, applications, and settings, providing a familiar environment with the new Windows 11 features.
- Process: The easiest way to upgrade is through Windows Update. Your system will automatically download and install Windows 11 when it’s ready for your device. You can manually check for updates in
Settings > Update & Security > Windows Update. If your system meets the requirements, you’ll see an option to download and install Windows 11. - Advantages:
- Data Preservation: All your personal files, documents, photos, and applications remain intact.
- Ease of Use: The process is largely automated, requiring minimal user intervention.
- Familiarity: You retain most of your existing settings, reducing the learning curve.
- Disadvantages:
- Carrying Over Issues: Any existing software conflicts, performance issues, or corrupted system files from Windows 10 might be carried over to Windows 11.
- Slightly Less “Fresh”: While it’s a new OS, it’s built on top of your existing Windows 10 installation, which might not offer the absolute peak performance of a truly clean slate.
A Fresh Beginning: Performing a Clean Installation
A clean installation involves erasing your entire hard drive and installing Windows 11 from scratch. This is often preferred by advanced users, those with new PCs, or anyone experiencing performance issues with their current system. It’s akin to getting a brand-new computer, offering the best possible performance and stability.
- Process: This method requires creating bootable installation media (USB drive or DVD) and booting your computer from it. During the setup process, you’ll delete existing partitions and create new ones for Windows 11.
- Advantages:
- Optimal Performance: A clean install removes all old junk files, unused programs, and potential conflicts, resulting in a snappier, more stable system. This directly impacts productivity, an important aspect for both personal and corporate Brands, and a wise Tech decision.
- Resolves Deep-Seated Issues: If you’ve been battling persistent software problems or viruses, a clean install is often the most effective solution.
- Complete Control: You have full control over disk partitioning and other setup options.
- Disadvantages:
- Data Loss: All data on the selected drive will be erased. Your backup is absolutely crucial here.
- Reinstallation of Applications: You will need to reinstall all your applications and configure their settings from scratch. This can be time-consuming.
- Driver Installation: While Windows 11 generally handles drivers well, you might need to manually install some specific drivers (e.g., for graphics cards or specialized peripherals).
Tools of the Trade: Windows 11 Media Creation Tool vs. ISO File
For a clean install or if Windows Update isn’t offering the upgrade, you’ll need to create installation media. Microsoft provides two primary tools for this:
- Windows 11 Media Creation Tool: This is the easiest and most recommended method for creating bootable USB drives.
- How it works: You download a small application from Microsoft’s website. Run it, and it will guide you through the process of downloading the Windows 11 installation files and writing them to a USB flash drive (minimum 8GB). The tool handles all the complexities of making the USB bootable.
- When to use: Ideal for most users who want to perform a clean install or an in-place upgrade (if Windows Update isn’t working).
- Windows 11 ISO File: An ISO file is a complete disc image of the Windows 11 installation DVD.
- How it works: You download the ISO file directly from Microsoft’s website. You then need a third-party tool like Rufus (for USB drives) or burning software (for DVDs) to create the bootable media.
- When to use: Preferred by advanced users, IT professionals, or for virtual machine installations. It offers more flexibility, especially if you need to customize the installation media or integrate drivers before deployment.
For the purpose of this guide, we will focus on creating a bootable USB drive using the Media Creation Tool, as it’s the most common and user-friendly method.
Step-by-Step Guide to Installing Windows 11
With your preparations complete and your installation method chosen, it’s time for the main event: installing Windows 11.
Creating Your Bootable Installation Media (Using Media Creation Tool)
- Download the Tool: Go to Microsoft’s official Windows 11 download page and download the “Create Windows 11 Installation Media” tool.
- Run the Tool: Execute the downloaded file (
MediaCreationToolW11.exe). Accept the license terms. - Select Language and Edition: Confirm the language and Windows 11 edition (usually pre-selected based on your current system). Click “Next.”
- Choose Media Type: Select “USB flash drive” as the media to use. Click “Next.”
- Select USB Drive: Choose your connected USB flash drive from the list. Ensure you select the correct drive, as all data on it will be erased. Click “Next.”
- Download and Create: The tool will now download the Windows 11 installation files and write them to your USB drive. This process can take some time, depending on your internet speed. Once complete, click “Finish.”
You now have a bootable Windows 11 USB installation media.
Initiating the Setup: Booting from Your Installation Media
To install Windows 11, your computer needs to start from the USB drive rather than its internal hard drive.
- Restart Your PC: Insert the bootable USB drive into an available port and restart your computer.
- Access Boot Menu/BIOS/UEFI: As your computer starts up, you’ll need to press a specific key repeatedly to enter the BIOS/UEFI settings or a dedicated boot menu. Common keys include
F2,F10,F12,Del, orEsc. The exact key varies by manufacturer (e.g., Dell, HP, Lenovo, ASUS, Acer). Consult your PC’s manual or look for on-screen prompts during startup. - Change Boot Order:
- Boot Menu: If you access a boot menu, simply select your USB drive (it might be listed by brand, like “SanDisk Cruzer” or “UEFI USB Device”) and press Enter.
- BIOS/UEFI Settings: If you enter the full BIOS/UEFI settings, navigate to the “Boot” tab or section. Change the boot order to prioritize your USB drive as the first boot device. Save your changes and exit (usually
F10).
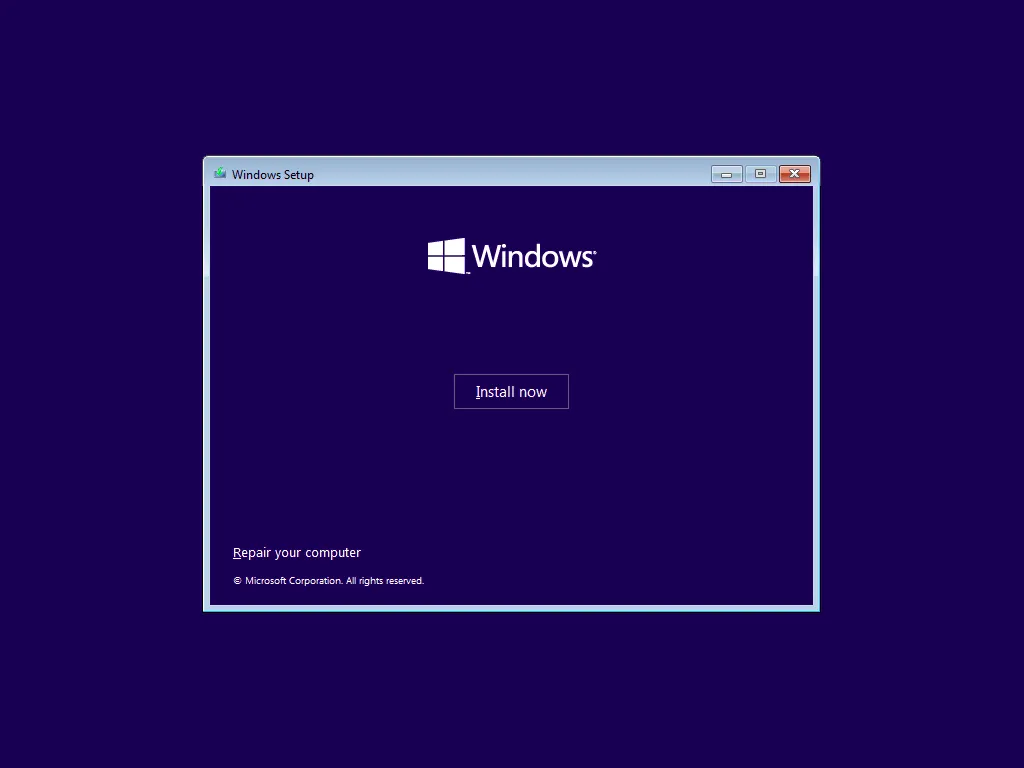
- Start Installation: Your computer should now boot from the USB drive, and you’ll see the Windows 11 setup screen appear.
Navigating the Windows Setup Wizard
The initial setup screens are straightforward:
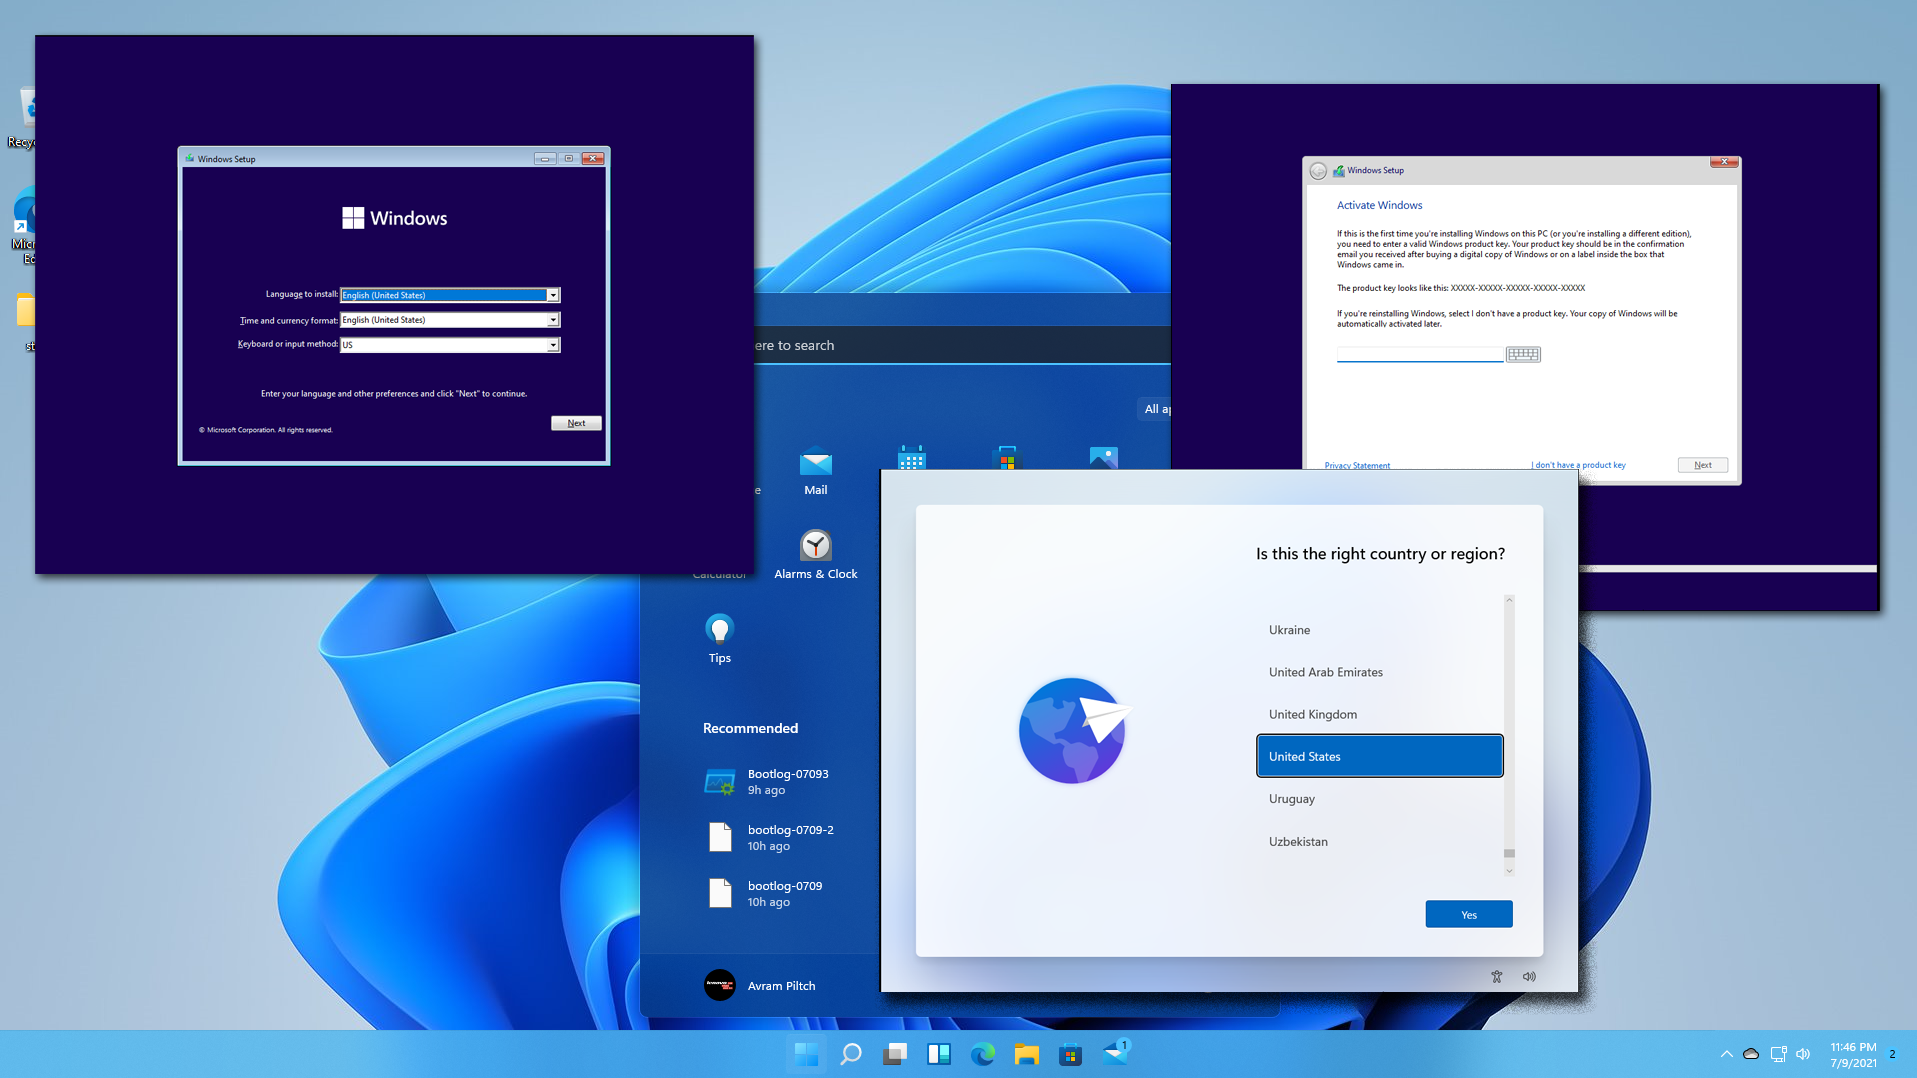
- Language, Time, and Keyboard: Select your preferred language, time and currency format, and keyboard or input method. Click “Next.”
- Install Now: Click the “Install now” button.
- Product Key: If prompted, enter your Windows 11 product key. If you are reinstalling Windows 11 on a device that previously had an activated digital license, or if you’re upgrading from an activated Windows 10, you can often click “I don’t have a product key.” Windows will activate automatically later once connected to the internet.
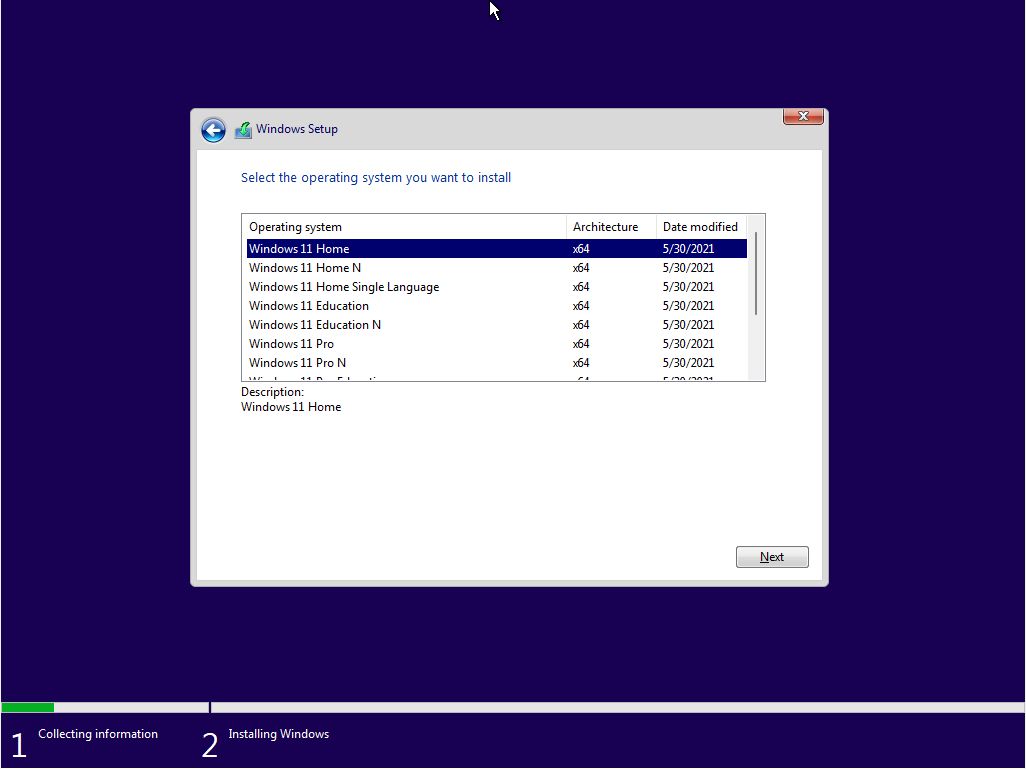
- Choose Operating System: Select the edition of Windows 11 you want to install (e.g., Windows 11 Home, Windows 11 Pro). Ensure it matches your product key or digital license. Click “Next.”
- License Terms: Accept the Microsoft Software License Terms. Click “Next.”
- Type of Installation: This is a crucial step:
- Upgrade: Install Windows and keep files, settings, and applications: Choose this if you’re upgrading from Windows 10 and want to preserve everything. This option is typically only available if you run the setup from within your existing Windows installation, not by booting from USB.
- Custom: Install Windows only (advanced): Choose this for a clean installation. This option will allow you to manage your disk partitions.
Disk Partitioning and Drive Selection (For Custom/Clean Installation)
If you chose “Custom: Install Windows only (advanced),” you’ll be taken to the disk partitioning screen. This is where your backup becomes critically important.
- Identify Target Drive: You’ll see a list of drives and partitions. Carefully identify the drive where you want to install Windows 11. This is usually your primary C: drive.
- Delete Partitions (Clean Install): To perform a truly clean install, select each partition on your target drive (e.g., “Drive 0 Partition 1,” “Drive 0 Partition 2,” etc.) and click “Delete.” This will erase all data on those partitions. Repeat until the drive shows as “Drive 0 Unallocated Space.”
- Create New Partition: Select the “Unallocated Space” and click “New” to create a new partition. Windows will typically suggest the maximum size. Apply it, and Windows will automatically create the necessary system, recovery, and primary partitions.
- Select Primary Partition: Select the largest primary partition (this will be your C: drive) and click “Next.”
The installation process will now begin, copying files and performing initial setup. Your computer will restart several times.
The Final Stretch: Initial Configuration and User Account Setup
After the main installation files are copied, your PC will reboot into the Out-Of-Box Experience (OOBE). This guides you through personalizing Windows 11 for the first time.
- Region and Keyboard Layout: Confirm your country/region and keyboard layout. You can add a second keyboard layout if needed.
- Connect to a Network: Connect to your Wi-Fi or wired network. An internet connection is often required to proceed, especially for Windows 11 Home.
- Name Your Device (Optional): You can name your PC now or skip this step.
- Microsoft Account vs. Local Account:
- Microsoft Account: Microsoft strongly encourages using a Microsoft account for seamless integration with OneDrive, Microsoft Store, and other services. Sign in with an existing account or create a new one.
- Local Account: For Windows 11 Pro, you can opt to create a local account by selecting “Sign-in options” and then “Offline account” (or by disconnecting from the internet before this step). Windows 11 Home often requires a Microsoft account at this stage unless specific workarounds are used.
- Create PIN: Set up a PIN for faster and more secure sign-ins.
- Privacy Settings: Review and choose your privacy settings (e.g., location, diagnostic data, tailored experiences). Adjust these according to your comfort level.
- Customize Your Experience (Optional): Choose how you plan to use your device (e.g., Gaming, Creativity, School) for personalized suggestions.
- OneDrive Setup (Optional): Decide whether to back up your files to OneDrive.
- Windows Hello (Optional): Set up facial recognition or fingerprint scanning if your device supports it.
After these steps, Windows 11 will finalize its setup, and you’ll be greeted by the new desktop. Congratulations, you’ve successfully installed Windows 11!
Post-Installation Essentials and Optimization
Installing Windows 11 is just the first step. To ensure your system is secure, performs optimally, and caters to your needs, some crucial post-installation tasks remain. This phase is vital for maximizing your Tech investment and securing your digital Brand.
Securing Your System: Drivers, Updates, and Antivirus
A fresh Windows installation is a blank canvas, but it needs to be fortified.
- Install Device Drivers: While Windows 11 has excellent built-in driver support, some specific hardware components might require proprietary drivers for optimal performance.
- Windows Update: The first place to check is Windows Update (
Settings > Windows Update). Many drivers will be automatically detected and installed. - Device Manager: Open Device Manager (right-click Start button > Device Manager) and look for any devices with yellow exclamation marks. These indicate missing or problematic drivers.
- Manufacturer Websites: For graphics cards (NVIDIA, AMD, Intel), motherboard chipsets, and specialized peripherals, always visit the manufacturer’s official website. Download and install the latest drivers specifically designed for Windows 11. Updated drivers often provide performance boosts, bug fixes, and enhanced stability.
- Windows Update: The first place to check is Windows Update (
- Run Windows Updates: Even immediately after installation, new updates might have been released. Repeatedly check for and install all available updates until no more are found. These updates include security patches, bug fixes, and feature enhancements crucial for maintaining system stability and security. Keeping your system updated is a cornerstone of responsible Digital Security, a key aspect of the Tech topic.
- Antivirus and Malware Protection: Windows 11 comes with Windows Security (including Microsoft Defender Antivirus) enabled by default, offering robust real-time protection. For most users, this is sufficient. However, if you prefer a third-party antivirus solution, install it now. Ensure you only run one primary antivirus program to avoid conflicts.
Tailoring Your Experience: Personalization and Productivity Tools
Now that your system is secure and up-to-date, it’s time to make Windows 11 truly yours and leverage its features for productivity.
- Personalization:
- Themes and Backgrounds: Go to
Settings > Personalizationto change your desktop background, accent colors, and themes. - Start Menu and Taskbar: Customize what appears on your Start Menu and how your taskbar behaves (e.g., alignment, widget visibility).
- Widgets: Explore the new Widgets panel for quick glances at news, weather, and calendar events.
- Themes and Backgrounds: Go to
- Productivity Tools:
- Snap Layouts and Snap Groups: Master these features for efficient multitasking. Hover over the maximize button of any window to see various snap layouts, allowing you to arrange multiple windows on your screen quickly.
- Virtual Desktops: Create multiple virtual desktops for different tasks or projects, helping you keep your workspace organized and focused. For instance, one desktop for work, another for personal browsing, enhancing your professional Brand by keeping distractions at bay.
- Copilot (AI Assistant): Windows 11 integrates Copilot, an AI-powered assistant, directly into the operating system. Learn how to use it for quick searches, content generation, system control, and more, significantly boosting your Productivity.
- Install Essential Software: Reinstall your most frequently used applications – web browser, office suite, creative software, communication tools, and any specialized programs for your work or hobbies.
By diligently following these post-installation steps, you not only ensure your Windows 11 system runs smoothly but also harness its full potential for enhanced security, improved performance, and a more personalized computing experience.
In conclusion, installing Windows 11 is a manageable process that, when approached systematically, yields significant benefits. From its refreshed aesthetics and powerful productivity features to its enhanced security architecture, Windows 11 is designed to be a modern operating system that caters to today’s digital demands. By carefully preparing your system, choosing the right installation path, and diligently following the setup and post-installation steps, you can confidently embrace the future of computing with Microsoft’s latest offering. Enjoy your new Windows 11 experience!
aViewFromTheCave is a participant in the Amazon Services LLC Associates Program, an affiliate advertising program designed to provide a means for sites to earn advertising fees by advertising and linking to Amazon.com. Amazon, the Amazon logo, AmazonSupply, and the AmazonSupply logo are trademarks of Amazon.com, Inc. or its affiliates. As an Amazon Associate we earn affiliate commissions from qualifying purchases.