
In an increasingly data-driven world, where our smartphones, cameras, drones, and even gaming consoles capture and process vast amounts of information, storage capacity has become a premium commodity. While cloud solutions offer seamless syncing and accessibility, there remains a fundamental need for local, expandable storage – a role perfectly filled by the humble yet mighty SD card. From snapping countless high-resolution photos and recording 4K videos to expanding your mobile apps library or boosting your laptop’s storage, an SD card offers a versatile and often indispensable solution.
This comprehensive guide will walk you through everything you need to know about installing an SD card, ensuring you maximize its potential across your various gadgets. We’ll delve into the different types, crucial compatibility factors, step-by-step installation instructions for a range of devices, and essential post-installation practices that ensure both performance and data integrity. Whether you’re a tech novice or a seasoned enthusiast looking for a refresher, understanding the nuances of SD card installation is key to enhancing your digital life and productivity.

Understanding SD Cards: More Than Just Storage
Before you even think about slotting an SD card into your device, it’s crucial to understand the landscape of these tiny powerhouses. Not all SD cards are created equal, and choosing the right one can significantly impact your device’s performance and your overall experience.
Types and Capacities: SD, microSD, SDHC, SDXC, UHS
The world of SD cards can seem a bit like an alphabet soup, but understanding the key distinctions is straightforward:
- SD (Standard Definition) Cards: These are the original format, with capacities typically up to 2GB. They are largely obsolete for modern devices but might be found in older cameras or embedded systems.
- SDHC (High Capacity) Cards: Ranging from 4GB to 32GB, SDHC cards are still common and widely compatible. They utilize the FAT32 file system.
- SDXC (Extended Capacity) Cards: Offering capacities from 64GB up to an impressive 2TB, SDXC cards are the standard for high-volume storage needs today. They use the exFAT file system, which supports larger individual files and storage volumes.
- microSD, miniSD: These are smaller form factors of the standard SD card, designed for mobile devices where space is at a premium.
- microSD: The most prevalent mobile storage solution, found in smartphones, tablets, drones, and portable gaming consoles. Like their larger counterparts, they also come in microSDHC and microSDXC variants.
- miniSD: A now-rare intermediate size, mostly phased out in favor of microSD.
The capacity you choose should reflect your usage. For casual photo storage, 32GB or 64GB might suffice. For extensive 4K video recording, high-resolution photography, or a large library of games, 128GB, 256GB, or even 512GB (and beyond) might be necessary.
Speed Classes: What Do C2, V30, U3 Mean for You?
Capacity is just one piece of the puzzle; speed is equally, if not more, important, especially for tasks like recording high-definition video or running apps directly from the card. SD card speeds are indicated by various class ratings:
- Speed Class (C2, C4, C6, C10): These numbers denote the minimum sequential write speed in megabytes per second (MB/s).
- C2: 2MB/s (suitable for standard video)
- C4: 4MB/s (HD video recording)
- C6: 6MB/s
- C10: 10MB/s (Full HD video, continuous shooting)
- UHS Speed Class (U1, U3): UHS (Ultra High Speed) cards are designed for devices that support the UHS interface, offering significantly faster bus speeds.
- U1: Minimum 10MB/s write speed (similar to C10, but faster bus interface)
- U3: Minimum 30MB/s write speed (ideal for 4K video, high-resolution still images)
- Video Speed Class (V6, V10, V30, V60, V90): The newest standard, specifically designed for video recording, ensuring consistent write speeds for various video formats.
- V6: 6MB/s (HD 720p)
- V10: 10MB/s (Full HD 1080p)
- V30: 30MB/s (4K video at 30/60fps)
- V60: 60MB/s (8K video, high frame rates)
- V90: 90MB/s (Professional 8K video, high bit-rate recording)
- Application Performance Class (A1, A2): Introduced for Android devices, these classes guarantee minimum random read and write speeds, making them suitable for running apps directly from the SD card.
- A1: Minimum 1500 IOPS (random read), 500 IOPS (random write), 10MB/s (sequential write)
- A2: Minimum 4000 IOPS (random read), 2000 IOPS (random write), 10MB/s (sequential write)
Recommendation: For most modern uses, especially with smartphones and action cameras, aim for a U3 or V30 card. If you plan to run apps from the card, an A1 or A2 rating is essential.
Compatibility Check: Device, Card Reader, and Formats
Before purchasing, always check your device’s manual or manufacturer’s website for supported SD card types and maximum capacity.
- An older device might only support SDHC, meaning a 128GB SDXC card won’t work.
- Ensure your computer’s card reader (if using one for formatting) or external card reader supports the specific type (e.g., microSD to SD adapter).
- File systems (FAT32, exFAT, NTFS) are critical. SDHC cards typically use FAT32, while SDXC cards use exFAT. Most modern devices support exFAT, but some older ones might require FAT32. Formatting the card in the device after installation is usually the safest bet.
Step-by-Step Installation Across Devices
The physical installation process is generally straightforward but varies slightly depending on the device. Remember to always power off your device before inserting or removing an SD card to prevent data corruption or physical damage.
Smartphones and Tablets: Expanding Mobile Horizons
Expanding storage on your mobile device can significantly boost productivity, allowing you to store more apps, photos, videos, and documents without constantly worrying about running out of space.
- Locate the SIM/SD Card Tray: Most modern smartphones and tablets use a combined tray accessible via a small pinhole on the side or top edge. Older models might have a dedicated slot under the battery cover.
- Eject the Tray: Use the SIM ejector tool (usually included with your device) or a straightened paperclip to gently press into the pinhole until the tray pops out.
- Place the microSD Card: Carefully place the microSD card into the designated slot on the tray. Ensure it’s correctly oriented (usually with the gold contacts facing down and the brand logo facing up), aligning it with the tray’s outline.
- Reinsert the Tray: Slide the tray back into the device until it clicks securely into place.
- Power On and Configure: Power on your device. It should detect the new SD card. You may receive a notification prompting you to set it up. (See “Post-Installation Essentials” for configuration details).
Important Note for Android Users: Modern Android versions offer “Adoptable Storage” where the SD card can be formatted to act as internal storage, allowing apps to be installed directly on it. This can be great for performance but makes the card unusable in other devices. The alternative is “Portable Storage,” where it functions as external media for photos, videos, and documents, remaining removable. Choose wisely based on your needs.
Digital Cameras and Drones: Capturing Every Moment
For photographers and videographers, an SD card is the lifeblood of their creative process. High-speed, high-capacity cards are essential here.
- Locate the SD Card Slot: This is typically found on the side of the camera/drone or under a battery/port flap.
- Open the Slot/Flap: Gently open the cover to reveal the slot.
- Insert the SD Card: Orient the SD card correctly (usually with the label facing the front of the camera or towards you, and the contacts going in first). Slide it into the slot until you feel a gentle click, indicating it’s locked in place.
- Close the Slot/Flap: Securely close the cover.
- Power On and Format: Turn on your camera/drone. Most devices will prompt you to format the new card. Always format new cards in the device you intend to use them with to ensure optimal compatibility and performance.
Laptops and PCs: Supplemental Storage Solutions
Many laptops come with built-in SD card slots, making them convenient for transferring photos or adding expandable storage. For desktops or laptops without a slot, a USB card reader is an affordable alternative.
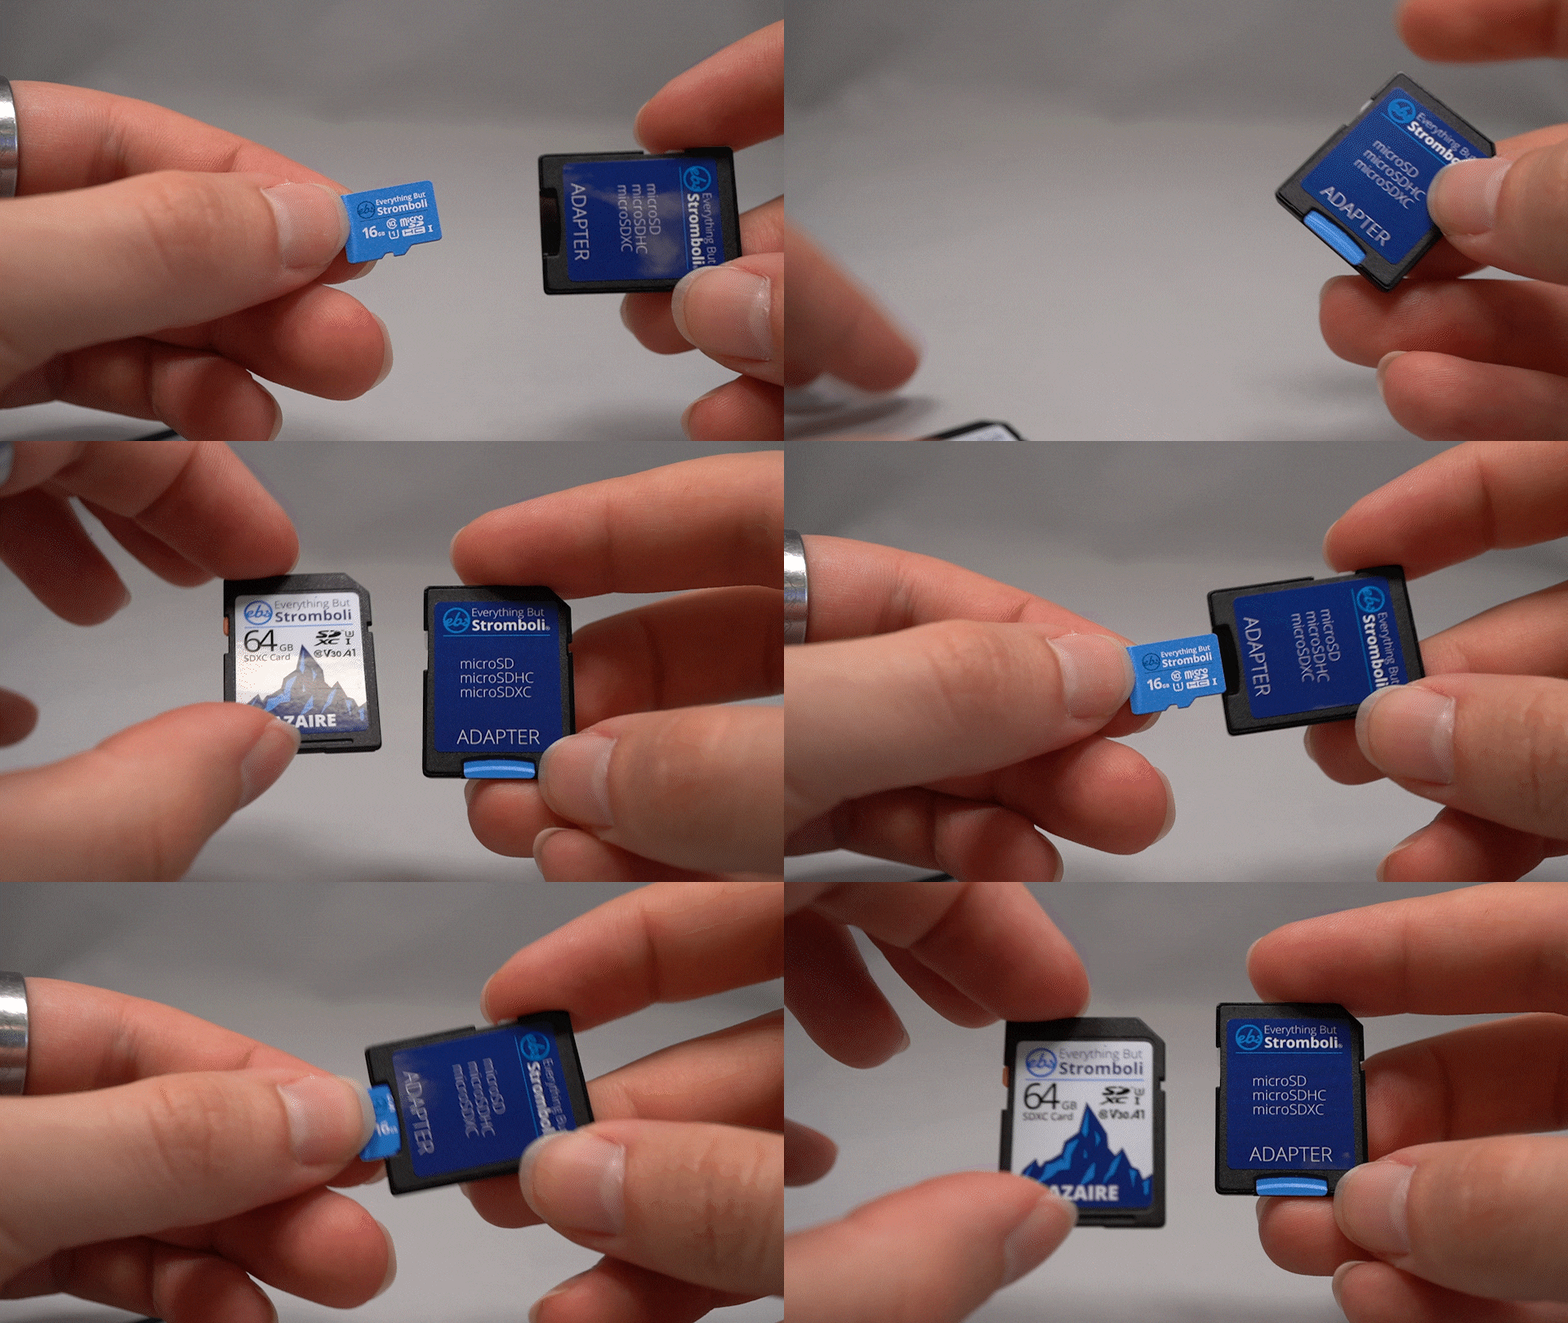
- Locate the SD Card Slot (Laptop): Typically on the side of the laptop. It’s usually a full-sized SD card slot. If you have a microSD card, you’ll need a microSD-to-SD adapter.
- Insert the SD Card: Gently slide the card into the slot with the gold contacts facing down (or as indicated by a small icon next to the slot). Push it in until it clicks and sits flush with the laptop’s chassis.
- Connect USB Card Reader (Desktop/No Slot): If using an external reader, insert the SD card into the reader, then plug the reader into a USB port on your computer.
- Verify Detection: Your operating system (Windows File Explorer or macOS Finder) should automatically detect the card and assign it a drive letter. You’ll see it listed under “This PC” or “Devices and locations.”
Gaming Consoles (e.g., Nintendo Switch): Level Up Your Library
Gaming consoles, particularly portable ones, benefit greatly from expanded storage for game downloads and updates.
- Power Off the Console: This is critical for Nintendo Switch.
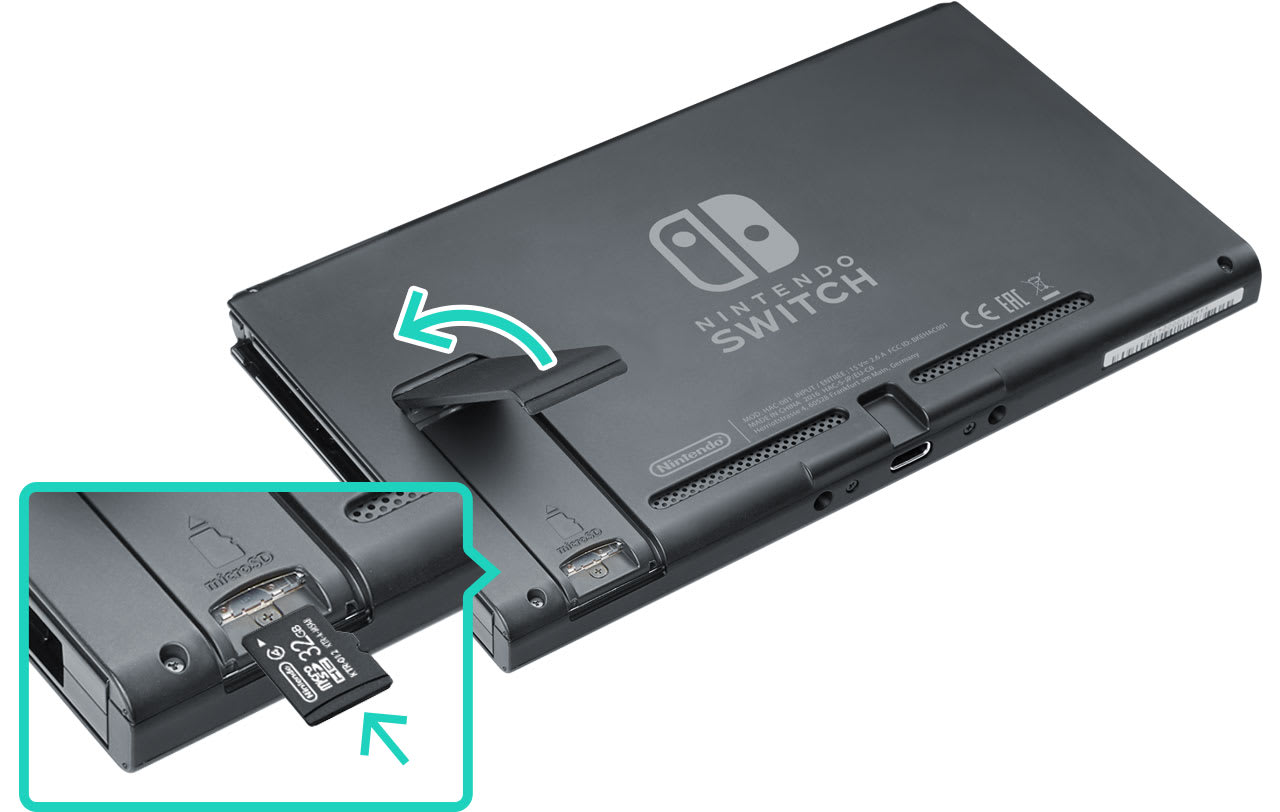
- Locate the microSD Card Slot: On the Nintendo Switch, the slot is conveniently located under the kickstand on the back of the console.
- Open the Kickstand: Gently lift the kickstand to expose the slot.
- Insert the microSD Card: Orient the microSD card with its gold contacts facing down and slide it into the slot until it clicks into place.
- Close the Kickstand: Lower the kickstand.
- Power On and Verify: Turn on your Switch. The console will automatically recognize the card. You can then navigate to System Settings > Data Management to verify storage capacity and manage data.
Post-Installation Essentials and Configuration
Installing the card is only half the battle. Proper setup and ongoing management are crucial for optimal performance and data security.
Initial Setup and Formatting: Preparing Your Card for Use
Formatting an SD card initializes it for use with your specific device and establishes a clean file system.
- Why Format?
- New Cards: Ensures the card is correctly configured for your device’s file system and eliminates any factory-installed bloatware or partitions.
- Old Cards: Wipes all existing data, resolving potential corruption issues and ensuring maximum free space.
- Cross-Device Use: If moving a card from one device to another, formatting it in the new device is often recommended for compatibility.
- How to Format:
- In-Device (Recommended for cameras, phones):
- Smartphones/Tablets: Go to Settings > Storage (or Device Care > Storage) > SD card. Look for an option like “Format,” “Erase,” or “Format as internal/portable storage.”
- Cameras: Access the menu system, navigate to “Setup” or “Tools,” and select “Format Card” or “Format Memory Card.”
- On Computer:
- Windows: Open File Explorer, right-click on the SD card drive, select “Format.” Choose the appropriate file system (FAT32 for smaller cards, exFAT for larger), leave “Allocation unit size” as default, and click “Start.”
- macOS: Open Disk Utility, select the SD card from the sidebar, click “Erase,” choose a format (e.g., ExFAT or MS-DOS (FAT)), and click “Erase.”
- In-Device (Recommended for cameras, phones):
Setting Default Storage and Managing Files
Once formatted, you’ll want to configure your device to use the SD card effectively.
- Smartphones (Android):
- Default Storage for Photos/Videos: In your camera app settings, look for an option to “Save to SD card.”
- Moving Apps: For apps that support it (and if using portable storage), go to Settings > Apps > [Select App] > Storage, then choose “Change” and move to the SD card.
- Moving Files: Use a file manager app (e.g., Google Files) to manually move photos, videos, and documents from internal storage to the SD card.
- Cameras: Once formatted, the camera will automatically use the SD card as its primary storage.
- Laptops/PCs: The SD card appears as a removable drive. You can simply drag and drop files to it, or change default save locations for applications if they support it.
- Gaming Consoles (Nintendo Switch): Games and updates will automatically download to the microSD card if it has space. You can also transfer existing data from internal memory to the SD card via System Settings > Data Management.
Safe Removal and Data Protection Practices
One of the most critical aspects of SD card management is safe removal. Failing to properly eject an SD card can lead to data corruption or even damage to the card itself, representing a significant digital security risk.
- Smartphones/Tablets: Go to Settings > Storage > SD Card, and select “Unmount” or “Eject.” Only physically remove the card after this software ejection process.
- Cameras/Drones/Consoles: Always power off the device completely before removing the SD card.
- Laptops/PCs: In Windows, click the “Safely Remove Hardware and Eject Media” icon in the taskbar, then select your SD card. On macOS, drag the drive icon to the Trash or right-click and select “Eject.”
Troubleshooting Common SD Card Issues
Despite careful installation, you might occasionally encounter issues. Here are some common problems and their solutions.
Card Not Detected: What to Check First
- Reinsert the Card: Sometimes, it’s just a loose connection. Remove the card, clean the gold contacts gently with a soft cloth, and reinsert it firmly.
- Check the Slot: Inspect the device’s SD card slot for any physical obstructions or damage.
- Test on Another Device: Try the SD card in a different compatible device (e.g., another phone, a computer with a card reader). If it works elsewhere, the issue might be with your original device’s slot. If it doesn’t work anywhere, the card might be faulty.
- Update Drivers (PC): On a computer, ensure your card reader drivers are up to date.
- Restart Device: A simple restart can often resolve detection issues.
Slow Performance or Corrupted Data
- Reformat the Card: If the card is performing slowly or showing signs of corruption, back up any salvageable data and then perform a full format (not a quick format). This can resolve file system errors.
- Check Card’s Health: Use a disk utility tool on your computer to check the card for bad sectors.
- Verify Speed Class: Ensure the card’s speed class is appropriate for the task (e.g., a C4 card will struggle with 4K video).
- Avoid Overheating: Excessive heat can impact performance and card longevity, especially in compact devices.
- Replace the Card: If issues persist after formatting and troubleshooting, the card might be failing. SD cards have a limited number of write cycles, and heavy use can lead to degradation. Investing in a new, reputable brand card is often the best solution.
Maximizing Your SD Card’s Potential
An SD card is a robust tool for enhancing your tech experience. By understanding how to select, install, and manage it, you unlock new levels of productivity and creativity.
Choosing the Right Card for Your Needs
- For Smartphones (Portable Storage): High capacity (64GB-256GB), A1 or A2 rating for better app performance, U3 or V30 for smooth video recording.
- For Digital Cameras/Drones: High speed (U3, V30, V60, or V90 depending on resolution and frame rate), high capacity (128GB-512GB) for extended shooting.
- For Gaming Consoles (e.g., Switch): High capacity (128GB-1TB) for game libraries, U3 for faster loading times.
- For Dash Cams/Security Cameras: High endurance (specifically designed for continuous recording), U1 or U3, and moderate capacity (32GB-64GB as older data is overwritten).
Digital Security and Data Backup Strategies
While incredibly convenient, SD cards are not immune to failure, loss, or theft. Integrating them into your digital security strategy is paramount.
- Regular Backups: Treat your SD card as temporary storage for critical data. Regularly transfer important photos, videos, and documents to a more secure location, such as your computer’s hard drive, an external SSD, or a cloud storage service. This protects against card failure and accidental deletion.
- Encryption: Some smartphones and software offer encryption for SD cards. If your device supports it, encrypting your card adds an extra layer of protection, making your data unreadable if the card is lost or stolen.
- Secure Disposal: When an SD card reaches the end of its life or you no longer need it, ensure sensitive data is permanently wiped. A full format doesn’t always guarantee complete data erasure. Consider using secure erase tools or physically destroying the card for highly sensitive information.
In conclusion, installing an SD card is a simple yet powerful way to expand the capabilities of your favorite tech gadgets. By choosing the right card, following proper installation procedures, and implementing smart management practices, you can enjoy seamless performance, enhanced productivity, and the peace of mind that your valuable digital memories and files are securely stored. Whether you’re a content creator, a mobile gamer, or simply someone who appreciates having extra space, mastering SD card installation is an essential skill in today’s digital landscape.
aViewFromTheCave is a participant in the Amazon Services LLC Associates Program, an affiliate advertising program designed to provide a means for sites to earn advertising fees by advertising and linking to Amazon.com. Amazon, the Amazon logo, AmazonSupply, and the AmazonSupply logo are trademarks of Amazon.com, Inc. or its affiliates. As an Amazon Associate we earn affiliate commissions from qualifying purchases.