
In today’s interconnected digital landscape, the choice of a web browser is more than just a preference; it’s a strategic decision that impacts productivity, security, and access to a vast ecosystem of online tools and services. For users of Ubuntu, a powerful and highly customizable open-source operating system, integrating a feature-rich browser like Google Chrome can unlock new levels of efficiency and streamline their digital workflow.
Google Chrome, renowned for its speed, robust security features, extensive extension library, and seamless synchronization across devices, has become a cornerstone for millions of users worldwide. Whether you’re a developer, a student, a creative professional, or an everyday user managing personal finances and online errands, Chrome’s integration with Google’s suite of applications and its developer-friendly environment makes it an indispensable tool. This guide will walk you through the process of installing Google Chrome on your Ubuntu system, ensuring you can harness its full potential to navigate the internet securely and productively. We’ll cover the most straightforward and officially recommended methods, delving into the commands and considerations that will make your installation smooth and hassle-free.

Understanding the “Why”: Why Choose Google Chrome for Ubuntu?
Before diving into the technical steps, it’s worth exploring the compelling reasons why Google Chrome often stands out as the preferred browser, even for dedicated Linux users who have a plethora of open-source alternatives. The decision to integrate Chrome into your Ubuntu environment goes beyond mere browsing; it’s about optimizing your digital experience across several critical dimensions – technology, brand interaction, and even financial efficiency.
Technological Prowess and Performance
Google Chrome is built on the Chromium open-source project, known for its rapid rendering engine (Blink) and V8 JavaScript engine, which deliver unparalleled browsing speed and responsiveness. For Ubuntu users, this means websites load faster, web applications run smoother, and multitasking becomes more efficient. The browser’s architecture is optimized for modern web standards, making it an ideal platform for accessing complex web-based tools, from advanced AI applications to collaborative productivity suites. Its sandboxing technology and automatic updates contribute to a robust security posture, protecting users from malware and phishing attempts, which is a critical aspect of digital security in an era of increasing cyber threats. Furthermore, Chrome’s resource management, while sometimes debated, has seen significant improvements, offering a balance between performance and system resource usage, particularly on contemporary Ubuntu setups. The continuous development cycle ensures that Chrome remains at the forefront of web technology, incorporating the latest features and security patches promptly.
Seamless Brand Experience and Ecosystem Integration
One of Chrome’s most significant advantages is its deep integration with the Google ecosystem. For individuals and businesses alike, this translates into a unified and consistent brand experience across various Google services. Gmail, Google Drive, Google Calendar, Google Docs, and YouTube are instantly accessible and seamlessly integrated, allowing for quick transitions between applications. This integration extends to user profiles, where bookmarks, browsing history, passwords, and extensions can be synchronized across all your devices (desktop, laptop, mobile), provided you’re logged in with your Google account. This feature alone can drastically improve productivity, saving valuable time that would otherwise be spent reconfiguring settings or searching for information. For professionals, this consistency is vital for maintaining an efficient workflow, collaborating with teams, and accessing cloud-based resources without interruption, ultimately bolstering their personal or corporate brand image through seamless digital operations.
Indirect Financial Efficiency and Productivity Gains
While installing a web browser doesn’t directly involve monetary transactions, the choice of browser can have indirect but significant financial implications through productivity gains and efficient resource management. A fast and reliable browser like Chrome reduces downtime caused by slow loading pages or crashes, allowing users to complete tasks more quickly. This time-saving translates directly into improved output for professionals and businesses. The extensive Chrome Web Store offers a vast array of extensions that can automate tasks, manage projects, block distractions, and enhance various aspects of online work – many of which are free or offer cost-effective solutions that might otherwise require standalone software. For example, extensions for password management improve digital security, reducing the risk of costly data breaches. Tools for online banking, investment platforms, and e-commerce transactions benefit from Chrome’s robust security features, helping to safeguard financial assets. By facilitating smoother online operations and providing access to productivity-enhancing tools, Chrome contributes to an overall increase in efficiency, indirectly impacting one’s financial well-being and operational costs.
Method 1: The Official & Recommended Approach (Using the .deb Package)
The most common and often preferred method for installing Google Chrome on Ubuntu involves downloading the official Debian package (.deb file) directly from Google. This method is straightforward, secure, and ensures you’re getting the latest stable version of the browser. It combines the ease of a graphical user interface (GUI) download with a simple command-line installation.
Step 1: Downloading the Google Chrome .deb Package
The first step is to acquire the installation file. Open your existing web browser (e.g., Firefox, which comes pre-installed with Ubuntu) and navigate to the official Google Chrome download page.
- Open your current browser: Launch Firefox or any other browser you have installed on your Ubuntu system.
- Go to the official Google Chrome download page: In the address bar, type
https://www.google.com/chrome/and press Enter. - Download the package: On the Chrome download page, you will see a prominent “Download Chrome” button. Click it. A dialog box will appear, asking you to “Download Chrome for Linux.” Crucially, ensure you select the correct package: “64 bit .deb (For Debian/Ubuntu)”. Clicking “Accept and Install” will initiate the download of the
google-chrome-stable_current_amd64.debfile (the exact filename might vary slightly with version updates) to your default “Downloads” directory.
Step 2: Installing Chrome via the Command Line
Once the .deb package is downloaded, you can install it using Ubuntu’s package manager through the terminal. This approach is highly reliable and provides immediate feedback on the installation process.
- Open the Terminal: You can do this by searching for “Terminal” in your applications menu or by pressing
Ctrl + Alt + T. - Navigate to the Downloads directory: The downloaded
.debfile is typically in your~/Downloadsdirectory. Change to this directory using thecdcommand:
bash

cd ~/Downloads
- Install the .deb package: Use the
dpkgcommand to install the package.dpkgis the package manager for Debian-based systems like Ubuntu.
bash

sudo dpkg -i google-chrome-stable_current_amd64.deb
sudo: This command is used to execute commands with superuser (root) privileges, which are required for installing software system-wide.dpkg -i: This instructsdpkgto install the specified package.google-chrome-stable_current_amd64.deb: This is the name of the downloaded Chrome installation file. Ensure you use the exact filename if it differs.
Step 3: Resolving Dependencies (If Necessary)
During the dpkg installation, you might encounter dependency errors. These occur if Chrome requires other software packages that are not yet installed on your system. Ubuntu’s apt package manager can usually fix these automatically.
- Fix broken dependencies: If
dpkgreports errors about missing dependencies, run the following command:
bash

sudo apt install -f
or, more explicitly:
bash

sudo apt --fix-broken install
This command tellsaptto find and install any missing dependencies for packages that have been partially installed (like Chrome in this scenario) and then configure them correctly. After this, Google Chrome should be properly installed.
Step 4: Verifying the Installation and Launching Chrome
Once the installation is complete and any dependencies are resolved, you can verify that Chrome has been successfully installed and then launch it.
- Launch Chrome:
- From the Applications Menu: Open your Ubuntu applications menu (usually by clicking the “Show Applications” icon in the dock or pressing the Super key/Windows key). Search for “Chrome” or “Google Chrome.” Click on the icon to launch it.
- From the Terminal (optional): You can also launch Chrome directly from the terminal by typing:
bash

google-chrome &
The&symbol runs the application in the background, allowing you to continue using the terminal.
The first time you launch Chrome, it may ask if you want to make it your default browser and if you want to send usage statistics to Google. Configure these settings according to your preference. Congratulations, you now have Google Chrome running on your Ubuntu system!
Method 2: Installing via Google’s Official Repository (Advanced Command Line)
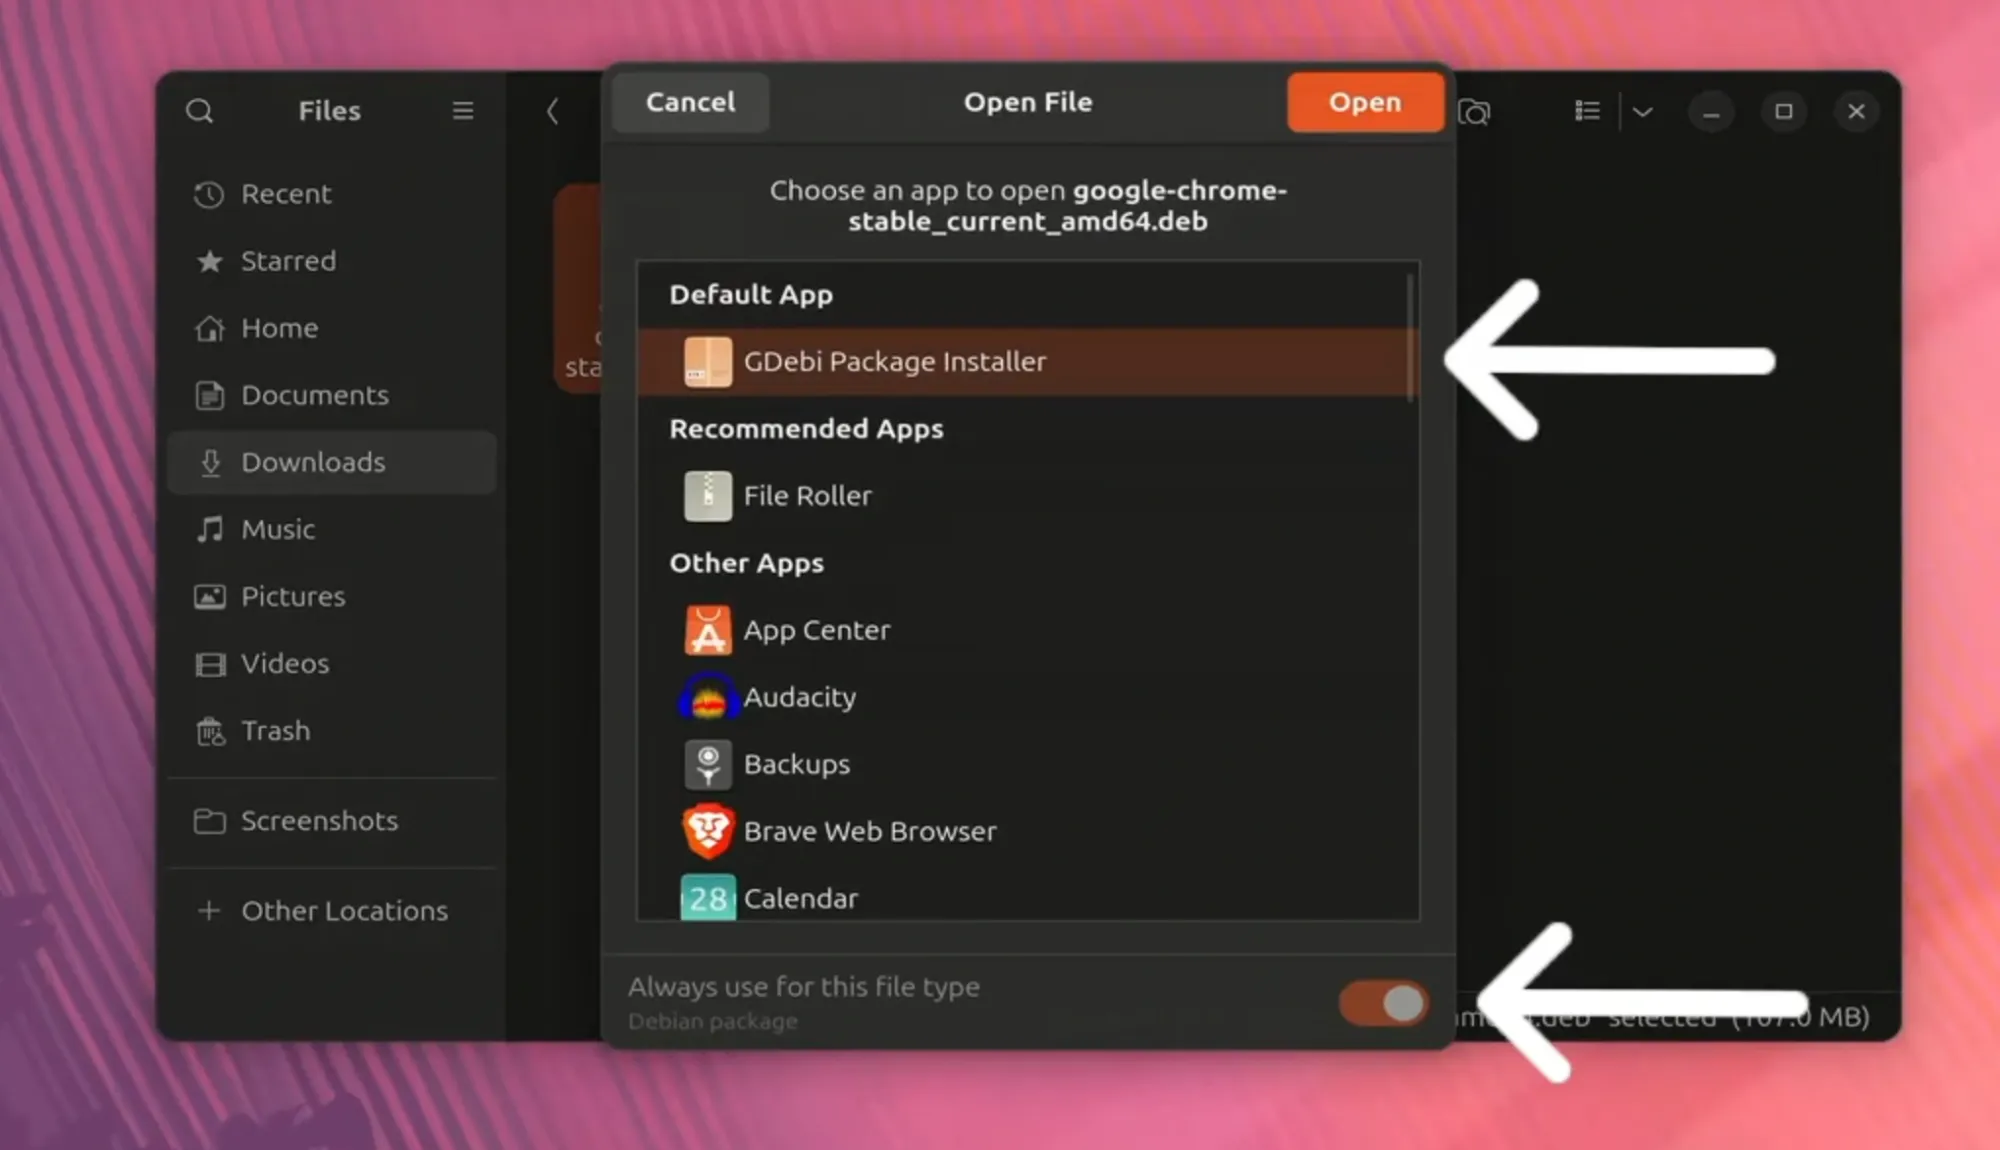
For users who prefer a more integrated and automatic update experience, installing Google Chrome by adding its official repository to your Ubuntu system is an excellent choice. This method ensures that Chrome receives updates alongside your regular system updates, maintaining security and access to the latest features without manual intervention. This approach aligns perfectly with best practices for system administration and software management within the Linux ecosystem, making it a robust solution for long-term use.
Step 1: Importing the Google GPG Key
To ensure the authenticity and integrity of the packages downloaded from Google’s repository, you first need to import Google’s public GPG (GNU Privacy Guard) key. This key is used to verify the digital signatures of the packages, confirming they haven’t been tampered with.
- Add the GPG key: Open your terminal (
Ctrl + Alt + T) and execute the following command:
bash

wget -q -O - https://dl.google.com/linux/linux_signing_key.pub | sudo apt-key add -
wget -q -O - ...: This command downloads the GPG key quietly (-q), outputs it to standard output (-O -), and retrieves it from the specified URL.|(pipe): This redirects the output ofwgetas input to the next command.sudo apt-key add -: This command adds the GPG key received from the pipe to your system’s list of trusted keys, making it possible for your system to verify packages signed by Google.
Step 2: Adding the Google Chrome Repository
After importing the GPG key, you need to add the Google Chrome repository to your system’s apt sources list. This tells your package manager where to find the Chrome packages.
- Add the repository to sources list: In the terminal, run the following command:
bash

sudo sh -c 'echo "deb [arch=amd64] http://dl.google.com/linux/chrome/deb/ stable main" >> /etc/apt/sources.list.d/google-chrome.list'
sudo sh -c '...': Executes the enclosed command with superuser privileges.echo "deb [arch=amd64] http://dl.google.com/linux/chrome/deb/ stable main": This prints the repository line, specifying that it’s for 64-bit (amd64) architectures, located at Google’s URL, for the “stable” release, and within the “main” component.>> /etc/apt/sources.list.d/google-chrome.list: This appends the repository line to a new file namedgoogle-chrome.listwithin the/etc/apt/sources.list.d/directory. This is the standard location for adding third-party repositories without directly modifying the mainsources.listfile, ensuring cleaner management.
Step 3: Updating Package Lists and Installing Chrome
With the repository added, your system needs to refresh its package index to recognize the new software available. Then, you can proceed with the installation.
- Update package lists:
bash

sudo apt update
This command fetches the updated package information from all configured repositories, including the newly added Google Chrome repository. You should see output indicating that the Google repository is being read. - Install Google Chrome:
bash

sudo apt install google-chrome-stable
This command instructsaptto find and install thegoogle-chrome-stablepackage.aptwill automatically handle all necessary dependencies. Confirm the installation by typingYwhen prompted.
After the installation completes, you can launch Google Chrome from your applications menu or by typing google-chrome in the terminal, just as described in Method 1. This repository-based installation ensures that when you run sudo apt update && sudo apt upgrade in the future, Google Chrome will be updated to its latest stable version automatically along with your other system software, providing continuous access to new features and security enhancements.
Managing Google Chrome on Ubuntu: Updates, Uninstallation, and Troubleshooting
Having Chrome installed is just the beginning. Effective management of your browser includes keeping it updated, knowing how to uninstall it if needed, and addressing common issues that may arise. These practices are crucial for maintaining a secure, efficient, and smooth browsing experience, which directly impacts your digital productivity and security.
Keeping Google Chrome Up-to-Date
If you installed Chrome using the repository method (Method 2), updates will be handled automatically with your regular system updates. When you run:
sudo apt update
sudo apt upgrade
Your system will check for new versions of all installed software, including Google Chrome, and prompt you to install them. This is the most convenient way to keep Chrome current and benefit from the latest security patches and features.
If you installed Chrome using the .deb package (Method 1) without explicitly adding the repository, Google’s .deb package installer usually adds the Google Chrome repository to your system’s sources list during the installation process. This means even with Method 1, Chrome typically integrates into your apt update cycle automatically. You can confirm this by checking for the google-chrome.list file in /etc/apt/sources.list.d/.
Uninstalling Google Chrome from Ubuntu
Should you ever decide to remove Google Chrome from your Ubuntu system, the process is straightforward using the apt package manager.
- Open Terminal: Press
Ctrl + Alt + T. - Remove the browser:
bash

sudo apt remove google-chrome-stable
This command removes thegoogle-chrome-stablepackage, but it might leave some configuration files behind. - Perform a complete removal (purge): If you want to remove Chrome and all its configuration files, use
purgeinstead:
bash

sudo apt purge google-chrome-stable
This is generally recommended if you want a clean slate or if you’re experiencing persistent issues with Chrome and plan to reinstall it. - Clean up unused dependencies (optional): After removing software, there might be dependencies that are no longer needed. You can remove them with:
bash

sudo apt autoremove
- Remove the Google Chrome repository (optional): If you added the repository and no longer wish to receive updates for Chrome or other Google software, you can remove its entry:
bash

sudo rm /etc/apt/sources.list.d/google-chrome.list
Then, update your package lists:
bash

sudo apt update
Troubleshooting Common Issues
While installing Chrome on Ubuntu is generally smooth, you might encounter minor hurdles.
- “Unable to locate package google-chrome-stable”: This usually means the
aptpackage list hasn’t been updated after adding the repository, or the repository was not added correctly. Ensure you ransudo apt updateafter adding the repository (Method 2). - Dependency Errors during
dpkginstallation: As covered in Method 1, ifdpkgcomplains about missing dependencies, runsudo apt install -forsudo apt --fix-broken installimmediately after thedpkg -icommand. This will promptaptto fetch and install any required packages. - “APT key is deprecated” warnings: If you see warnings about
apt-keybeing deprecated after adding the GPG key, don’t worry excessively for now. Whileapt-keyis indeed deprecated, the methods shown here are still widely used and functional. For long-term best practices, modern Linux distributions are moving towards putting GPG keys directly into/etc/apt/trusted.gpg.d/or similar paths using signeddeb822formatsources.listfiles. For a simple Chrome installation, the existing method is sufficient, but advanced users might research updated GPG key management practices for their specific Ubuntu version. - Chrome not launching: If Chrome doesn’t launch, try launching it from the terminal (
google-chrome) to see if any error messages are displayed. These messages can provide clues about the underlying problem, such as missing libraries or profile corruption. You might try clearing Chrome’s cache and user profile directory (after backing up any important data) or reinstalling the browser.
By following these management practices, you ensure that Google Chrome remains a reliable and powerful tool in your Ubuntu setup, contributing to a seamless and secure digital experience for all your technology, brand, and financial interactions online.

Conclusion: Empowering Your Ubuntu Experience with Google Chrome
The journey to installing Google Chrome on your Ubuntu system, whether through the official .deb package or by integrating Google’s repository, is a fundamental step toward enhancing your daily computing experience. This guide has provided you with the necessary steps and insights to confidently set up one of the world’s most popular browsers on a robust open-source platform.
The implications of this installation extend far beyond mere web surfing. By choosing Google Chrome, you are opting for a browser that consistently delivers on technological advancements, offering superior speed, advanced security features, and a versatile platform for web applications. Its deep integration with the vast Google ecosystem means a seamless, synchronized experience across all your devices, which is invaluable for maintaining productivity and a consistent digital identity, whether for personal use or professional branding.
Furthermore, the indirect benefits of using a highly efficient and reliable browser like Chrome translate into real-world advantages, including time savings through faster workflows, access to productivity-enhancing extensions, and a secure environment for managing sensitive online transactions, all of which contribute to a more financially aware and efficient digital life.
With Chrome now a part of your Ubuntu toolkit, you are better equipped to navigate the complexities of the modern web, engage with cutting-edge AI tools, manage your online presence, and interact with the digital economy with greater confidence and efficiency. Embrace the power of choice and the synergy between open-source flexibility and proprietary innovation to empower your Ubuntu experience.
aViewFromTheCave is a participant in the Amazon Services LLC Associates Program, an affiliate advertising program designed to provide a means for sites to earn advertising fees by advertising and linking to Amazon.com. Amazon, the Amazon logo, AmazonSupply, and the AmazonSupply logo are trademarks of Amazon.com, Inc. or its affiliates. As an Amazon Associate we earn affiliate commissions from qualifying purchases.