In the rapidly evolving landscape of technology, staying ahead means embracing tools that offer both power and flexibility. For IT professionals, developers, and system administrators, a robust command-line interface and scripting environment are indispensable. Enter PowerShell 7 – a modern, cross-platform automation platform built on .NET Core. Far from being just another shell, PowerShell 7 represents a significant leap forward from its predecessors, offering unparalleled capabilities for managing diverse systems, automating complex workflows, and streamlining operations across Windows, macOS, and Linux environments.
This guide delves into the specifics of installing PowerShell 7, exploring various methods tailored for different operating systems and user preferences. Beyond the technical steps, we’ll examine why adopting PowerShell 7 is a strategic move, not just for enhancing individual productivity but also for contributing to a more efficient and secure technological infrastructure within any organization. Whether you’re a seasoned scripter looking to leverage the latest features, or a newcomer aiming to empower your digital toolkit, understanding how to effectively deploy PowerShell 7 is a foundational step towards mastering modern command-line management and unlocking its potential for significant returns, both in terms of operational efficiency and professional growth.
Why Upgrade to PowerShell 7? Unpacking Its Core Advantages
The decision to install and integrate PowerShell 7 into your workflow isn’t merely about adopting a newer version; it’s about embracing a paradigm shift in how you interact with and automate your digital world. The benefits extend far beyond cosmetic changes, offering tangible improvements that directly impact productivity, security, and the bottom line.
Cross-Platform Prowess and Performance Enhancements
One of PowerShell 7’s most transformative features is its cross-platform compatibility. Built on .NET Core, it allows you to run the same scripts and cmdlets seamlessly across Windows, macOS, and various Linux distributions. This eliminates the need for platform-specific scripting languages, simplifying heterogeneous environment management and fostering a unified automation strategy. Imagine developing a script once and deploying it across your entire infrastructure, regardless of the underlying operating system – this is the power PowerShell 7 brings.
Beyond platform agnosticism, PowerShell 7 boasts significant performance improvements. Leveraging the advancements in .NET Core, it offers faster startup times, improved cmdlet execution speed, and more efficient resource utilization. For complex scripts and large-scale automation tasks, these performance gains translate directly into reduced execution times, freeing up valuable computational resources and allowing for quicker task completion. This agility is crucial in dynamic tech environments, where every second counts in responding to incidents, deploying updates, or scaling resources.
Enhanced Productivity and Automation Capabilities
PowerShell 7 is packed with new features and cmdlets designed to boost productivity. From new operators like the null-coalescing (??), null-conditional (?.), and ternary (a ? b : c) operators that streamline code, to the ability to invoke ForEach-Object -Parallel for parallel processing of items, it empowers users to write more concise, efficient, and readable scripts. These linguistic enhancements not only reduce development time but also make scripts easier to maintain and troubleshoot, leading to fewer errors and more reliable automation.
For organizations, this translates into substantial productivity gains. Automation is no longer confined to repetitive, mundane tasks; it can now tackle more sophisticated challenges across diverse platforms. This allows IT teams to focus on strategic initiatives rather than reactive maintenance, driving innovation and improving overall operational efficiency. The ability to automate security checks, compliance reporting, infrastructure provisioning, and application deployments across the entire enterprise significantly reduces manual labor and associated human errors.
Relevance in Modern DevOps and Cloud Environments
In the age of DevOps and cloud computing, PowerShell 7 is not just relevant; it’s essential. Its native support for REST APIs and JSON manipulation makes it an ideal tool for interacting with cloud services like Azure, AWS, and Google Cloud Platform. You can automate the provisioning of resources, configure services, manage users, and orchestrate complex deployments directly from your PowerShell scripts. This integration is vital for implementing Infrastructure as Code (IaC) principles and maintaining consistent, reproducible environments.
Furthermore, PowerShell 7’s modular architecture and extensive module ecosystem allow for easy integration with various DevOps tools and platforms. Whether it’s integrating with CI/CD pipelines, configuration management systems, or monitoring solutions, PowerShell 7 provides the glue that binds disparate components together. For tech professionals, mastering PowerShell 7 positions them at the forefront of modern IT practices, enhancing their personal brand and marketability in a competitive landscape that increasingly demands multi-platform automation and cloud expertise. For businesses, this translates to faster deployment cycles, reduced operational costs, and a more agile response to market demands, directly impacting financial performance and strategic positioning.
Preparing for Installation: Prerequisites and Considerations
Before embarking on the installation of PowerShell 7, it’s crucial to lay the groundwork. Understanding the prerequisites and making informed decisions about the installation method will ensure a smooth process and avoid potential conflicts with existing environments.
System Requirements and Compatibility
PowerShell 7 runs on a variety of operating systems, thanks to its .NET Core foundation. However, specific versions are required for optimal performance and compatibility.
- Windows: Windows 8.1, Windows Server 2012 R2, or newer versions (Windows 10, Windows Server 2016/2019/2022). It supports both 64-bit (x64) and 32-bit (x86) architectures, though x64 is recommended for most users.
- macOS: macOS 10.13 (High Sierra) or newer. It supports 64-bit (x64) and ARM-based (Apple Silicon) architectures.
- Linux: Various distributions are supported, including Ubuntu 18.04/20.04/22.04+, Debian 9/10/11+, CentOS 7+, RHEL 7/8/9+, Fedora 30+, openSUSE, and Alpine Linux. Ensure your specific distribution and version are supported by checking the official Microsoft documentation.
A stable internet connection is generally required for downloading installation packages or utilizing package managers. While PowerShell 7 itself is relatively lightweight, ensure you have sufficient disk space (typically a few hundred MBs) for the installation.
Coexistence with Windows PowerShell 5.1
A common concern for users is how PowerShell 7 interacts with the built-in Windows PowerShell 5.1. The good news is that PowerShell 7 installs side-by-side with Windows PowerShell 5.1 (and earlier versions like PowerShell Core 6.x), without replacing or interfering with them. This means you can have both versions on your system simultaneously and use them independently.
Windows PowerShell 5.1 relies on the full .NET Framework, while PowerShell 7 relies on .NET Core. They have separate executables (powershell.exe for 5.1 and pwsh.exe for 7), separate module paths, and separate configuration files. This clear separation allows for a smooth transition, giving you the flexibility to gradually migrate your scripts and workflows to PowerShell 7 while still maintaining compatibility with legacy systems or scripts that specifically require 5.1. When developing new scripts, it’s generally recommended to target PowerShell 7 to leverage its modern features and cross-platform capabilities.
Choosing the Right Installation Method
PowerShell 7 offers several installation methods, each with its own advantages. The best method depends on your operating system, administrative privileges, and specific use case:
- MSI Package (Windows): The recommended method for most Windows users. It provides a straightforward, guided installation experience and handles system-wide setup.
- Winget (Windows): Microsoft’s native package manager for Windows 10/11, offering a command-line approach for easy installation and updates.
- Microsoft Store (Windows): A convenient option for personal use, providing automatic updates and a sandbox-like environment.
- .NET Global Tool (Windows/macOS/Linux): Ideal for developers who already have the .NET SDK installed and prefer managing tools via the
dotnetCLI. - Portable ZIP (Windows/macOS/Linux): For advanced users, testing environments, or situations where full installation isn’t feasible or desired. It doesn’t require administrator rights and can be run from any location.
- Homebrew (macOS): The preferred package manager for macOS, simplifying installation and future updates.
- Package Managers (Linux): Using
apt,yum,dnf, orsnapis the standard and most robust way to install PowerShell on Linux distributions, integrating it seamlessly with the system.
Carefully consider your needs. For a typical user on Windows, the MSI package is the simplest. For macOS users, Homebrew is often the best choice. Linux users will almost always opt for their distribution’s native package manager.
Step-by-Step Installation Guides for Major Operating Systems
With the groundwork laid, let’s proceed with the detailed installation instructions for PowerShell 7 across the most common operating systems.
Installing PowerShell 7 on Windows
Windows users have several robust options for installing PowerShell 7, catering to different preferences and scenarios.
MSI Package: The Recommended Approach
For most users, the MSI (Microsoft Installer) package offers the most straightforward and complete installation experience.
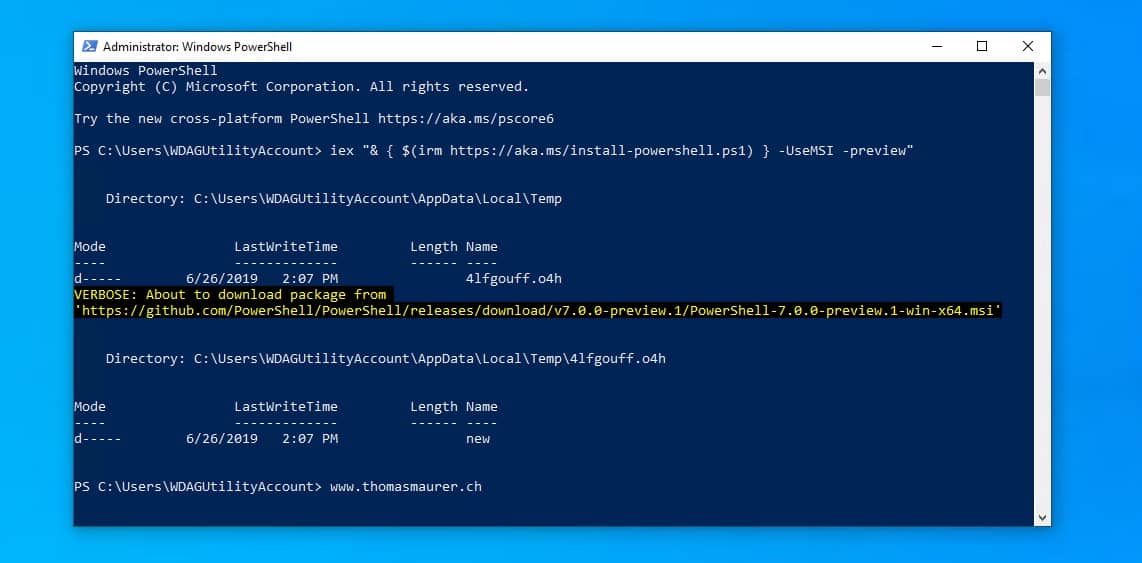
- Download the MSI: Navigate to the official PowerShell GitHub releases page (or search “PowerShell 7 GitHub release” online). Locate the latest stable release. Under the “Assets” section, download the
PowerShell-7.<x.x>-win-x64.msi(for 64-bit systems) orPowerShell-7.<x.x>-win-x86.msi(for 32-bit systems) file. - Run the Installer: Double-click the downloaded MSI file.
- Follow the Wizard: The PowerShell 7 Setup Wizard will guide you through the process.
- Accept the license agreement.
- Choose the installation path (the default is usually fine).
- On the “Optional components” page, consider selecting:
- Add PowerShell to PATH environment variable: Highly recommended for easy access from any command prompt.
- Enable PowerShell Remoting: If you plan to use PowerShell for remote management.
- Register Windows Event Logging Manifest: For improved event logging.
- Add “Open here” context menus: Convenient for opening PowerShell 7 directly in a folder from File Explorer.
- Install PSH Core remoting over WinRM: Necessary if you need to use PowerShell Remoting over WinRM (older style) with PowerShell 7.
- Complete Installation: Click “Install” and then “Finish” once the process is complete.
Winget: Streamlined Installation
If you’re on Windows 10 (version 1709 or later) or Windows 11 and have Winget installed (it’s usually pre-installed), this method offers a quick and command-line friendly way to install.
- Open Command Prompt/PowerShell: Launch either a standard Command Prompt or Windows PowerShell 5.1.
- Install PowerShell 7: Type the following command and press Enter:
bash

winget install --id Microsoft.PowerShell --source winget
- Confirm: If prompted, agree to the source agreements and review the installation details. Winget will download and install PowerShell 7.
Microsoft Store: User-Friendly Deployment
The Microsoft Store offers an easy, app-store-like experience, providing automatic updates and a degree of sandboxing.
- Open Microsoft Store: Search for “PowerShell” in the Microsoft Store app.
- Find PowerShell 7: Look for “PowerShell” by Microsoft Corporation.
- Install: Click “Get” or “Install.” The Store will handle the download and installation.
.NET Global Tool and Portable ZIP: Advanced Options
- Using .NET Global Tool: If you have the .NET SDK installed, you can install PowerShell 7 as a global tool.
- Open Command Prompt/PowerShell:
- Install:
bash

dotnet tool install --global PowerShell
- Portable ZIP: For a standalone, non-installed version, download the appropriate
PowerShell-7.<x.x>-win-x64.ziporPowerShell-7.<x.x>-win-x86.zipfrom the GitHub releases page. Extract the contents to a folder of your choice (e.g.,C:Program FilesPowerShell7-Portable) and runpwsh.exefrom there. You’ll need to manually add it to your PATH if you want to runpwshfrom any directory.
Installing PowerShell 7 on macOS
For macOS users, Homebrew is the preferred package manager, simplifying the installation process.
Homebrew: The Package Manager of Choice
If you don’t have Homebrew installed, open Terminal and run:
/bin/bash -c "$(curl -fsSL https://raw.githubusercontent.com/Homebrew/install/HEAD/install.sh)"
Once Homebrew is installed:
- Open Terminal:
- Install PowerShell 7:
bash

brew install powershell
Homebrew will handle downloading and installing the latest stable version of PowerShell 7. - Update (Optional): To keep PowerShell 7 updated, periodically run:
bash

brew upgrade powershell
Direct PKG Download: Manual Installation
Similar to Windows, a direct installer package is available.
- Download the PKG: Go to the official PowerShell GitHub releases page. Download the
PowerShell-7.<x.x>-osx-x64.pkg(for Intel Macs) orPowerShell-7.<x.x>-osx-arm64.pkg(for Apple Silicon Macs) file. - Run the Installer: Double-click the downloaded
.pkgfile. - Follow the Wizard: The macOS installer will guide you through the steps, including agreeing to terms and choosing the installation location.
Installing PowerShell 7 on Linux Distributions
Linux users typically rely on their distribution’s package manager for a seamless and integrated installation.
APT-based Systems (Ubuntu, Debian, Mint)
-
Update Package Lists and Install Dependencies:
bash

sudo apt-get update

sudo apt-get install -y wget apt-transport-https software-properties-common
-
Download Microsoft GPG Key and Add Repository:
wget -q https://packages.microsoft.com/config/ubuntu/$(lsb_release -rs)/prod.list -O /etc/apt/sources.list.d/microsoft.list
sudo apt-key adv --keyserver packages.microsoft.com --recv-keys EB3E94ADBE1229CF
sudo apt-get update
Note: Replace
ubuntuwithdebianor your specific distribution name if needed, and adjust$(lsb_release -rs)to your OS version if the command doesn’t resolve it correctly. -
Install PowerShell 7:
bash

sudo apt-get install -y powershell
YUM/DNF-based Systems (Fedora, RHEL, CentOS)
- Install Dependencies:
bash

sudo yum install -y wget
(For Fedora, usednfinstead ofyum). - Download Microsoft GPG Key and Add Repository:
bash

wget -q https://packages.microsoft.com/config/rhel/$(lsb_release -rs)/prod.repo -O /etc/yum.repos.d/microsoft.repo

sudo rpm --import https://packages.microsoft.com/keys/microsoft.asc
Note: Replacerhelwithcentosorfedoraif needed. - Install PowerShell 7:
bash

sudo yum install -y powershell
(For Fedora, usesudo dnf install -y powershell).
Snap Store: Universal Linux Package Manager
Snap can provide a simpler installation experience across many Linux distributions.
- Ensure Snap is Installed: Most modern Linux distributions come with Snap pre-installed. If not, refer to the official Snapcraft documentation for installation instructions for your specific distribution.
- Install PowerShell 7:
bash

sudo snap install powershell --classic
The--classicflag is necessary because PowerShell requires broad system access.
Post-Installation: Verification, Configuration, and Best Practices
Once PowerShell 7 is installed, a few crucial steps ensure it’s ready for use and optimally configured for your workflow.
Verifying Your PowerShell 7 Installation
After installation, it’s essential to confirm that PowerShell 7 is correctly installed and accessible.
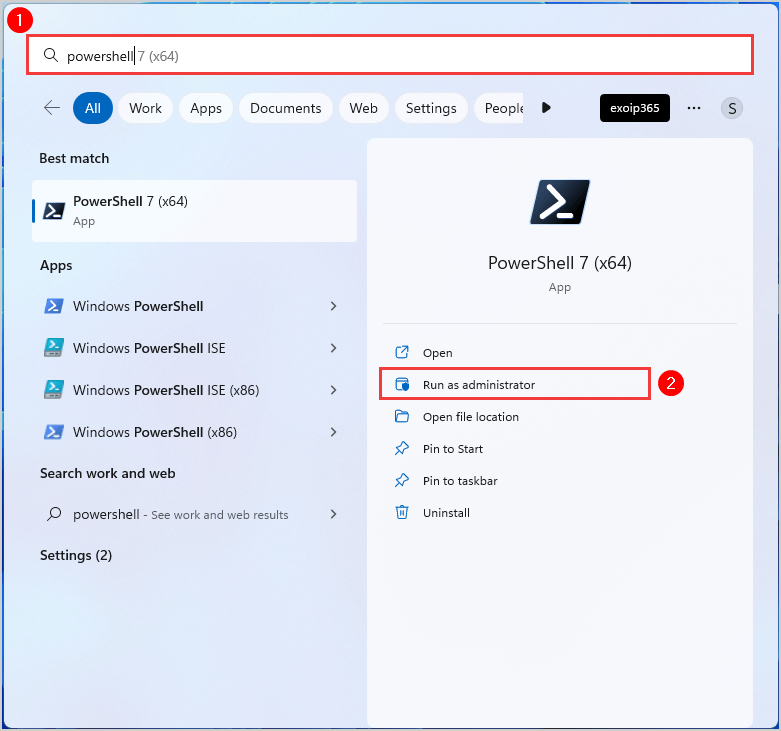
- Open PowerShell 7:
- Windows: Search for “PowerShell 7” in the Start Menu, or open Command Prompt/Windows PowerShell 5.1 and type
pwshand press Enter. - macOS/Linux: Open Terminal and type
pwshand press Enter.
- Windows: Search for “PowerShell 7” in the Start Menu, or open Command Prompt/Windows PowerShell 5.1 and type
- Check Version Information: Inside the PowerShell 7 console, type the following command and press Enter:
powershell

$PSVersionTable
This cmdlet will display a table containing detailed version information. Look for thePSVersionentry, which should clearly indicate “7.“. This confirms a successful installation.
Configuring Your Profile and Environment
PowerShell profiles are scripts that run automatically when a new PowerShell session starts. They are incredibly useful for customizing your environment, loading frequently used modules, defining aliases, or setting preferences.
- Location: The profile script is typically located at
~/.config/powershell/profile.ps1on macOS/Linux andC:Users<YourUser>DocumentsPowerShellMicrosoft.PowerShell_profile.ps1on Windows, though other profile paths exist for specific scopes (e.g., all users, all hosts). You can find the exact path by running$PROFILEin PowerShell. - Creation: If the profile file doesn’t exist, you can create it with:
powershell

New-Item -Path $PROFILE -ItemType File -Force
- Editing: Open the
$PROFILEfile with your favorite text editor (e.g.,code $PROFILEif you have VS Code installed).- Examples:
Set-Location C:Projects(start in your projects folder)Import-Module Az.Accounts(automatically load Azure module)function Get-MyIP { (Invoke-RestMethod ipinfo.io/json).ip }(define a custom function)$env:PATH += ";C:Tools"(add a custom path)
- Examples:
Managing Modules and Updating PowerShell 7
PowerShell 7 thrives on its rich module ecosystem. Keeping your modules and PowerShell itself up-to-date is crucial for security, performance, and access to the latest features.
- Installing Modules: Use the
Install-Modulecmdlet from the PowerShell Gallery.
powershell

Install-Module -Name Az -Scope CurrentUser # Installs Azure module for the current user
- Updating Modules:
powershell

Update-Module -Name Az
You can also update all installed modules from the gallery:
powershell

Get-Module -ListAvailable | Where-Object { $_.Repository } | Update-Module
- Updating PowerShell 7:
- Windows (MSI/Winget): Re-run the MSI installer for a newer version, or use
winget upgrade --id Microsoft.PowerShell. - Windows (Microsoft Store): Updates are automatic through the Store.
- macOS (Homebrew):
brew upgrade powershell. - Linux (Package Managers):
sudo apt-get update && sudo apt-get upgrade powershell(for APT) orsudo yum update powershell(for YUM/DNF). - Snap:
sudo snap refresh powershell.
- Windows (MSI/Winget): Re-run the MSI installer for a newer version, or use
Regular updates not only provide new functionalities but also patch security vulnerabilities, ensuring your scripting environment remains robust and protected.
Maximizing Your Investment: PowerShell 7 for Professionals and Businesses
Installing PowerShell 7 is just the beginning. Leveraging its capabilities strategically can yield substantial benefits, impacting individual career trajectories and organizational bottom lines.
Boosting Productivity and Operational Efficiency
For individual IT professionals, PowerShell 7 offers a significant boost in productivity. The modern syntax, cross-platform capabilities, and performance enhancements mean you can write more efficient scripts faster. This directly translates to less time spent on repetitive tasks and more time available for complex problem-solving, strategic planning, and skill development. Automating routine administrative tasks across diverse systems – from user management and software deployment to system monitoring and log analysis – frees up precious hours. This efficiency isn’t just about saving time; it’s about reducing mental fatigue, minimizing human error, and creating a more proactive, less reactive, work environment.
For businesses, the aggregate effect of enhanced individual productivity is transformative operational efficiency. Standardized automation through PowerShell 7 ensures consistency in IT operations, reduces manual labor costs, and accelerates service delivery. Imagine deploying a new server or setting up a development environment in minutes instead of hours, or generating compliance reports with a single command across your entire hybrid cloud infrastructure. This agility allows businesses to respond faster to market changes, scale operations seamlessly, and reallocate resources from maintenance to innovation. The return on investment for mastering PowerShell 7 manifests in reduced operational expenditures, improved service reliability, and a more competitive edge in a technology-driven market.
Elevating Your Technical Skillset and Personal Brand
In the competitive tech industry, continuous learning and skill diversification are paramount. Mastering PowerShell 7 demonstrates a commitment to modern IT practices, showcasing your ability to work with contemporary automation tools across different operating systems and cloud platforms. This expertise significantly enhances your personal brand as a versatile and forward-thinking professional. Employers are actively seeking individuals who can navigate complex, heterogeneous environments, and PowerShell 7 proficiency is a clear indicator of such a capability.
Furthermore, contributing to open-source PowerShell projects, sharing your scripts, or participating in community forums can further solidify your reputation and establish you as a thought leader. This kind of engagement not only broadens your network but also provides invaluable learning opportunities and recognition within the tech community. For those aiming for leadership roles, a deep understanding of automation and system management through PowerShell 7 is often a prerequisite, underscoring its importance in career progression.

Financial Implications of Advanced Automation
The financial impact of advanced automation with PowerShell 7 is multi-faceted. On the cost-saving front, reducing manual intervention directly cuts labor costs associated with repetitive tasks. Errors, which are often costly in terms of downtime, data loss, or security breaches, are significantly minimized through automated, standardized processes. The ability to manage cloud resources more efficiently means optimizing cloud spend by ensuring resources are provisioned correctly and scaled appropriately, preventing unnecessary overprovisioning.
Beyond cost reduction, PowerShell 7 can unlock new revenue streams or facilitate business growth. Faster deployment of new services or applications means quicker time-to-market, allowing businesses to capitalize on opportunities ahead of competitors. Improved operational efficiency can free up resources to invest in R&D or expansion, fostering innovation. For individuals, the enhanced skills gained from mastering PowerShell 7 can lead to higher-paying roles, opportunities for consulting, or even fuel side hustles in automation and IT solutions. Ultimately, PowerShell 7 isn’t just a tool; it’s an investment in a more efficient, secure, and financially robust future for both individuals and enterprises.
By following this comprehensive guide, you are now equipped not only with the technical know-how to install PowerShell 7 but also with a deeper understanding of its strategic importance. Embrace this powerful tool to transform your approach to technology and unlock new possibilities for productivity, innovation, and growth.
aViewFromTheCave is a participant in the Amazon Services LLC Associates Program, an affiliate advertising program designed to provide a means for sites to earn advertising fees by advertising and linking to Amazon.com. Amazon, the Amazon logo, AmazonSupply, and the AmazonSupply logo are trademarks of Amazon.com, Inc. or its affiliates. As an Amazon Associate we earn affiliate commissions from qualifying purchases.