In the vast and rapidly evolving landscape of data science, statistics, and quantitative analysis, R stands as a cornerstone. Renowned for its unparalleled capabilities in statistical computing and graphics, R empowers researchers, analysts, and developers across diverse industries. At the heart of R’s immense power and flexibility lies its package ecosystem—a sprawling network of user-contributed modules that extend the base functionality of R far beyond its initial scope. These packages provide specialized functions, datasets, and tools, transforming R into a dynamic environment capable of tackling virtually any data-related challenge, from sophisticated machine learning algorithms and advanced statistical modeling to intricate data visualization and robust web application development.
For anyone venturing into the world of R, or for seasoned professionals seeking to enhance their productivity and expand their analytical toolkit, understanding how to efficiently install and manage these packages is not merely a technical step; it’s a fundamental skill that unlocks a wealth of possibilities. This comprehensive guide aims to demystify the process, offering a step-by-step approach to installing R packages, covering standard methods, advanced techniques, and crucial troubleshooting tips. Whether you’re integrating cutting-edge AI tools, optimizing data workflows, or simply exploring new statistical methods, mastering R package installation is your gateway to leveraging the full potential of this incredible open-source platform.
The Foundation of R: Understanding Packages and Their Ecosystem
Before diving into the mechanics of installation, it’s essential to grasp what R packages are and why they are so pivotal to the R experience. Far from being mere add-ons, packages are the lifeblood of the R ecosystem, embodying the collaborative spirit of its global community.
What Exactly Are R Packages?
An R package is a collection of functions, data, and compiled code in a well-defined format that extends the capabilities of R. Think of them as modular toolkits, each designed to address specific analytical needs or provide specialized functionalities. For instance, the ggplot2 package revolutionized data visualization in R, offering a grammar of graphics that allows users to create stunning and complex plots with ease. Similarly, dplyr and data.table provide highly optimized tools for data manipulation, making data wrangling significantly faster and more intuitive. Beyond these popular examples, there are packages for virtually every domain imaginable: econometrics, bioinformatics, natural language processing, spatial analysis, machine learning frameworks, and even tools for building interactive web applications like Shiny.
Each package comes with its own documentation, examples, and often, vignettes (detailed tutorials), ensuring that users can quickly learn how to utilize its offerings. This standardized structure not only promotes ease of use but also facilitates sharing and collaboration within the R community.
Navigating the R Package Ecosystem: CRAN, Bioconductor, and GitHub
The R package landscape is diverse, primarily distributed through a few key repositories:
- CRAN (The Comprehensive R Archive Network): This is the official and primary repository for R packages. CRAN hosts thousands of stable, thoroughly vetted packages that adhere to strict quality control guidelines. When you use the standard
install.packages()command, R by default fetches packages from CRAN. It’s the go-to source for general-purpose statistical, graphical, and utility packages. - Bioconductor: Specializing in bioinformatics and computational biology, Bioconductor provides tools for analyzing high-throughput genomic data. Its packages often deal with complex data structures and require specific dependencies. While distinct from CRAN, Bioconductor packages are also rigorously reviewed and maintained, offering robust solutions for biological data analysis.
- GitHub and Other Version Control Systems: For developers and early adopters, GitHub is a crucial source for cutting-edge packages, development versions, and personal projects. Many innovative tools and experimental features appear on GitHub before they might be submitted to CRAN or Bioconductor, or sometimes remain exclusively there. Installing from GitHub requires specialized tools, which we will cover.
Understanding these different sources is key to efficiently finding and installing the right package for your specific project needs. Each repository serves a unique purpose, catering to different stages of package development and specific scientific or technical domains.
Essential Prerequisites for a Smooth R Package Installation
While R package installation is generally straightforward, a few preparatory steps and considerations can prevent common pitfalls and ensure a seamless experience. Like any software environment, R and its packages rely on underlying system configurations and components.
1. Installing R and RStudio: Your Core Environment
The absolute first step, if you haven’t already, is to install R itself. We recommend downloading the latest stable version from the official CRAN website (cran.r-project.org). This ensures you have the most up-to-date features, performance enhancements, and bug fixes, which are often necessary for compatibility with newer packages.
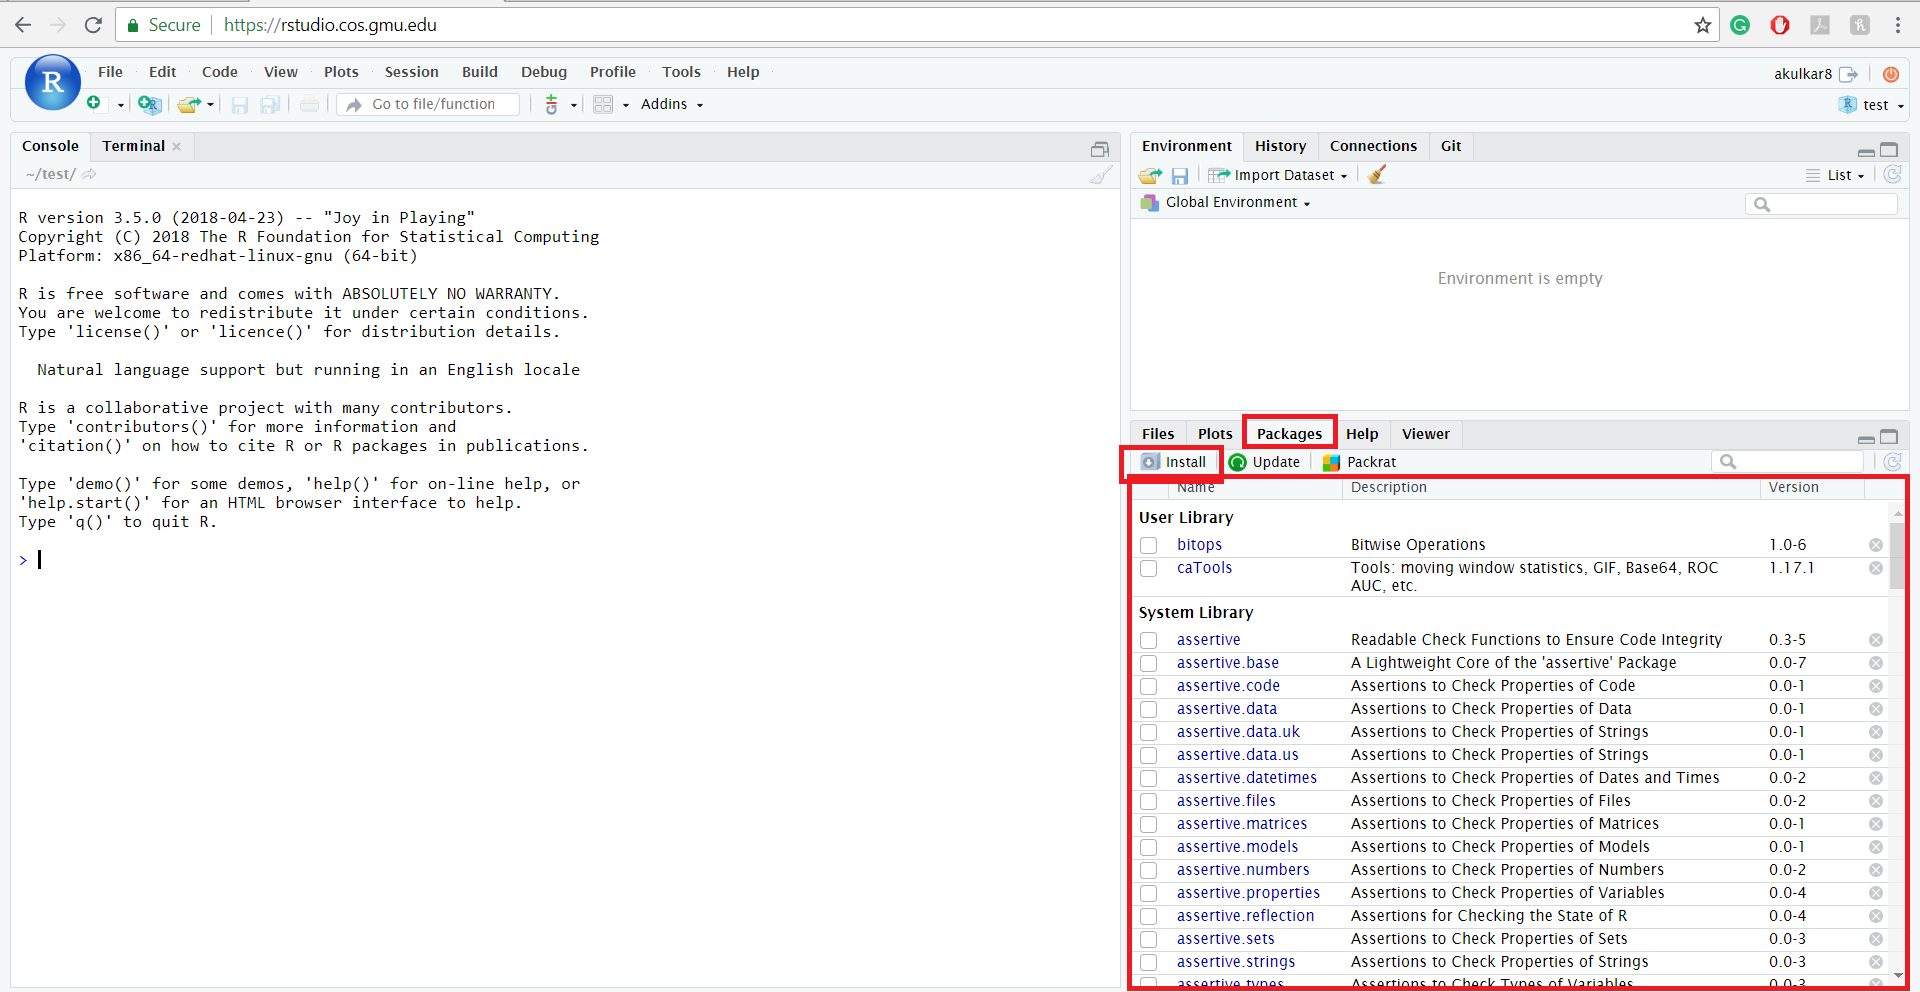
Equally important for productivity is RStudio Desktop. RStudio is a powerful Integrated Development Environment (IDE) that significantly enhances the R user experience. It provides a user-friendly interface with features like syntax highlighting, code completion, integrated help, debugging tools, and convenient package management interfaces. While you can use R without RStudio, the IDE streamlines workflows, making package installation, script writing, and project management much more efficient. Download RStudio Desktop (free version) from their official website (rstudio.com).
Ensure both R and RStudio are installed correctly and that RStudio is configured to use your desired R installation.
2. System Dependencies and Development Tools
Many R packages, particularly those that require high performance or interface with external libraries, are written in compiled languages like C, C++, or Fortran. To install these “source” packages (rather than pre-compiled binaries), your system needs appropriate development tools:
- Windows: You’ll need
Rtools. This is a collection of tools (like compilers and utilities) necessary for building R packages from source on Windows. Download the appropriate version ofRtoolsfor your R version from the CRAN website and follow the installation instructions carefully, ensuring it’s added to your system’s PATH. - macOS: macOS users typically need to install
Xcode Command Line Tools. You can usually do this by opening your Terminal and runningxcode-select --install. This command prompts you to install the necessary compilers and tools. - Linux: On Linux distributions (e.g., Ubuntu, Debian, Fedora, CentOS), you’ll need to install development libraries and compilers. For Debian/Ubuntu-based systems, this typically involves
sudo apt-get install build-essentialand potentially other specific development headers (e.g.,libcurl4-openssl-devfor packages that interact with web services,libxml2-devfor XML parsing packages).
Without these development tools, attempts to install source packages will often result in compilation errors, leading to failed installations and frustrating setbacks. It’s a common cause of package installation issues, so taking the time to set them up upfront is highly recommended.
3. Internet Connection and Proxy Configurations
A stable internet connection is, of course, a prerequisite for downloading packages from CRAN, Bioconductor, or GitHub. If you are operating within a corporate or academic network, you might be behind a firewall or proxy server. In such cases, R may struggle to connect to external repositories.
You might need to configure R to use your proxy settings. This can typically be done by setting environment variables or by using R’s options() function:
# For HTTP proxy
options(HTTP_PROXY = "http://your.proxy.server:port")
# For HTTPS proxy (often needed)
options(HTTPS_PROXY = "http://your.proxy.server:port")
Replace "http://your.proxy.server:port" with your actual proxy address and port. Your IT department can provide these details if you’re unsure. Failing to configure proxy settings can lead to “cannot open URL” or “connection refused” errors during package installation.
Standard Methods for Installing R Packages
With your R environment correctly set up and understanding the package ecosystem, you’re ready to dive into the primary methods for installing packages. These methods cover the vast majority of scenarios you’ll encounter.
1. Installing Packages from CRAN: The Default and Most Common Method
The Comprehensive R Archive Network (CRAN) is the official repository for R packages and the default source for install.packages(). This is by far the most common way to get new packages into your R environment.
To install a single package, you use the install.packages() function:
install.packages("package_name")
Example: To install the popular dplyr package for data manipulation:
install.packages("dplyr")
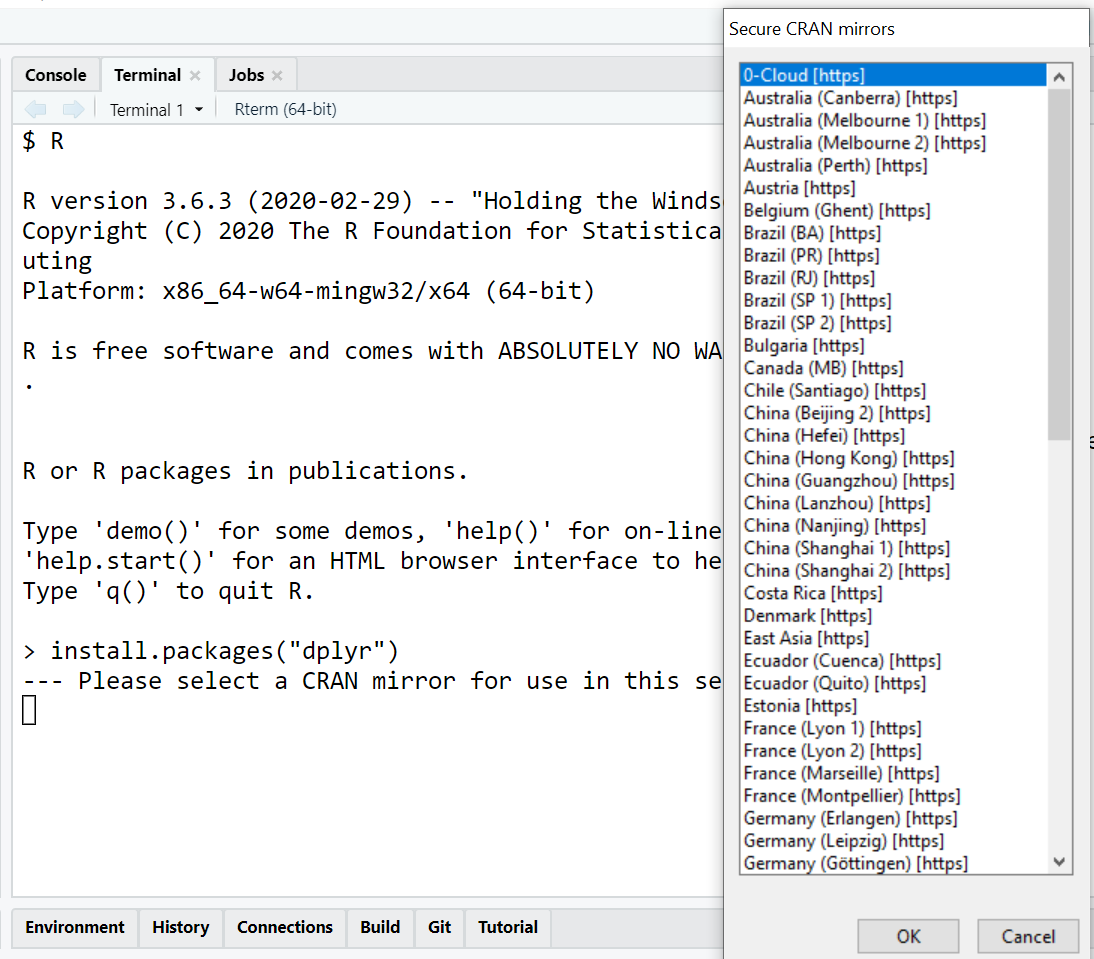
When you run this command for the first time in a session, R might ask you to select a CRAN mirror (a server location) closest to you. Choosing a geographically close mirror generally results in faster download speeds. Once selected, R remembers this choice for the session.
Installing Multiple Packages: You can install several packages at once by providing a character vector of package names:
install.packages(c("ggplot2", "readr", "tidyr", "lubridate"))
This is incredibly efficient for setting up a new project or environment.
Key Arguments for install.packages():
-
repos: Specifies the repository URL. By default, this is set to CRAN. You might override this if you want to install from a different CRAN-like repository or a local repository. For example,install.packages("mypackage", repos = "http://cran.r-project.org"). -
dependencies = TRUE: This is often the default behavior but explicitly ensures that any other packages required by the one you’re installing (its dependencies) are also installed automatically. It’s almost always a good idea to leave this asTRUE. -
lib: Specifies the library path where the package should be installed. R has default library locations (.libPaths()), but advanced users might want to install packages to a custom directory (e.g., for project-specific environments or when write permissions are an issue).# To see your current library paths .libPaths() # To install to a specific path (e.g., in your project folder) install.packages("mypackage", lib = "/path/to/my/r_library")Important Note: Packages installed to a custom library path will only be available when that path is included in
.libPaths()or when you explicitly refer to it.
Updating Installed Packages: Keeping your packages updated is crucial for accessing new features, performance improvements, and security patches.
update.packages()
This command will check all currently installed packages against the CRAN repository, identify newer versions, and prompt you to update them. It’s a good practice to do this periodically, though be aware that updating can sometimes introduce breaking changes if your code relies on specific older package behaviors. For critical production environments, consider using tools like renv (discussed later) for version control.
2. Installing Packages from Bioconductor
For those working in bioinformatics, Bioconductor is an indispensable resource. Its installation process is slightly different from CRAN due to its focus on specific R and package version compatibility.
First, you need to install the BiocManager package from CRAN, which provides the tools for managing Bioconductor packages:
install.packages("BiocManager")
Once BiocManager is installed, you can use its install() function to get Bioconductor packages:
BiocManager::install("bioconductor_package_name")
Example: To install the DESeq2 package for differential gene expression analysis:
BiocManager::install("DESeq2")
BiocManager::install() automatically handles dependencies and ensures that you install versions of Bioconductor packages that are compatible with your R version. It’s designed to make the often complex task of managing bioinformatics software dependencies much simpler.
3. Installing Packages from GitHub and Other Version Control Systems
GitHub has become a hub for R package development, hosting experimental features, pre-release versions, and packages that aren’t yet (or may never be) on CRAN or Bioconductor. To install packages directly from GitHub, you’ll need the devtools package (or remotes, which devtools depends on).
First, install devtools from CRAN:
install.packages("devtools")
Once devtools is installed, you can use its install_github() function:
devtools::install_github("user_name/repo_name")
Example: To install a hypothetical package named newtool developed by a user johndoe:
devtools::install_github("johndoe/newtool")
- Installing a specific branch or commit: You can specify a particular branch or commit SHA using the
refargument:
R

devtools::install_github("user_name/repo_name", ref = "development_branch")

devtools::install_github("user_name/repo_name", ref = "commit_sha")
- Installing a private repository: For private repositories, you might need to provide an access token via the
auth_tokenargument, or configure Git credentials on your system.
devtools also provides functions for installing from other sources, such as Bitbucket (install_bitbucket()) or a direct URL to a package archive (install_url()), offering great flexibility for accessing packages from various development environments. This method is particularly useful for collaborating on packages in development, testing new features, or using niche tools not widely distributed.
Advanced Scenarios and Troubleshooting Common Installation Issues
Despite the general straightforwardness of R package installation, specific scenarios can arise, leading to challenges. Understanding advanced techniques and common troubleshooting steps can save significant time and frustration.
1. Managing Package Libraries and Permissions
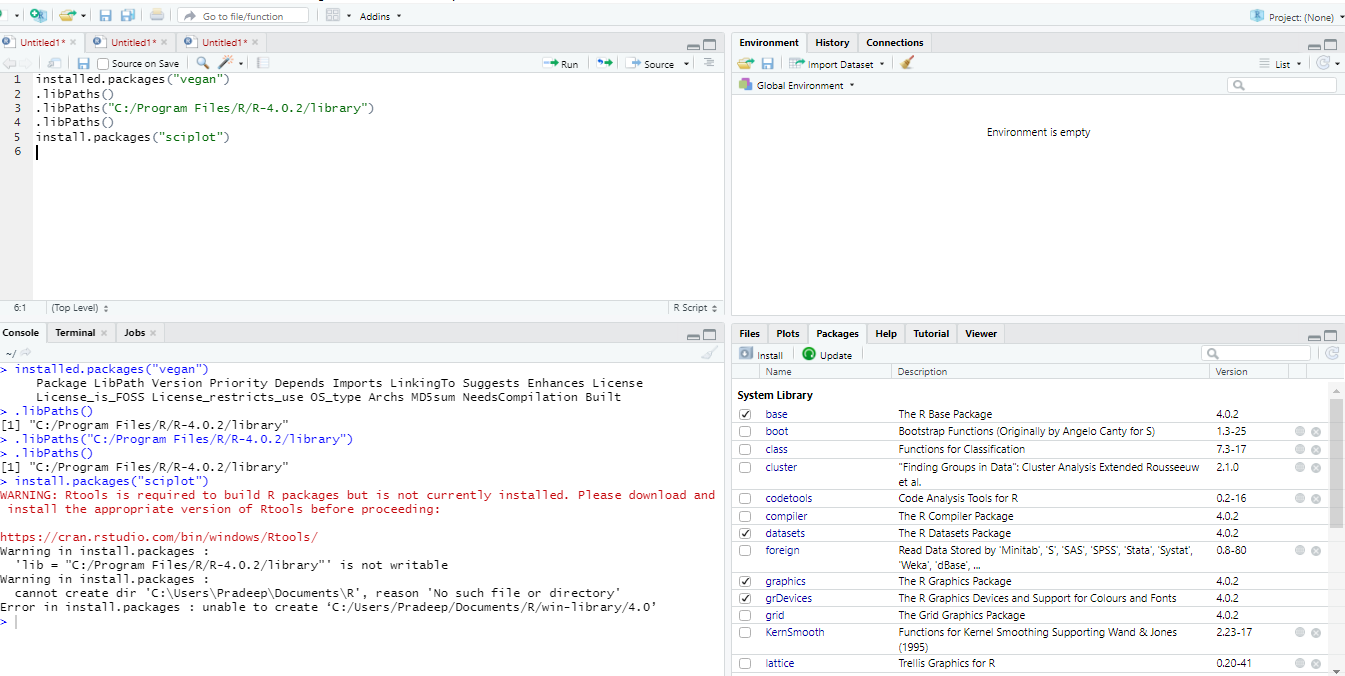
By default, R installs packages into standard library locations, which are typically found within your R installation directory or your user’s home directory. You can view these paths using .libPaths():
.libPaths()
This will show a character vector of directories where R looks for packages. When installing, R tries to write to the first writable directory in this list.
Common Issue: Permission Denied Errors:
One of the most frequent problems, especially on corporate machines or shared servers, is encountering “permission denied” errors. This occurs when R tries to install a package into a directory where your current user account doesn’t have write access.
Solution: Specifying a Custom Library Path:
The best practice to circumvent permission issues is to install packages into a personal, writable library directory. You can create a directory within your user’s home folder (e.g., ~/R/library) and tell R to use it.
You can specify this directory directly in the install.packages() function:
# Create the directory if it doesn't exist
dir.create("~/R/library", recursive = TRUE, showWarnings = FALSE)
install.packages("mypackage", lib = "~/R/library")
To ensure R always uses this custom library path, you can add it to your .Rprofile file (a startup script for R). This file is typically located in your user’s home directory (~/.Rprofile on Linux/macOS, or Documents/.Rprofile on Windows). Add the following line to it:
.libPaths("~/R/library", .libPaths()) # Add your custom path at the beginning
This tells R to look for packages in ~/R/library first, then in the default locations. Restart R for changes to .Rprofile to take effect.
2. Handling Dependencies and Compilation Challenges
Package dependencies are a complex but crucial aspect of the R ecosystem. A package often relies on other packages to function correctly. While install.packages(dependencies = TRUE) usually handles this, sometimes issues arise:
- Missing System Dependencies: As mentioned in the prerequisites, if a package requires external system libraries (e.g.,
libxml2-devfor XML parsing,gfortranfor certain numerical linear algebra packages), you’ll see errors during compilation (makeerrors, “cannot find -lxml2”, etc.). The solution is to identify the missing system library (the error message usually provides clues) and install it using your operating system’s package manager (e.g.,apt-geton Debian/Ubuntu,brewon macOS,yumon Fedora/CentOS). - Compilation Errors (Rtools/Xcode issues): If you haven’t installed
Rtools(Windows) orXcode Command Line Tools(macOS), or if they are outdated, source package installations will fail with compilation errors. Ensure these are correctly installed and updated. - Circular Dependencies or Version Conflicts: Less common but possible, especially with
devtools::install_github(), are situations where packages have conflicting dependency requirements.BiocManager::install()is good at resolving Bioconductor-specific conflicts. For CRAN,install.packages()is generally robust. Manual intervention or using package isolation tools (likerenv) may be necessary for severe conflicts.
Dealing with Broken Packages: Sometimes, a package installation might be corrupted. You can try reinstalling with install.packages("package_name", dependencies = TRUE, force = TRUE) (from devtools or remotes) or manually deleting the package’s folder from your library and reinstalling.
3. Offline Installation and Local Archives
For environments without internet access, or to ensure reproducibility with specific package versions, offline installation is a valuable technique.
Steps for Offline Installation:
-
Download Package Archives: On a machine with internet access, navigate to CRAN (or Bioconductor) and download the package source archive (
.tar.gzfor Linux/macOS,.zipfor Windows binaries) and all its dependencies. Make sure to download the correct version for your target R version and OS. -
Transfer Archives: Move these
.tar.gzor.zipfiles to the offline machine. -
Install from Local Files: Use
install.packages()withrepos = NULLandtype = "source"(for.tar.gz) ortype = "win.binary"(for.zipon Windows).# For a source package (e.g., .tar.gz on Linux/macOS, or when compiling on Windows/macOS) install.packages("/path/to/my_package_1.0.0.tar.gz", repos = NULL, type = "source") # For a Windows binary package (.zip) install.packages("/path/to/my_package_1.0.0.zip", repos = NULL, type = "win.binary")You must install dependencies manually in the correct order before installing the main package. This process is more complex than online installation but essential in isolated environments.
4. Version Control for R Environments: Project-Specific Libraries with renv
For serious data science projects, especially in collaborative or production settings, ensuring reproducibility is paramount. The renv package (a modern alternative to packrat) provides an elegant solution for creating project-specific, isolated R library environments.
How renv Works:
- When you initialize
renvin a project, it creates a local library within that project’s directory. - All packages installed for that project are installed into this local library, isolated from your global R library.
renv::snapshot()captures the exact versions of all packages used in your project and saves them inrenv.lockfile.- When someone else opens your project,
renv::restore()readsrenv.lockand installs precisely those package versions, ensuring everyone works with the identical environment.
Basic renv Workflow:
- Install
renvglobally (once):
R

install.packages("renv")
- Initialize
renvin your project:
R

# Navigate to your project directory in RStudio or terminal

renv::init()
This creates arenv/folder andrenv.lockfile in your project. - Install packages as usual:
R

install.packages("ggplot2")

install.packages("dplyr")
renvwill intercept these calls and install them into your project’s local library. - Snapshot your environment:
R

renv::snapshot()
This updatesrenv.lockwith the current package versions. Commitrenv.lock(andrenv/activate.R) to your version control system (e.g., Git). - Restore environment (for collaborators or deployment):
R

renv::restore()
This command readsrenv.lockand installs all necessary packages at their specified versions into the project’s local library.
renv is a powerful tool for maintaining consistent and reproducible R environments, greatly simplifying collaboration and deployment of R-based solutions. It’s a best practice for any serious R project.
Best Practices for R Package Management
Beyond the mechanics of installation, adopting smart practices for managing your R packages can significantly improve your workflow, enhance project stability, and ensure long-term maintainability.
1. Regular Updates (But with Caution)
While update.packages() is a convenient way to keep your R environment fresh, a blanket update is not always advisable, especially in production or long-running projects. Newer package versions might introduce breaking changes to functions or alter output formats, potentially invalidating existing code or analysis results.
Recommendation:
- For personal exploration and learning, update frequently.
- For active projects, update dependencies individually and cautiously, testing thoroughly after each update.
- Utilize
renvto lock down specific package versions for project reproducibility. Whenrenvis active, it manages updates within the project’s scope, allowing you to update specific packages within that isolated environment without affecting others.
2. Understanding Package Documentation and Community Support
Every R package hosted on CRAN or Bioconductor comes with extensive documentation. Leveraging this is critical for efficient package usage and troubleshooting.
?function_name: In your R console, typing?followed by a function name (e.g.,?install.packages) will bring up its help page, detailing arguments, usage, and examples.help(package = "package_name"): Provides a general overview and an index of all functions within a package.- Vignettes: Many packages include vignettes, which are longer, tutorial-style documents demonstrating the package’s capabilities and typical workflows. Access them via
browseVignettes(package = "package_name"). - CRAN Task Views: For discovering packages in specific domains (e.g., “MachineLearning”, “TimeSeries”), CRAN Task Views provide curated lists and descriptions of relevant packages.
- Online Resources: Stack Overflow (with the
rtag), R-Help mailing lists, and specialized forums are invaluable resources for troubleshooting specific errors or seeking advice on package usage. Learning how to formulate clear, reproducible questions is a skill that pays dividends.
3. Creating Your Own Packages (A Brief Mention)
For advanced users, the ultimate form of R package management and contribution is creating your own packages. If you find yourself repeatedly writing similar sets of functions for different projects, or if you’ve developed a novel method you wish to share, packaging your code is the most effective way to organize it, document it, and make it available to others. The usethis and devtools packages significantly streamline the package development process, making it more accessible than ever before. This not only centralizes your code but also forces good programming practices, leading to more robust and maintainable solutions.
Conclusion
The ability to effectively install and manage R packages is more than just a technical skill; it’s a foundational competency that empowers data scientists, statisticians, and analysts to harness the full analytical power of the R ecosystem. From basic installations of widely used CRAN packages to navigating the specialized world of Bioconductor, and even tapping into the bleeding edge of development on GitHub, each method plays a crucial role in building robust and dynamic data analysis workflows.
By understanding the core repositories, preparing your environment with necessary system dependencies, and adopting best practices like renv for project reproducibility, you transform potential roadblocks into seamless processes. The R community thrives on collaboration, and its package system is a testament to this spirit, offering an ever-expanding array of tools for every imaginable task. As you continue your journey with R, mastering these installation techniques will not only streamline your daily tasks but also open doors to new methodologies, enhanced productivity, and the ability to confidently tackle increasingly complex data challenges. Embrace the package ecosystem, and unlock the true potential of your R-powered analytics.