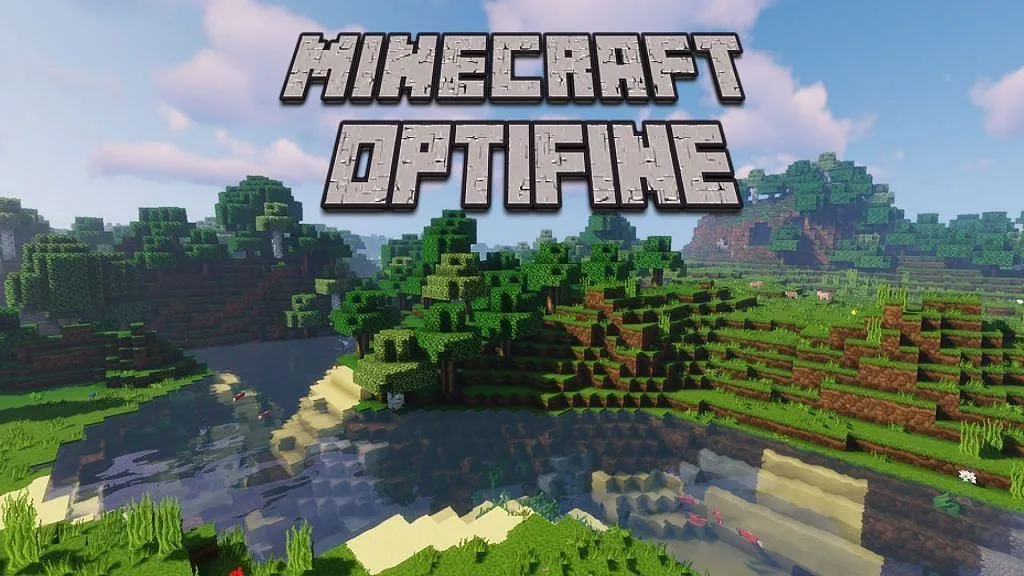
The evolution of sandbox gaming has reached a pinnacle with Minecraft version 1.20.1, the “Trails & Tales” update. While Mojang Studios continues to refine the technical foundation of the game, the demand for high-performance optimization and superior graphical fidelity remains a priority for the community. Enter OptiFine—a cornerstone of Minecraft utility software that has defined the technical standards for performance tuning for over a decade.
OptiFine is more than a simple modification; it is an extensive overhaul of the game’s rendering engine. It provides users with significant increases in frame rates (FPS), support for high-definition (HD) textures, and a plethora of configuration options that go far beyond the native settings menu. This guide provides a detailed technical walkthrough on how to install OptiFine 1.20.1, ensuring your software environment is optimized for the best possible gaming experience.
Technical Prerequisites: Preparing Your Environment for Optimization
Before proceeding with the installation of OptiFine 1.20.1, it is essential to ensure that your local machine meets the software requirements necessary for a stable deployment. OptiFine operates as a bridge between the game’s code and your hardware’s GPU, requiring specific dependencies to function correctly.
Identifying Version Compatibility
The primary rule of Minecraft modding is version parity. For OptiFine 1.20.1 to function, you must have the vanilla version of Minecraft 1.20.1 already installed and registered in your Minecraft Launcher.
- Open the Minecraft Launcher.
- Navigate to the “Installations” tab.
- Ensure you have run Minecraft 1.20.1 at least once. This process allows the launcher to download the necessary .jar files and asset indexes that OptiFine will eventually modify.
The Critical Role of the Java Runtime Environment (JRE)
OptiFine is distributed as an executable .jar file, which relies on Java to run its installation wizard. While Minecraft now comes bundled with its own Java version, the standalone OptiFine installer often requires a system-wide installation of Java.
- Java 17 or higher: For version 1.20.1, Java 17 is the technical standard. If your system does not recognize the OptiFine file as an executable, you may need to download the latest JDK (Java Development Kit) from Oracle or adopt an open-source version like Adoptium (Eclipse Temurin).
- Jarfix Utility: Occasionally, even with Java installed, Windows may associate .jar files with archival software like WinRAR or 7-Zip. A lightweight utility called “Jarfix” can be used to restore the correct file association, ensuring the OptiFine installer launches correctly.
The Core Installation Process: From Source to Software Integration
Once the prerequisites are met, the installation process involves fetching the correct binaries and integrating them into the Minecraft directory. This section covers the standalone installation method, which is the most direct path to performance gains.
Navigating the Official OptiFine Infrastructure
Security is paramount when downloading third-party software. Always source your files directly from the official OptiFine website.
- Navigate to the “Downloads” section of the site.
- Locate the “Minecraft 1.20.1” header.
- If the main version is not yet listed, click “Preview versions” to find the latest development build, which is often highly stable.
- Download the file, being careful to avoid “mirror” links that may contain intrusive advertisements unless necessary.
Executing the Standalone Installer
The OptiFine installer is designed to be user-friendly, automating the directory mapping for the user.
- Locate the downloaded
OptiFine_1.20.1_HD_U_XX.jarfile. - Right-click and select “Open with… Java(TM) Platform SE binary.”
- A small window will appear, displaying the default Minecraft installation path (usually
%appdata%.minecraft). - Click the “Install” button.
- Within seconds, a dialogue box should appear stating: “OptiFine is successfully installed.”
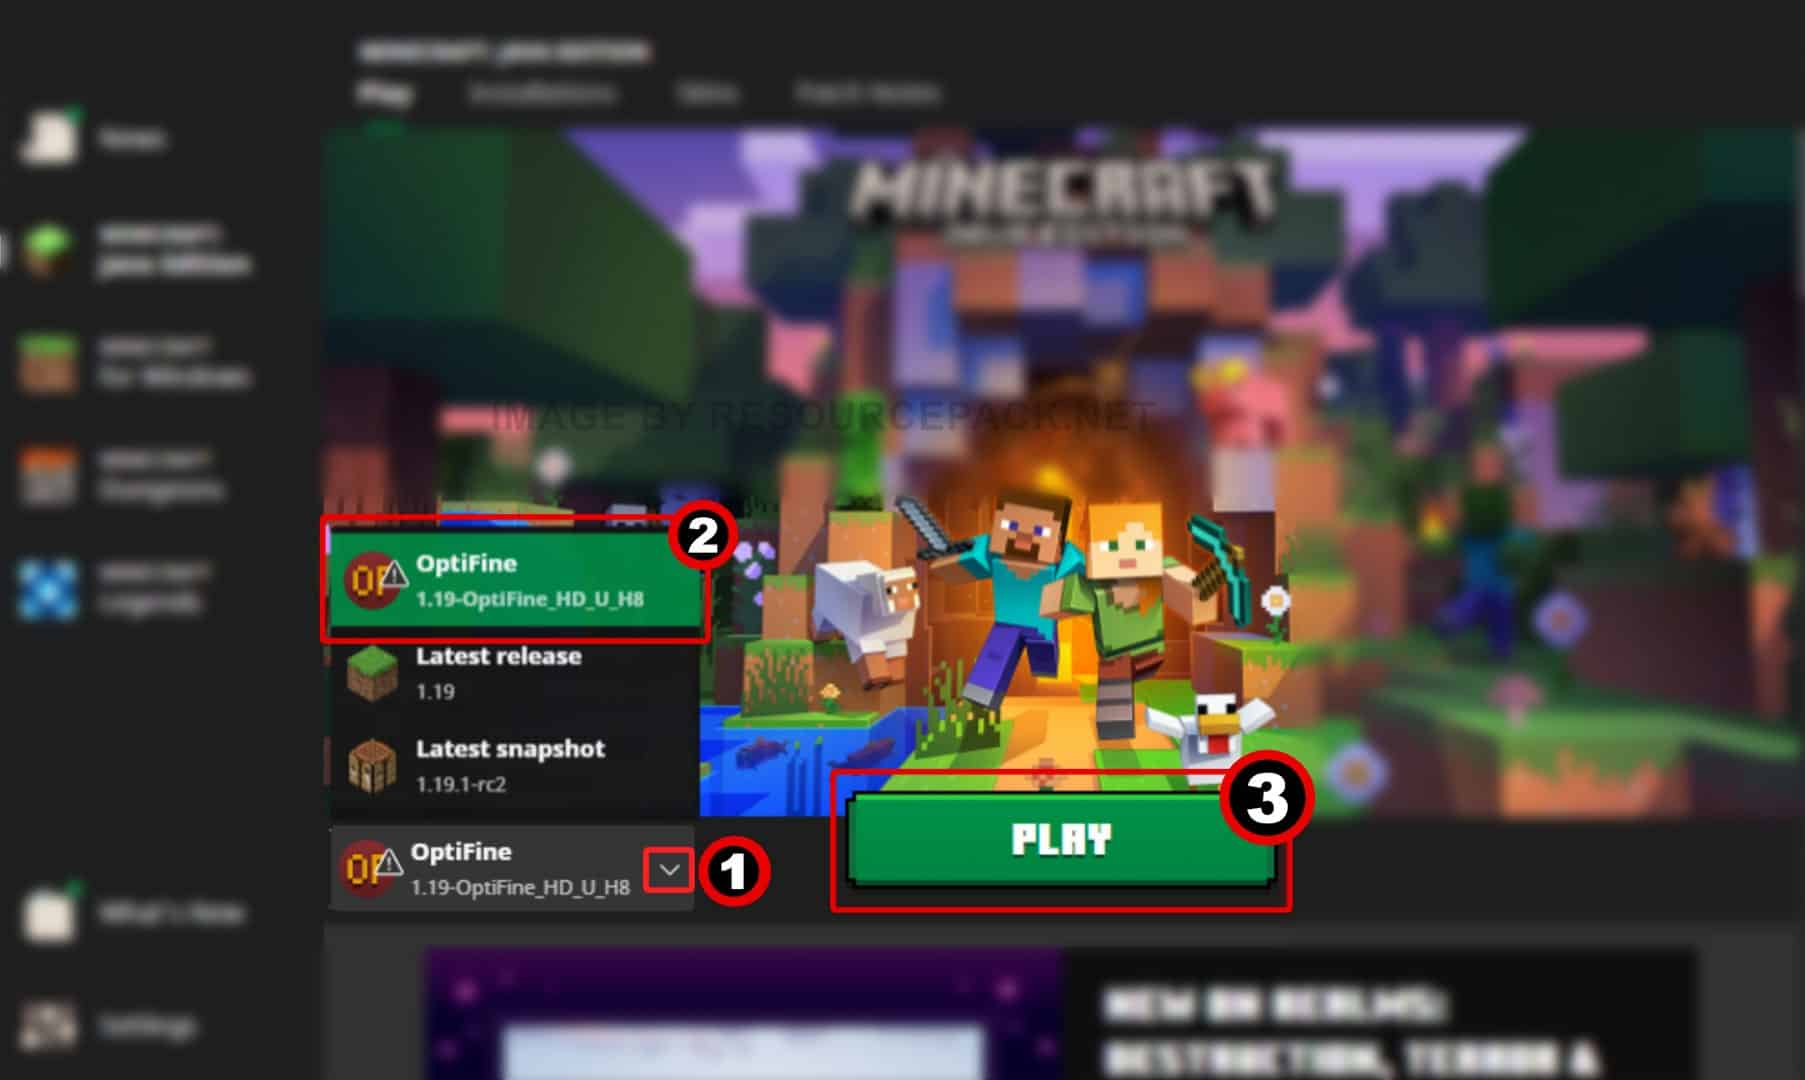
Upon completion, OptiFine creates a new “Installation” profile in your Minecraft Launcher. You should see a new entry labeled “OptiFine 1.20.1” with the OptiFine logo. Selecting this profile ensures that the game launches with the optimized rendering engine enabled.
Advanced Integration: Using OptiFine with Minecraft Forge
For many power users, OptiFine is just one component of a larger suite of mods. If you intend to run OptiFine alongside content mods (such as Biomes O’ Plenty or Industrial Craft), you must install it as a library within a mod loader like Minecraft Forge.
The Mod Loader Paradigm
Forge acts as a middle-layer API that allows multiple mods to communicate and function simultaneously without crashing the game. To use OptiFine with Forge:
- Download and install the Forge 1.20.1 installer.
- Run the Forge installer to create a “Forge” profile in your launcher.
- Do not run the OptiFine installer. Instead, copy the OptiFine .jar file you downloaded earlier.
Manual File Placement and Conflict Management
Instead of running the OptiFine .jar, you must treat it as a standard mod file.
- Press
Win + Ron your keyboard and type%appdata%, then press Enter. - Navigate to
.minecraft>mods. If themodsfolder does not exist, create one. - Paste the OptiFine .jar file into this folder.
- Launch Minecraft using the Forge profile. Forge will detect OptiFine as a compatible optimization mod and load it during the startup sequence.
Note: While OptiFine is highly compatible, some modern modpacks favor “Fabric” or “Quilt” loaders. For those environments, a “wrapper” mod like OptiFabric is required, as OptiFine is not natively built for the Fabric API.
Maximizing Graphical Fidelity: Configuring OptiFine Features
Installation is only the first step. To truly leverage the power of OptiFine 1.20.1, you must navigate its extensive settings menu to balance performance and visual quality.
Dynamic Lighting and Render Distances
OptiFine introduces “Dynamic Lights,” a feature that allows light-emitting items (like torches) to illuminate the environment while held in the player’s hand or dropped on the ground. This adds a layer of immersion previously unavailable in vanilla Minecraft.
- Shaders: This is the most sought-after feature. Under
Options > Video Settings > Shaders, users can install shader packs (like BSL or SEUS) that introduce realistic shadows, water reflections, and volumetric lighting. - Render Distance: OptiFine allows for “Extreme” render distances (up to 48+ chunks), though this requires substantial VRAM. It also introduces “Render Regions,” an optimization that allows the GPU to render chunks more efficiently.
Texture and Model Enhancements
OptiFine enables “Connected Textures,” allowing blocks like glass or grass to blend seamlessly into one another rather than showing harsh borders. It also supports “Custom Entity Models” (CEM) and “Emissive Textures,” which allow resource pack creators to design glow-in-the-dark textures and unique mob shapes without requiring additional mods.
Technical Troubleshooting: Resolving Common Installation Anomalies
Despite its stability, the interaction between Java, hardware drivers, and Minecraft can occasionally lead to errors. Understanding how to diagnose these issues is key to maintaining a functional tech stack.
Addressing the “Java Not Found” or “Open With” Errors
The most common issue arises when the operating system does not know how to handle the .jar extension. If double-clicking the installer opens a console window that immediately closes, or if it opens as a zip file:
- Ensure the latest JRE is installed.
- Use the “Jarfix” tool mentioned earlier to repair the registry paths.
- Alternatively, run the installer via the Command Prompt by typing
java -jar [filename].jar.
Managing Version Mismatches and Crash Reports
If the game crashes upon launch (Exit Code: 0 or 1), it is often due to a conflict between OptiFine and another mod.
- Log Analysis: Check the
latest.login the.minecraft/logsfolder. Search for keywords like “Fatal” or “Conflict.” - Driver Updates: OptiFine utilizes advanced OpenGL features. Ensure your NVIDIA, AMD, or Intel graphics drivers are updated to the latest version to prevent rendering artifacts or “White Screen” bugs.
- Memory Allocation: Minecraft defaults to 2GB of RAM. If you are using OptiFine with high-end shaders, you should increase this to 4GB or 6GB in the “JVM Arguments” section of the profile settings in the Minecraft Launcher.
Conclusion: The Future of Minecraft Optimization
Installing OptiFine 1.20.1 is a fundamental skill for any Minecraft player looking to elevate their technical setup. By following the structured approach of verifying prerequisites, choosing the correct installation method, and fine-tuning the internal settings, you transform Minecraft from a simple block game into a visually stunning, high-performance simulation.
As the Minecraft technical ecosystem continues to grow, tools like OptiFine remain essential for bridging the gap between hardware capabilities and software limitations. Whether you are seeking a competitive edge with higher frame rates or an aesthetic overhaul through shaders, the successful deployment of OptiFine 1.20.1 ensures your digital environment is as robust and beautiful as possible.
aViewFromTheCave is a participant in the Amazon Services LLC Associates Program, an affiliate advertising program designed to provide a means for sites to earn advertising fees by advertising and linking to Amazon.com. Amazon, the Amazon logo, AmazonSupply, and the AmazonSupply logo are trademarks of Amazon.com, Inc. or its affiliates. As an Amazon Associate we earn affiliate commissions from qualifying purchases.