The world of technology is in constant flux, with new tools and frameworks emerging at an astonishing pace. For anyone navigating the landscape of web development, software engineering, or even dabbling in emerging AI tools, understanding how to set up your development environment is paramount. Node.js, a powerful and versatile JavaScript runtime environment, is a cornerstone of modern web development. If you’re a Mac user eager to harness its capabilities, this guide will walk you through the entire process, from understanding what Node.js is to ensuring a smooth and successful installation.
Our website, your go-to resource for all things Tech, Brand, and Money, is dedicated to empowering you with the knowledge and skills you need to thrive. Whether you’re a seasoned developer looking to streamline your workflow, a budding entrepreneur building your next big idea, or simply a curious individual interested in the digital realm, mastering tools like Node.js is a crucial step. This article falls squarely within our “Tech” pillar, focusing on practical tutorials and software guidance that can boost your productivity and open up new avenues for innovation.
Understanding Node.js and Why You Need It on Your Mac
Before diving into the installation process, it’s essential to grasp what Node.js is and why it’s become such an indispensable tool for developers. At its core, Node.js is an open-source, cross-platform JavaScript runtime environment that executes JavaScript code outside of a web browser. This is a game-changer. Historically, JavaScript was confined to the client-side, powering the interactivity of websites. Node.js liberates JavaScript, allowing it to be used for server-side programming, command-line tools, and even desktop applications.
The Power of JavaScript Everywhere
The primary advantage of Node.js is its ability to use JavaScript for both front-end and back-end development. This “full-stack” JavaScript approach offers significant benefits:
- Code Reusability: Developers can share code and libraries between the client and server, reducing development time and effort.
- Simplified Learning Curve: For those already familiar with JavaScript, picking up Node.js is relatively straightforward.
- Vast Ecosystem (npm): Node.js comes bundled with npm (Node Package Manager), the world’s largest software registry. npm provides access to millions of reusable code packages, from simple utility functions to complex frameworks, accelerating development significantly.
- Performance: Node.js is built on Chrome’s V8 JavaScript engine, which is known for its speed and efficiency. Its non-blocking, event-driven architecture makes it highly scalable for real-time applications like chat apps, streaming services, and online gaming.
- Versatility: Beyond web servers, Node.js is used for building APIs, developing command-line interfaces (CLIs), creating mobile apps (with frameworks like React Native), and even for Internet of Things (IoT) projects.
For Mac users, installing Node.js is a gateway to a world of exciting development possibilities. Whether you’re building a personal portfolio website, contributing to open-source projects, or developing the next killer app, Node.js on your Mac will be your trusted companion.
What About macOS and Node.js?
macOS, with its Unix-like foundation, is an excellent platform for development. It offers a robust command-line interface and a stable operating system that many developers prefer. Installing Node.js on a Mac is generally a smooth and well-supported process, with various methods available to suit different needs and preferences. This guide will explore these methods, ensuring you can choose the one that best fits your workflow.
Installing Node.js on Your Mac: Choosing Your Method
There are several popular and recommended ways to install Node.js on a macOS system. Each method has its own advantages, and the best choice often depends on your specific needs, such as managing multiple Node.js versions or how you prefer to handle software installations. We’ll cover the most common and effective approaches.
Method 1: Using a Version Manager (Recommended for Developers)
For developers who work on multiple projects, each potentially requiring a different version of Node.js, using a version manager is by far the most efficient and recommended approach. Version managers allow you to install, switch between, and manage multiple Node.js versions on your system seamlessly.
Node Version Manager (nvm)
nvm is the most popular Node.js version manager. It’s a script that enables you to run multiple independent versions of Node.js simultaneously. This is incredibly useful when collaborating with others or when a specific project requires an older or a bleeding-edge version of Node.js.
Installation Steps for nvm:
-
Open your Terminal: You can find the Terminal application in
Applications > Utilities. -
Install nvm: The easiest way to install nvm is by downloading and running an installation script. You can typically find the latest installation command on the official nvm GitHub repository. As of my last update, a common command looks like this:
curl -o- https://raw.githubusercontent.com/nvm-sh/nvm/v0.39.3/install.sh | bash(Note: Always check the official nvm GitHub repository for the most current installation command, as version numbers might change.)
-
Follow on-screen instructions: The script will download and install nvm, and then it will typically instruct you to close and reopen your Terminal or run a specific command to load nvm into your shell.
-
Verify nvm installation: After reopening your Terminal, type the following command to ensure nvm is installed and accessible:
command -v nvmIf nvm is installed correctly, this command will output
nvm. If it doesn’t, you might need to manually add nvm to your shell’s profile file (e.g.,.bash_profile,.zshrc, or.profile). The installation script usually provides guidance on this. -
Install a Node.js version: Now you can install specific Node.js versions. To install the latest LTS (Long Term Support) version, which is generally recommended for most projects, use:
nvm install --ltsTo install the absolute latest stable version:
nvm install nodeYou can also install a specific version, for example, Node.js version 18.17.0:
nvm install 18.17.0 -
Use a Node.js version: Once installed, you need to tell nvm which version you want to use for your current session:
nvm use --ltsOr for a specific version:
nvm use 18.17.0 -
Set a default Node.js version: To ensure a specific Node.js version is used every time you open a new Terminal session, set it as the default:
nvm alias default --ltsOr for a specific version:
nvm alias default 18.17.0 -
Verify Node.js installation: Check that Node.js and npm are installed and accessible:
```bash
node -v
npm -v
```

These commands should output the versions of Node.js and npm that you just installed.
Alternative Version Managers:
While nvm is the most popular, other excellent version managers exist for Node.js:
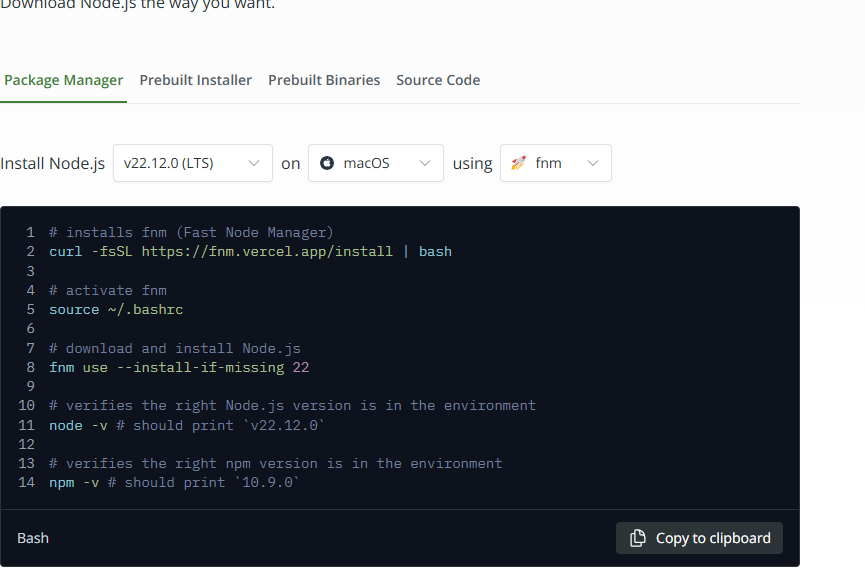
- fnm (Fast Node Manager): A faster, more modern alternative to nvm.
- volta: A more opinionated tool that manages Node.js and other JavaScript tools, automatically switching versions based on project configurations.
The principles of using these managers are similar: install the manager, then use it to install and switch between Node.js versions.
Method 2: Using Homebrew
Homebrew is a popular package manager for macOS that simplifies the installation of software that Apple didn’t include. If you already use Homebrew for other development tools, installing Node.js this way can be very convenient and integrates well into your existing package management workflow.
Installation Steps for Homebrew:
-
Install Homebrew (if you don’t have it): Open your Terminal and run the following command:
/bin/bash -c "$(curl -fsSL https://raw.githubusercontent.com/Homebrew/install/HEAD/install.sh)"Follow the on-screen prompts to complete the installation.
-
Update Homebrew: It’s always a good practice to update Homebrew before installing new packages:
brew update -
Install Node.js: To install the latest LTS version of Node.js, use:
brew install nodeHomebrew typically installs the latest stable version by default. If you need a specific version or want to manage multiple versions, Homebrew alone might not be as flexible as a dedicated Node.js version manager like nvm. However, for a single, current installation, it’s very straightforward.
-
Verify Node.js installation: After the installation completes, check the versions:
node -v
npm -v
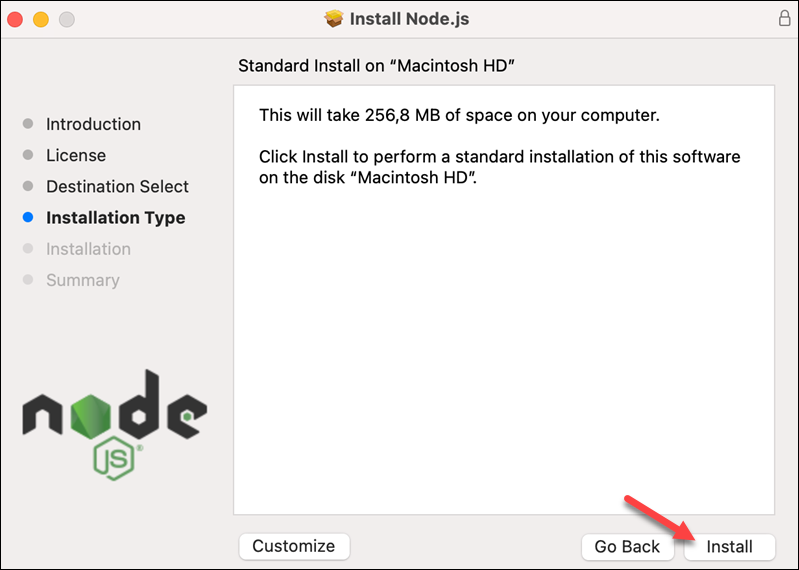
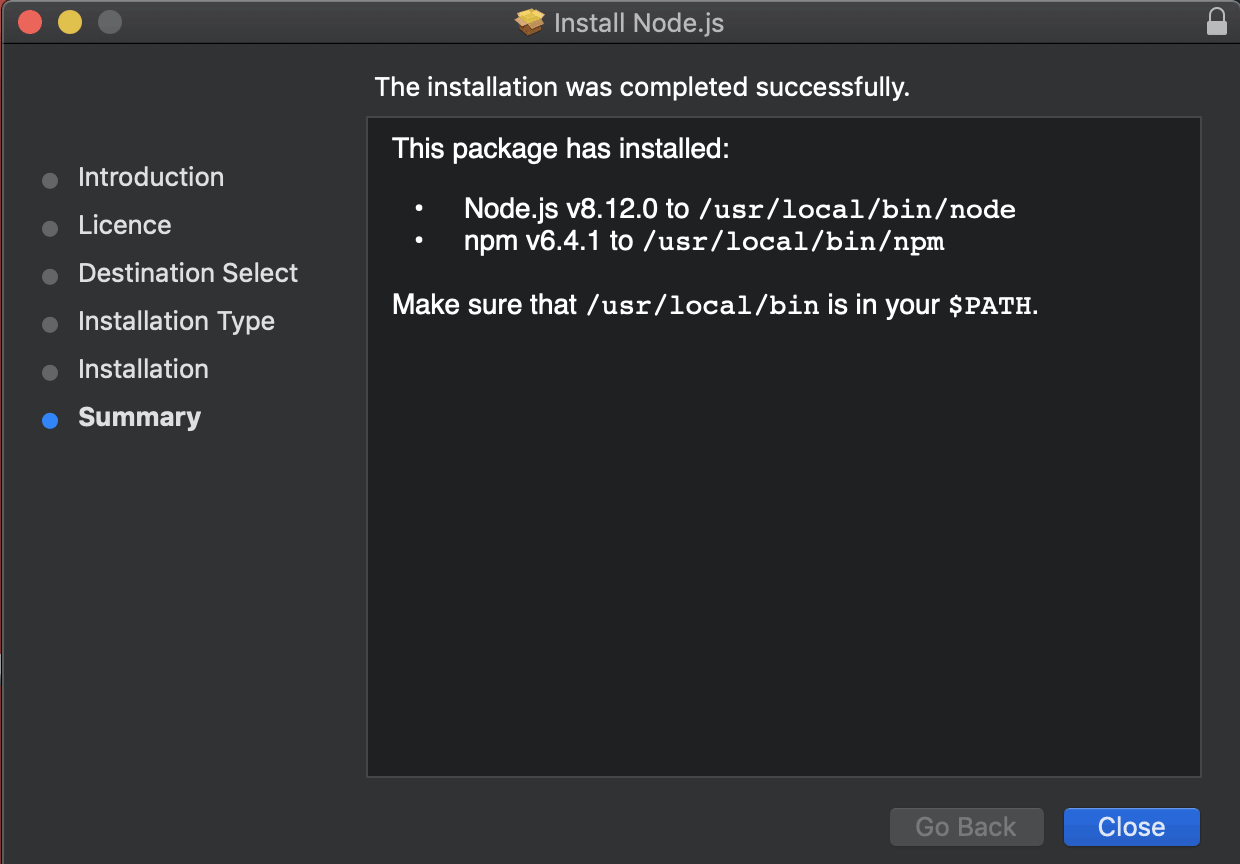
Method 3: Using the Official Installer
The simplest method for users who only need one version of Node.js and don’t require frequent switching is to download the official installer directly from the Node.js website.
Installation Steps using the Official Installer:
-
Visit the Node.js website: Go to https://nodejs.org/.
-
Download the macOS Installer: You’ll see two download options:
- LTS (Long Term Support): Recommended for most users, offering stability.
- Current: Features the latest additions and is suitable for those who want the newest functionalities, but might be less stable.
Click on the recommended LTS version for macOS. This will download a.pkgfile.
-
Run the Installer: Locate the downloaded
.pkgfile in your Downloads folder and double-click it. -
Follow the Installation Wizard: The installer will guide you through the process. You’ll need to agree to the license, select the installation destination (usually the default is fine), and provide your administrator password to authorize the installation.
-
Verify Node.js installation: Once the installation is complete, open your Terminal and check the versions:
node -v
npm -v
This method installs Node.js and npm to your system’s default locations.
Managing Node.js and npm: Essential Commands and Best Practices
Once Node.js is installed, understanding how to manage it and its package manager, npm, is crucial for an efficient development workflow.
Understanding npm (Node Package Manager)
npm is the default package manager for Node.js. It’s used to install, share, and manage code packages (modules) that extend Node.js’s functionality.
package.json: This file is at the heart of every Node.js project. It contains metadata about the project, including its name, version, dependencies, and scripts. When you install packages for a project, they are listed here.- Installing Packages:
- Globally:
npm install -g <package-name>(installs the package for use across your system, often for command-line tools). - Locally:
npm install <package-name>(installs the package within your project’snode_modulesdirectory and adds it to yourpackage.jsondependencies).
- Globally:
- Updating Packages:
npm update(updates all dependencies to their latest allowed versions as specified inpackage.json).npm update <package-name>(updates a specific package).
- Uninstalling Packages:
npm uninstall <package-name>(removes the package from your project).
- Running Scripts: The
scriptssection inpackage.jsonallows you to define custom commands. For example, you might have a script to start your server:"start": "node index.js". You can then run it withnpm start.
Keeping Node.js Up-to-Date
Technology evolves rapidly, and keeping your Node.js installation current is important for security, performance, and access to new features.
- With nvm:
- To see installed versions:
nvm ls - To update to the latest LTS:
nvm install --lts && nvm use --lts - To update to the latest current version:
nvm install node && nvm use node
- To see installed versions:
- With Homebrew:
brew upgrade node
- With Official Installer: You’ll typically need to download and run the latest installer package from the Node.js website.
Troubleshooting Common Installation Issues
While Node.js installation on macOS is usually smooth, here are a few common issues and their solutions:
- Command not found (
nodeornpm): This often means Node.js is not correctly added to your system’s PATH.- For nvm: Ensure you’ve correctly configured your shell profile (e.g.,
.zshrcor.bash_profile) with the nvm sourcing lines provided by the nvm installation script. Close and reopen your Terminal or runsource ~/.zshrc(or your respective profile file). - For Homebrew: Ensure Homebrew’s bin directory is in your PATH. The Homebrew installation script usually handles this.
- For nvm: Ensure you’ve correctly configured your shell profile (e.g.,
- Permissions errors during global npm installs: Sometimes installing packages globally (
npm install -g) can lead to permission issues. Using a version manager like nvm or configuring npm’s global prefix to a directory you own can resolve this. - Conflicting Node.js installations: If you’ve installed Node.js using multiple methods (e.g., official installer and Homebrew), it can lead to conflicts. It’s best to stick to one primary method, ideally a version manager like nvm. If you encounter this, uninstalling all existing Node.js versions and then reinstalling with your preferred method is often the cleanest solution.
Conclusion: Empowering Your Mac Development Journey
Installing Node.js on your Mac is a pivotal step towards unlocking a vast array of development opportunities. Whether you’re a seasoned developer leveraging the power of JavaScript for full-stack applications, a student learning the fundamentals of web development, or an entrepreneur building a new online service, having Node.js readily available on your machine will significantly enhance your productivity and capabilities.
We’ve explored the most effective installation methods, from the highly recommended version managers like nvm, which offer unparalleled flexibility for managing multiple Node.js environments, to the simplicity of Homebrew and the official installer. By choosing the method that best suits your needs, you can ensure a smooth setup process. Furthermore, understanding essential npm commands and best practices for keeping your Node.js environment up-to-date will set you on a path to efficient and effective development.
As a hub for Tech, Brand, and Money, we believe in empowering you with practical knowledge. Mastering tools like Node.js is not just about writing code; it’s about building scalable, performant, and innovative solutions that can shape the future. So, go ahead, install Node.js on your Mac, and start building your next great project. The world of technology awaits!
aViewFromTheCave is a participant in the Amazon Services LLC Associates Program, an affiliate advertising program designed to provide a means for sites to earn advertising fees by advertising and linking to Amazon.com. Amazon, the Amazon logo, AmazonSupply, and the AmazonSupply logo are trademarks of Amazon.com, Inc. or its affiliates. As an Amazon Associate we earn affiliate commissions from qualifying purchases.