In today’s hyper-connected world, a stable and fast internet connection isn’t just a luxury; it’s a fundamental necessity for work, education, entertainment, and staying in touch. At the heart of this connectivity lies a crucial piece of hardware: the network controller, often referred to as a Network Interface Card (NIC) or network adapter. Without a properly installed and configured network controller, your computer would be an island, unable to communicate with the vast ocean of the internet or even other devices on your local network.
Whether you’re building a new PC from scratch, upgrading an older system, or simply troubleshooting connectivity issues, understanding how to install and manage your network controller is an essential skill. This guide will walk you through everything you need to know, from identifying your hardware to installing the necessary drivers, verifying your connection, and even tackling common problems. By the end of this article, you’ll be equipped with the knowledge to ensure your device is always ready to connect to the digital world.
Understanding Your Network Controller
Before diving into the installation process, it’s vital to grasp what a network controller is, its different forms, and how to identify the specific hardware you’re working with. This foundational knowledge will streamline your installation and troubleshooting efforts significantly.
What is a Network Controller?
A network controller, also widely known as a Network Interface Card (NIC), network adapter, or LAN adapter, is a hardware component that allows a computer to connect to a network, whether that’s a local area network (LAN) like your home Wi-Fi or the global internet. It translates digital signals from your computer into signals that can be sent over a network cable (Ethernet) or wirelessly (Wi-Fi), and vice versa. Essentially, it acts as the bridge between your computer’s operating system and the physical network infrastructure.
Every device that connects to a network—be it a desktop PC, laptop, server, or even a smartphone—has some form of a network controller built-in or externally connected. Its proper functioning is paramount for any form of network communication.
Types of Network Controllers
Network controllers primarily come in two major types, though there are variations within each:
-
Ethernet Adapters (Wired): These controllers facilitate connections using physical cables, typically Ethernet cables (RJ-45). They offer high speed, low latency, and a very stable connection, making them ideal for gaming, large file transfers, and environments where reliability is paramount.
- Integrated: Most motherboards come with one or more integrated Ethernet ports, meaning the controller chip is soldered directly onto the motherboard.
- PCIe Expansion Cards: For older systems without integrated Ethernet, or for users requiring additional ports or higher speeds (e.g., 2.5GbE, 10GbE), dedicated Ethernet cards can be installed into a PCI Express (PCIe) slot on the motherboard.
- USB to Ethernet Adapters: Small, external devices that plug into a USB port, useful for laptops without an Ethernet port or for adding an extra wired connection.
-
Wireless Adapters (Wi-Fi): These controllers enable network connectivity without the need for physical cables, using radio waves to communicate with a wireless router or access point. They offer convenience and mobility.
- Integrated: Laptops, tablets, and many modern desktop motherboards feature built-in Wi-Fi modules.
- PCIe Expansion Cards: Desktop PCs can have Wi-Fi functionality added or upgraded by installing a PCIe Wi-Fi card, often combined with Bluetooth capabilities. These usually include external antennas for better signal reception.
- USB Wi-Fi Adapters: Similar to USB Ethernet adapters, these external dongles plug into a USB port, providing an easy way to add Wi-Fi to a desktop or upgrade a laptop’s existing Wi-Fi standard.
Understanding which type of network controller you’re dealing with will dictate the physical installation steps and the kind of drivers you’ll need.
Identifying Your Hardware
Before you can install or update drivers, you need to know exactly which network controller hardware you have. This is especially crucial for aftermarket cards or motherboards where Windows might not automatically install the correct generic drivers.
- For Integrated Controllers (Motherboard): The easiest way to identify these is to check your motherboard’s manufacturer and model number. This information is often printed directly on the motherboard itself or can be found in your system’s BIOS/UEFI settings. Once you have the motherboard model, visit the manufacturer’s website (e.g., ASUS, MSI, Gigabyte, ASRock) and navigate to the support or downloads section for your specific model.
- For PCIe Expansion Cards: Look for the manufacturer and model name printed on the card itself. If it’s not clearly visible, check the packaging or documentation that came with the card.
- For USB Adapters: Again, the manufacturer and model are usually printed on the device itself or its packaging.
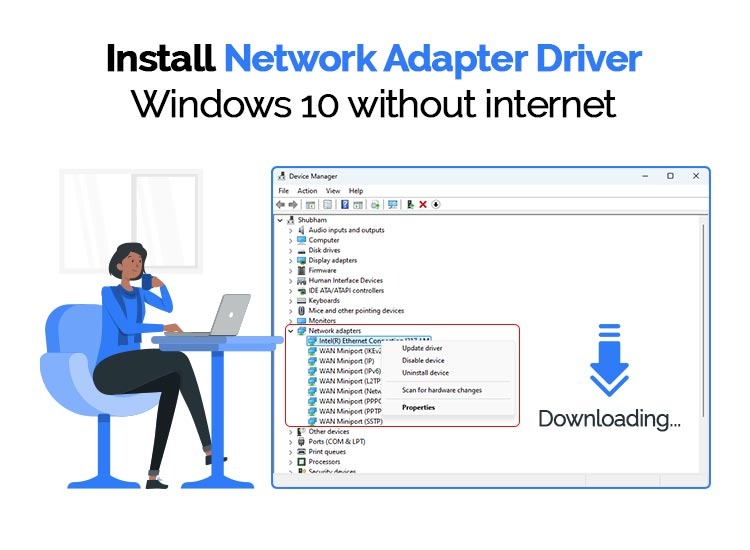
- Using Device Manager (Windows): If your system is somewhat functional, you can often identify unknown devices. Press
Win + Xand select “Device Manager.” Look for “Network adapters.” If drivers are missing, you might see an “Other devices” section with yellow exclamation marks next to “Ethernet Controller” or “Network Controller.” Right-clicking these and checking “Properties” > “Details” tab, then selecting “Hardware Ids” from the dropdown, can reveal vendor and device IDs (VENxxxx&DEVxxxx). A quick search for these IDs online can help identify the hardware. - Using
lspciorlsusb(Linux): In a terminal,lspci -nnk | grep -i netorlsusbcan list your network hardware with vendor/device IDs.
Accurate identification is the first and most critical step towards a successful installation.
Preparing for Installation
Proper preparation can save you a lot of time and frustration during the installation process. This includes gathering the necessary resources, ensuring compatibility, and taking preventative measures.
Gathering Necessary Information and Tools
Before you start, make sure you have the following ready:
- Internet Access (Alternative Device): This is paramount. Since you’re installing a network controller, your primary computer might not have internet access. Use another computer, a smartphone, or tablet to download drivers and access online guides if needed.
- Network Controller Drivers: These are software programs that allow your operating system to communicate with your hardware.
- Motherboard CD/DVD: Many motherboards come with a driver disc. This is a good starting point, though drivers on these discs are often outdated.
- Manufacturer’s Website: Always the best source for the latest drivers. You’ll need the exact model of your motherboard or network card.
- USB Drive: To transfer downloaded drivers from an internet-connected device to the target PC.
- Basic Toolkit: For internal cards, you’ll need a Phillips head screwdriver.
- User Manuals: For your motherboard and/or network card, especially for jumper settings or specific slot requirements.
- Power Cord: Make sure your computer is properly powered.
- Anti-static Wrist Strap (Recommended): To prevent electrostatic discharge (ESD) damage to internal components when handling PCIe cards.
Downloading Drivers (Pre-installation)
Even if your operating system has generic drivers, using the official manufacturer-specific drivers is always recommended for optimal performance and stability.
- Identify Your OS: Know whether you’re running Windows (and which version, e.g., Windows 10, 11), macOS, or a specific Linux distribution. Drivers are operating system-specific.
- Visit Manufacturer’s Website: Go to the support or download section for your motherboard (if integrated) or the specific network card.
- Search for Your Model: Enter the exact model number.
- Locate Network Drivers: Find the section for LAN (Ethernet) or Wi-Fi drivers.
- Download the Latest Version: Always prioritize the latest stable driver version compatible with your operating system. Download it to a USB drive or another accessible medium.
It’s a common rookie mistake to forget to download network drivers before installing an operating system, only to find you have no internet access to download them later! Plan ahead.
Ensuring System Compatibility
While most modern network cards are plug-and-play, a few compatibility checks can prevent headaches:
- PCIe Slot Type: Ensure your PCIe network card matches an available slot on your motherboard (e.g., PCIe x1, x4, x16). A smaller card can fit in a larger slot, but not vice versa.
- Operating System Support: Verify that the drivers you downloaded explicitly support your version of Windows, macOS, or Linux kernel.
- Power Supply: While network cards don’t draw significant power, ensure your PSU is adequate for your overall system, especially if adding multiple components.
- Physical Space: For desktop PCs, make sure there’s enough physical clearance inside the case for the card and any antennas.
Step-by-Step Installation Process
The installation process varies depending on whether you’re adding new hardware to a new build, installing drivers on an existing system, or dealing with external adapters. We’ll cover each scenario in detail.
Scenario 1: New System Build (Hardware Installation)
This applies when you’re physically installing an internal Ethernet or Wi-Fi card into a desktop PC.
- Power Down and Disconnect: Completely shut down your computer and unplug it from the wall socket.
- Open the PC Case: Remove the side panel of your computer case.
- Ground Yourself: Touch a bare metal part of the case to discharge any static electricity. Ideally, wear an anti-static wrist strap.
- Locate an Available PCIe Slot: Identify an empty PCI Express slot on your motherboard that matches the card’s requirements (e.g., a PCIe x1 slot for most network cards).
- Remove Slot Cover: Carefully remove the metal slot cover from the back of the PC case corresponding to the chosen PCIe slot. You might need a screwdriver.
- Insert the Network Card: Align the network card with the PCIe slot and firmly but gently push it straight down until it clicks into place. Ensure it’s fully seated. Do not force it.
- Secure the Card: Use the screw (or tool-less latch) from the case to secure the card to the case’s chassis at the back.
- Attach Antennas (for Wi-Fi cards): If it’s a Wi-Fi card, screw the included antennas onto the connectors at the back of the card.
- Close the PC Case: Replace the side panel and reconnect all cables.
- Power On: Turn on your computer.
Scenario 2: Installing Drivers on an Existing System (Software Installation)
Once the hardware is physically installed (or if it’s an integrated controller), the next step is to install the necessary software drivers.
Windows Operating Systems
Windows often has generic drivers that might allow basic network connectivity, but installing the manufacturer’s specific drivers is always better.
- Boot Up the System: Start your Windows PC.
- Access Device Manager: Press
Win + Xand select “Device Manager.” - Locate the Network Adapter: Look under “Network adapters.” Your new card might appear with a generic name (e.g., “Ethernet Controller”) or a yellow exclamation mark under “Other devices” if drivers are missing.
- Install Drivers from USB:
- Insert the USB drive containing the downloaded drivers.
- Right-click on the identified network adapter (or the “Ethernet Controller” with the yellow mark) and select “Update driver.”
- Choose “Browse my computer for drivers.”
- Click “Browse…” and navigate to the folder on your USB drive where you saved the drivers. Ensure “Include subfolders” is checked.
- Click “Next.” Windows will attempt to find and install the appropriate driver.
- Run Installer Executable (if provided): Some driver packages come as an executable file (
.exe). If so, simply double-click the.exefile on your USB drive and follow the on-screen instructions. This is often the easiest method. - Reboot: After the driver installation is complete, it’s a good practice to restart your computer.
macOS
macOS typically has excellent built-in driver support for common hardware. However, if you’ve installed a third-party PCIe Wi-Fi card or an external USB adapter that isn’t natively supported, you’ll need drivers.
- Download Drivers: Obtain the macOS-compatible drivers from the hardware manufacturer’s website. These often come as a
.dmgfile. - Install the Driver: Double-click the
.dmgfile to mount it, then run the installer package (.pkg) inside. Follow the on-screen instructions. - Check System Information: Go to “Apple Menu” > “About This Mac” > “System Report.” Under “Network,” you should see your newly installed adapter listed.
- Reboot: Restart your Mac after installation.
Linux Distributions

Linux also has robust driver support. Many network controllers (especially Intel, Realtek, Atheros) are supported out-of-the-box by the kernel. For unsupported or very new hardware, you might need to compile drivers or use a pre-compiled kernel module.
- Check for Automatic Recognition: Open a terminal and use
ip a(for wired) oriwconfig(for wireless). Your adapter might already be listed. - Install via Package Manager: If the driver is available in your distribution’s repositories, you can install it using your package manager (e.g.,
sudo apt install firmware-realtekfor Debian/Ubuntu,sudo dnf install iwlwifi-firmwarefor Fedora). - Manual Installation (from source):
- Download the driver source code (usually a
.tar.gzfile) from the manufacturer’s website. - Extract the archive:
tar -xf driver_name.tar.gz - Navigate into the extracted directory:
cd driver_name - Read the
READMEorINSTALLfile for specific build instructions. Typically, it involves:makesudo make installsudo modprobe driver_module_name(to load the module)
- You might need to install build essentials (
sudo apt install build-essentialorsudo dnf groupinstall "Development Tools").
- Download the driver source code (usually a
- Reboot: A reboot might be necessary for the new kernel module to be fully recognized and loaded.
Scenario 3: Installing an External USB Network Adapter
USB adapters are typically the easiest to install, often being “plug-and-play.”
- Download Drivers (if needed): While many are driverless or use generic OS drivers, some require specific drivers, especially for advanced features or newer standards. Download these first using another device.
- Plug in the Adapter: Insert the USB network adapter into an available USB port on your computer.
- Automatic Detection: Windows, macOS, and many Linux distributions will usually detect the new hardware and attempt to install a generic driver automatically. You might see a notification.
- Install Specific Drivers: If no driver is installed, or for optimal performance, run the manufacturer’s installer executable from your USB drive, or follow the “Update driver” steps in Device Manager (Windows) as described above.
- Reboot: A restart is often recommended.
Verifying and Configuring Your Network Controller
Once the physical installation and driver setup are complete, it’s time to confirm everything is working correctly and perform basic configuration.
Checking Device Manager (Windows) or System Information (macOS/Linux)
The first step is to confirm that your operating system recognizes the network controller without errors.
- Windows:
- Open “Device Manager” (
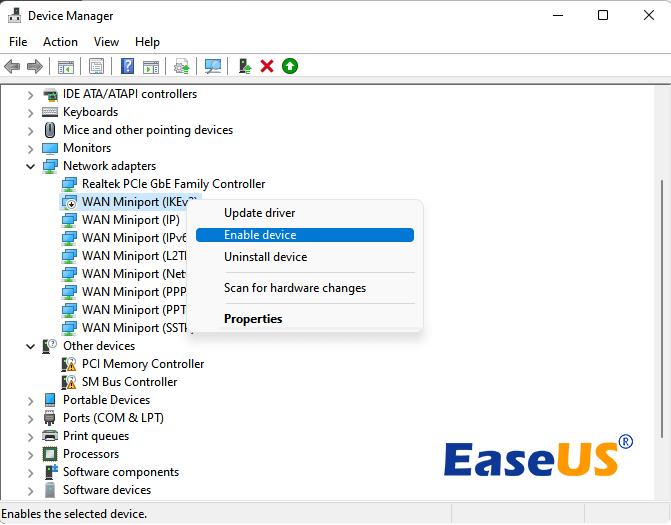
Win + X> “Device Manager”). - Expand “Network adapters.”
- Your network controller should be listed by its proper name (e.g., “Intel(R) Ethernet Controller I219-V” or “Realtek RTL8822CE 802.11ac PCIe Adapter”) without any yellow exclamation marks or red “X” icons. An exclamation mark indicates a driver issue, and a red “X” usually means the device is disabled.
- Double-click on the adapter and check the “Device status” under the “General” tab; it should say “This device is working properly.”
- Open “Device Manager” (
- macOS:
- Go to “Apple Menu” > “About This Mac” > “System Report.”
- Under the “Network” section in the sidebar, you should see your network adapter listed, along with its status and details.
- Linux:
- Open a terminal.
- Type
ip aand press Enter. This will list all network interfaces, including your new one (e.g.,eth0,wlan0,enpXsY). - Type
nmcli deviceorifconfig -a(ififconfigis installed) to see device status.
Connecting to a Network
With the driver installed, you can now attempt to connect.
- Wired (Ethernet):
- Plug an Ethernet cable from your router/modem into the Ethernet port on your network card.
- Windows/macOS/Linux should automatically detect the connection and attempt to obtain an IP address via DHCP. You should see a network icon indicating connectivity.
- Wireless (Wi-Fi):
- In Windows, click the network icon in the system tray. A list of available Wi-Fi networks will appear.
- In macOS, click the Wi-Fi icon in the menu bar.
- In Linux, use your desktop environment’s network manager (e.g., GNOME NetworkManager, KDE Plasma nm-applet).
- Select your desired Wi-Fi network (SSID), enter the password (security key) if prompted, and click “Connect.”
- You should now be connected to the wireless network.
Basic Network Settings
Most home users can rely on default network settings, but you might need to configure some basics.
- IP Address: By default, most networks use DHCP (Dynamic Host Configuration Protocol) to automatically assign IP addresses. You can verify this in Windows via “Network and Sharing Center” > “Change adapter settings” > right-click your adapter > “Properties” > “Internet Protocol Version 4 (TCP/IPv4)” > “Properties.” Ensure “Obtain an IP address automatically” and “Obtain DNS server address automatically” are selected. Similar settings exist in macOS and Linux.
- DNS Servers: If you experience slow browsing or cannot access certain websites, you might consider changing to public DNS servers like Google DNS (8.8.8.8, 8.8.4.4) or Cloudflare DNS (1.1.1.1, 1.0.0.1).
- Network Profiles: Operating systems often create network profiles. For Wi-Fi, you might want to tell your OS to connect automatically to your home network. For wired connections, ensure the network is set to “Private” (Windows) for better security if it’s a home network.
Troubleshooting Common Issues
Even with careful installation, problems can arise. Here are some common issues and their solutions.
“No Internet Access” Errors
This is perhaps the most common issue after network controller installation.
- Check Cables: Ensure all Ethernet cables are securely plugged in at both ends (computer and router/modem).
- Router/Modem Status: Check your router and modem. Are they powered on? Are their indicator lights showing normal operation (e.g., internet light solid, not blinking red)? Try power cycling them (unplug for 30 seconds, then plug back in).
- IP Address Conflict/No IP:
- In Windows, open Command Prompt as administrator and type
ipconfig /release, thenipconfig /renew. - Check your router’s DHCP server settings.
- In Windows, open Command Prompt as administrator and type
- DNS Issues: Try pinging an IP address directly (e.g.,
ping 8.8.8.8). If that works but browsing doesn’t, it’s likely a DNS problem. Change your DNS servers as mentioned above. - Firewall/Antivirus: Temporarily disable your firewall or antivirus to see if they are blocking the connection. If so, configure them to allow network access.
Driver Conflicts and Updates
Incorrect or outdated drivers are a frequent source of network problems.
- Driver Not Installed: As discussed, ensure drivers are installed and the device appears correctly in Device Manager (Windows) or System Information (macOS/Linux).
- Outdated Drivers: Always try to get the latest drivers from the manufacturer’s website. Outdated drivers can cause performance issues or instability.
- Corrupted Drivers: If you suspect a driver is corrupted, uninstall it via Device Manager (checking “Delete the driver software for this device” if available), then reinstall a fresh copy.
- Driver Rollback: If a recent driver update caused issues, you can often “Roll Back Driver” in Device Manager (under the driver’s Properties > Driver tab) to a previous version.
Hardware Malfunctions
Sometimes, the problem isn’t software but the hardware itself.
- Network Card Failure: If the card isn’t detected at all, or consistently fails to connect, it might be faulty. Test it in another PC if possible, or try a different PCIe slot.
- Port Issues: Try a different Ethernet port on your router. If using a USB adapter, try a different USB port on your computer.
- Cable Damage: A damaged Ethernet cable can cause intermittent connectivity or no connection. Try a different cable.
Network Discovery Problems
You might be connected to the internet, but can’t see other devices on your local network (e.g., network drives, printers).
- Network Profile (Windows): Ensure your network is set to “Private Network” in Windows. Go to “Settings” > “Network & Internet” > “Status” > “Change connection properties.”
- Network Discovery (Windows): Check “Network and Sharing Center” > “Change advanced sharing settings.” Make sure “Turn on network discovery” and “Turn on file and printer sharing” are enabled for your current profile.
- Firewall: Ensure your firewall isn’t blocking network discovery protocols (e.g., UPnP, SMB).
Advanced Tips & Maintenance
Beyond basic installation and troubleshooting, a few practices can ensure your network controller performs optimally over the long term.
Keeping Drivers Up-to-Date
Regularly updating your network drivers is crucial for several reasons:
- Performance Improvements: Manufacturers often release driver updates that enhance speed, reduce latency, and improve overall throughput.
- Bug Fixes: New drivers can resolve compatibility issues, connectivity drops, and other bugs.
- Security Patches: Driver updates sometimes include security fixes that protect against vulnerabilities that could be exploited by malicious actors.
- New Features: Support for new network standards (e.g., Wi-Fi 6E features) or operating system versions often comes via driver updates.
Make it a habit to check your motherboard or network card manufacturer’s website for new drivers every few months. Some utilities (like Intel Driver & Support Assistant) can also help automate this for specific hardware.
Optimizing Network Performance
A few settings can tweak your network controller’s performance:
- Driver Settings (Advanced Tab): In Device Manager (Windows), right-click your network adapter, select “Properties,” then go to the “Advanced” tab. Here, you’ll find various settings depending on your adapter, such as:
- Jumbo Frames: Can improve performance for very large data transfers on a LAN, but both ends must support it.
- Speed & Duplex: Usually “Auto Negotiation” is best, but if you have connection issues with specific older hardware, you might manually set it (e.g., “1.0 Gbps Full Duplex”).
- Power Management: For laptops, ensure the adapter isn’t set to aggressively save power, which can lead to dropped connections.
- Quality of Service (QoS): Some routers and network adapters support QoS settings, allowing you to prioritize certain types of traffic (e.g., gaming, video streaming) over others, ensuring a smoother experience for critical applications.
- Wi-Fi Channel Optimization: For wireless networks, using a less congested Wi-Fi channel can significantly improve speed and reliability. Tools like Wi-Fi Analyzer apps can help identify optimal channels.
Security Considerations
Your network controller is the gateway to your system, making its security paramount.
- Strong Wi-Fi Passwords: Always use WPA2 or WPA3 encryption with a strong, unique password for your wireless network.
- Firewall: Keep your operating system’s firewall enabled and properly configured. This prevents unauthorized access to your computer from the network.
- Router Security: Your router itself has a crucial role. Change its default administrator password, keep its firmware updated, and consider disabling features like WPS if not needed, as they can pose security risks.
- VPN Usage: For sensitive activities or when using public Wi-Fi, a Virtual Private Network (VPN) encrypts your internet traffic, adding an extra layer of security and privacy.
By following this comprehensive guide, you should be well-equipped to install, configure, and troubleshoot your network controller, ensuring a reliable and efficient connection to the digital world. A properly functioning network controller is the bedrock of modern computing, enabling everything from seamless online collaboration to immersive entertainment.
aViewFromTheCave is a participant in the Amazon Services LLC Associates Program, an affiliate advertising program designed to provide a means for sites to earn advertising fees by advertising and linking to Amazon.com. Amazon, the Amazon logo, AmazonSupply, and the AmazonSupply logo are trademarks of Amazon.com, Inc. or its affiliates. As an Amazon Associate we earn affiliate commissions from qualifying purchases.