
Grand Theft Auto V, or GTA 5, has long transcended its status as merely a game to become a cultural phenomenon. Since its monumental launch, Rockstar Games’ sprawling rendition of Los Santos and Blaine County has captivated millions with its gripping narrative, satirical wit, and an open world brimming with endless possibilities. Yet, for a significant and passionate segment of its player base, the true, enduring magic of GTA 5 unfolds beyond its vanilla offerings: within the vibrant and ever-evolving realm of user-created modifications, more commonly known as mods.
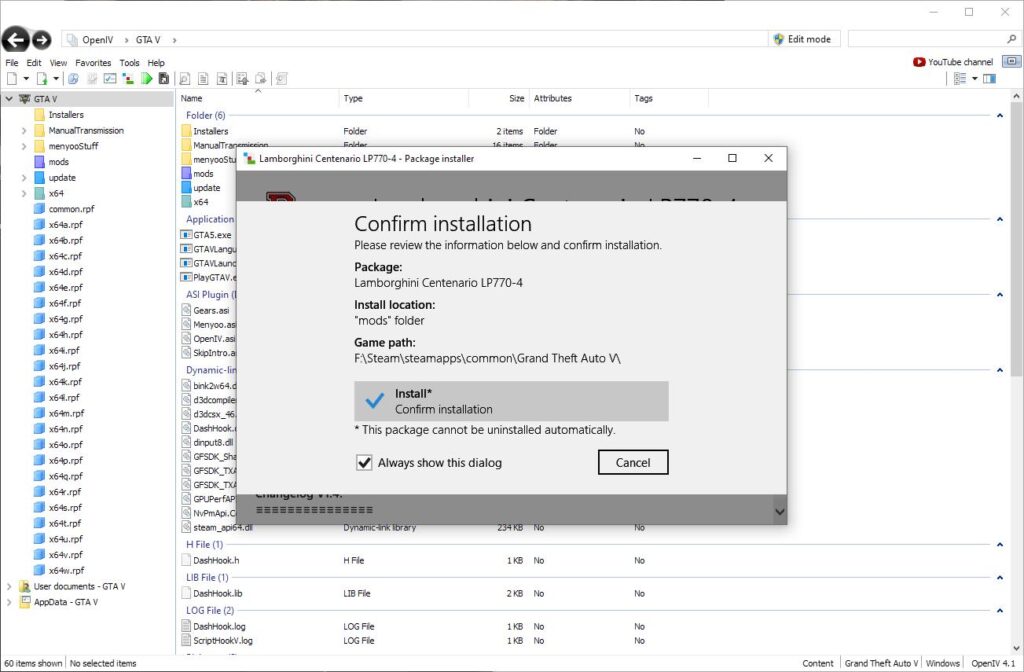
Mods, short for modifications, are custom content developed by the community that can profoundly alter or enhance nearly every aspect of the game. Imagine cruising through Los Santos in hyper-realistic, real-world vehicles, witnessing a complete graphical overhaul that pushes visual fidelity to photorealistic levels, or experiencing entirely new gameplay mechanics that transform the very essence of the game. From novel missions and weapons to innovative character models and expansive map additions, mods inject an unparalleled degree of customization and extend the game’s longevity far beyond its original design. They elevate GTA 5 from an already exceptional title to a truly extraordinary, personalized digital experience, showcasing the remarkable power of community-driven innovation within the technology landscape.
However, the journey into GTA 5 modding isn’t always a simple, plug-and-play affair. Unlike many contemporary titles that feature built-in mod support or user-friendly workshop integrations, GTA 5 requires a more hands-on, technical approach. This guide is meticulously crafted to demystify the modding process, providing a comprehensive, step-by-step tutorial designed to empower both novice users taking their first dive and experienced enthusiasts looking to deepen their understanding of GTA 5’s intricate modding ecosystem. We will navigate through essential preparatory steps, introduce you to the indispensable tools, walk you through various installation methods, and equip you with troubleshooting strategies to ensure you can safely and effectively enhance your GTA 5 experience. By the end, you’ll not only have new content but also a clearer understanding of the underlying digital architecture that makes such modifications possible.
A Crucial Disclaimer for Aspiring Modders: While modding offers incredible creative freedom, it comes with inherent risks that every user must acknowledge. Always, without exception, back up your core game files before initiating any mod installations. Certain mods may introduce instability, lead to game crashes, or, in rare cases, corrupt your save files. Furthermore, it is paramount to understand that using mods in Grand Theft Auto Online is strictly prohibited by Rockstar Games’ Terms of Service and will almost certainly result in severe consequences, including permanent account bans. This guide is exclusively intended for enhancing the single-player experience of GTA 5. Proceed with caution and at your own risk, ensuring your digital security and game integrity remain paramount.
Laying the Foundation: Essential Preparations for GTA 5 Modding
Before you embark on the exciting journey of transforming your GTA 5 experience, a few critical preparatory steps are necessary. These foundational actions will not only safeguard your game but also streamline the modding process, ensuring a smoother and more secure environment for experimentation. Think of this as establishing a robust technological framework for your customization efforts.
The Golden Rule: Back Up Your Game Files
This step is, without a doubt, the single most important piece of advice in the entire modding process. Modifying game files inherently carries a risk of unintended consequences, from minor glitches to complete game instability.
- How to Backup: Locate your GTA 5 installation directory. This is typically found within your Steam, Epic Games Launcher, or Rockstar Games Launcher folders. Once found, simply copy the entire “Grand Theft Auto V” folder to a safe, easily accessible location on your hard drive. Consider an external drive or a dedicated “GTA 5 Backup” folder on your main drive.
- Why It’s Paramount: This full backup serves as your ultimate safety net. Should any mod cause irreversible issues, or if you simply wish to revert to an unmodded version of the game, you can quickly restore your original files without the need for a lengthy re-download or a complete reinstallation. It’s a fundamental principle of digital security and system administration applied to gaming.
Understanding the Landscape: Risks and Responsibilities
Beyond the technical steps, a clear understanding of the broader context of modding is crucial for a responsible and enjoyable experience.
- Single-Player Focus: Reiterate that all discussions and instructions in this guide pertain exclusively to the single-player narrative and sandbox mode of GTA 5. The online component, GTA Online, operates on a different set of rules designed to maintain fair play, and modding it will lead to punitive action. Respecting these boundaries is key to avoiding account penalties.
- Mod Stability: Not all mods are created equal. Some are meticulously crafted and extensively tested, while others might be experimental or quickly developed. Be prepared for potential instability, crashes, or minor bugs, especially when combining multiple mods. Part of the modding experience involves troubleshooting and learning to identify conflicting elements.
Assembling Your Toolkit: Indispensable Software
To effectively install and manage GTA 5 mods, you’ll need a suite of specialized software. These tools act as the technical backbone, allowing you to interact with the game’s core files and integrate new content. Ensure you download these from reputable sources, such as official modding websites (e.g., GTA5-Mods.com, Nexus Mods) or their direct developer links, to mitigate security risks.
- Script Hook V: This is the absolute cornerstone for the vast majority of GTA 5 script-based mods. Script Hook V acts as an API (Application Programming Interface), injecting itself into the game’s process to allow custom scripts (typically
.asifiles) to run within the game environment. Without it, most complex gameplay modifications simply cannot function. It bridges the gap between the game’s engine and external code. - Community Script Hook V .NET: Building upon Script Hook V, this extension provides support for mods written in .NET programming languages (like C# or VB.NET). Many popular and feature-rich mods leverage the .NET framework, making this tool an essential companion for expanding your mod library. It broadens the types of custom scripts the game can interpret and execute.
- OpenIV: Often hailed as the “Swiss Army knife” of GTA 5 modding, OpenIV is an incredibly powerful multi-purpose editor and archive manager. GTA 5 stores most of its assets (textures, models, audio, game logic) within compressed
.rpfarchives. OpenIV allows you to open, view, extract, and crucially, modify these.rpffiles. It is indispensable for installing graphical overhauls, custom vehicles, new character models, and virtually any mod that replaces or adds game assets directly into the game’s file structure. Its robust features enable direct interaction with the game’s core data. - NativeUI: While not a standalone modding tool in the same vein as Script Hook V or OpenIV, NativeUI is a widely used user interface library that many script mods depend on. It provides a standardized framework for creating in-game menus, options, and interactive elements. If a mod requires an in-game menu, there’s a high chance it utilizes NativeUI, making its prior installation a common prerequisite.
- Text Editor (Recommended): While not strictly required for every mod, a good text editor like Notepad++ (free and open-source) is highly recommended. You’ll often need to edit
.xmlor.iniconfiguration files for certain mods, and a capable text editor provides syntax highlighting and other features that make these edits far easier and less error-prone than standard Notepad.
Having these tools downloaded and ready is the first major step in confidently navigating the GTA 5 modding landscape.
Building Your Modding Hub: Setting Up the Core Environment
With your preparations complete and your tools assembled, the next phase involves installing these foundational utilities into your GTA 5 directory. This establishes the necessary infrastructure for all subsequent mod installations.
Integrating Script Hooks
These are the first tools to install, as they enable the very execution of custom scripts within GTA 5.
-
Install Script Hook V:
- Once you’ve downloaded the Script Hook V archive, extract its contents to a temporary folder.
- Inside the extracted folder, you’ll typically find several files. The two crucial ones are
ScriptHookV.dllanddinput8.dll. - Copy only
ScriptHookV.dllanddinput8.dllinto your main GTA 5 installation directory. This is the folder containingGTA5.exe. - Important Note: You might also see
NativeTrainer.asiin the archive. This is a basic in-game trainer provided by the Script Hook V developer. If you don’t specifically want this trainer, do NOT copyNativeTrainer.asito your game directory. You will likely use more advanced trainers later that offer greater functionality. - Upon launching the game, Script Hook V will inject itself, enabling
.asiscript functionality.
-
Install Community Script Hook V .NET:
- Extract the downloaded Community Script Hook V .NET archive.
- Copy the core files – typically
ScriptHookV.NET.dll,ScriptHookV.NET.asi, andScriptHookV.NET.xml– into your main GTA 5 directory. - Similar to Script Hook V, this provides the necessary framework for .NET-based mods to run.
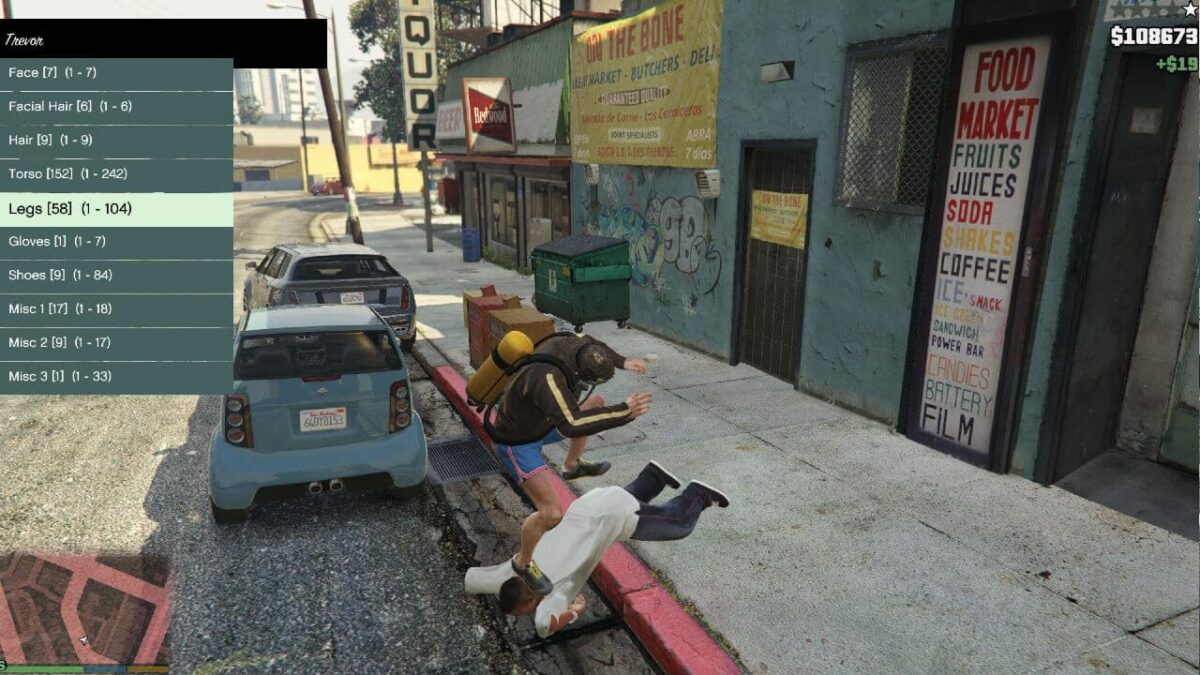
Mastering OpenIV: The Gateway to Game Files
OpenIV is where most of your asset-based modding will happen, making its proper setup critical. It requires a slightly more interactive installation process.
- Run the OpenIV Setup Wizard: Execute the OpenIV installer you downloaded. Follow the on-screen prompts.
- Point to Your GTA 5 Directory: During the installation, OpenIV will ask you to specify the location of your GTA 5 main installation folder. Carefully browse and select the correct folder (the one containing
GTA5.exe). This step allows OpenIV to correctly link to your game files. - Install ASI Loader and OpenIV.asi:
- Once OpenIV is installed and you launch it for the first time, it will likely prompt you to install two crucial components: “ASI Loader” and “OpenIV.asi.” It is absolutely essential that you click “Install” for both of these.
- ASI Loader: This component is similar to Script Hook V in concept, but specifically for mods that rely on OpenIV to load their
.asifiles, facilitating the loading of custom assets and modifications. - OpenIV.asi: This file is OpenIV’s own plugin that allows it to modify the game’s internal file structure and enable the “mods” folder system (explained below).
- ASI Loader: This component is similar to Script Hook V in concept, but specifically for mods that rely on OpenIV to load their
- Without these two components, OpenIV cannot function correctly, and many of its advanced features will be inaccessible.
- Once OpenIV is installed and you launch it for the first time, it will likely prompt you to install two crucial components: “ASI Loader” and “OpenIV.asi.” It is absolutely essential that you click “Install” for both of these.
- Enable “Edit Mode”:
- After the initial setup, you’ll see the OpenIV interface. When you intend to make any changes to the game’s files (adding, replacing, or deleting), you must enable “Edit Mode.”
- This is typically a prominent button in the OpenIV toolbar (often labeled “Edit Mode” or indicated by a pencil icon). Click it. OpenIV will warn you about modifying original game files, which brings us to the next, vital step.
- Create a “mods” Folder (The Best Practice for Digital Hygiene):
- This is a cornerstone of safe and organized GTA 5 modding. Within your main GTA 5 installation directory, create a new folder named exactly “mods” (all lowercase).
- Why this is crucial: When you modify game files using OpenIV, particularly
.rpfarchives, OpenIV will prompt you to copy the original.rpffiles into this “mods” folder. Always agree to this. By doing so, OpenIV creates a duplicate of the original game files within your “mods” folder and then applies your modifications to those copies. Your original game files remain untouched. - This strategy offers significant advantages:
- Safety: Your core game files are preserved, making it easy to revert or uninstall mods by simply deleting content from the “mods” folder.
- Updates: When Rockstar releases a game update, it often overwrites modified original files. By using the “mods” folder, you minimize this risk, as your changes are isolated.
- Organization: It provides a clean, segregated environment for all your custom content.
By diligently following these setup steps, you establish a robust and secure modding environment, reflecting sound digital management practices.
Hands-On Modding: Installing Different Mod Types
With your core modding environment configured, you’re now ready to start adding custom content. Mods come in various forms, each with its own installation method. We’ll cover the two most common categories.
Script Mods: Enhancing Gameplay with Custom Logic
Script mods typically add new features, change gameplay mechanics, or introduce custom trainers and menus. They leverage Script Hook V and Script Hook V .NET.
- Download the Mod: Find a script mod you’d like to install from a reputable modding website (e.g., GTA5-Mods.com).
- Read Instructions Meticulously: Always, always read the mod’s specific installation instructions. While general guidelines exist, individual mods can have unique requirements, dependencies (like NativeUI), or specific folder structures. This is critical for successful implementation.
- Installation:
.asiFiles: If the mod is a single.asifile (e.g., Simple Trainer, a new ability mod), copy it directly into your main GTA 5 installation directory. Script Hook V will automatically detect and load it when the game starts..luaFiles: Some mods are written in LUA. For these, you might need a “LUA Plugin for Script Hook V” (a separate tool you’d install similarly to Script Hook V). The.luafiles would then typically go into ascriptsfolder within your main GTA 5 directory.- Script Folders: Many complex script mods come packaged as a folder (e.g., a “scripts” folder containing subfolders and files, or a specific mod’s folder name). In these cases, copy the contents of the mod’s folder into your main GTA 5 directory, merging if prompted. For example, if the mod includes a “scripts” folder, copy its contents into your game’s “scripts” folder. If your game directory doesn’t have a “scripts” folder yet, simply copy the mod’s “scripts” folder directly into your game’s root.
Once installed, these mods should activate automatically when you launch GTA 5, leveraging the Script Hook framework you set up earlier.
Add-On Content: Vehicles, Peds, and Beyond
Add-on mods are a superior method for integrating new vehicles, character models (peds), maps, or other game assets without overwriting original game files. This approach is highly recommended for maintaining game integrity. It heavily relies on OpenIV and the “mods” folder strategy.
- Download the Mod: Obtain your desired add-on vehicle, ped, or map mod. Look for mods explicitly labeled “add-on” in their descriptions, as these come with the necessary file structure.
- OpenIV Preparation:
- Launch OpenIV.
- Ensure “Edit Mode” is enabled (the button in the toolbar). This is non-negotiable for making changes.
- Navigate within OpenIV to the path:
updateupdate.rpfcommondata. - Inside this folder, locate
dlclist.xml. This file tells the game which additional content packs to load. - Right-click
dlclist.xmland choose “Extract.” Save it to your desktop or an easily accessible temporary folder. This creates an editable copy.
- Add Entry to dlclist.xml:
- Open the extracted
dlclist.xmlwith a text editor (like Notepad++). - You’ll see a series of
<Item>tags within<Paths>...</Paths>. You need to add a new line within the<Paths>section, typically looking like this:<Item>dlcpacks:YOUR_MOD_FOLDER_NAME</Item>. - Replace
YOUR_MOD_FOLDER_NAMEwith the exact folder name specified by the mod author in the mod’s instructions (e.g.,supercar01,newped1). This name will correspond to the folder you’ll create later. - Ensure the new line is placed above the closing
</Paths>tag. - Save the
dlclist.xmlfile.
- Open the extracted
- Import dlclist.xml back into OpenIV:
- Drag and drop the modified
dlclist.xmlfile from your desktop back into theupdateupdate.rpfcommondatafolder in OpenIV. OpenIV will integrate the changes.
- Drag and drop the modified
- Create Mod Folder and Import Files:
- Within OpenIV, navigate to
updatex64dlcpacks. - Right-click in the empty space within this folder and choose “New folder.” Name this new folder exactly the
YOUR_MOD_FOLDER_NAMEyou used indlclist.xml. - Inside this newly created folder, create another new folder named
dlc.rpf. Thisdlc.rpfis critical, as it’s where the mod’s actual assets reside. - Now, open the downloaded mod’s archive. It will typically contain a folder structure like
YOUR_MOD_FOLDER_NAMEdlc.rpfx64levelsgta5vehicles.rpfor similar. Your goal is to copy the contents from the mod’sdlc.rpffolder into thedlc.rpfyou just created within OpenIV. Essentially, you are recreating the mod’s internal file structure within yourmodsfolder via OpenIV. - For instance, if the mod archive has
modnamedlc.rpfx64, you would drag thex64folder from the mod’sdlc.rpfinto thedlc.rpfyou created in OpenIV.
- Within OpenIV, navigate to
- Spawn the Mod: Most vehicle or ped add-on mods come with a “spawn name” or “model name” provided in their instructions. Launch GTA 5, and use an in-game trainer (like Simple Trainer, Menyoo, or Enhanced Native Trainer) to spawn the vehicle or ped using this specific name.
This add-on method is a testament to the robust, yet flexible, architecture of GTA 5’s file system, allowing for extensive additions without directly overwriting core game assets.
Maintaining a Healthy Modding Ecosystem: Troubleshooting & Best Practices
Even with careful installation, issues can arise. Understanding how to diagnose and resolve common problems, coupled with adopting best practices, will ensure a more stable and enjoyable modding experience.
Decoding Common Issues
- Game Crashes on Startup:
- Outdated Script Hook V/OpenIV: This is by far the most frequent culprit. Rockstar Games occasionally updates GTA 5, which often breaks compatibility with Script Hook V and OpenIV. The solution is to wait patiently for the respective developers to release updated versions of their tools. Always check their official sources for the latest updates.
- Conflicting Mods: If you’ve installed multiple mods recently, two or more might be trying to modify the same game file or script in incompatible ways. To diagnose, try disabling recently installed mods one by one until the crash stops.
- Corrupt Game Files: If all else fails, your game files might be corrupted. Use your backup to restore the game, or utilize the “Verify Integrity of Game Files” feature via your Steam, Epic Games, or Rockstar Launcher client.
- Mods Not Appearing/Working:
- Check Installation Path: Double-check that all mod files (especially
.asifiles, script folders, and.rpffiles) are placed in the exact correct directories as specified in the mod’s instructions and this guide. A misplaced file is a common oversight. - OpenIV “Edit Mode”: If you used OpenIV, did you remember to enable “Edit Mode” before making changes? Changes made outside of edit mode are not saved.
- ASI Loader/OpenIV.asi: Confirm these critical components were successfully installed via OpenIV’s prompt.
- Incorrect
dlclist.xmlEntry: For add-on mods, re-examine yourdlclist.xmlentry. Spelling errors, incorrect folder names, or misplaced lines are common pitfalls. Ensure the<Item>tag points to the exact folder name. - Missing Dependencies: Many mods rely on other specific mods (e.g., NativeUI, specific script frameworks). Read the mod description carefully to identify and install any prerequisites.
- Check Installation Path: Double-check that all mod files (especially
- Performance Issues (Stuttering, Low FPS):
- Too Many Mods: Overloading the game with an excessive number of high-resolution textures, complex scripts, or demanding add-ons can strain your system. GTA 5, while optimized, has its limits.
- Demanding Graphical Mods: ENBSeries presets and extensive texture packs are beautiful but extremely resource-intensive. Experiment with different settings within these mods or consider removing the most demanding ones if your hardware struggles.
- Hardware Limitations: Ensure your PC meets or exceeds the recommended specifications for GTA 5, especially if you’re adding extensive visual enhancements.
Cultivating Smart Modding Habits
Developing disciplined habits will significantly improve your long-term modding success and enjoyment.
- Start Small: Resist the urge to install dozens of mods simultaneously. Begin with a few essential tools and one simple script mod or vehicle mod. Confirm it works before adding more. This makes troubleshooting infinitely easier.
- Read Everything: The descriptions, README files, and forum discussions associated with a mod are invaluable. They often contain specific installation instructions, known issues, compatibility notes, and even tips for optimal performance. Ignoring them is a recipe for frustration.
- Stay Updated: Regularly check for updates for your essential modding tools (Script Hook V, OpenIV) and your favorite mods. Developers frequently release compatibility patches or new features.
- Backup Regularly: Beyond your initial game backup, consider periodically backing up your
modsfolder and important configuration files, especially before major game updates or when experimenting with complex new mods. This is a core principle of robust digital asset management. - Join Modding Communities: Websites like GTA5-Mods.com, Nexus Mods, and Reddit communities (e.g., r/GrandTheftAutoV_PC) are fantastic resources. They offer a wealth of knowledge, new mods, troubleshooting advice, and a community of fellow enthusiasts willing to help.
- Consider Mod Managers (Advanced): While this guide focuses on manual installation for clarity, experienced modders might explore tools like Lenny’s Mod Loader (LML). These managers can streamline the process of installing, enabling, and disabling multiple mods, particularly for specific categories like vehicle or texture replacements, offering a more advanced layer of technical organization.
The Future of GTA 5 Modding: An Enduring Legacy
Even years after its initial release, Grand Theft Auto V’s modding scene remains astonishingly vibrant and innovative. The sheer dedication of the community continues to push the boundaries of what’s possible, from creating intricate role-playing frameworks (like FiveM) to developing full-scale conversion mods that fundamentally alter the game’s setting and mechanics. This persistent ingenuity ensures that Los Santos will remain a dynamic playground for creativity and technical exploration for the foreseeable future.
For players, modding offers far more than just new content; it provides a powerful avenue to truly personalize and make the game their own. It stands as a profound testament to the power of user-generated content and the enduring appeal of a meticulously crafted open world. By diligently following this guide, you’re not merely installing files; you’re unlocking a new dimension of gameplay, extending the practical life and entertainment value of an already legendary title, and perhaps even igniting your own passion for understanding game architecture and digital customization. This journey into GTA 5 modding is a compelling blend of gaming and technological exploration, offering limitless possibilities for those willing to dive in.
aViewFromTheCave is a participant in the Amazon Services LLC Associates Program, an affiliate advertising program designed to provide a means for sites to earn advertising fees by advertising and linking to Amazon.com. Amazon, the Amazon logo, AmazonSupply, and the AmazonSupply logo are trademarks of Amazon.com, Inc. or its affiliates. As an Amazon Associate we earn affiliate commissions from qualifying purchases.