
The digital world we inhabit is fundamentally built upon robust and versatile programming languages, and among the giants, Java stands as a towering figure. From powering enterprise-level applications and Android mobile development to scientific computing and cloud services, Java’s influence is pervasive. For anyone aspiring to delve into software development, particularly within these vast ecosystems, installing the Java Development Kit (JDK) is not merely a recommendation—it’s an essential first step. This comprehensive tutorial will guide you through the process, ensuring you have the foundational tools to embark on your Java programming journey, aligning perfectly with our mission to provide practical “Tech” insights and “Tutorials” for enhanced “Productivity” in the digital realm.

Understanding the Java Development Kit (JDK): A Prerequisite for Developers
Before we dive into the installation process, it’s crucial to understand what the Java Development Kit (JDK) is and why it’s indispensable for developers. Often, the terms “Java,” “JDK,” “JRE,” and “JVM” are used interchangeably, leading to confusion. Let’s demystify them.
- Java Virtual Machine (JVM): This is the core component responsible for executing Java bytecode. It’s the engine that runs your compiled Java programs. When you hear “write once, run anywhere,” the JVM is the technology that makes it possible, translating platform-independent bytecode into native machine instructions.
- Java Runtime Environment (JRE): The JRE is a package that includes the JVM and the necessary libraries and files for running Java applications. If you only need to run existing Java programs (like a Java-based desktop application or a browser plugin), the JRE is sufficient. It does not contain development tools.
- Java Development Kit (JDK): This is the complete package for Java developers. It includes everything in the JRE (the JVM and runtime libraries) plus development tools such as the compiler (
javac), debugger (jdb), archiver (jar), and documentation generator (javadoc). In essence, if you want to write, compile, debug, and run Java applications, you need the JDK.
For any aspiring programmer, understanding the distinction is vital. The JDK is your toolkit for creating software, while the JRE is for end-users who only need to execute that software. As a developer, the JDK is your gateway to crafting innovative applications, making it a cornerstone of your digital security and productivity toolkit, directly contributing to your ability to leverage technology trends.
Choosing Your JDK Distribution and Preparing for Installation
The Java landscape has evolved, offering various JDK distributions. Making an informed choice and preparing your system are critical initial steps.
Oracle JDK vs. OpenJDK: Making the Right Choice
Historically, Oracle JDK was the standard, freely available option. However, Oracle changed its licensing terms, making commercial use of newer Oracle JDK versions subject to a subscription. This shift significantly boosted the popularity of OpenJDK, the open-source reference implementation of Java.
- Oracle JDK: Offers excellent performance and reliability, often with longer-term support. While it requires a commercial license for enterprise use of newer versions, older versions might still be free. Oracle also provides comprehensive documentation and support.
- OpenJDK: This is the free and open-source implementation, maintained by Oracle and the Java community. It’s fully compatible with Oracle JDK and widely used in development and production environments. Several vendors provide builds of OpenJDK, such as Adoptium (formerly AdoptOpenJDK), Amazon Corretto, Azul Zulu, and Microsoft Build of OpenJDK. These builds are often preferred by developers and organizations seeking a cost-effective and community-driven solution, aligning with open-source trends in modern tech.
For most individual developers and small to medium-sized projects, an OpenJDK distribution from a reputable vendor like Adoptium is an excellent choice. It offers the same functionality without licensing complexities, making it a pragmatic decision for maximizing productivity without incurring unnecessary costs.
System Requirements and Pre-Installation Checks
Before downloading, ensure your system meets the basic requirements and is prepared for installation:
- Operating System: Ensure you’re running a supported version of Windows (7 SP1 or later, 64-bit recommended), macOS (10.13 High Sierra or later), or a popular Linux distribution (Ubuntu, Fedora, CentOS, Debian, etc.).
- Disk Space: Allocate at least 500 MB to 1 GB of free disk space for the JDK and potential development tools.
- RAM: While Java can run with minimal RAM, 4 GB or more is recommended for a smooth development experience, especially when using Integrated Development Environments (IDEs) like IntelliJ IDEA or Eclipse.
- Existing Java Installations: It’s good practice to check if you have any existing Java installations by opening a terminal or command prompt and typing
java -version. While multiple JDKs can coexist, it’s essential to understand which one your system will default to, which we’ll cover in the environment variable section.
Downloading the JDK Installer
Once you’ve chosen your JDK distribution, you’ll need to download the appropriate installer.
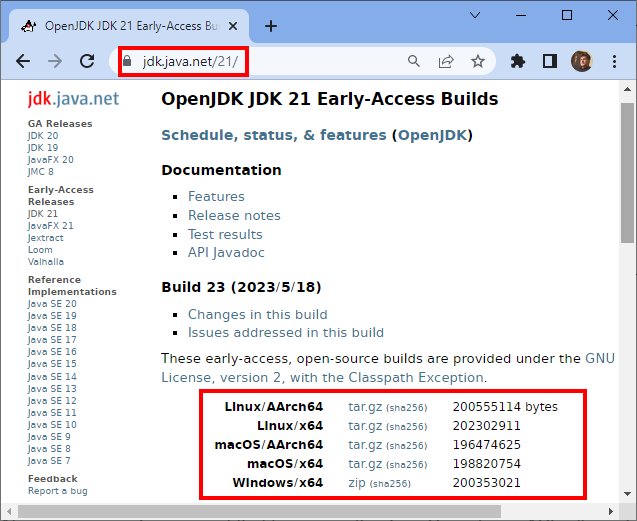
- For OpenJDK (Recommended for most):
- Visit the Adoptium website (adoptium.net).
- Choose your desired Java version (e.g., Java 17 LTS, Java 21 LTS). LTS (Long-Term Support) versions are generally recommended for stability.
- Select your operating system (Windows, macOS, Linux) and architecture (x64, ARM64).
- Download the
.msi(Windows),.pkgor.dmg(macOS), or.tar.gz(Linux) file.
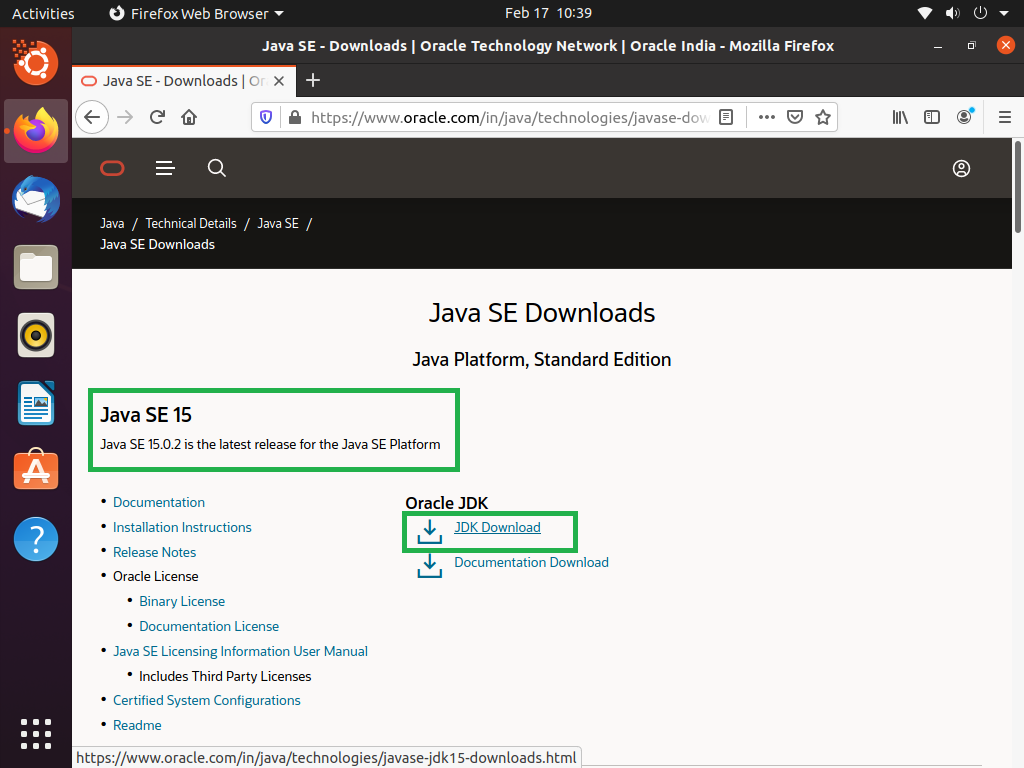
- For Oracle JDK:
- Navigate to the official Oracle Java downloads page (oracle.com/java/technologies/downloads/).
- Select the latest Java LTS version.
- Download the installer specific to your operating system and architecture. Remember Oracle’s licensing terms if you choose this option for commercial use.
Always download from official or reputable sources to ensure the integrity and security of your software. Verifying checksums, if provided, is an excellent digital security practice.
Step-by-Step Installation Guides for Major Operating Systems
The installation process varies slightly depending on your operating system. Follow the instructions relevant to your environment.
Installing Java JDK on Windows
Installing Java JDK on Windows is typically straightforward, thanks to user-friendly installers.
- Download the Installer: Download the
.msiinstaller from your chosen JDK provider (e.g., Adoptium). - Run the Installer: Locate the downloaded
.msifile (usually in yourDownloadsfolder) and double-click it to start the installation wizard. - Follow the Wizard:
- Click “Next” on the welcome screen.
- Accept the license agreement if prompted.
- Choose the installation path. The default path (e.g.,
C:Program FilesEclipse Adoptiumjdk-XX.0.X.X-hotspot) is usually fine, but you can change it if you prefer. Make a note of this path, as you’ll need it later for environment variables. - Select which features to install. Ensure “Development Tools” is selected (it usually is by default). You can also choose to set environment variables here, but we will cover this manually for better understanding and control.
- Click “Next” and then “Install.”
- Complete Installation: Once the installation is complete, click “Finish.” You might be prompted to restart your system, though it’s not always strictly necessary immediately, it’s good practice.
Installing Java JDK on macOS
macOS users also benefit from a guided installation process.
- Download the Installer: Download the
.pkgor.dmginstaller from your chosen JDK provider (e.g., Adoptium). - Open the Installer:
- If it’s a
.dmgfile, double-click to mount it, then open the.pkgfile inside. - If it’s a
.pkgfile directly, double-click it.
- If it’s a
- Follow the Installation Wizard:
- Click “Continue” through the introduction.
- Agree to the software license agreement.
- Select the installation location. The default
/Library/Java/JavaVirtualMachines/jdk-XX.jdkis recommended. - Click “Install” and enter your macOS administrator password when prompted.
- Complete Installation: After the installation finishes, you’ll see a success message. Click “Close.” The JDK is now installed on your system.
Installing Java JDK on Linux
Linux offers more flexibility, with options for package managers or manual installation. We’ll cover common methods for Ubuntu/Debian-based and Fedora/RHEL-based systems, as well as a generic manual installation.
Using Package Managers (Recommended for OpenJDK)
For Ubuntu/Debian-based Systems:
- Update Package List: Open a terminal and run:
bash

sudo apt update
- Install OpenJDK: To install a specific version (e.g., OpenJDK 17):
bash

sudo apt install openjdk-17-jdk
Replace17with your desired version number. - Verify (Optional but Recommended): You can set the default Java version if multiple JDKs are present:
bash

sudo update-alternatives --config java

sudo update-alternatives --config javac
For Fedora/RHEL-based Systems:
- Install OpenJDK: Open a terminal and run:
bash

sudo dnf install java-17-openjdk-devel
Replace17with your desired version number. (For older RHEL/CentOS, useyuminstead ofdnf). - Verify (Optional but Recommended):
bash

sudo alternatives --config java

sudo alternatives --config javac
Manual Installation (for tar.gz files, common for Oracle JDK or specific OpenJDK builds)
- Download
tar.gz: Download the.tar.gzarchive for your Linux distribution and architecture. - Create Installation Directory: It’s common to install JDKs in
/opt/javaor/usr/local/java.
bash

sudo mkdir -p /opt/java
- Extract the Archive: Navigate to your download directory, then extract the archive to your chosen installation path.
bash

cd ~/Downloads

sudo tar -xzf jdk-XX.tar.gz -C /opt/java/
Replacejdk-XX.tar.gzwith your actual file name. This will create a directory like/opt/java/jdk-XX.0.X.X. Make a note of this full path. - Set Permissions:
bash

sudo chown -R root:root /opt/java/jdk-XX.0.X.X
Configuring Environment Variables for Seamless Development
After installing the JDK, the next critical step is to configure environment variables. This tells your operating system where to find the Java executable (java), the compiler (javac), and other tools, making them accessible from any directory in your terminal or command prompt. It also helps IDEs and other applications locate the JDK correctly.
Setting JAVA_HOME and PATH on Windows
- Locate JDK Installation Path: Find the directory where your JDK is installed (e.g.,
C:Program FilesEclipse Adoptiumjdk-17.0.X.X-hotspot). - Open Environment Variables:
- Search for “Environment Variables” in the Windows search bar and select “Edit the system environment variables.”
- In the System Properties dialog, click the “Environment Variables…” button.
- Set JAVA_HOME:
- Under “System variables,” click “New…”.
- For “Variable name,” enter
JAVA_HOME. - For “Variable value,” paste the full path to your JDK installation directory (e.g.,
C:Program FilesEclipse Adoptiumjdk-17.0.X.X-hotspot). - Click “OK.”
- Add to PATH:
- Under “System variables,” find the “Path” variable and select it, then click “Edit…”.
- Click “New” and add
%JAVA_HOME%bin. - Ensure this entry is at the top of the list to prioritize your newly installed JDK if multiple versions exist.
- Click “OK” on all open dialogs to save the changes.
- Restart Terminal: Close and reopen any command prompt or PowerShell windows for the changes to take effect.
Setting JAVA_HOME and PATH on macOS
For macOS, you’ll typically edit your shell configuration file. This is often .bash_profile for Bash users or .zshrc for Zsh users (the default shell since macOS Catalina).
- Locate JDK Installation Path: The default path is usually
/Library/Java/JavaVirtualMachines/jdk-XX.jdk/Contents/Home. - Open Shell Configuration File: Open your terminal and type:
bash

# For Zsh (default for recent macOS)

nano ~/.zshrc

# For Bash

nano ~/.bash_profile
(You can usevior another text editor if you prefer). - Add Environment Variables: Add the following lines to the end of the file. Replace
jdk-XX.jdkwith your actual JDK folder name.
bash

export JAVA_HOME="/Library/Java/JavaVirtualMachines/jdk-17.jdk/Contents/Home"

export PATH="$JAVA_HOME/bin:$PATH"
If you manually installed the JDK to a different path (e.g.,/opt/java/jdk-17.0.X.X), adjustJAVA_HOMEaccordingly. - Save and Exit:
- If using
nano: PressCtrl+O(write out), thenEnter, thenCtrl+X(exit).
- If using
- Apply Changes: Load the updated configuration into your current shell session:
bash

# For Zsh

source ~/.zshrc

# For Bash

source ~/.bash_profile
This applies the changes without needing to restart your terminal.
Setting JAVA_HOME and PATH on Linux
Similar to macOS, Linux users will edit their shell configuration files. Common files include .bashrc, .profile, or .zshrc. .profile is often used for system-wide settings, while .bashrc or .zshrc are for interactive shell sessions.
- Locate JDK Installation Path:
- If installed via package manager:
JAVA_HOMEmight be automatically configured, or you can find it usingreadlink -f $(which java) | sed "s:bin/java::". - If installed manually to
/opt/java/jdk-XX.0.X.X, this is your path.
- If installed via package manager:
- Open Shell Configuration File: Open your terminal and type:
bash

nano ~/.bashrc

# Or ~/.profile, or ~/.zshrc depending on your shell and preference
- Add Environment Variables: Add the following lines, replacing the path with your actual JDK installation directory:
bash

export JAVA_HOME="/opt/java/jdk-17.0.X.X" # Adjust this path!

export PATH="$JAVA_HOME/bin:$PATH"
If you have multiple JDKs and want to make one the default without manually settingJAVA_HOME, Linux often handles this withupdate-alternatives. However, explicitly settingJAVA_HOMEis often preferred by IDEs and build tools. - Save and Exit:
- If using
nano: PressCtrl+O(write out), thenEnter, thenCtrl+X(exit).
- If using
- Apply Changes: Load the updated configuration:
bash

source ~/.bashrc

# Or source ~/.profile, or source ~/.zshrc
You may need to log out and back in for system-wide changes, butsourceusually suffices for the current session.
Verifying Your Installation and Next Steps
Once the installation and environment variable configuration are complete, it’s crucial to verify that everything is set up correctly. This ensures your Java development environment is ready for action.
Confirming a Successful Java JDK Installation
Open a new terminal or command prompt window and run the following commands:
-
Check Java Runtime Version:
java -versionYou should see output similar to this, indicating the installed Java version:
openjdk version "17.0.X.X" 202X-XX-XX LTS
OpenJDK Runtime Environment (build 17.0.X.X+X-LTS)
OpenJDK 64-Bit Server VM (build 17.0.X.X+X-LTS, mixed mode, sharing)
This confirms that the Java runtime is accessible and the correct version.
-
Check Java Compiler Version:
javac -versionYou should see output like:
javac 17.0.X.XThis confirms that the Java compiler (part of the JDK) is recognized, which is essential for development. If
javacis not found, it often indicates an issue with yourPATHenvironment variable orJAVA_HOME. -
Verify JAVA_HOME (Optional but Recommended):
- Windows (Command Prompt):
bash

echo %JAVA_HOME%
- Windows (PowerShell):
powershell

Get-ChildItem Env:JAVA_HOME
- macOS/Linux:
bash

echo $JAVA_HOME
The output should display the exact path you set forJAVA_HOME.
- Windows (Command Prompt):
-
Run a “Hello World” Program: The ultimate test is to compile and run a simple Java program.
- Create a file named
HelloWorld.javawith the following content:
java

public class HelloWorld {

    public static void main(String[] args) {

        System.out.println("Hello, Java JDK!");

    }

}
- Open your terminal/command prompt in the directory where you saved
HelloWorld.java. - Compile the program:
bash

javac HelloWorld.java
If successful, this will create aHelloWorld.classfile in the same directory. - Run the program:
bash

java HelloWorld
You should see the output:Hello, Java JDK!
- Create a file named
If all these checks pass, congratulations! Your Java JDK environment is successfully installed and configured.
Common Installation Issues and Troubleshooting Tips
Despite careful steps, you might encounter issues. Here are some common problems and their solutions:
'java' is not recognized as an internal or external command(Windows) orcommand not found(macOS/Linux):- Cause: The
PATHenvironment variable is not correctly set or doesn’t include thebindirectory of your JDK. - Solution: Revisit the “Setting JAVA_HOME and PATH” section for your OS. Ensure
%JAVA_HOME%bin(Windows) or$JAVA_HOME/bin(macOS/Linux) is correctly added to yourPATHand thatJAVA_HOMEpoints to the correct JDK root. Remember to open a new terminal window after making changes.
- Cause: The
'javac' is not recognized...butjava -versionworks:- Cause: This usually means you have a JRE installed and its
bindirectory is in yourPATH, but the JDK’sbindirectory (which containsjavac) is not. Or,JAVA_HOMEis not correctly set. - Solution: Ensure
JAVA_HOMEpoints to the JDK root, and thatPATHincludes$JAVA_HOME/bin. The JDK always includes a JRE, so accessing the JDK’sbindirectory ensures bothjavaandjavacare found.
- Cause: This usually means you have a JRE installed and its
- Multiple JDK Versions:
- Cause: You might have several JDKs installed. Your system will use the first one it finds in your
PATHenvironment variable. - Solution: When editing your
PATH, ensure the desired JDK’sbindirectory is listed before any other Java installations. For Linux/macOS, explicitly settingJAVA_HOMEhelps applications target a specific JDK.
- Cause: You might have several JDKs installed. Your system will use the first one it finds in your
- Permission Errors during Installation:
- Cause: You might not have administrator/root privileges to install software in system directories.
- Solution: Ensure you are logged in as an administrator (Windows) or use
sudo(Linux/macOS) when running installation commands or moving files to system directories.
- Corrupted Download:
- Cause: The installer file might have been corrupted during download.
- Solution: Delete the downloaded file and re-download it from the official source. Compare checksums if provided.
- “No Java runtime present…” (macOS specific):
- Cause: An old macOS system message that sometimes appears even if Java is installed, or if the installed JDK is not recognized by the system’s
java_homeutility. - Solution: Ensure your
JAVA_HOMEandPATHvariables are correctly configured in your shell profile.
- Cause: An old macOS system message that sometimes appears even if Java is installed, or if the installed JDK is not recognized by the system’s
By meticulously following these steps and troubleshooting common issues, you’ll establish a solid foundation for your Java development endeavors. The world of Java is vast, offering incredible opportunities in various tech domains. With the JDK installed, you’re ready to explore IDEs like IntelliJ IDEA or Eclipse, delve into frameworks like Spring Boot, and begin building powerful applications, contributing to your “productivity” and mastery of current “technology trends.”
aViewFromTheCave is a participant in the Amazon Services LLC Associates Program, an affiliate advertising program designed to provide a means for sites to earn advertising fees by advertising and linking to Amazon.com. Amazon, the Amazon logo, AmazonSupply, and the AmazonSupply logo are trademarks of Amazon.com, Inc. or its affiliates. As an Amazon Associate we earn affiliate commissions from qualifying purchases.