In today’s digital landscape, multimedia content reigns supreme. From captivating videos to crystal-clear audio, the ability to manipulate and convert media files is an indispensable skill for content creators, developers, and everyday users alike. For Mac users seeking a powerful, versatile, and free solution for all their multimedia needs, FFmpeg stands out as an unparalleled command-line tool. It’s the Swiss Army knife of media processing, capable of handling virtually any audio or video format with astonishing efficiency.
This comprehensive guide will walk you through the process of installing FFmpeg on your Mac, ensuring you unlock its full potential for everything from video editing and audio extraction to format conversion and streaming. We’ll leverage Homebrew, the beloved package manager for macOS, to make the installation smooth and hassle-free. Dive in and transform your Mac into a multimedia powerhouse.
Understanding FFmpeg: The Multimedia Powerhouse for Mac Users
Before we jump into the installation process, let’s take a moment to appreciate what FFmpeg is and why it has become an indispensable tool for countless professionals and enthusiasts. Understanding its capabilities will illuminate why it’s a critical addition to your digital toolkit, especially if your work involves any form of media production, digital content creation, or even just personal media management.
What is FFmpeg?
FFmpeg is an open-source project consisting of a vast suite of libraries and programs designed for handling video, audio, and other multimedia files and streams. At its core, FFmpeg is a command-line tool that can decode, encode, transcode, mux, demux, stream, filter, and play virtually any media format. It’s built on robust and highly optimized codecs, allowing for lightning-fast processing without compromising quality.
Developed by a global community of contributors, FFmpeg supports an astonishing array of formats, including MP4, MOV, MKV, AVI, WebM, MP3, AAC, FLAC, and many more. It’s not just a converter; it’s a complete ecosystem for media manipulation. Many popular video players, streaming services, and video editing software actually use FFmpeg under the hood for their multimedia processing capabilities. This pervasive presence is a testament to its reliability, efficiency, and flexibility.
Why FFmpeg is Essential for Your Mac
For Mac users, FFmpeg fills a critical gap, offering a level of control and flexibility that built-in macOS tools often lack. While applications like QuickTime Player or iMovie offer basic media functionalities, FFmpeg provides advanced features accessible through simple commands. Here’s why it’s essential:
- Universal Compatibility: No more worrying about incompatible file formats. FFmpeg can convert almost any video or audio file to any other format, ensuring your content plays everywhere it needs to. This is particularly useful for web content, social media, or cross-platform sharing.
- Advanced Media Manipulation: Beyond simple conversion, FFmpeg allows you to perform complex tasks such as extracting audio from video, trimming specific segments, resizing and scaling videos, adding watermarks, merging multiple video files, and even creating animated GIFs from videos. These features are invaluable for professional content creators, videographers, and anyone managing a large media library.
- Efficiency for Content Creation: For those involved in digital content, whether for a personal brand, a small business, or a large corporation, time is money. FFmpeg’s command-line nature means tasks can be automated with scripts, saving countless hours on repetitive media processing workflows. This efficiency translates directly into increased productivity and reduced operational costs, enabling faster content delivery and more dynamic marketing efforts.
- Developer-Friendly: If you’re a developer working on applications that involve media processing, FFmpeg’s libraries provide a robust foundation. Integrating its capabilities into custom scripts or applications can extend functionality and performance significantly.
- Lightweight and Resourceful: Despite its immense power, FFmpeg is a relatively lightweight application. Once installed, it doesn’t hog system resources in the background, making it an excellent choice for machines of all specifications.
In essence, installing FFmpeg transforms your Mac into a highly capable media workstation, offering unparalleled control over your digital audio and video assets. It’s an investment in efficiency, versatility, and creative freedom.
The Preparatory Steps: Setting Up Your Mac for FFmpeg Installation
Installing FFmpeg directly from source can be a convoluted process, involving compiling code and managing dependencies. Fortunately, macOS users have a much simpler and highly recommended method: Homebrew. Homebrew is a free and open-source software package management system that simplifies the installation of software on macOS and Linux. Think of it as an app store for command-line tools, making installations as simple as a single command.
Introducing Homebrew: Your Mac’s Missing Package Manager
Homebrew is often described as “the missing package manager for macOS.” It allows you to install thousands of command-line tools and utilities that Apple doesn’t include with macOS. Instead of manually downloading and compiling source code, Homebrew automates the entire process, including dependency resolution, ensuring that all necessary components are installed correctly.
Using Homebrew offers several advantages:
- Simplicity: Install software with a single command:
brew install [package]. - Dependency Management: Homebrew automatically handles installing other necessary packages that your desired software relies on.
- Updates and Upgrades: Keeping your installed software up-to-date is just as easy:
brew updateandbrew upgrade. - Cleanliness: Homebrew installs packages into their own directory and then symlinks them into
/usr/local(or/opt/homebrewfor Apple Silicon Macs), keeping your system clean and organized.
For these reasons, Homebrew is the preferred method for installing FFmpeg on a Mac.
Installing Homebrew on macOS
If you don’t already have Homebrew installed on your Mac, don’t worry – the process is straightforward.
-
Open Terminal: The first step is to open your Terminal application. You can find it in
Applications/Utilities/Terminal.appor by searching for “Terminal” using Spotlight (Cmd + Space). -
Run the Installation Command: Once Terminal is open, paste the following command and press Enter:
/bin/bash -c "$(curl -fsSL https://raw.githubusercontent.com/Homebrew/install/HEAD/install.sh)"- Explanation: This command downloads and executes the Homebrew installation script directly from GitHub. The
curl -fsSLpart fetches the script, and/bin/bash -cexecutes it.
- Explanation: This command downloads and executes the Homebrew installation script directly from GitHub. The
-
Follow On-Screen Prompts: The script will likely ask for your macOS user password (this is for
sudoaccess, required to install Homebrew in the correct system directories). Type your password (it won’t show characters as you type) and press Enter. You might also be prompted to press Enter to confirm the installation. -
Wait for Installation to Complete: Homebrew will then download and install all necessary components, including Xcode Command Line Tools if they are not already present. This process can take several minutes, depending on your internet speed and system configuration.
-
Environment Path (Apple Silicon Macs): If you’re on an Apple Silicon Mac (M1, M2, M3 chip), Homebrew installs into
/opt/homebrew. The installer should automatically add this to yourPATH, but if you encounter “command not found” errors forbrewlater, you might need to manually add it. The installer usually tells you what to add, which looks something like:
bash

echo 'eval "$(/opt/homebrew/bin/brew shellenv)"' >> ~/.zprofile

eval "$(/opt/homebrew/bin/brew shellenv)"
(Note:.zprofileis for Zsh, the default shell on modern macOS. If you use Bash, it would be~/.bash_profileor~/.bashrc.)
Verifying Your Homebrew Installation
After Homebrew has finished installing, it’s a good practice to verify that everything is working correctly.
-
Check Homebrew Version: In Terminal, type:
brew --versionYou should see the installed Homebrew version number, confirming that the
brewcommand is recognized. -
Run Doctor: Homebrew has a built-in “doctor” command that checks for potential issues in your Homebrew environment. Run it with:
brew doctorIf everything is set up correctly, you should see “Your system is ready to brew.” If there are any warnings or errors, Homebrew will usually provide instructions on how to resolve them. It’s recommended to address these before proceeding with FFmpeg installation.
With Homebrew successfully installed and verified, your Mac is now fully prepared to install FFmpeg with ease.
Installing FFmpeg on Your Mac: A Step-by-Step Guide
With Homebrew acting as your reliable package manager, installing FFmpeg becomes a straightforward process. This section will guide you through the exact commands and considerations to get FFmpeg up and running on your macOS system.
Updating Homebrew Before Installation
It’s always a good practice to ensure your Homebrew installation and package list are up-to-date before installing new software. This prevents potential conflicts and ensures you’re getting the latest stable version of FFmpeg and its dependencies.
-
Update Homebrew’s Formulae: Open Terminal and run:
brew updateThis command fetches the latest information about all available packages (called “formulae” in Homebrew terminology) and Homebrew itself. It doesn’t upgrade your installed packages yet, just updates the list.
-
Upgrade Existing Packages (Optional but Recommended): If you have other packages installed via Homebrew, it’s often wise to upgrade them before installing FFmpeg to avoid any dependency issues.
brew upgradeThis command will upgrade all currently installed packages to their latest versions. If you prefer not to upgrade everything, you can skip this step, but it’s generally recommended for a healthy Homebrew environment.
Executing the FFmpeg Installation Command
Once Homebrew is updated, installing FFmpeg is as simple as running a single command.
-
Install FFmpeg: In Terminal, type the following command and press Enter:
brew install ffmpeg- Explanation: Homebrew will first check for any necessary dependencies that FFmpeg requires and install them if they’re not already present. Then, it will download and compile FFmpeg (or install a pre-compiled binary, known as a “bottle,” if available for your system architecture), and link it into your system’s PATH. This process can take several minutes, depending on your internet speed and Mac’s processing power. You’ll see various lines of output indicating progress.
Understanding FFmpeg Installation Options (Codecs)
By default, brew install ffmpeg provides a robust FFmpeg build with support for many common codecs. However, FFmpeg is highly modular, and you might occasionally need support for specific codecs or features that aren’t included in the default build. Historically, Homebrew allowed --with- options to include these, but modern Homebrew (since 2020) generally recommends installing specific codecs as separate dependencies if needed, and FFmpeg’s formula is built to detect and link them.
For example, if you explicitly needed specific non-free codecs or libraries, you might have previously used commands like:
# This syntax is mostly deprecated for modern Homebrew.
# Modern approach: install the libraries separately, then brew install ffmpeg
# Example: If you need x264, install it first:
brew install x264
brew install libvpx
brew install openh264
brew install ffmpeg
Homebrew is smart enough to detect these commonly used libraries if they are installed and will compile FFmpeg to link against them. For most users, brew install ffmpeg is sufficient, as it includes libx264 for H.264 video encoding, libvorbis for Vorbis audio, and other essential components by default. If you encounter an error related to a missing codec when trying to process a specific file type, you can search for that codec on Homebrew (brew search [codec_name]) and install it separately, then ensure FFmpeg is linked against it (sometimes requiring brew reinstall ffmpeg).
Confirming Your FFmpeg Installation
After the installation process completes, it’s crucial to verify that FFmpeg has been installed correctly and is accessible from your Terminal.
-
Check FFmpeg Version: In Terminal, type:
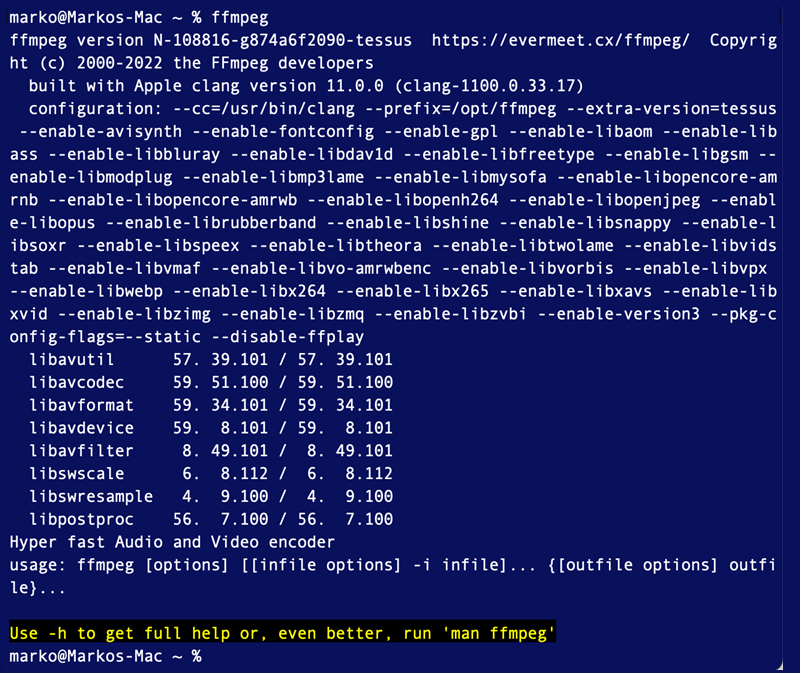
ffmpeg -versionYou should see a detailed output displaying the FFmpeg version number, configuration options, and supported libraries. This confirms that FFmpeg is installed and the
ffmpegcommand is recognized in your system’s PATH. -
Check FFprobe Version (Optional): FFmpeg comes with companion tools like
ffprobe(for analyzing media streams) andffplay(for simple media playback). You can also verifyffprobe:ffprobe -versionYou should see similar version information, confirming the entire suite is ready.
Congratulations! You have successfully installed FFmpeg on your Mac using Homebrew. You now have one of the most powerful and versatile multimedia tools at your fingertips, ready to tackle any audio or video challenge you throw its way.
Mastering FFmpeg: Basic Usage, Maintenance, and Troubleshooting
Now that FFmpeg is installed, it’s time to put it to use. While FFmpeg’s full capabilities are vast, understanding a few basic commands will allow you to perform common multimedia tasks immediately. This section also covers how to keep FFmpeg updated and troubleshoot potential issues, ensuring a smooth and productive experience.
Essential FFmpeg Commands for Everyday Tasks
FFmpeg commands follow a general structure: ffmpeg [global options] -i [input file] [output options] [output file]. Here are some practical examples:
-
Converting Video Formats: This is one of FFmpeg’s most common uses. Let’s convert an MP4 file to a MOV file.
ffmpeg -i input.mp4 output.mov- Explanation:
-ispecifies the input file. FFmpeg intelligently determines the output format based on the output file extension. It will attempt to use reasonable default encoding parameters for the output. - Specifying Codecs: For more control, you can specify video and audio codecs:
bash

ffmpeg -i input.mp4 -c:v libx264 -preset medium -crf 23 -c:a aac -b:a 128k output.mov
-c:v libx264: Use H.264 video codec.-preset medium: A speed/quality tradeoff (others includeultrafast,fast,slow,veryslow).-crf 23: Constant Rate Factor, a quality setting for H.264 (0 is lossless, 51 is worst quality; 23 is a good default).-c:a aac: Use AAC audio codec.-b:a 128k: Set audio bitrate to 128 kbps.
- Explanation:
-
Extracting Audio from Video: Need an MP3 version of a video’s soundtrack?
ffmpeg -i video.mp4 -vn audio.mp3- Explanation:
-vntells FFmpeg to disable video recording (i.e., don’t include video stream). FFmpeg will automatically convert the audio stream to MP3. - Specifying Audio Codec/Bitrate:
bash

ffmpeg -i video.mp4 -vn -c:a libmp3lame -q:a 2 audio.mp3
-c:a libmp3lame: Use the LAME MP3 encoder.-q:a 2: Set audio quality (0 is highest, 9 is lowest for LAME).
- Explanation:
-
Resizing Video: Change the dimensions of a video.
ffmpeg -i input.mp4 -vf scale=1280:-1 output_720p.mp4- Explanation:
-vf scale=WIDTH:HEIGHTuses the video filter to scale.1280:-1means set width to 1280 pixels and automatically calculate height to maintain aspect ratio. - Specific Dimensions:
scale=640:480(will stretch if aspect ratio is not maintained).
- Explanation:
-
Trimming Video Segments: Extract a specific portion of a video.
ffmpeg -i input.mp4 -ss 00:00:10 -to 00:00:30 -c copy output_trim.mp4- Explanation:
-ssspecifies the start time (HH:MM:SS or seconds).-tospecifies the end time.-c copyis crucial here: it tells FFmpeg to copy the video and audio streams directly without re-encoding, which is much faster and avoids quality loss. This works if you’re cutting on keyframes. - From Start for Duration:
bash

ffmpeg -i input.mp4 -ss 00:00:10 -t 20 -c copy output_duration_trim.mp4
-t 20means extract for a duration of 20 seconds from the start time (-ss).
- Explanation:
-
Creating an Animated GIF from Video:
ffmpeg -i input.mp4 -vf "fps=10,scale=320:-1:flags=lanczos" -c:v gif -loop 0 output.gif- Explanation:
-vfapplies multiple video filters.fps=10sets the frame rate to 10 frames per second.scale=320:-1scales width to 320px, maintaining aspect ratio.flags=lanczosuses a high-quality scaling algorithm.-loop 0makes the GIF loop indefinitely. Creating optimized GIFs can be more complex, often involving palette generation for better color accuracy.
- Explanation:
These examples are just the tip of the iceberg. FFmpeg’s documentation is extensive, and with a bit of experimentation, you’ll discover its true power.
Keeping FFmpeg Up-to-Date
Like any software, FFmpeg receives updates and bug fixes regularly. Keeping your installation current ensures you have the latest features, performance improvements, and security patches.
-
Update All Homebrew Packages: The simplest way to update FFmpeg is to update all your Homebrew-managed packages:
brew update
brew upgrade
brew updaterefreshes Homebrew’s package list, andbrew upgradethen downloads and installs the latest versions of all your installed packages, including FFmpeg. -
Update FFmpeg Specifically: If you only want to update FFmpeg and no other packages, you can specify it:
brew upgrade ffmpegThis command will specifically check for and install the latest version of FFmpeg if one is available.
Common Troubleshooting Tips for FFmpeg on Mac
While Homebrew makes FFmpeg installation quite robust, you might occasionally encounter issues. Here are some common problems and their solutions:
-
“ffmpeg: command not found”:
- Cause: This usually means FFmpeg’s executable is not in your system’s PATH.
- Solution:
- Ensure Homebrew is correctly installed and its path (
/usr/local/binor/opt/homebrew/bin) is in your shell’s PATH variable. - For Apple Silicon Macs, review the Homebrew installation output for instructions on adding
/opt/homebrew/binto your~/.zprofileor~/.bash_profile. After modifying, runsource ~/.zprofile(or your respective profile) or restart Terminal. - Run
brew doctorto check for general Homebrew issues. - Try
brew link ffmpegto ensure the symbolic links are correctly created.
- Ensure Homebrew is correctly installed and its path (
-
“Unknown encoder ‘libx264′” or similar codec errors:
- Cause: FFmpeg was compiled without support for a specific codec you’re trying to use.
- Solution:
- Check if the required codec library is installed via Homebrew (e.g.,
brew install x264). - If it’s installed, try reinstalling FFmpeg:
brew reinstall ffmpeg. Homebrew should detect the newly installed library and compile/link FFmpeg with support for it. - If the codec is proprietary or less common, you might need to find a Homebrew “tap” that provides an FFmpeg formula with extended support, or compile FFmpeg manually (which is more advanced).
- Check if the required codec library is installed via Homebrew (e.g.,
-
Installation stuck or failing:
- Cause: Could be internet issues, corrupted downloads, or conflicts during compilation.
- Solution:
- Check your internet connection.
- Clean Homebrew’s cache:
brew cleanup. - Try
brew updateandbrew doctoragain. - If it’s a compilation error, it might be due to missing Xcode Command Line Tools. Ensure they are installed:
xcode-select --install.
-
Permissions issues:
- Cause: Incorrect file permissions can sometimes prevent Homebrew or FFmpeg from operating correctly.
- Solution:
sudo chown -R $(whoami) $(brew --prefix)/*can sometimes resolve permissions issues within the Homebrew directory, but be cautious withsudoand understand what the command does.brew doctorusually points out permission problems.
Removing FFmpeg from Your System (Optional)
If for any reason you need to uninstall FFmpeg, Homebrew makes it simple:
brew uninstall ffmpeg
This command will remove FFmpeg and any dependencies that were installed only for FFmpeg and are no longer required by other Homebrew packages. To clean up cached files and broken symlinks, you can run:
brew cleanup
This will ensure your system remains tidy and efficient.
Installing FFmpeg on your Mac opens up a world of possibilities for media manipulation and content creation. By following this guide, you’ve successfully leveraged Homebrew to integrate this powerful tool into your workflow. Whether you’re a professional video editor, a burgeoning content creator looking to streamline your brand’s media assets, or simply an enthusiast managing a personal media library, FFmpeg provides the granular control and efficiency you need. Embrace the command line, experiment with its vast array of options, and unlock the full potential of your multimedia projects right from your macOS device. This fundamental tech tool empowers you to not just consume media, but to truly master it.
aViewFromTheCave is a participant in the Amazon Services LLC Associates Program, an affiliate advertising program designed to provide a means for sites to earn advertising fees by advertising and linking to Amazon.com. Amazon, the Amazon logo, AmazonSupply, and the AmazonSupply logo are trademarks of Amazon.com, Inc. or its affiliates. As an Amazon Associate we earn affiliate commissions from qualifying purchases.