Mastering your Mac begins with understanding how to populate it with the tools and software you need. Whether you’re a first-time Mac owner or a seasoned user looking to refine your digital habits, the process of installing applications is a fundamental skill that underpins your productivity and digital security. From essential productivity suites to cutting-edge AI tools and creative applications, macOS offers several distinct pathways for acquiring and setting up software, each with its own advantages in terms of ease of use, security, and control. This guide will walk you through every significant method, ensuring you can confidently install, manage, and even uninstall applications, keeping your Mac efficient and secure.
The Mac App Store: Simplicity, Security, and Seamless Updates
For most users, the Mac App Store represents the easiest and safest avenue for installing applications. It’s Apple’s curated marketplace, offering a vast array of software ranging from games and entertainment to powerful business tools and niche utility apps. The App Store experience is designed for seamless integration with the macOS ecosystem, emphasizing user-friendliness and robust security measures.
Navigating the Mac App Store
Accessing the Mac App Store is straightforward. You can find its icon (a blue circle with a white ‘A’) in your Dock or locate it via Spotlight Search (Command + Space) by typing “App Store.” Once open, you’re greeted with a polished interface featuring various categories, editor’s picks, and trending applications.
The App Store’s layout is intuitive, making discovery simple. You can browse apps by category, explore featured collections, or use the powerful search bar in the top-left corner to find specific applications. Each app has its own dedicated page, providing comprehensive information including descriptions, screenshots, user reviews, ratings, privacy practices, and compatibility requirements. This detailed overview allows you to make informed decisions, much like reading a product review for a gadget, ensuring the software meets your needs before you commit to downloading. Pay attention to the “Compatibility” section, especially if you’re using a newer Apple Silicon Mac (M1, M2, M3 chips) to ensure the app runs natively or efficiently via Rosetta 2 emulation.
Installing an Application from the App Store
The installation process itself is incredibly simple:
- Find your app: Navigate to the app’s page, either by browsing or searching.
- Initiate Download: Click the “Get” button (if it’s a free app) or the price button (for paid apps).
- Authenticate: You’ll be prompted to enter your Apple ID password, use Touch ID on supported Macs, or double-click the side button on your Apple Watch if enabled for authentication. This step is a crucial security layer, ensuring only authorized users can install software.
- Automatic Installation: Once authenticated, the app will download and automatically install itself into your Applications folder. A progress bar will appear in the App Store window and also under the app’s icon in Launchpad.
- Launch: After installation, the “Get” or price button will change to “Open,” allowing you to launch the app directly. You can also find the app in your Applications folder or Launchpad.
Advantages of App Store Installations
Choosing the Mac App Store offers several compelling benefits that align with modern tech expectations around security, convenience, and productivity:
- Enhanced Security: Every app submitted to the Mac App Store undergoes an extensive review process by Apple to check for malware, adherence to privacy guidelines, and overall stability. This vetting significantly reduces the risk of installing malicious software, contributing directly to your digital security. Apps are also sandboxed, meaning they have limited access to your system resources and other applications, further containing any potential issues.
- Automatic Updates: Apps downloaded from the App Store can be set to update automatically, ensuring you always have the latest features, bug fixes, and critical security patches without manual intervention. This passive maintenance is a massive boost to productivity and system hygiene.
- Effortless Uninstallation: Removing App Store apps is as simple as finding them in Launchpad, clicking and holding their icon until they jiggle, and then clicking the ‘X’ button. This cleanly removes the app and its associated files, maintaining a clutter-free system.
- Family Sharing: Purchased apps can often be shared with up to six family members, providing excellent value for shared subscriptions and software licenses.
- Seamless Integration: Apps often leverage macOS features like iCloud, Continuity, and Notification Center more deeply, providing a cohesive user experience.
When to Use (and When Not to Use) the App Store
The Mac App Store is ideal for general-purpose applications, productivity tools, creative suites, and games where security and ease of use are paramount. However, it’s important to recognize its limitations. Some specialized software, professional development tools, legacy applications, or open-source projects might not be available on the App Store due to Apple’s strict review guidelines or developers preferring direct distribution. For these scenarios, you’ll need to turn to alternative installation methods.
Installing Applications Downloaded from the Internet: Flexibility and Control
While the Mac App Store offers unparalleled convenience and security, a significant portion of macOS software is distributed directly by developers via their websites. This method provides greater flexibility, allowing users access to a wider range of applications, including niche tools, powerful development environments, and beta versions of software. However, it also places more responsibility on the user regarding security and proper installation.
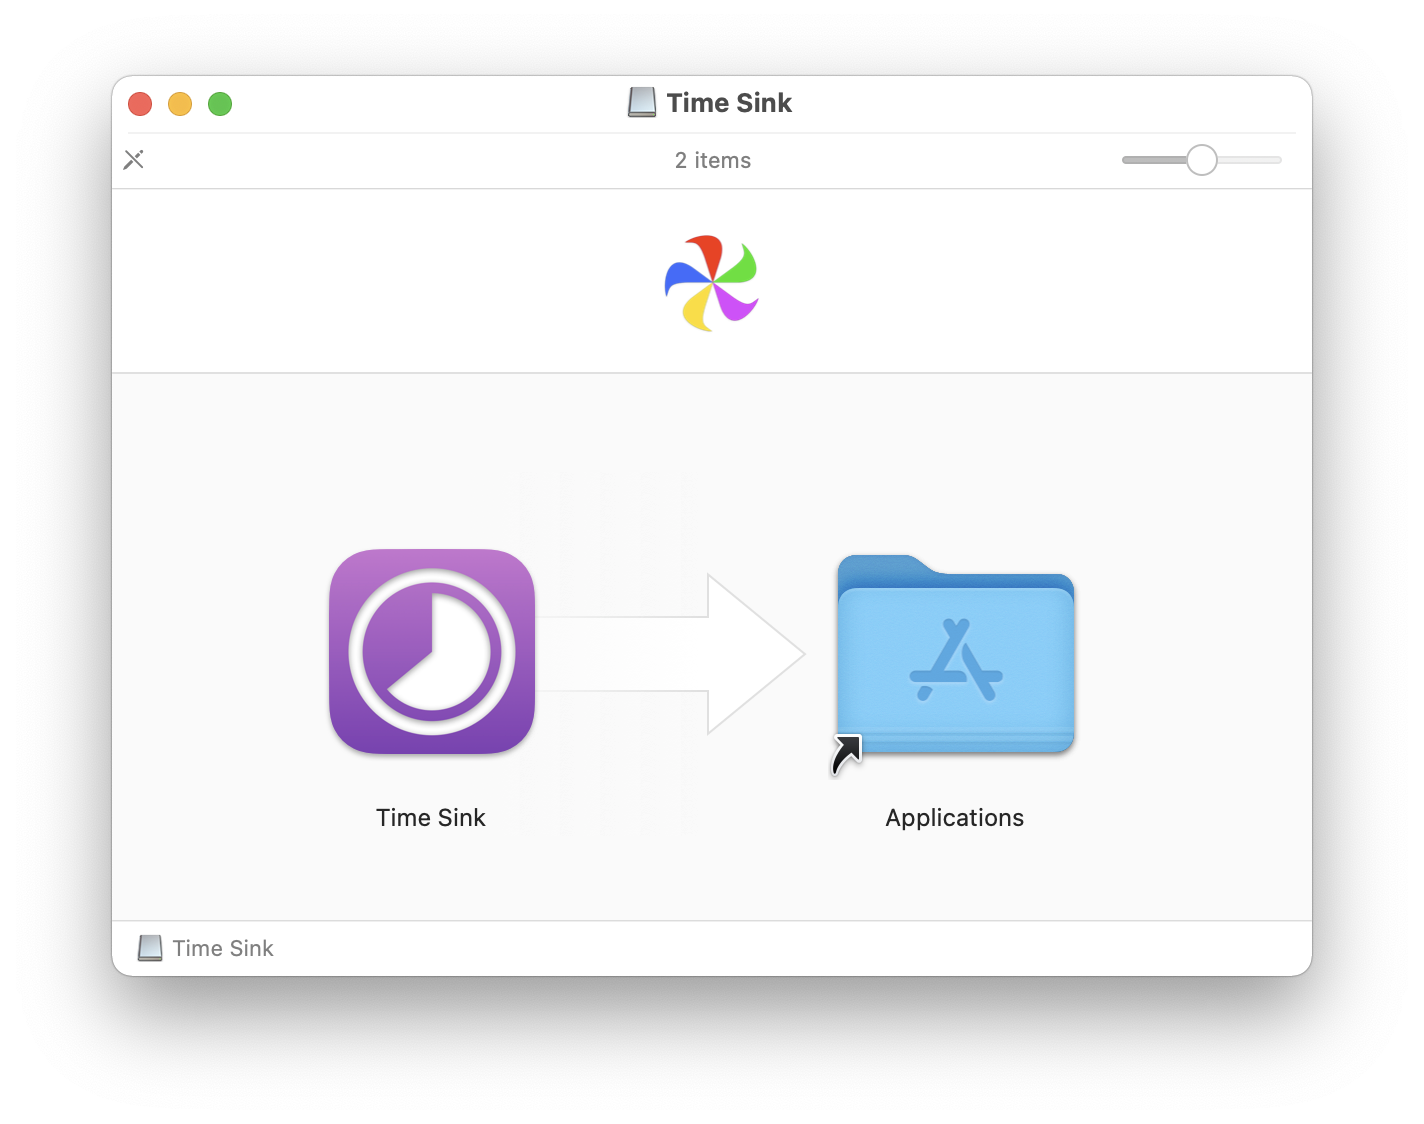
Understanding .DMG Files: The Drag-and-Drop Method
The most common way to install apps from the internet involves a .dmg (disk image) file. A DMG acts like a virtual disk that, when opened, mounts itself on your desktop, much like inserting a USB drive.
The process usually involves these steps:
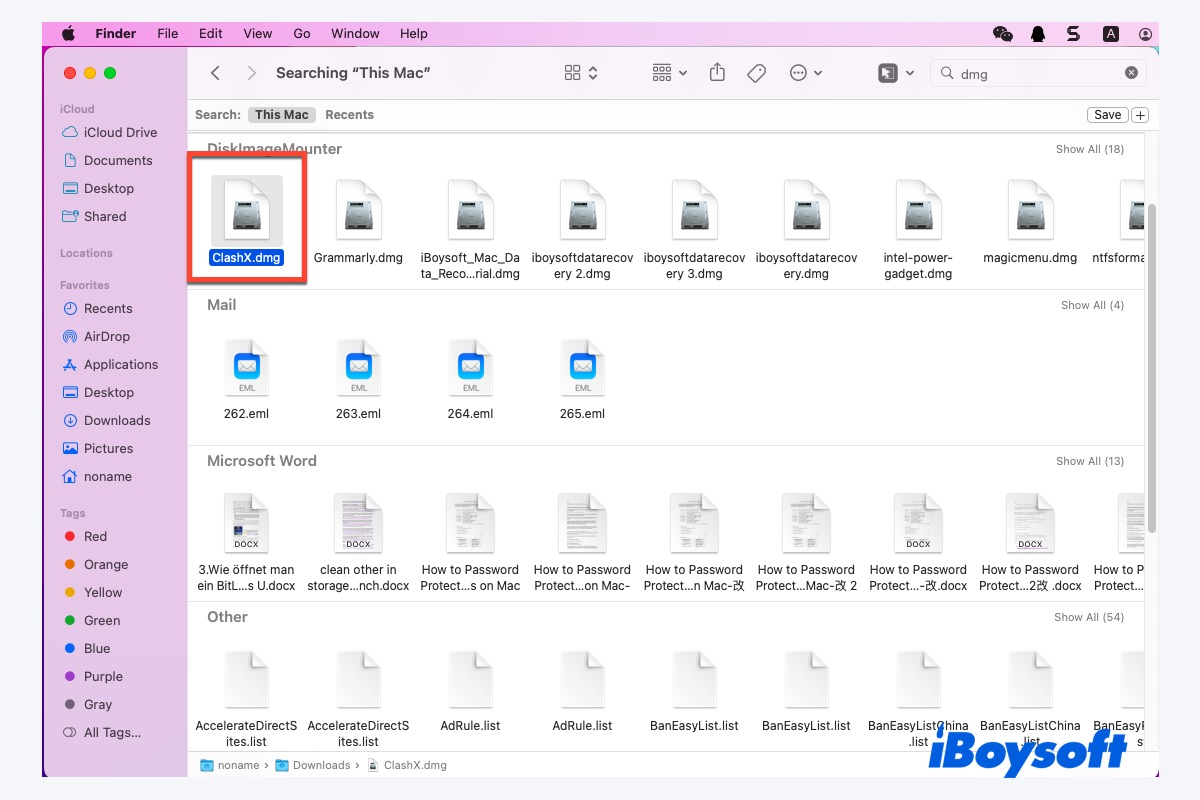
- Download: Obtain the
.dmgfile from the developer’s official website. Always prioritize official sources to mitigate security risks. - Open the DMG: Double-click the
.dmgfile. It will verify and then open, presenting a Finder window that often contains the application icon and an “Applications” folder alias (a shortcut). - Install: Drag the application icon from the
.dmgwindow directly into your Applications folder (or the “Applications” alias provided within the DMG). This copies the app to your system. - Eject: After the copy is complete, drag the mounted disk image icon from your desktop (or the Finder sidebar) to the Trash, or right-click it and select “Eject ‘Disk Image Name’.” This unmounts the virtual disk.
- Clean Up: Once ejected, you can move the original
.dmgfile you downloaded to the Trash.
This drag-and-drop method is elegantly simple for many self-contained applications.
Navigating .PKG Files: The Installer Wizard Approach
Another common format for internet-downloaded applications is the .pkg (package) file. These are typically used for more complex software that requires additional files, system integrations, or specific installation locations beyond just the Applications folder. Think of them as traditional installer wizards you might encounter on other operating systems.
To install a .pkg file:
- Download: Download the
.pkgfile from a trusted source. - Run the Installer: Double-click the
.pkgfile. This will launch the macOS Installer application. - Follow On-Screen Prompts: The installer will guide you through a series of steps:
- Introduction: Provides information about the software.
- License Agreement: You usually need to agree to the terms.
- Destination Select: Choose where you want to install the software (often “Macintosh HD” or a specific user’s drive).
- Installation Type: Sometimes offers “Standard” or “Custom” installation options, allowing you to select specific components.
- Installation: Click “Install.” You’ll likely be prompted to enter your administrator password for security, as
.pkgfiles often require system-level changes.
- Completion: Once the installation is complete, the installer will usually offer to move the
.pkgfile to the Trash. It’s a good practice to do so to save disk space.
Applications installed this way will also appear in your Applications folder and Launchpad.
Addressing Security Warnings: Gatekeeper and Unidentified Developers
When installing applications from outside the Mac App Store, you’ll inevitably encounter macOS’s built-in security feature: Gatekeeper. Gatekeeper’s primary role is to protect your Mac from malicious software by verifying the origin and integrity of downloaded applications.
If you download an app from an “unidentified developer” (i.e., a developer not registered with Apple, or an app that hasn’t been notarized by Apple), you might see a warning message stating, “AppName” cannot be opened because it is from an unidentified developer.”
To bypass this (only for trusted software):
- Don’t double-click: If you see the warning, click “Cancel.”
- Open Anyway: Go to
System Settings(orSystem Preferenceson older macOS versions) >Privacy & Security. Scroll down to the “Security” section. You should see a message stating, “‘AppName’ was blocked from opening because it is not from an identified developer,” with an “Open Anyway” button next to it. - Confirm: Click “Open Anyway,” and then confirm your decision when prompted. This tells macOS that you trust this specific application.
A Word of Caution: While Gatekeeper is there for your protection, it’s not infallible. Always download software from reputable, official websites. Be wary of download sites offering “free” versions of paid software, as these are often bundled with malware. This is a critical aspect of digital security, as installing compromised software can lead to data breaches, system instability, and other major issues, undermining your productivity.
Handling Common Installation Issues
Occasionally, you might encounter minor hurdles during installation:
- Permissions: Ensure you have administrator rights if the installation requires system-level changes.
- Disk Space: Verify you have enough free storage on your Mac for the application and its associated files.
- Compatibility: For Macs with Apple Silicon (M1, M2, M3 chips), some older applications might require Rosetta 2 to run. macOS will usually prompt you to install Rosetta 2 automatically if an Intel-based app is launched for the first time. Keep your macOS updated to ensure the best compatibility with the latest software and security patches.
Beyond Traditional Methods: Power User Tools and Web Apps
For advanced users, developers, or those seeking niche software not available through standard channels, macOS offers even more powerful and flexible installation methods. Furthermore, the rise of web-based applications provides an alternative that bypasses traditional installation altogether.
Harnessing Homebrew: The macOS Package Manager
For developers, IT professionals, and power users, Homebrew is an indispensable tool. It’s a free, open-source package manager that simplifies the installation and management of command-line tools, utilities, and even some graphical applications not readily available via the App Store or traditional downloads. Think of it as an App Store for the terminal, making it incredibly productive for managing development environments and specialized AI tools.
Why use Homebrew?
- Access to a vast repository: Homebrew provides access to thousands of open-source tools, programming languages, databases, and more, which are essential for software development, data science, and system administration.
- Simplified installation: Instead of manually compiling source code or navigating complex setups, a single command installs software and all its dependencies.
- Easy updates and uninstallation: Managing your installed packages is streamlined, ensuring your tools are always up-to-date and easy to remove.
Basic Homebrew Usage:
- Installation: Open the Terminal app (found in
/Applications/Utilities) and paste the installation command from the official Homebrew website (brew.sh). It typically involves running:
bash

/bin/bash -c "$(curl -fsSL https://raw.githubusercontent.com/Homebrew/install/HEAD/install.sh)"
Follow the on-screen instructions, which may include installing Apple’s Command Line Tools for Xcode. - Installing Apps (Formulae/Casks): Once Homebrew is installed, you can install software using simple commands:
- For command-line tools (called “formulae”):
brew install [package-name](e.g.,brew install git) - For graphical applications (called “casks”):
brew install --cask [app-name](e.g.,brew install --cask visual-studio-code)
- For command-line tools (called “formulae”):
- Updating: To update Homebrew itself and all installed packages:
brew update && brew upgrade - Uninstalling: To remove an application installed via Homebrew:
- For formulae:
brew uninstall [package-name] - For casks:
brew uninstall --cask [app-name]
- For formulae:
Homebrew dramatically boosts productivity for anyone working with a wide array of command-line or open-source software, fitting perfectly into the “Technology Trends” and “AI Tools” aspects by providing easy access to libraries and frameworks.
Web Applications and PWAs: Apps Without Installation
In today’s cloud-centric world, many powerful applications exist entirely within your web browser. These “web apps” or “Progressive Web Apps” (PWAs) don’t require traditional installation, relying on internet connectivity and the browser’s capabilities. Popular examples include Google Workspace (Docs, Sheets), Microsoft 365 Online, Figma, and countless project management tools.
Benefits:
- No installation overhead: Saves disk space and avoids installation complexities.
- Cross-platform: Accessible from any device with a compatible web browser.
- Always up-to-date: Developers push updates instantly without user intervention.
Some modern browsers, like Safari and Chrome, allow you to “install” web apps to your Dock. This often involves selecting an option like “Add to Dock” or “Create Shortcut” from the browser’s menu (e.g., in Safari, File > Add to Dock). This creates a standalone icon that launches the web app in its own window, making it feel more like a native application and enhancing your workflow. While not a true installation, it significantly boosts the productivity of using web-based services.
Managing Your Software: Uninstalling and Best Practices
Installing applications is only half the battle; knowing how to properly uninstall them and maintain a healthy software ecosystem is equally important for your Mac’s performance, security, and long-term productivity. Neglecting uninstallation can lead to wasted disk space, system clutter, and potential security vulnerabilities from outdated software.
How to Uninstall Applications on Mac
The method for uninstalling an application typically mirrors its installation method:
-
Mac App Store Apps:
- Open Launchpad (usually by pinching with four fingers on the trackpad or clicking its icon in the Dock).
- Click and hold the app icon until all icons begin to jiggle.
- Click the ‘X’ button that appears in the corner of the app you wish to uninstall.
- Confirm your decision. This method removes the application and most of its associated files completely.
-
Applications Installed via .DMG (Drag-and-Drop):
- Open your Applications folder (Finder > Applications).
- Drag the application’s icon directly to the Trash in your Dock.
- Empty the Trash.
- Note: While this removes the main application, some preference files or application support data might remain in your User Library folder (
~/Library/). For a truly thorough cleanup, you might need to manually navigate to~/Library/Application Support/,~/Library/Caches/,~/Library/Preferences/, and~/Library/Containers/and delete folders related to the uninstalled app. Be cautious when doing this manually, as deleting the wrong files can affect other applications or your system. Third-party uninstallers (like AppCleaner) can automate this deeper cleanup, but always download them from trusted sources.
-
Applications Installed via .PKG (Installer Wizard):
- Some
.pkginstallations come with their own dedicated uninstaller utility, often located in the Applications folder or a subfolder created during installation. Always check for this first. - If no uninstaller is provided, you can usually drag the main application file from the Applications folder to the Trash. However,
.pkgfiles often scatter components across the system. In such cases, a more thorough cleanup might involve looking in/Library/Application Support/,/Library/LaunchAgents/, and/Library/LaunchDaemons/for related files (these are system-wide libraries, unlike the user-specific~/Library/mentioned above, requiring more care). Using a reputable third-party uninstaller or following developer-provided uninstallation instructions is highly recommended for complex.pkginstallations.
- Some
-
Homebrew Apps:
- For command-line tools:
brew uninstall [package-name] - For graphical apps:
brew uninstall --cask [app-name] - To clean up old packages and versions:
brew cleanup
- For command-line tools:
Crucial Security and Maintenance Tips
Maintaining a lean, secure, and productive Mac goes beyond just knowing how to install and uninstall apps. Adopt these best practices as part of your digital security and productivity routine:
- Keep macOS Updated: Apple regularly releases macOS updates that include critical security patches and performance enhancements. Always install these updates promptly.
- Verify Download Sources: Only download software from official developer websites or the Mac App Store. Avoid file-sharing sites or suspicious download links.
- Review App Permissions: Be mindful of the permissions you grant to applications, especially regarding access to your camera, microphone, location, and files. Regularly review these in
System Settings > Privacy & Security. - Use Strong Passwords and 2FA: For your Apple ID and any accounts associated with app purchases or logins, use strong, unique passwords and enable two-factor authentication.
- Regularly Audit Your Apps: Periodically review the applications installed on your Mac. Uninstall any apps you no longer use or recognize. This reduces clutter, frees up space, and minimizes potential attack vectors.
- Consider Antivirus/Anti-Malware: While macOS has robust built-in security, supplementing it with a reputable antivirus or anti-malware solution can provide an additional layer of protection, particularly if you frequently download software from various sources or deal with cross-platform files.
- Backup Your Data: Regardless of how careful you are, issues can arise. Regularly back up your Mac using Time Machine or a cloud service to protect your valuable data.
By understanding these diverse installation methods and embracing robust security and maintenance practices, you empower yourself to confidently manage your Mac’s software ecosystem. This knowledge not only enhances your productivity by ensuring you have the right tools at your fingertips but also fortifies your digital security, allowing you to leverage technology trends and innovative apps with peace of mind.
aViewFromTheCave is a participant in the Amazon Services LLC Associates Program, an affiliate advertising program designed to provide a means for sites to earn advertising fees by advertising and linking to Amazon.com. Amazon, the Amazon logo, AmazonSupply, and the AmazonSupply logo are trademarks of Amazon.com, Inc. or its affiliates. As an Amazon Associate we earn affiliate commissions from qualifying purchases.