
In the ever-evolving landscape of technology, maintaining a robust and efficient operating system is paramount, whether you’re a casual user, a professional managing critical applications, or a budding entrepreneur relying on digital tools. Over time, even the most meticulously maintained Windows installations can accumulate digital clutter, face performance degradation, or encounter persistent issues that hinder productivity and compromise security. This is where a fresh Windows 10 installation becomes an indispensable skill, offering a reset button that can revitalize your machine, enhance your digital security posture, and optimize your overall user experience.
Far beyond a simple troubleshooting step, performing a fresh install means wiping the slate clean – removing all existing data, programs, and potential malware to install a pristine copy of Windows 10. This guide, tailored for tech enthusiasts, productivity seekers, and anyone looking to reclaim their PC’s peak performance, will walk you through every critical step. From initial preparations and securing your data to navigating the installation process and post-setup optimization, we’ll ensure you’re equipped to handle this crucial procedure with confidence and ease. Let’s embark on the journey to a faster, cleaner, and more secure Windows 10 experience.
Why a Fresh Windows 10 Installation Matters
A fresh Windows 10 installation isn’t just for emergencies; it’s a powerful maintenance strategy that can significantly impact your daily computing experience. Understanding its benefits can help you decide when it’s the right time for a digital detox.
Revitalizing Performance
One of the most immediate and noticeable benefits of a fresh installation is the dramatic improvement in system performance. Over months or years of use, Windows accumulates numerous temporary files, unused programs, registry entries, and remnants of uninstalled software. These digital artifacts, often referred to as “bloatware” or “junk files,” can consume valuable system resources, leading to slower boot times, sluggish application loading, and overall system unresponsiveness. A fresh install eliminates all this clutter, giving your operating system a clean canvas to work from, resulting in a noticeably faster and more agile PC. This isn’t merely about speed; it’s about reclaiming your time and focus, critical elements for productivity in today’s fast-paced digital world. For anyone running financial analysis software, complex design applications, or simply demanding efficient multitasking, a performance boost translates directly into tangible benefits.
Clearing Digital Clutter
Beyond performance, a fresh install offers a psychological and practical benefit of clearing digital clutter. Think of it as spring cleaning for your computer. Many users install numerous applications over time, some of which are only used once or twice and then forgotten. Others might be trial versions or programs bundled with hardware that you never intended to keep. A fresh installation provides an opportunity to reassess your software needs, installing only what is truly essential. This minimalist approach not only frees up disk space but also simplifies your digital environment, making it easier to find files, manage applications, and maintain a streamlined workflow. It’s a strategic move that aligns with modern productivity principles, reducing distractions and enhancing focus.
Enhancing Security and Stability
Security is a cornerstone of any robust digital environment, and a fresh Windows 10 installation plays a critical role in enhancing it. Over time, operating systems can become susceptible to malware, spyware, and other malicious software that might evade even the best antivirus programs. These threats can compromise your personal data, slow down your system, or even provide unauthorized access to your computer. A fresh install effectively removes all such threats by wiping the entire system drive clean, providing a pristine, secure foundation. Furthermore, it resolves persistent software glitches, driver conflicts, and system instability issues that might have accumulated, ensuring a more reliable and less error-prone computing experience. For individuals handling sensitive data, whether personal finances or proprietary business information, this security reset is invaluable. It’s a proactive step in digital security, ensuring your system adheres to the latest standards of protection.
When is a Fresh Install Necessary?
While beneficial, a fresh install isn’t an everyday task. Consider it when:
- Performance is severely degraded: Your PC is consistently slow, freezes often, or takes an unusually long time to boot.
- Persistent software issues: You’re experiencing continuous software crashes, inexplicable errors, or driver conflicts that conventional troubleshooting can’t resolve.
- Malware infection: You suspect or have confirmed a deep-seated malware infection that standard antivirus scans can’t fully eradicate.
- Upgrading hardware: You’ve installed a new Solid State Drive (SSD) or a larger hard drive and want to leverage its full potential with a clean OS installation.
- Selling or donating your PC: To ensure complete data privacy and security, a fresh install is essential before transferring ownership.
- Simply wanting a clean slate: You feel overwhelmed by digital clutter and wish to start anew with a streamlined system.
Pre-Installation Essentials: Gathering Your Tools and Information
Before you embark on the fresh installation journey, meticulous preparation is key. Skipping these crucial steps can lead to data loss, installation headaches, or an incomplete setup. This phase is about ensuring you have everything you need, from backups to bootable media, guaranteeing a smooth and successful process.
Back Up Your Precious Data
This is arguably the most critical step. A fresh installation will erase everything on the drive where Windows is installed. Therefore, backing up all your personal files – documents, photos, videos, music, bookmarks, emails, and any other important data – is non-negotiable.
Methods for data backup:
- External Hard Drive: A reliable and straightforward method. Simply copy and paste your files or use a dedicated backup software.
- Cloud Storage: Services like Google Drive, OneDrive, Dropbox, or iCloud offer convenient online storage. This is excellent for syncing important files and accessing them from anywhere.
- Network Attached Storage (NAS): For those with a home network, a NAS provides centralized, robust storage for all your devices.
- USB Flash Drives: Suitable for smaller sets of critical files.
What to back up: Don’t just think about your Documents, Pictures, and Videos folders. Also consider:
- Desktop files: Many users save important items directly to the desktop.
- Downloads folder: Often contains installers or temporary files you might need.
- Browser bookmarks and settings: Export these from your browser’s settings.
- Email archives: If using a desktop email client (like Outlook or Thunderbird), back up your PST/OST files or profile folders.
- Application-specific data: Save files from creative suites, project management tools, or financial software.
- Drivers: While we’ll re-install drivers, sometimes having backups of specific hardware drivers (especially for older or niche devices) can save time.
Secure Your Windows 10 License Key
You’ll need a legitimate Windows 10 license key (product key) to activate your operating system. Without it, your Windows installation will be limited in functionality and feature a persistent “Activate Windows” watermark.
Where to find your product key:
- Digital License: If you upgraded from Windows 7/8/8.1, or bought a digital copy, your license is likely tied to your Microsoft account. You usually won’t need to enter a key during installation; it will activate automatically after signing in to your Microsoft account.
- Sticker on your PC/Laptop: For pre-built systems, look for a sticker on the chassis (sometimes under the battery for older laptops).
- Email confirmation: If you purchased a digital key, check your email.
- Retail box: If you bought a physical copy of Windows, the key is usually inside the box or on a card.
wmic path softwarelicensingservice get OA3xOriginalProductKey: You can try running this command in Command Prompt (as administrator) on your current Windows installation to retrieve the key, though this mainly works for OEM keys embedded in the BIOS.
Prepare Your Installation Media (USB Flash Drive)
You’ll need a bootable USB drive (at least 8GB, preferably 16GB or larger) with the Windows 10 installation files.
Using the Windows 10 Media Creation Tool:
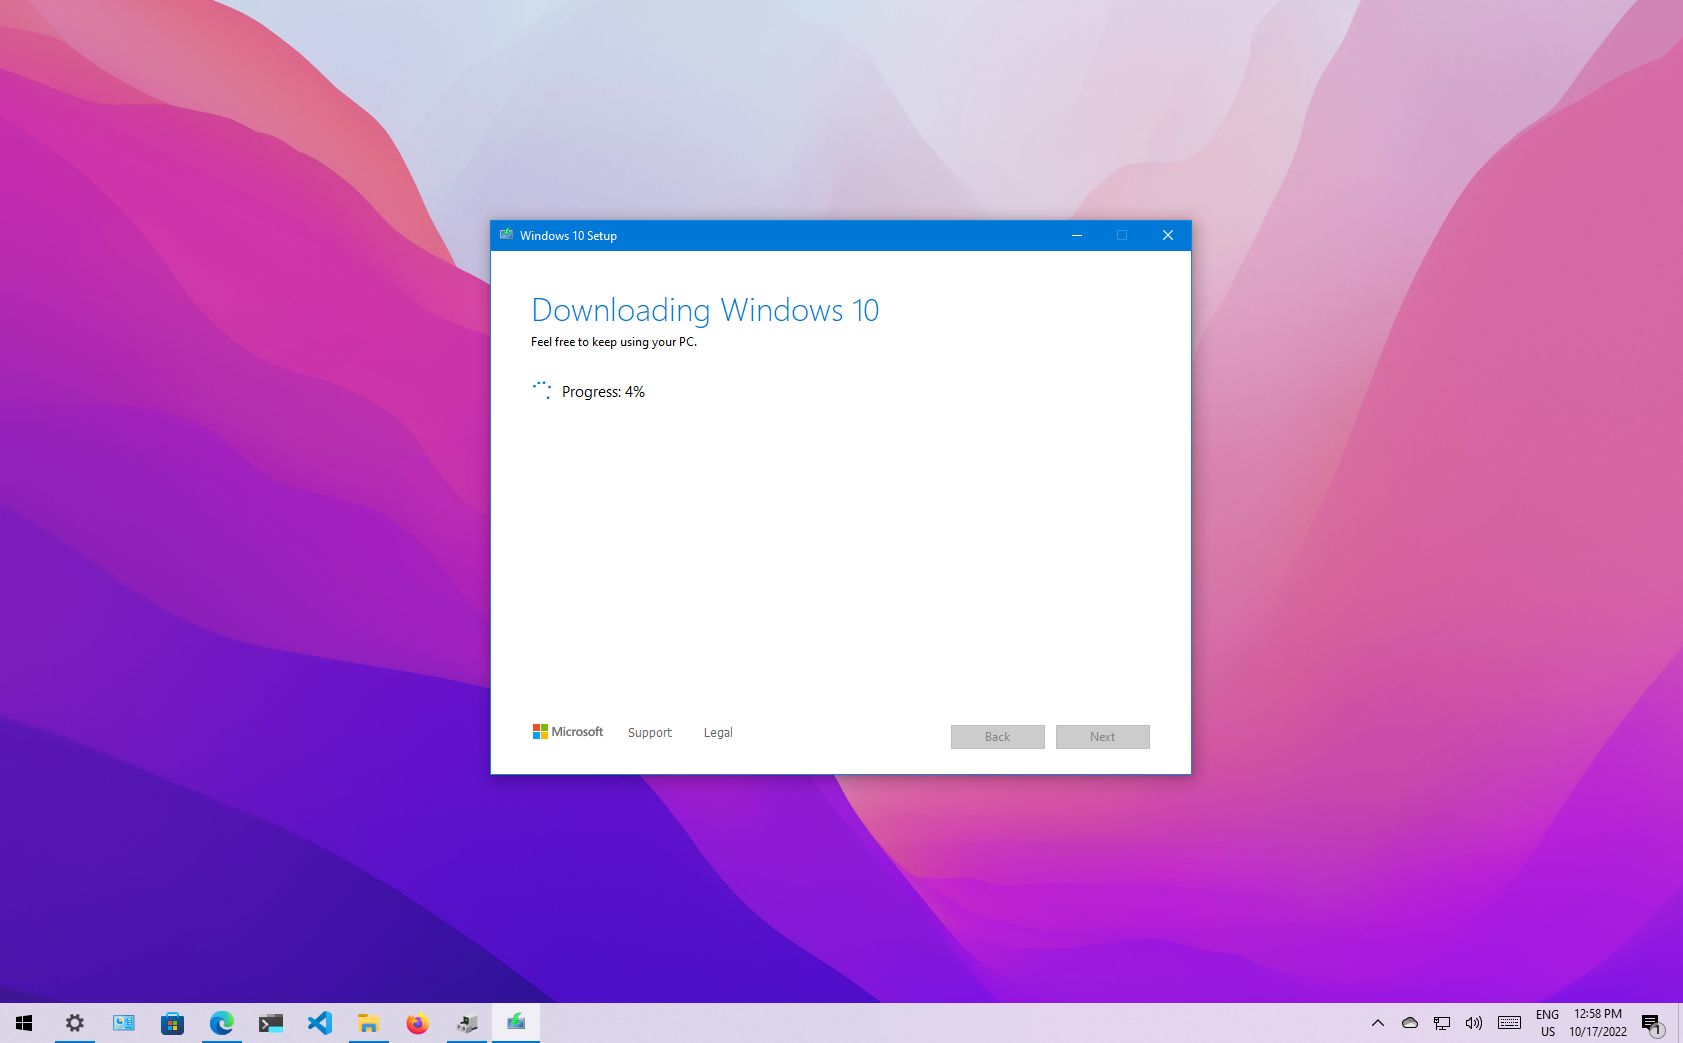
- Download: Go to the official Microsoft website and download the Windows 10 Media Creation Tool.
- Run the tool: Accept the terms, then select “Create installation media (USB flash drive, DVD, or ISO file) for another PC.”
- Select options: Choose your language, edition (Windows 10), and architecture (64-bit is most common).
- Choose USB drive: Select “USB flash drive” as the media type and pick your connected USB drive.
- Create: The tool will download the Windows 10 ISO and create the bootable USB drive. This process can take some time depending on your internet speed.
- Verify: Once complete, your USB drive will be ready to boot from.
Note on Rufus: While the Media Creation Tool is excellent, advanced users might prefer Rufus for creating bootable media, especially for specific UEFI/Legacy BIOS configurations or to integrate drivers into the ISO. However, for most users, the Microsoft tool suffices.
Check System Requirements and Compatibility
Ensure your computer meets the minimum requirements for Windows 10:
- Processor: 1 gigahertz (GHz) or faster compatible processor
- RAM: 1 gigabyte (GB) for 32-bit or 2 GB for 64-bit
- Hard disk space: 32 GB for 64-bit OS or 20 GB for 32-bit OS
- Graphics card: DirectX 9 or later with WDDM 1.0 driver
- Display: 800×600 resolution
Most modern PCs easily exceed these. However, older machines might struggle, and knowing this beforehand prevents frustration.
Gather Essential Drivers
While Windows 10 has a good selection of built-in drivers, it’s wise to have critical drivers downloaded beforehand, especially for your network adapter (Ethernet/Wi-Fi). Without network drivers, you won’t be able to connect to the internet to download other drivers or updates.
Key drivers to download (from your PC manufacturer’s support website):
- Network (LAN/Wi-Fi) drivers: Crucial for internet connectivity.
- Chipset drivers: Important for motherboard functionality.
- Graphics card drivers: Essential for display performance and stability.
- Audio drivers: For sound output.
Save these drivers to a separate USB flash drive or another partition that won’t be wiped during the installation.
The Step-by-Step Installation Process
With your preparations complete, it’s time to dive into the core installation. This section details how to boot from your installation media, partition your drive, and initiate the Windows 10 setup.
Adjusting BIOS/UEFI Settings for Boot
Your computer needs to be instructed to boot from your USB installation media instead of your primary hard drive. This is done through your system’s BIOS (Basic Input/Output System) or UEFI (Unified Extensible Firmware Interface) settings.

- Restart your PC: Insert the bootable USB drive into an available port.
- Access BIOS/UEFI: As your computer starts, repeatedly press the designated key to enter BIOS/UEFI setup. Common keys include
Del,F2,F10,F12, orEsc. The specific key usually flashes on the screen during startup. - Navigate to Boot Options: Look for a menu item like “Boot Options,” “Boot Order,” or “Startup.”
- Change Boot Priority: Set your USB drive as the first boot device. You might see options like “USB HDD,” “Removable Devices,” or the specific brand name of your USB drive. If you have a UEFI system, ensure you select the UEFI version of your USB drive if available.
- Save and Exit: Save your changes and exit BIOS/UEFI. Your computer will restart and should now boot from the USB drive. If it doesn’t, revisit BIOS/UEFI to confirm settings and ensure the USB is properly formatted/bootable.
Initiating the Windows 10 Setup
Once your computer successfully boots from the USB drive, you’ll see the Windows setup screen.
- Initial Setup Screen: The first screen will ask for your language, time and currency format, and keyboard input method. Choose your preferences and click “Next.”
- Install Now: Click the “Install now” button to begin the process.
- Enter Product Key: You’ll be prompted to enter your Windows 10 product key.
- If you have one, enter it now.
- If your license is digital (tied to your Microsoft account) or you plan to activate later, click “I don’t have a product key.” Windows will usually activate automatically once you connect to the internet and sign in with your Microsoft account after installation.
- Accept License Terms: Read the Microsoft Software License Terms and check “I accept the license terms” if you agree. Click “Next.”
Choosing Installation Type: Custom (Fresh Install)
This is a critical decision point.
- Which type of installation do you want?: You’ll be presented with two options:
- Upgrade: Install Windows and keep files, settings, and applications: This performs an in-place upgrade, preserving your existing data. Do NOT choose this for a fresh install.
- Custom: Install Windows only (advanced): This is the option you want for a clean installation. Select “Custom.”
Partitioning Your Hard Drive
This step involves managing your disk drives and partitions. Proceed with caution here, as incorrect choices can lead to data loss.
- Drive Selection: You’ll see a list of all drives and partitions on your computer. Identify the drive where you want to install Windows (usually
Drive 0). - Deleting Existing Partitions: For a truly fresh install, it’s recommended to delete all existing partitions on the target drive. This ensures no remnants of previous installations or hidden recovery partitions remain.
- Select each partition on
Drive 0(e.g., “Drive 0 Partition 1,” “Drive 0 Partition 2,” etc.) and click “Delete.” - Confirm the warning messages about data loss. Repeat until
Drive 0shows only “Drive 0 Unallocated Space.”
- Select each partition on
- Creating New Partition (Optional but recommended):
- Select “Drive 0 Unallocated Space.”
- Click “New” to create a new partition. Windows will suggest the maximum available size. You can adjust this if you want to create multiple partitions (e.g., one for Windows and one for data).
- Click “Apply.” Windows will then create the primary partition and often a few small system partitions (Recovery, System, MSR). This is normal.
- Select Primary Partition: Ensure the newly created “Primary” partition on
Drive 0is selected. This is where Windows will be installed. - Click “Next.”
The Core Installation Phase
Windows will now begin copying files and installing the operating system.
- Installation Progress: You’ll see a screen showing the progress, including “Copying Windows files,” “Getting files ready for installation,” “Installing features,” “Installing updates,” and “Finishing up.”
- Automatic Restarts: Your computer will restart several times during this phase. Do NOT remove the USB drive until the first restart, or even until you see the Windows welcome screen. The system might need to boot from the USB again briefly to complete certain setup stages, but it will eventually boot from the newly installed Windows on your hard drive.
Initial System Setup and Personalization
After the installation files are copied, your computer will boot into the initial Windows 10 setup experience (Out-of-Box Experience – OOBE).
- Region and Keyboard Layout: Select your region and keyboard layout. You can add a second keyboard layout if needed.
- Network Connection: Connect to a Wi-Fi network or plug in an Ethernet cable. This is crucial for completing the setup and subsequent activation.
- Account Setup:
- Microsoft Account: Microsoft strongly encourages using a Microsoft account. Sign in with your existing account or create a new one. This links your digital license and syncs settings.
- Offline Account (Limited): If you prefer not to use a Microsoft account, look for an option like “Offline account” or “Domain join instead” (the wording changes with Windows versions). This will let you create a local user account.
- PIN Creation: Windows will prompt you to create a PIN for faster sign-ins.
- Privacy Settings: Review the privacy settings (location, speech recognition, diagnostic data, tailored experiences, advertising ID). Disable anything you’re uncomfortable with. This is a critical step for safeguarding your personal data and digital footprint.
- Cortana Setup: Choose whether to enable Cortana.
- Other Settings: You might see prompts for OneDrive, timeline, and other Microsoft services. Make your choices based on your preferences.
Once these steps are complete, Windows will finalize the setup, and you’ll be greeted by the Windows 10 desktop. Congratulations, you’ve successfully installed a fresh copy of Windows 10!
Post-Installation Checklist: Optimizing Your New System
Installing Windows is just the first step. To ensure optimal performance, security, and a seamless user experience, a few crucial post-installation tasks are essential. This is where you transform a barebones OS into a personalized, fully functional workstation.
Install Essential Drivers
Even with a fresh Windows installation, some hardware components might be using generic drivers, or critical ones (like your graphics card) might be missing entirely.
- Check Device Manager: Right-click the Start button and select “Device Manager.” Look for any devices with a yellow exclamation mark, indicating a missing or problematic driver.
- Install Pre-downloaded Drivers: Install the network, chipset, graphics, and audio drivers you downloaded earlier. Start with the network driver if you don’t have internet access.
- Manufacturer’s Website: Visit your PC or motherboard manufacturer’s support website to download the latest drivers specific to your model.
- Graphics Card Drivers: For dedicated graphics cards (NVIDIA, AMD), download the latest drivers directly from their respective websites for the best performance in gaming and demanding applications.
- Peripherals: Install drivers for any specialized peripherals like printers, scanners, or external webcams.
Run Windows Update
After installing drivers, the next crucial step is to ensure your system is fully up-to-date with the latest security patches and feature updates from Microsoft.
- Access Windows Update: Go to
Settings > Update & Security > Windows Update. - Check for Updates: Click “Check for updates.” Windows will download and install any pending updates.
- Restart (Multiple Times): Be prepared for multiple restarts, as some updates require them to complete their installation. Continue checking for updates until no more are found.
- Benefit: Keeping Windows updated is paramount for security, stability, and access to the latest features. It patches vulnerabilities that hackers could exploit, thereby fortifying your digital defenses.
Restore Your Data and Applications
Now that your system is stable and updated, you can start bringing your personal files and essential software back.
- Restore Personal Data: Copy your backed-up documents, photos, videos, and other personal files from your external drive or cloud storage back to their respective folders on your new Windows installation.
- Reinstall Applications: Reinstall your essential software, starting with productivity suites (Microsoft Office, LibreOffice), web browsers (Chrome, Firefox, Edge), communication apps (Slack, Discord), and any specialized software you use for work or hobbies.
- Download from official sources: Always download software from the official developer websites to avoid bundled malware or outdated versions.
- Avoid unnecessary installations: This is an opportunity to be selective and only install applications you genuinely need, adhering to the “clearing digital clutter” philosophy.
- Browser Settings/Bookmarks: Import your saved browser bookmarks and settings.
Optimize Privacy Settings
During the initial setup, you might have made some privacy choices. It’s a good idea to revisit these and fine-tune them.
- Go to
Settings > Privacy: Review each category (General, Location, Camera, Microphone, Account info, etc.). - Disable Unnecessary Permissions: Turn off permissions for apps or features that don’t need them. For example, if you don’t use location services, turn it off.
- Review Diagnostic Data: Choose the “Basic” diagnostic data setting if you’re concerned about Microsoft collecting usage information.
- Tailored Experiences: Disable “Let apps use my advertising ID” and “Show me suggested content in the Settings app” to reduce personalized ads and suggestions.
- Benefit: Taking control of your privacy settings is crucial for managing your digital footprint and protecting sensitive information.
Install Antivirus and Security Software
While Windows Defender (built-in antivirus) is robust, many users prefer third-party solutions for additional features and peace of mind.
- Enable Windows Defender: If you don’t plan to install a third-party antivirus, ensure Windows Defender is active and up-to-date. It’s a capable solution for most users.
- Install Third-Party Antivirus (Optional): If you opt for a third-party antivirus (e.g., Bitdefender, Norton, ESET), install it now. Windows Defender will automatically disable itself once a third-party solution is detected.
- Firewall: Ensure your firewall is active (Windows Firewall is enabled by default) to protect against unauthorized network access.
- Benefit: Robust security software is your first line of defense against malware, ransomware, and other cyber threats, safeguarding your data and system integrity.
Create a System Restore Point
After all your drivers, updates, and essential software are installed, and your system is running perfectly, it’s an ideal time to create a system restore point.
- Search for “Create a restore point” in the Windows search bar and open the System Properties window.
- Click “Create…”: In the “System Protection” tab, click the “Create…” button.
- Name the restore point: Give it a descriptive name, like “Post Fresh Install – All Drivers & Software.”
- Benefit: A restore point acts as a snapshot of your system. If you encounter issues later (e.g., after installing new software or drivers), you can revert your system to this stable state without reinstalling Windows.
By diligently following these post-installation steps, you transform your fresh Windows 10 installation into a finely tuned, secure, and personalized computing environment. This comprehensive approach ensures that your system is not only fast and clean but also resilient against future challenges, ready to support all your technological endeavors, brand-building efforts, and financial management tasks with unparalleled efficiency.
aViewFromTheCave is a participant in the Amazon Services LLC Associates Program, an affiliate advertising program designed to provide a means for sites to earn advertising fees by advertising and linking to Amazon.com. Amazon, the Amazon logo, AmazonSupply, and the AmazonSupply logo are trademarks of Amazon.com, Inc. or its affiliates. As an Amazon Associate we earn affiliate commissions from qualifying purchases.