
Is your Windows 10 PC feeling sluggish, riddled with inexplicable errors, or perhaps infected with persistent malware? Over time, even the most robust operating systems can accumulate digital clutter, corrupted files, and conflicting software, leading to a noticeable decline in performance and reliability. While simply resetting Windows 10 can offer a partial solution, a “clean install” takes a more radical, yet highly effective, approach. It’s akin to giving your computer a complete digital makeover, wiping the slate entirely clean and reinstalling Windows 10 from scratch. This process eliminates all old files, applications, and settings, resulting in a fresh, responsive, and optimized system.

This comprehensive guide will walk you through every step of performing a clean installation of Windows 10. From crucial preparatory measures like backing up your data and gathering necessary drivers to the actual installation process and essential post-installation tasks, we’ll ensure you have all the information needed to confidently restore your PC to its peak performance. By the end, you’ll not only have a faster and more stable computer but also a deeper understanding of its foundational software, enhancing your overall tech proficiency.
Why Opt for a Clean Installation? Understanding the Benefits
Many users might shy away from the idea of completely reinstalling their operating system, fearing data loss or complex technical procedures. However, the benefits of a clean installation often far outweigh these initial concerns, especially when dealing with deeply rooted system issues. It’s not just about fixing problems; it’s about optimizing your digital workspace for peak efficiency and security.
Enhanced Performance and Responsiveness
One of the most immediate and noticeable benefits of a clean install is a dramatic improvement in system performance. Over months or years of use, Windows accumulates temporary files, registry entries from uninstalled programs, and various forms of digital detritus that can bog down your system. Even after uninstalling software, residual files often remain, contributing to bloat. A clean install meticulously wipes away all this unnecessary baggage, allowing Windows 10 to run as efficiently as it did on day one. Applications will launch faster, multitasking will feel smoother, and boot times will significantly decrease, providing a snappier and more enjoyable computing experience. This revitalization can even extend the useful life of older hardware, offering a cost-effective alternative to immediate hardware upgrades.
Resolving Persistent Software Issues and Conflicts
Beyond just performance, a clean install is the ultimate troubleshooting tool for stubborn software issues. Are you encountering frequent blue screens of death (BSODs), application crashes, or inexplicable system freezes? These problems often stem from corrupted system files, driver conflicts, or deeply embedded malware that a standard antivirus scan might miss. A clean installation eradicates these underlying problems by replacing all system files with fresh, uncorrupted versions. It eliminates conflicting drivers, resolves registry errors, and provides a pristine environment free from third-party software conflicts that might have been causing headaches. For anyone grappling with frustrating and persistent software glitches, a clean install offers a definitive solution.
Bolstering Digital Security and Privacy
In an age where digital security is paramount, a clean install serves as a powerful defense mechanism. If you suspect your system has been compromised by malware, rootkits, or other persistent threats that resist conventional removal tools, a complete reinstallation is often the most reliable way to ensure your PC is truly clean. It acts as a digital reset button, eradicating any malicious software that might have burrowed deep into your system files or boot sector. Furthermore, a fresh installation allows you to meticulously review and configure your privacy settings from scratch, ensuring that only the data you consent to is shared. This heightened control over your digital footprint contributes to a more secure and private computing environment, crucial for protecting personal and sensitive information.
A Fresh Start for Productivity and Organization
Beyond the technical advantages, a clean install offers a psychological benefit: a fresh start. It provides an opportunity to reassess your software needs, installing only essential applications and discarding unnecessary bloatware that might have accumulated. This selective approach fosters a more organized and streamlined digital workspace, free from distractions and irrelevant programs. For professionals and students alike, a decluttered system translates directly into improved productivity, allowing you to focus on tasks without being hindered by slow performance or a chaotic array of desktop icons and installed applications. It’s a chance to build a custom environment tailored precisely to your workflow, enhancing efficiency and reducing digital stress.
Essential Preparations Before You Begin
Before you embark on the journey of reinstalling Windows 10, meticulous preparation is key. Skipping these crucial steps can lead to significant headaches, including data loss or frustrating delays. Think of this phase as laying the groundwork for a smooth and successful installation.
Crucial Data Backup: Your Digital Safety Net
This is, without a doubt, the most critical step. A clean installation will erase everything on the drive where Windows is installed. If you have any personal documents, photos, videos, music, saved games, or any other irreplaceable files, you must back them up.
- External Hard Drive: The most common and reliable method. Simply copy and paste your important folders (Documents, Pictures, Videos, Downloads, Desktop) to an external drive.
- Cloud Storage: Services like OneDrive, Google Drive, Dropbox, or iCloud offer convenient ways to back up files, especially if you have an active subscription with ample space. This is also excellent for off-site redundancy.
- Network-Attached Storage (NAS): If you have a home network server, this can be an efficient way to back up large amounts of data.
Ensure you verify that your backups are complete and accessible before proceeding. There is no recovery from data loss if you haven’t backed up properly.
Locating Your Windows 10 Product Key
While Windows 10 often reactivates automatically on hardware where it was previously installed, having your product key readily available is a smart precaution.
- Digital License: If your Windows 10 license is tied to your Microsoft account or came pre-installed on your PC, it likely has a digital license. This usually reactivates automatically after a clean install when you sign in with your Microsoft account.
- Sticker on PC: For older PCs upgraded to Windows 10, or retail copies, the key might be on a sticker on your computer’s casing or in the product packaging.
- Third-Party Tools: If you can still boot into your current Windows installation, tools like ProduKey can often retrieve the product key from your system. Make a note of it and store it safely.
Gathering Necessary Drivers
After a clean install, Windows 10 may not automatically have all the drivers for your specific hardware, especially for older or less common components. Network drivers (Ethernet or Wi-Fi) are particularly important as they allow you to connect to the internet and download other updates.
- Manufacturer’s Website: Visit your PC manufacturer’s support website (e.g., Dell, HP, Lenovo, ASUS) or the motherboard manufacturer’s website (for custom-built PCs). Navigate to the support/drivers section for your specific model.
- Key Drivers: Prioritize downloading drivers for your chipset, network adapter (Wi-Fi and Ethernet), graphics card (GPU), and any critical storage controllers (like RAID drivers, if applicable).
- USB Drive: Save these drivers to a separate USB flash drive, distinct from your Windows installation media, so they are readily available post-installation.
Creating Bootable Windows 10 Installation Media
You’ll need a way to install Windows 10 onto your system. The most common and recommended method is using a USB flash drive.
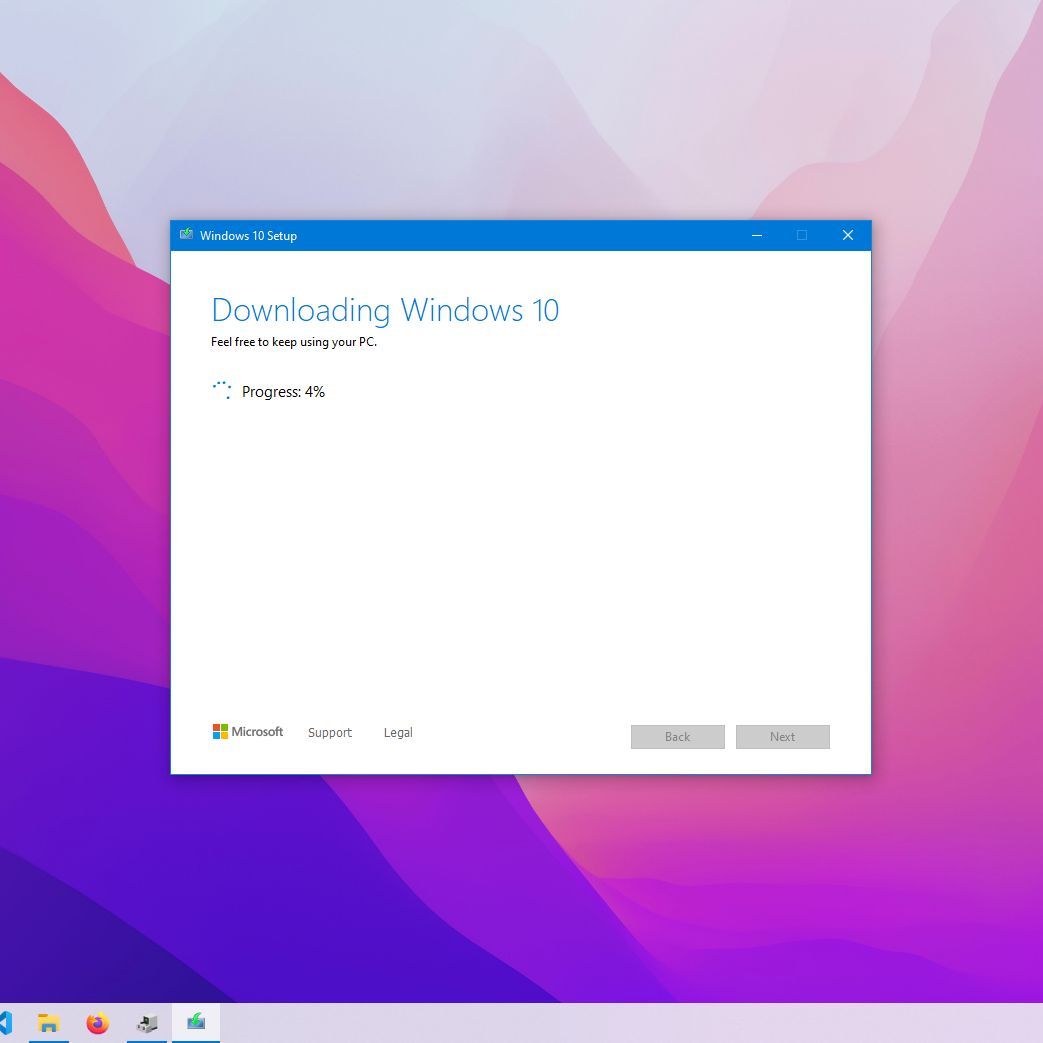
- Microsoft’s Media Creation Tool: This free tool from Microsoft is the easiest way to create a bootable USB drive (at least 8GB capacity) or download an ISO file.
- Go to the official Microsoft Windows 10 download page.
- Download the “Media Creation Tool.”
- Run the tool, accept the terms, and choose “Create installation media (USB flash drive, DVD, or ISO file) for another PC.”
- Select your language, edition, and architecture (usually 64-bit).
- Choose “USB flash drive” and select your connected USB drive from the list.
- The tool will download Windows 10 and make the USB drive bootable. Ensure your USB drive contains no important data as it will be formatted.
- DVD (Optional): If you prefer using a DVD, the Media Creation Tool can also create an ISO file which you can then burn to a blank DVD.
System Requirements and Power Considerations
Ensure your PC meets the minimum system requirements for Windows 10:
- Processor: 1 gigahertz (GHz) or faster compatible processor
- RAM: 1 gigabyte (GB) for 32-bit or 2 GB for 64-bit
- Hard disk space: 32 GB for 64-bit OS or 20 GB for 32-bit OS
- Graphics card: DirectX 9 or later with WDDM 1.0 driver
- Display: 800×600 resolution
Finally, ensure your computer is plugged into a reliable power source, especially if it’s a laptop. An interruption during the installation process can corrupt your system and necessitate starting over.
The Step-by-Step Clean Installation Process
With your preparations complete, you’re ready to dive into the core process of installing Windows 10. This sequence involves booting from your prepared media, navigating the setup wizard, and making critical decisions regarding your storage drive.
Initiating the Boot Sequence from Your USB/DVD
The first step is to tell your computer to start from your newly created installation media instead of its internal hard drive.
- Insert Media: Plug your bootable USB flash drive into an available USB port or insert the Windows 10 installation DVD into your optical drive.
- Restart PC: Restart your computer.
- Access Boot Menu/BIOS/UEFI: As your computer starts up, you’ll need to repeatedly press a specific key to enter either the Boot Menu or the BIOS/UEFI firmware settings. Common keys include
F2,F10,F12,Del, orEsc. The exact key varies by manufacturer (check your PC’s manual or look for an on-screen prompt during startup).- Boot Menu: If you can access a “Boot Menu,” simply select your USB drive or DVD drive from the list and press Enter.
- BIOS/UEFI: If you enter the BIOS/UEFI settings, navigate to the “Boot” tab or section. Change the “Boot Order” or “Boot Priority” to make your USB drive or DVD drive the first boot device. Save your changes and exit, and the computer will restart.
- “Press any key to boot from USB/DVD”: Once your computer attempts to boot from the installation media, you might see a message like “Press any key to boot from CD or DVD…” or “Press any key to boot from USB…”. Press any key on your keyboard to proceed. If you miss this prompt, the computer might boot back into your old OS, and you’ll have to restart and try again.
Navigating the Windows Setup Wizard
Once you’ve successfully booted from the installation media, the Windows Setup wizard will begin.
- Language, Time, and Keyboard: The first screen asks you to select your language, time and currency format, and keyboard or input method. Make your selections and click “Next.”
- Install Now: Click the “Install now” button in the center of the screen.
- Enter Product Key: The next screen will ask for your product key.
- If you have your key, enter it here.
- If your Windows 10 license is a digital license tied to your Microsoft account (e.g., if it came pre-installed or was an upgrade from an activated Windows 7/8), you can click “I don’t have a product key.” Windows will automatically activate once you connect to the internet and sign in with your Microsoft account after the installation is complete.
- Accept License Terms: Read through the Microsoft Software License Terms, check the “I accept the license terms” box, and click “Next.”
- Choose Installation Type: This is a crucial step for a clean install.
- You’ll be presented with two options: “Upgrade: Install Windows and keep files, settings, and applications” or “Custom: Install Windows only (advanced).”
- Select “Custom: Install Windows only (advanced).” This option ensures a clean installation, erasing everything on the selected drive.
Disk Partitioning: Wiping and Configuring Your Drive
This is where you’ll manage your hard drives and decide where Windows 10 will be installed. Proceed with extreme caution here, as selecting the wrong drive or partition will result in data loss.
- Identify Target Drive: You’ll see a list of drives and partitions detected on your computer. If you have multiple hard drives, carefully identify the drive where you want to install Windows 10 (usually the SSD or primary HDD). Look for the drive with the largest “Total Size” that you intend to use for your operating system.
- Delete Existing Partitions: To ensure a truly clean install and remove any old Windows installations, recovery partitions, or manufacturer bloatware:
- Select each partition associated with the drive you intend to clean install on (e.g., “Drive 0 Partition 1,” “Drive 0 Partition 2,” etc.).
- Click the “Delete” button for each one. Windows will warn you about losing data; confirm to proceed. Repeat this for all partitions on your target drive until it shows as a single block of “Unallocated Space.”
- Self-correction note: If you have other drives in your system where you store data and do not want to wipe them, be extremely careful not to delete partitions on those drives. Only delete partitions on the drive you intend to install Windows 10 on.
- Create New Partition (Optional, but Recommended):
- Select the “Unallocated Space” that represents your target drive.
- Click “New.” Windows will usually suggest the maximum available size. Click “Apply.”
- Windows will inform you that it needs to create additional partitions for system files (like recovery and EFI partitions). Click “OK.” This will create a “Primary” partition for Windows and a few smaller system-reserved partitions.
- Select Primary Partition: Select the newly created “Primary” partition (or the largest partition, typically “Drive X Partition Y: Primary”) and click “Next.”
The installation process will now begin, copying Windows files to your drive. This can take some time, and your computer will restart multiple times. Do not turn off your computer during this phase.
Completing the Installation and Initial Setup
After the main installation files are copied, your computer will reboot, and you’ll go through the initial setup screens.
- Regional Settings: Choose your region and click “Yes.”
- Keyboard Layout: Select your keyboard layout and click “Yes.” You can add a second layout if needed.
- Network Connection: Connect to a network (Wi-Fi or Ethernet). If you skip this, you might have limited setup options.
- Account Setup:
- Microsoft Account: Windows 10 strongly encourages signing in with a Microsoft account. This links your digital license, OneDrive, and other Microsoft services.
- Offline Account (Local Account): If you prefer not to use a Microsoft account, you might see an option like “Offline account” or “Skip for now” on some versions. This creates a local user account.
- Enter your desired username and password.
- Privacy Settings: Carefully review the privacy settings options (Location, Diagnostic data, Tailored experiences, etc.). Microsoft defaults to enabling most of these; disable any you’re uncomfortable with for enhanced privacy. Click “Accept.”
- Cortana Setup: Decide whether you want to enable Cortana.
- Final Touches: Windows will finish setting up your desktop. This might take a few minutes. Eventually, you’ll be greeted by your new, clean Windows 10 desktop.
Post-Installation: Optimizing Your Fresh Windows 10 System
Getting to the desktop is just the beginning. To truly complete your clean install and ensure your system is secure, stable, and ready for use, there are several crucial post-installation steps. These tasks will bring your system up to date, install essential software, and restore your personal data.
Installing Essential Drivers
Although Windows 10 often includes many generic drivers, installing the latest manufacturer-specific drivers is vital for optimal performance and stability, especially for graphics, chipset, and network adapters.
- Start with Network Drivers: If you saved your drivers to a separate USB drive during preparation, start by installing your network adapter drivers (Wi-Fi and/or Ethernet). This will allow you to connect to the internet.
- Install Chipset Drivers: Install your motherboard’s chipset drivers next. These are fundamental for how your system’s components communicate.
- Graphics Card (GPU) Drivers: Download and install the latest drivers for your graphics card from NVIDIA, AMD, or Intel’s official websites. This is critical for display performance, gaming, and video editing.
- Other Drivers: Install any other critical drivers you gathered, such as for sound cards, webcams, or peripherals. Device Manager (accessible by right-clicking the Start button) can help identify any missing drivers (look for yellow exclamation marks).
Running Windows Updates
Once you have internet access and basic drivers installed, the next priority is to update Windows 10 itself. This ensures you have the latest security patches, bug fixes, and feature improvements.
- Go to Settings: Click the Start button, then the gear icon (Settings).
- Update & Security: Navigate to “Update & Security.”
- Windows Update: Click “Check for updates.” Let Windows download and install all available updates. This process might take a considerable amount of time and require multiple restarts. Continue checking for updates until no more are found.
Reinstalling Your Go-To Applications
Now that your system is updated and drivers are in place, you can begin reinstalling your essential software.
- Prioritize Essentials: Start with applications you use daily, such as your preferred web browser (Chrome, Firefox, Edge), office suite (Microsoft Office, LibreOffice), communication tools (Discord, Slack, Zoom), and any specialized software for work or hobbies.
- Download from Official Sources: Always download software from the official developer’s website to avoid bundled bloatware or malware.
- Consider a Software Manager (Optional): Tools like Ninite (ninite.com) can simplify this process by allowing you to select multiple popular applications and install them all at once, silently and without bloatware.
Restoring Your Backed-Up Data
Once your applications are installed, it’s time to bring back your personal files.
- Connect Backup Drive: Plug in your external hard drive or access your cloud storage.
- Copy Files: Copy your documents, pictures, videos, music, and other personal files from your backup location back to their respective folders (Documents, Pictures, etc.) on your new Windows 10 installation.
- Organize: This is also an excellent opportunity to reorganize your files and eliminate any unnecessary clutter you might have accumulated.
Fine-Tuning Privacy and Security Settings
While you addressed some privacy settings during the initial setup, it’s worth reviewing them again now that the system is fully operational.
- Privacy Dashboard: Go to Settings > Privacy. Review each category (General, Speech, Inking & typing, Diagnostics & feedback, Activity history, etc.) and adjust settings to your comfort level.
- App Permissions: Under Settings > Privacy, check “App permissions” to see which applications have access to your camera, microphone, location, etc., and revoke permissions for those that don’t need them.

Initializing Essential Security Software
Although Windows 10 includes Windows Defender (now Microsoft Defender Antivirus), which is a capable antivirus solution, you might prefer a third-party security suite.
- Microsoft Defender: If you plan to stick with Microsoft Defender, ensure it’s up to date. It should automatically update with Windows Updates.
- Third-Party Antivirus: If you prefer a different antivirus (e.g., Avast, AVG, Bitdefender, ESET, Kaspersky), download and install it from its official website. Once installed, Windows Defender will usually disable itself automatically to avoid conflicts. Run a full system scan immediately after installation.
- Firewall: Ensure your firewall is active (Windows Firewall is usually enabled by default and sufficient for most users).
By diligently following these post-installation steps, you’ll not only have a clean and fast Windows 10 system but also one that is fully updated, secure, and tailored to your specific needs. The initial effort of a clean install pays dividends in terms of long-term stability, performance, and peace of mind, providing a robust foundation for all your digital endeavors.
A clean installation of Windows 10 is a powerful tool for breathing new life into an ailing PC, resolving persistent software issues, and ensuring a secure, efficient computing environment. While it requires careful preparation and attention to detail, the process itself is straightforward and highly rewarding. By following this comprehensive guide, you’ve equipped yourself with the knowledge to not only perform the installation but also to optimize and secure your system for future use. Embrace the fresh start, enjoy the enhanced performance, and take pride in your revitalized Windows 10 experience.
aViewFromTheCave is a participant in the Amazon Services LLC Associates Program, an affiliate advertising program designed to provide a means for sites to earn advertising fees by advertising and linking to Amazon.com. Amazon, the Amazon logo, AmazonSupply, and the AmazonSupply logo are trademarks of Amazon.com, Inc. or its affiliates. As an Amazon Associate we earn affiliate commissions from qualifying purchases.