In the landscape of modern smart home technology, the DIY security sector has seen an explosion in popularity. Among the frontrunners is Blink, an Amazon-owned brand known for its affordability, ease of installation, and wireless convenience. However, for many new users, the terminology used within the Blink Home Monitor app can be slightly confusing. One of the most common questions from new owners is: “What does Armed mean on Blink?”
Understanding the “Armed” status is fundamental to getting the most out of your security system. It is the bridge between a simple camera that allows for live viewing and a comprehensive security sentinel that actively guards your property. In this guide, we will dive deep into the technical mechanics of the Armed state, how to manage it, and how to optimize your settings for the best possible digital security.
Decoding the Armed State: How Blink Protects Your Property
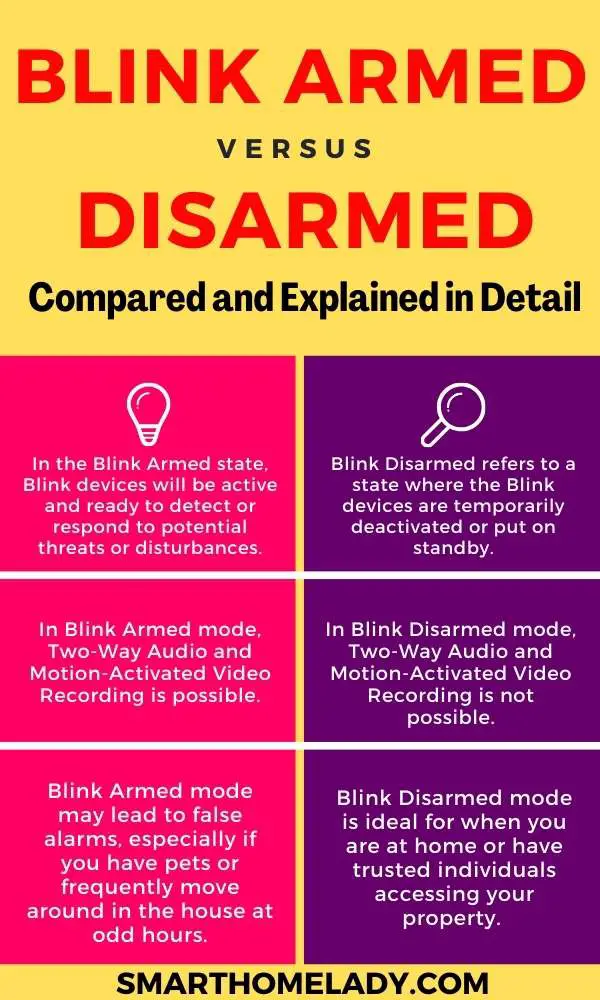
At its most basic level, “Armed” on a Blink system means that your cameras are actively monitoring for motion. When you toggle your system to the Armed state, you are essentially telling the software to engage the Passive Infrared (PIR) sensors located on the front of each camera.
The Core Difference Between Armed and Disarmed
When your Blink system is “Disarmed,” the cameras are in a standby mode. In this state, they will not record video clips when someone walks by, nor will they send notifications to your smartphone. You can still access a “Live View” to see what is happening in real-time, but the automated surveillance features are effectively turned off.
Conversely, once the system is “Armed,” every camera associated with that system (or specific cameras you have enabled) becomes a vigilant observer. If the PIR sensor detects a heat signature moving across its field of view, the camera wakes up, records a clip (the length of which you can customize), and immediately pushes a notification to your device.
Visual Cues: How to Tell Your System is Active
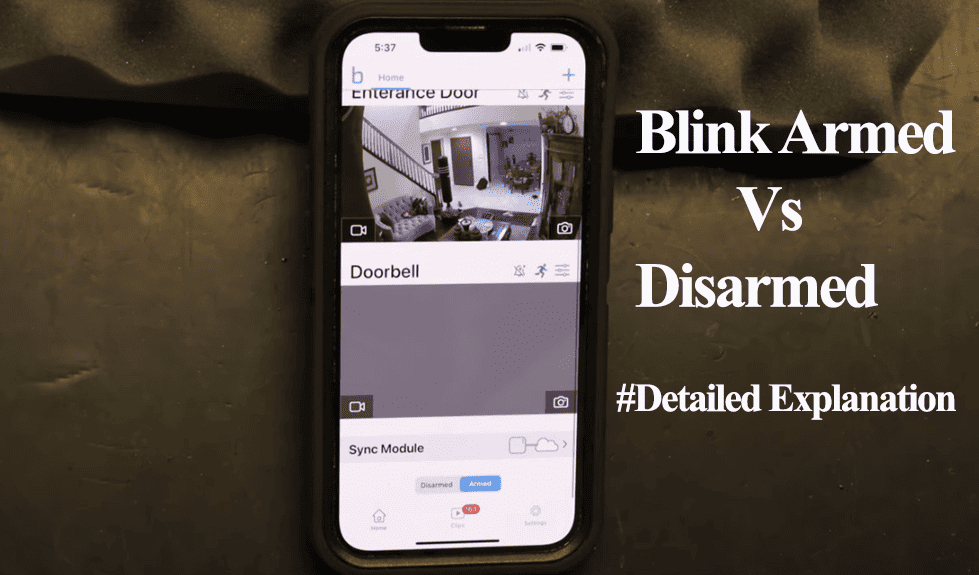
Blink has designed its interface to be intuitive. Within the Blink Home Monitor app, you will see a toggle at the bottom of the screen labeled “Armed” and “Disarmed.” When Armed is selected, the icon typically turns blue, signaling that the system is live.
On individual camera thumbnails, you may also notice a small “Running Man” icon. If the icon is blue, that specific camera is armed and ready to detect motion. If the icon is grey or has a slash through it, that particular camera is “snoozed” or disabled within the armed system. This granular control allows you to arm your front door while keeping the backyard camera inactive while you are gardening.
Navigating the Blink App Interface for System Management
The Blink Home Monitor app is the command center for your hardware. Understanding how to navigate this software is essential for maintaining a secure environment without being overwhelmed by unnecessary alerts.
How to Arm Your System Manually
Manual arming is the most common way users interact with the system. Typically, as you leave your home or head to bed for the evening, you open the app and tap the “Armed” button. The system usually provides a brief exit delay (if configured) or arms instantly.
It is important to understand the role of the “Sync Module” in this process. For Blink Outdoor, Indoor, and XT2 cameras, the Sync Module acts as the hub. When you tap “Armed,” the app sends a command to the cloud, which then talks to your Sync Module, which finally tells each camera to activate its sensors. Because this relies on a chain of communication, having a stable Wi-Fi connection and a well-placed Sync Module is critical for the “Armed” command to execute quickly.
Setting Up Scheduled Arming and Disarming
For many users, manually toggling the system every day becomes a chore. Blink offers a “Scheduling” feature that automates this process. Within the system settings, you can define specific times for the system to arm itself.
For example, you might set your system to automatically Arm at 11:00 PM when the family is asleep and Disarm at 6:00 AM. Or, if you work a standard 9-to-5 job, you can schedule the system to be Armed only during work hours. This automation ensures that your home is never left vulnerable due to human forgetfulness, a key component of a robust digital security strategy.
Advanced Configuration: Fine-Tuning Motion Detection and Alerts
Simply arming the system is often not enough. To prevent “notification fatigue”—where you receive so many alerts that you begin to ignore them—you must fine-tune how the cameras behave when they are in the Armed state.
Customizing Motion Zones to Reduce False Positives
One of the most powerful tech features in the Blink ecosystem is “Activity Zones.” When a camera is Armed, it looks for motion across its entire field of view. However, if your camera faces a street with passing cars or a tree that sways in the wind, you will receive constant false alarms.
By accessing the camera settings, you can pull up a grid view of the camera’s perspective and “mask out” specific areas. This tells the software to ignore motion in those specific squares while remaining vigilant in others. This technical precision ensures that when your system is Armed, it only notifies you of relevant events, such as a person approaching your porch.
Sensitivity Settings and Re-trigger Intervals
Every environment is different, and Blink allows you to adjust the sensitivity of the PIR sensors on a scale of 1 to 9. A higher sensitivity means the camera will trigger with very slight movements, while a lower setting requires more significant heat signatures.
Furthermore, the “Re-trigger Interval” is a vital setting. This determines how long the camera waits after finishing one recording before it is ready to record again. If you set this too short, you may drain your batteries quickly. If you set it too long, you might miss the second half of an unfolding event. Finding the “Goldilocks” zone—usually between 10 to 30 seconds—is key to effective monitoring during the Armed state.
Integrating Blink with Your Smart Home Ecosystem
In the age of the Internet of Things (IoT), your security system shouldn’t exist in a vacuum. Blink’s integration with the broader Amazon Alexa ecosystem adds a layer of convenience and technological sophistication to the Armed status.
Using Alexa for Hands-Free Arming
If you own an Echo Dot, Echo Show, or any Alexa-enabled device, you can control your Blink system using voice commands. By enabling the Blink SmartHome skill, you can simply say, “Alexa, ask Blink to arm [System Name].”
This integration is more than just a party trick; it allows for “Routines.” You can create a routine where saying “Alexa, goodnight” simultaneously locks your smart locks, turns off the lights, and Arms your Blink cameras. This seamless interaction between different tech gadgets creates a comprehensive shield around your home with minimal effort.
The Role of the Sync Module in System Connectivity
Technologically speaking, the Sync Module 2 is the unsung hero of the “Armed” state. While newer cameras like the Blink Mini and Blink Wired Floodlight can connect directly to Wi-Fi, the battery-powered models rely on the Sync Module’s Low Frequency Device (LFD) radio to manage power consumption.
When the system is Armed, the Sync Module manages the communication between the cameras and the cloud. It also facilitates local storage options. If you have a USB flash drive plugged into your Sync Module 2, the system will back up clips recorded while Armed to that physical drive, providing a secondary layer of data security in case of internet outages.
Troubleshooting Common Arming Issues
Even the best technology can encounter hiccups. Understanding why your system might not be behaving as expected when “Armed” can save you significant frustration.
Why Your Camera Might Fail to Record While Armed
There are several technical reasons why a camera might stay silent even when the system is Armed:
- Low Battery: If the lithium batteries are depleted, the camera may have enough power to stay connected to the Sync Module but not enough to trigger the PIR sensor and record a high-definition clip.
- Wi-Fi Interference: If the camera is too far from the router or Sync Module, the “Armed” command may reach it, but the camera may fail to upload the recorded clip to the cloud.
- The Snooze Feature: Blink allows you to “Snooze” notifications for a set period. If you have snoozed a camera, the system is still technically Armed and recording, but you won’t receive the alerts on your phone.

Connectivity and Power Management Solutions
To ensure your system remains reliably Armed, it is recommended to check your “Connection to Sync Module” and “Connection to Wi-Fi” signal strengths in the app settings. Both should ideally show at least three bars of strength.
Additionally, for high-traffic areas where the camera is constantly Armed and triggering, consider using a Blink Solar Panel Mount or a power adapter. This negates the battery drain issues and ensures that your “Armed” status never fails due to a lack of power.
By mastering the “Armed” settings, you transform a set of cameras into a sophisticated, automated security network. Whether through manual control, automated scheduling, or voice integration, the Armed state is the heart of the Blink experience, providing peace of mind through intelligent digital surveillance.
aViewFromTheCave is a participant in the Amazon Services LLC Associates Program, an affiliate advertising program designed to provide a means for sites to earn advertising fees by advertising and linking to Amazon.com. Amazon, the Amazon logo, AmazonSupply, and the AmazonSupply logo are trademarks of Amazon.com, Inc. or its affiliates. As an Amazon Associate we earn affiliate commissions from qualifying purchases.