In today’s increasingly interconnected world, the desire for enhanced security for our homes and businesses has never been greater. Security cameras, once a luxury item, have become an accessible and vital tool for deterring crime, monitoring activity, and providing invaluable evidence when incidents occur. While the prospect of installing a security camera system might seem daunting, with the right guidance and a little preparation, it’s a manageable DIY project for most individuals. This comprehensive guide will walk you through the process, from choosing the right cameras to ensuring a secure and effective installation, drawing upon principles of technology, brand considerations, and even financial prudence.
Understanding Your Security Camera Needs: The Foundation of a Smart System
Before you even think about mounting a camera, it’s crucial to understand your specific security needs. This initial assessment will dictate the type of cameras you purchase, their placement, and the overall complexity of your system. Think of this as the foundational step in building a robust security solution, akin to defining your brand’s core message or understanding your investment goals.
Assessing Your Property and Vulnerabilities
Walk around your property, both inside and out, with a critical eye. Identify potential entry points that might be vulnerable:
- Exterior: Front door, back door, ground-floor windows, garage doors, secluded side gates, and any areas with poor external lighting. Consider areas where packages are typically left.
- Interior: Hallways, main living areas, basements, and any valuable areas like home offices or rooms containing expensive electronics.
Think about what you want to monitor:
- Deterrence: Simply the visible presence of cameras can discourage potential intruders.
- Monitoring: Real-time viewing of your property, whether you’re at home or away.
- Evidence Gathering: Recording footage in case of theft, vandalism, or other incidents.
- Peace of Mind: Knowing your loved ones and belongings are safe.
Types of Security Cameras: Choosing the Right Tools for the Job
The security camera market is vast, offering a diverse range of options. Understanding the different types will help you select the best fit for your needs and budget. This is where the “Tech” aspect of our website truly shines, as we explore the innovations driving modern security.
Wired vs. Wireless Security Cameras: A Fundamental Decision
This is perhaps the most significant choice you’ll make. Each has its pros and cons:
-
Wired Security Cameras:
- Pros: Generally offer more stable and reliable connections, less prone to interference. Power and data are transmitted through the same cable (PoE – Power over Ethernet) or separate cables, leading to consistent performance. Often deliver higher resolution and better image quality.
- Cons: Installation can be more complex, requiring running cables through walls, ceilings, or conduits, which can be time-consuming and may require professional help.
- Best For: Users who prioritize ultimate reliability and don’t mind a more involved installation process, or for new constructions where cable runs can be incorporated easily.
-
Wireless Security Cameras:
- Pros: Significantly easier and faster to install, as they rely on Wi-Fi for data transmission. Batteries or AC power adapters are used, offering more placement flexibility. Ideal for renters or those who prefer a less intrusive installation.
- Cons: Signal strength can be an issue depending on your Wi-Fi network’s range and potential interference from other devices. Battery-powered cameras require periodic recharging or replacement. Video quality might be slightly less consistent than wired options.
- Best For: Quick setup, renters, or situations where running wires is impractical or undesirable.
Camera Features to Consider: Beyond the Basics
Once you’ve decided on wired or wireless, delve into the specific features:
- Resolution: Higher resolution (e.g., 1080p, 2K, 4K) means clearer images, allowing you to identify faces and details more easily. This directly impacts the quality of evidence you can gather.
- Field of View (FOV): This determines how wide an area the camera can see. A wider FOV (e.g., 130-180 degrees) covers more ground but might offer less detail in the distance. A narrower FOV offers more detail in a specific area.
- Night Vision: Essential for round-the-clock surveillance. Look for cameras with Infrared (IR) night vision, which uses LEDs to illuminate the scene in darkness. The range of the night vision is also a key factor.
- Motion Detection: Alerts you when movement is detected, saving you from constantly reviewing footage. Advanced motion detection can differentiate between people, vehicles, and animals, reducing false alarms.
- Two-Way Audio: Allows you to hear what’s happening and speak through the camera, useful for deterring intruders or communicating with visitors.
- Weather Resistance: If installing outdoors, ensure the camera has an appropriate IP rating (e.g., IP65, IP67) to withstand rain, dust, and extreme temperatures.
- Storage Options:
- Cloud Storage: Footage is uploaded to a remote server. Convenient for remote access but usually requires a subscription fee.
- Local Storage: Footage is stored on an SD card within the camera or on a Network Video Recorder (NVR) or Digital Video Recorder (DVR). No ongoing fees but storage is limited.
Considering Your Brand and Reputation: The Aesthetics of Security
While the primary function is security, especially for businesses or individuals concerned with their public image, the appearance and integration of security cameras can also be a consideration. Think of this as aligning your security choices with your overall brand identity.
- Discreet vs. Visible Cameras: For deterrence, highly visible cameras can be effective. For a more subtle approach, or to avoid a “surveillance state” aesthetic, discreet cameras can be chosen. This choice can influence how your property is perceived.
- Color and Design: Some cameras come in various colors or have sleeker designs that might blend better with your property’s architecture.
- Brand Integration: For businesses, consider how the security system reflects the professionalism and care they put into their operations. A well-maintained and modern security system can subtly reinforce a brand’s commitment to safety and customer well-being.
Planning Your Installation: Strategizing for Optimal Coverage
With your camera needs defined, it’s time to plan the actual installation. This phase involves mapping out camera locations, considering power and connectivity, and ensuring you have the necessary tools. This is where meticulous planning, much like a business strategy or financial plan, pays dividends.
Mapping Camera Placement: Maximizing Visibility and Minimizing Blind Spots
Strategic placement is paramount. A poorly placed camera is as good as no camera at all.
- Exterior Cameras:
- Entry Points: Mount cameras covering all doors and ground-floor windows. Aim for a height that’s difficult to tamper with but still allows for clear facial recognition (typically 7-10 feet).
- Driveways and Garages: Essential for monitoring vehicle activity and deterring break-ins.
- Perimeter: Consider cameras that cover the edges of your property to detect movement before it reaches your home.
- Lighting: Avoid pointing cameras directly at bright lights, as this can wash out the image. Conversely, consider cameras for dark areas that lack existing lighting.

- Interior Cameras:
- Main Entry Points: Cover the primary entrances to your home.
- High-Traffic Areas: Hallways, living rooms, and kitchens are good choices.
- Valuable Areas: Home offices, areas with safes, or where expensive electronics are kept.
- Privacy Considerations: Be mindful of privacy. Avoid placing cameras in bedrooms or bathrooms. Ensure all occupants are aware of interior camera placement.
Power and Connectivity: The Lifeblood of Your System
This is a critical technical consideration that can make or break your installation.
-
Wired Systems:
- Power Source: If using PoE, you’ll need an NVR or a PoE switch to provide power to the cameras. If using separate power cables, you’ll need access to electrical outlets.
- Data Connection: Ethernet cables will run from the cameras to your NVR or router. Plan your cable routes carefully to minimize visible wires and ensure they are protected.
-
Wireless Systems:
- Wi-Fi Signal Strength: Ensure strong Wi-Fi coverage in the intended camera locations. You might need to install Wi-Fi extenders or a mesh network for optimal performance.
- Power Source: Battery-powered cameras need to be accessible for charging or battery replacement. Cameras that plug into an AC adapter require proximity to an outlet.
Gathering Your Tools and Materials: Preparation is Key
Having the right tools will make the installation process smoother and safer.
- Basic Tools: Screwdriver set, drill with appropriate drill bits, ladder, level, measuring tape, wire stripper (if applicable), pliers.
- Mounting Hardware: Screws, anchors, mounting brackets (often included with cameras).
- Cabling (for wired systems): Ethernet cables (CAT5e or CAT6), conduit, cable clips, junction boxes.
- Testing Equipment: Smartphone or tablet for initial setup and testing of wireless cameras.
Executing the Installation: Step-by-Step Guidance
With your plan in place and tools ready, it’s time for the hands-on work. Approach this systematically, much like executing a marketing campaign or a financial transaction.
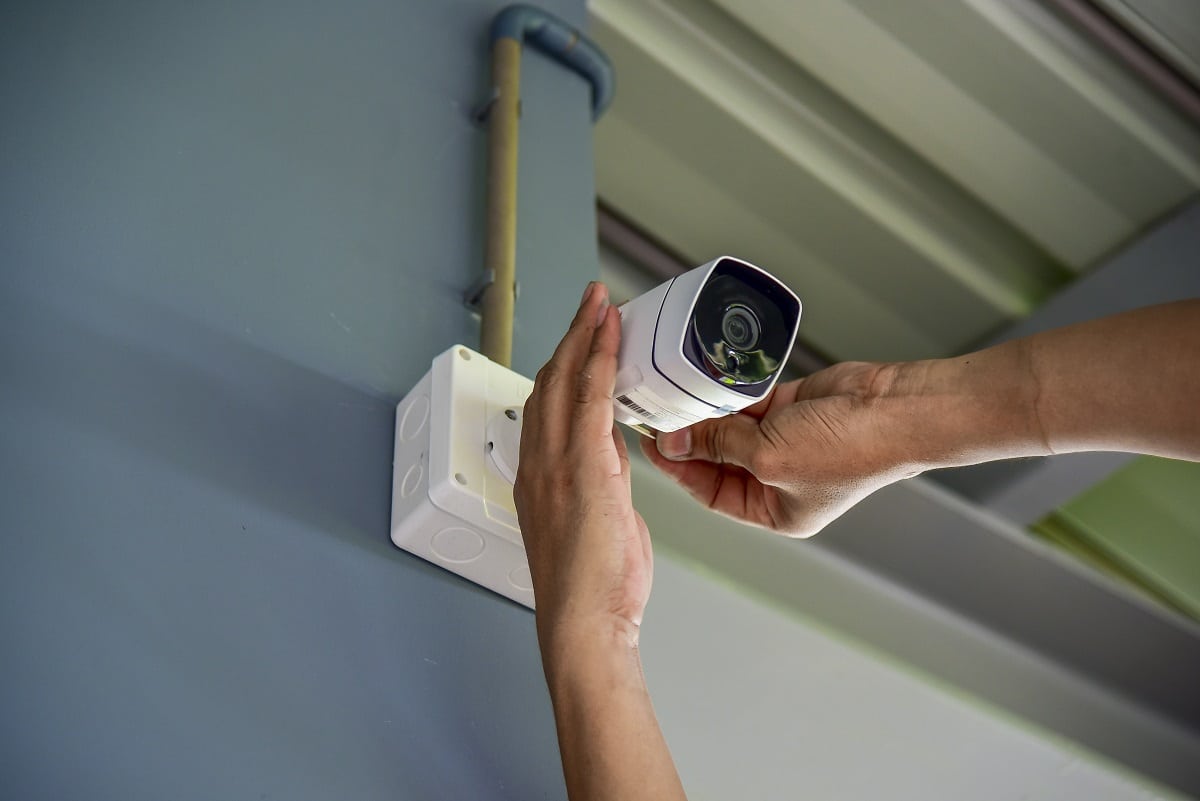
Mounting the Cameras: Securing Your Eyes on the Property
- Marking the Spot: Hold the camera or mounting bracket in the desired location and mark where screws will go. Use a level to ensure it’s straight.
- Drilling Pilot Holes: Drill pilot holes at your marks. If mounting on drywall, use appropriate anchors for a secure fit.
- Securing the Mount: Attach the mounting bracket firmly to the wall or surface.
- Attaching the Camera: Screw the camera onto the bracket.
- Adjusting the Angle: Position the camera to achieve the desired field of view. You’ll fine-tune this later.
Running Cables (Wired Systems): The Backbone of Reliability
This is often the most time-consuming part of installing wired cameras.
- Route Planning: Determine the cleanest and safest path for your cables. Consider using attic spaces, basements, or exterior conduits.
- Drilling Holes: You may need to drill holes through walls or ceilings to pass cables. Ensure these holes are sealed to prevent water or pest intrusion.
- Securing Cables: Use cable clips to neatly secure cables along walls or beams, keeping them out of sight and protected.
- Connecting to NVR/Router: Run the cables to your central hub (NVR for IP cameras, DVR for analog, or router for some wireless configurations).
Powering Up and Connecting: Bringing Your System to Life
-
Wired Systems:
- Connect the Ethernet cables from the cameras to your PoE switch or NVR.
- Connect the NVR or DVR to your router via an Ethernet cable.
- Connect the NVR/DVR to a power source.
-
Wireless Systems:
- Power Connection: Plug in AC-powered cameras or ensure batteries are charged.
- App Setup: Most wireless cameras require you to download a companion app on your smartphone or tablet. Follow the app’s instructions to connect the camera to your Wi-Fi network. This typically involves scanning a QR code, pressing a sync button, or manually entering network credentials.
Testing and Fine-Tuning: Ensuring Optimal Performance
Once everything is connected, it’s time to test.
- Live View: Open the camera app or NVR/DVR interface and check the live feed from each camera.
- Angle Adjustment: Fine-tune the camera angles to ensure you have clear views of your target areas and minimize blind spots.
- Motion Detection Settings: Configure motion detection zones and sensitivity levels to reduce false alarms and ensure you’re alerted to relevant events.
- Recording Test: Trigger motion or manually start a recording to ensure footage is being saved correctly to your chosen storage method.
- Night Vision Test: Check the image quality in low-light or complete darkness.

Maintaining Your Security System: Ongoing Vigilance
Installation is just the beginning. Regular maintenance ensures your security system continues to function effectively. This mirrors the ongoing efforts required for brand management and financial review.
- Regular Cleaning: Wipe camera lenses and housings periodically to remove dust, cobwebs, and debris that can obstruct the view.
- Software Updates: Keep your camera’s firmware and associated apps updated. Updates often include security patches and performance improvements.
- Battery Checks (Wireless): Regularly check battery levels on wireless cameras and replace or recharge them as needed.
- Network Stability: Ensure your Wi-Fi network remains stable for wireless cameras.
- Storage Management: Monitor your storage capacity (cloud or local) and clear old footage if necessary.
By following these steps, you can successfully install a security camera system that provides peace of mind and enhances the safety of your property. Remember, a well-planned and properly installed system is an investment in your security and a smart addition to your home or business.
aViewFromTheCave is a participant in the Amazon Services LLC Associates Program, an affiliate advertising program designed to provide a means for sites to earn advertising fees by advertising and linking to Amazon.com. Amazon, the Amazon logo, AmazonSupply, and the AmazonSupply logo are trademarks of Amazon.com, Inc. or its affiliates. As an Amazon Associate we earn affiliate commissions from qualifying purchases.