The hum of your computer, once a familiar comfort, has become a source of frustration. Boot times stretch into eternity, applications lag, and saving large files feels like an exercise in patience. If this sounds like your daily digital grind, it’s likely your trusty hard disk drive (HDD) is showing its age. Fortunately, there’s a readily accessible and remarkably impactful upgrade that can breathe new life into your PC: installing a Solid State Drive (SSD).
SSDs represent a significant leap in storage technology. Unlike traditional HDDs that rely on spinning platters and moving read/write heads, SSDs use flash memory chips, much like those found in USB drives and smartphones. This fundamental difference translates into drastically faster performance, increased durability, and lower power consumption. For anyone looking to boost their PC’s speed and responsiveness without undertaking a full system overhaul, installing a new SSD is an exceptionally smart move, directly impacting your Tech efficiency and productivity. While the allure of cutting-edge Gadgets is strong, sometimes the most effective upgrades are the most practical.
This comprehensive guide will walk you through the entire process of installing a new SSD in your PC. We’ll cover everything from choosing the right drive to physically installing it and preparing it for use. Whether you’re a seasoned PC builder or a first-time hardware tinkerer, by the end of this article, you’ll have the knowledge and confidence to perform this upgrade yourself, unlocking a significantly smoother and faster computing experience.
Understanding SSDs and Their Benefits
Before diving into the installation process, it’s crucial to understand why an SSD is such a worthwhile upgrade and what types are available. The benefits extend beyond mere speed.
The Performance Revolution
The most immediate and noticeable advantage of an SSD is its speed. This isn’t just about booting your operating system faster, though that’s a significant perk. Think about:
- Faster Boot Times: Your PC will spring to life in seconds, not minutes.
- Quicker Application Loading: Programs will launch almost instantly.
- Reduced Loading Screens: Games and demanding software will spend less time waiting.
- Snappier File Transfers: Copying and moving large files will be dramatically faster.
- Improved Overall Responsiveness: Your entire system will feel more fluid and responsive, a direct boost to your Productivity.
Beyond Speed: Durability and Efficiency
Beyond raw performance, SSDs offer other advantages:
- Durability: With no moving parts, SSDs are far less susceptible to damage from drops or vibrations compared to HDDs. This makes them a more reliable choice for laptops and any system that might be moved.
- Lower Power Consumption: SSDs use less energy than HDDs, which can translate to slightly longer battery life for laptops and a minor reduction in your electricity bill for desktops.
- Silent Operation: The lack of spinning platters means SSDs operate silently, contributing to a quieter computing environment.
Types of SSDs: NVMe vs. SATA
When you embark on your SSD quest, you’ll encounter two primary interface types: SATA and NVMe. Understanding the difference is key to selecting the right drive for your needs and motherboard.
SATA SSDs: The Widely Compatible Workhorse
Serial ATA (SATA) SSDs have been the standard for many years. They connect to your motherboard via a SATA cable and typically come in a 2.5-inch form factor, the same size as most laptop HDDs.
- Pros:
- Universal Compatibility: Almost all modern PCs and laptops have SATA ports, making them incredibly versatile.
- Cost-Effective: Generally less expensive per gigabyte than NVMe SSDs.
- Easy Installation: Physically very straightforward to connect.
- Cons:
- Slower Speeds: While much faster than HDDs, SATA SSDs are limited by the SATA III interface, which caps out at around 550 MB/s sequential read/write speeds.
NVMe SSDs: The Speed Demon
Non-Volatile Memory Express (NVMe) SSDs are the latest generation of high-performance storage. They connect directly to your motherboard via an M.2 slot and utilize the PCIe (Peripheral Component Interconnect Express) interface, which offers significantly higher bandwidth than SATA.
- Pros:
- Blazing Fast Speeds: NVMe SSDs can achieve sequential read/write speeds of 3,500 MB/s and beyond, with newer generations pushing much higher. This is a game-changer for demanding tasks.
- Direct Connection: Bypassing the SATA bus offers lower latency and higher throughput.
- Compact Form Factor: M.2 NVMe drives are small, stick-like modules that slot directly into the motherboard, contributing to cleaner builds and better airflow.
- Cons:
- Higher Cost: Typically more expensive per gigabyte than SATA SSDs.
- Motherboard Compatibility: Requires an M.2 slot on your motherboard that supports NVMe protocol. Older motherboards might only support SATA M.2 drives or lack M.2 slots altogether.
- Potential for Thermal Throttling: Due to their high speeds, some NVMe drives can generate more heat, and performance might be throttled if cooling is insufficient.
Choosing the Right Drive: For most users, a SATA SSD is an excellent and affordable upgrade that will deliver a dramatic improvement. If your motherboard supports NVMe and you’re looking for the absolute best performance for gaming, video editing, or other intensive workloads, an NVMe SSD is the way to go. Always check your motherboard’s specifications to ensure compatibility with the SSD type you choose.
Preparing for the SSD Installation
Before you get your hands dirty, some preparation will ensure a smooth and successful installation. This involves gathering tools, backing up your data, and deciding how you’ll use your new SSD.
Essential Tools and What You’ll Need
Fortunately, installing an SSD is a relatively simple hardware task that doesn’t require an extensive toolkit.
- Your New SSD: The star of the show!
- Phillips Head Screwdriver: A magnetic tip can be a lifesaver for handling tiny screws.
- Anti-Static Wrist Strap (Recommended): Static electricity can damage sensitive computer components. Wearing one ensures you discharge any static buildup.
- Flashlight (Optional): To help you see into the dark corners of your PC case.
- SATA Data Cable (If installing a SATA SSD and your PC doesn’t have a spare): Most motherboards come with at least two, but it’s good to have one on hand.
- SATA Power Cable: This will come from your power supply unit (PSU).
- User Manuals: Your PC case and motherboard manuals can be invaluable for identifying ports and mounting points.
Data Backup: A Non-Negotiable Step
This is the most critical preparation step. While installing an SSD is generally a safe procedure, accidents can happen. More importantly, if you plan to replace your primary drive (the one with your operating system), you’ll need to either clone your existing drive or perform a fresh installation of Windows.
- Clone Your Existing Drive: This copies everything from your old drive (OS, programs, files) to the new SSD. This is the easiest way to get up and running without reinstalling everything. You’ll need cloning software (many SSD manufacturers provide their own, or third-party options like Macrium Reflect Free are excellent) and an external adapter or enclosure if you don’t have enough SATA ports to connect both drives simultaneously.
- Fresh Installation of Windows: This involves wiping the new SSD clean and installing Windows from scratch. This offers a clean slate and can sometimes resolve lingering software issues. You’ll need a Windows installation USB drive, which you can create using Microsoft’s Media Creation Tool.
Important: Regardless of whether you clone or fresh install, ensure you have backed up any essential personal files to an external drive, cloud storage, or another reliable location. This provides an extra layer of security.
Deciding Your SSD’s Role
Your new SSD can serve various purposes within your PC, and this decision influences its placement and setup.
- Primary Boot Drive: The most common and impactful use. Installing your operating system and frequently used applications on the SSD will dramatically speed up your entire system.
- Secondary Storage Drive: If you have a large HDD for storing media files, games, or documents, you can install the SSD as a secondary drive to host your most frequently accessed files or programs for faster loading.
- Dedicated Game Drive: Many gamers install their most demanding titles on an SSD to minimize loading times.
The Physical Installation Process
Now for the hands-on part. We’ll break this down into installing SATA SSDs and NVMe SSDs, as their physical connections differ.
Installing a SATA SSD
SATA SSDs are most commonly found in a 2.5-inch form factor, designed to fit into drive bays that traditionally housed 3.5-inch HDDs.
- Power Down and Disconnect: Shut down your PC completely. Turn off the power switch on the back of the PSU and unplug the power cord from the wall. For extra safety, press the power button a few times to discharge any residual power.
- Open Your PC Case: Most PC cases have side panels that are secured with thumbscrews or regular screws. Gently unscrew and remove the side panel to gain access to the interior.
- Locate a Drive Bay: Look for 2.5-inch drive bays. Many cases have specific mounts for 2.5-inch drives, or you might need a mounting bracket to adapt a 3.5-inch bay for a 2.5-inch SSD.
- Mount the SSD: Secure the SSD into the chosen bay or bracket using screws. Ensure it’s firmly in place.
- Connect the SATA Data Cable: Plug one end of the SATA data cable into the back of the SSD and the other end into an available SATA port on your motherboard. Refer to your motherboard manual to identify the correct SATA ports.
- Connect the SATA Power Cable: Take a SATA power cable from your PSU and plug it into the power connector on the back of the SSD.
- Cable Management (Optional but Recommended): Tidy up your cables using zip ties or Velcro straps. This improves airflow within the case, which is good for cooling all your components, not just your storage.
- Reassemble and Reconnect: Carefully replace the side panel of your PC case and reconnect the power cord and any other peripherals.
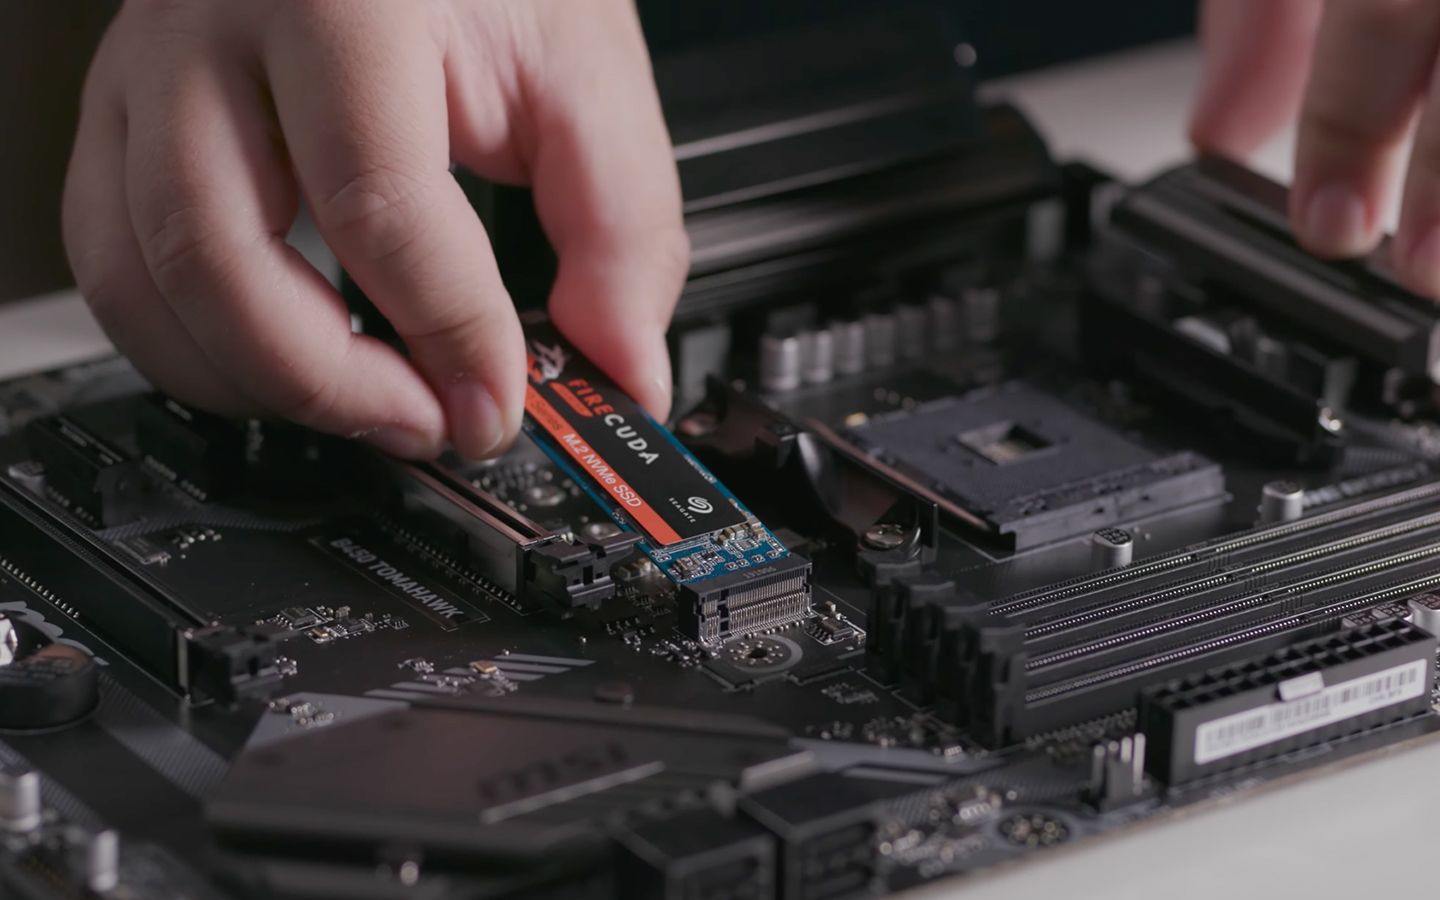
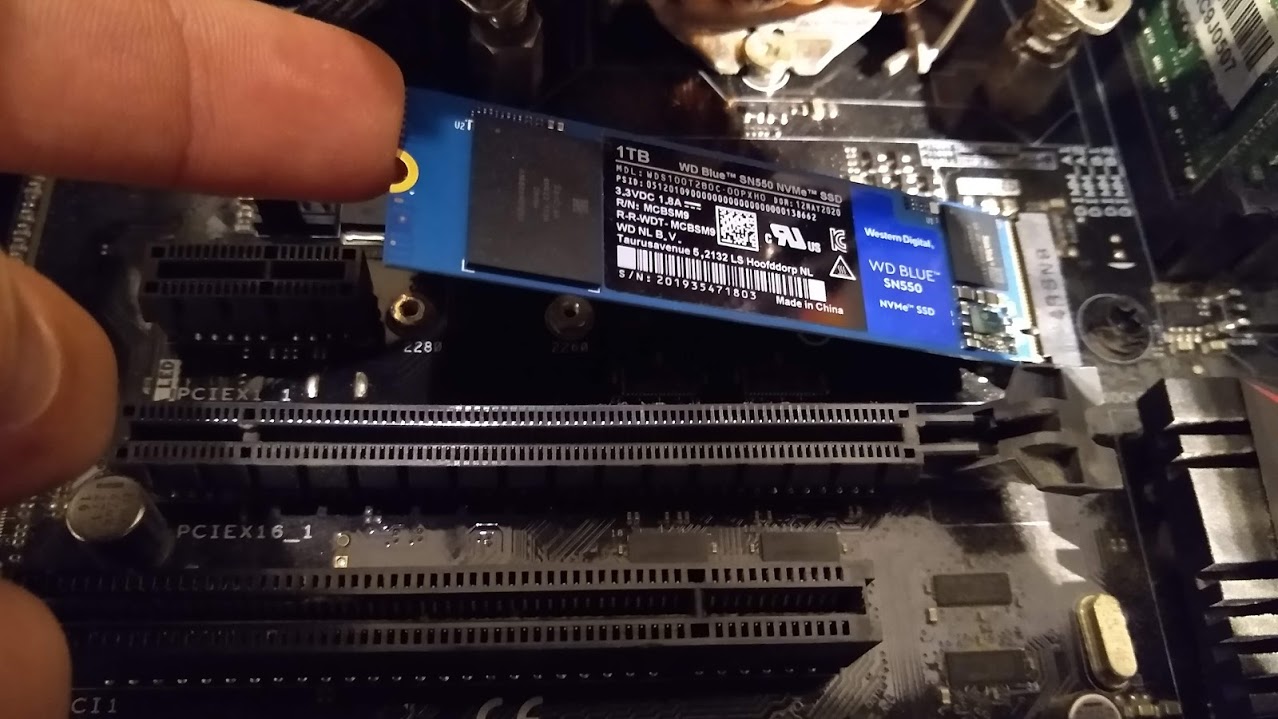
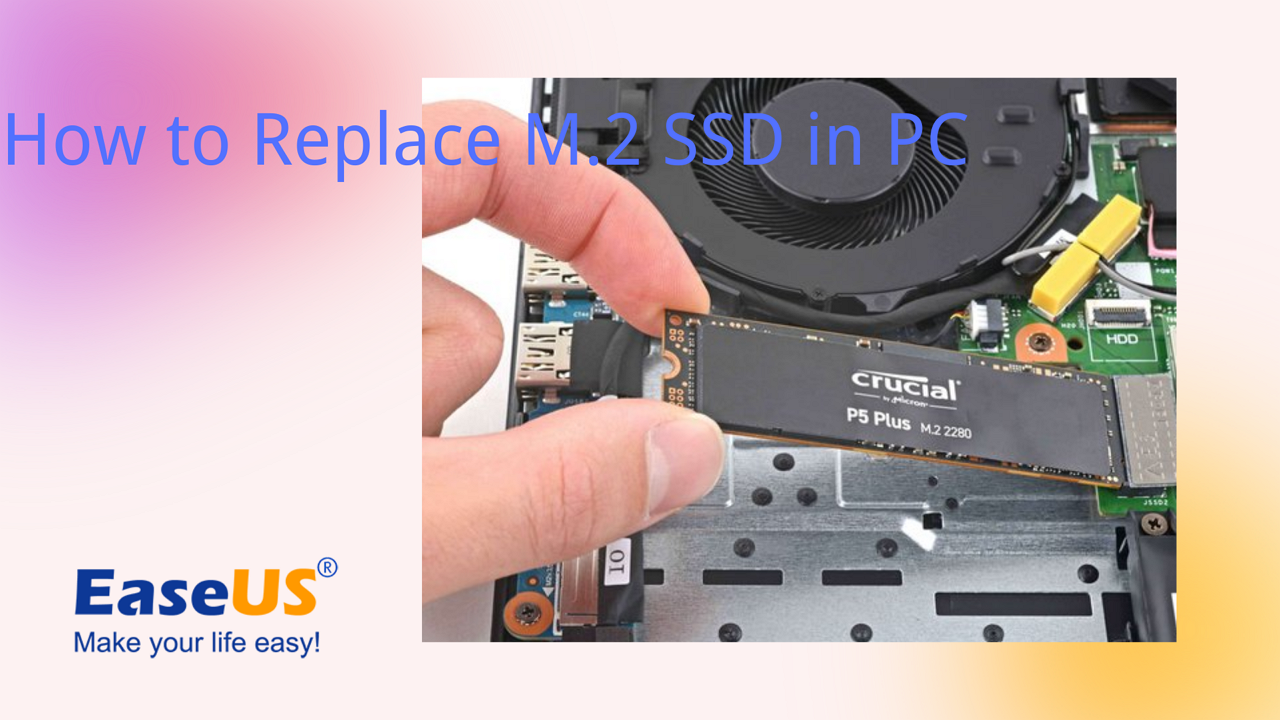
Installing an NVMe SSD
NVMe SSDs, in their M.2 form factor, are much simpler to install physically.
- Power Down and Disconnect: As with SATA SSDs, shut down your PC, turn off the PSU switch, and unplug the power cord.
- Open Your PC Case: Remove the side panel.
- Locate the M.2 Slot: Consult your motherboard manual to find the M.2 slot(s). They are typically small, horizontal slots on the motherboard, often near the CPU socket or PCIe slots. Some M.2 slots may have heatsinks that you’ll need to remove first.
- Remove the M.2 Screw: M.2 drives are secured by a small screw at the end. This screw might be pre-installed or located in a small bag of motherboard accessories.
- Insert the NVMe SSD: Gently slide the NVMe SSD into the M.2 slot at an angle, ensuring the contacts are fully seated. The drive will likely sit at about a 30-degree angle.
- Secure the SSD: Press the end of the NVMe SSD down towards the motherboard and re-insert and tighten the M.2 screw to hold it in place. If your M.2 slot came with a heatsink, reattach it now, ensuring any thermal pads are properly positioned.
- Cable Management: While NVMe drives have no cables, ensure other cables inside your PC are tidy for good airflow.
- Reassemble and Reconnect: Replace the side panel and reconnect all peripherals.
Initializing and Formatting Your New SSD
After physically installing the SSD, your operating system needs to recognize and prepare it for use. This process is called initialization and formatting.
Accessing Disk Management
This is where you’ll manage all your storage drives.
- Boot Your PC: Turn on your computer. If you’ve replaced your boot drive, you’ll likely boot into your Windows installation media (if performing a fresh install) or your cloned drive.
- Open Disk Management:
- Windows 10/11: Right-click the Start button and select “Disk Management.”
- Older Windows Versions: You can access it via
Control Panel>Administrative Tools>Computer Management>Disk Management.
Initializing the New SSD
When you first connect a new, unformatted drive, Disk Management will often prompt you to initialize it. If it doesn’t, you’ll see the SSD listed as “Unknown” and “Not Initialized.”
- Initialize Disk: Right-click on the disk you want to initialize (it will likely be labeled “Disk 1” or “Disk 2” and show its capacity).
- Choose Partition Style: You’ll be presented with two partition style options:
- GPT (GUID Partition Table): This is the modern standard and recommended for all new installations, especially if you have a UEFI BIOS. It supports larger drive sizes and more partitions.
- MBR (Master Boot Record): An older standard, primarily for compatibility with older systems. It has limitations on drive size and number of partitions.
Recommendation: Unless you have a specific reason for MBR, choose GPT.
- Confirm Initialization: Click “OK.” Your SSD will now show as “Online” with “Unallocated” space.
Creating a New Simple Volume (Formatting)
Now you need to create a partition (a usable space) on the SSD and format it with a file system so Windows can read and write data to it.
- Create New Simple Volume: Right-click on the “Unallocated” space of your new SSD in Disk Management.
- Follow the Wizard:
- Click “Next” to begin the New Simple Volume Wizard.
- Specify Volume Size: For a single SSD, you’ll typically use the maximum available space. Click “Next.”
- Assign Drive Letter: Choose a drive letter for your new SSD (e.g., D:, E:). Avoid using letters already in use by your system. Click “Next.”
- Format Partition:
- File System: Choose NTFS (New Technology File System), which is the standard for Windows.
- Allocation Unit Size: Leave this as “Default.”
- Volume Label: Give your SSD a descriptive name (e.g., “SSD Storage,” “Games Drive”).
- Perform a Quick Format: Check this box. A full format is usually unnecessary for new drives and takes much longer.
- Enable File and Folder Compression: Leave this unchecked unless you have a very specific need.
- Click “Next.”
- Finish: Review your settings and click “Finish.”
Your new SSD is now initialized, formatted, and ready to be used! You’ll see it appear in File Explorer with the drive letter and volume label you assigned.
Final Thoughts and Optimization
You’ve successfully installed a new SSD, a significant upgrade that will undoubtedly improve your PC’s performance. But there are a few final steps and considerations to maximize your investment.
Setting Your SSD as the Boot Drive (if applicable)
If you installed the SSD as your primary boot drive, and have performed a fresh installation of Windows, you are essentially done with this step. However, if you cloned your old drive or are using the SSD as a secondary drive, you might want to ensure your BIOS/UEFI is configured to boot from the SSD.
- Access BIOS/UEFI: Restart your PC and press the designated key during boot-up (often F2, F10, F12, or DEL – your motherboard manual will specify).
- Boot Order: Navigate to the “Boot” or “Boot Order” section.
- Prioritize SSD: Set your new SSD as the first boot device.
- Save and Exit: Save your changes and exit the BIOS/UEFI. Your PC will restart, now booting from your SSD.
Optimizing SSD Performance
Modern operating systems like Windows 10 and 11 are designed to work well with SSDs, but a few optimizations can further enhance performance and longevity.
- TRIM Command: TRIM is a command that tells the SSD which data blocks are no longer in use and can be cleared. This is crucial for maintaining write performance. Windows usually enables TRIM automatically for SSDs. You can check its status in Command Prompt (as Administrator) by typing
fsutil behavior query disabledelete(if the result is0, TRIM is enabled). - Defragmentation: DO NOT defragment an SSD. Defragmentation is designed for HDDs to reduce seek times by consolidating file fragments. SSDs have no mechanical parts, and defragmenting them will only cause unnecessary wear on the flash memory cells without any performance benefit. Windows will automatically recognize an SSD and disable defragmentation for it, opting for TRIM instead.
- Over-Provisioning: Some SSD manufacturers recommend leaving a small percentage of the SSD’s capacity unallocated to allow for internal maintenance and wear leveling. This is often handled automatically by modern SSDs and firmware, but if you’re using advanced SSD management tools, you might see an option for this. For most users, simply formatting the entire drive is sufficient.
- Firmware Updates: Periodically check your SSD manufacturer’s website for firmware updates. These updates can improve performance, fix bugs, and enhance compatibility.
Enjoy Your Speed Boost!
You’ve now equipped your PC with a significantly faster storage solution. The difference in your daily computing experience will be substantial. From faster boot-ups and application launches to quicker file transfers and a generally snappier system, your new SSD will be a constant reminder of how effective a single hardware upgrade can be. This isn’t just about chasing the latest Gadgets; it’s about practical, impactful improvements to your Tech setup, directly enhancing your Productivity and enjoyment of your PC. The investment in an SSD pays dividends in time saved and frustration avoided, making it one of the most cost-effective performance boosts you can give your computer.
aViewFromTheCave is a participant in the Amazon Services LLC Associates Program, an affiliate advertising program designed to provide a means for sites to earn advertising fees by advertising and linking to Amazon.com. Amazon, the Amazon logo, AmazonSupply, and the AmazonSupply logo are trademarks of Amazon.com, Inc. or its affiliates. As an Amazon Associate we earn affiliate commissions from qualifying purchases.