In the vast and ever-evolving landscape of digital communication, fonts are more than just mere text; they are powerful tools for expression, branding, and readability. For designers, marketers, content creators, or anyone seeking to elevate their digital presence, knowing how to install a downloaded font is a fundamental skill. This guide will demystify the process, offering step-by-step instructions for various operating systems while also exploring the broader implications of typography in tech, brand, and even financial strategies.
Whether you’ve stumbled upon a captivating new typeface, purchased a premium font for a client project, or are simply trying to maintain consistency across your brand assets, the ability to seamlessly integrate new fonts into your system is invaluable. Let’s delve into the world of digital typography, ensuring your creative vision is never limited by a lack of the perfect font.

The Foundation: Understanding Fonts and Their Digital Impact
Before we dive into the technicalities of installation, it’s crucial to grasp what fonts are, why they matter, and the different formats you’ll encounter. This foundational knowledge will empower you to make informed decisions, not just about installation, but about how typography shapes your digital endeavors.
Why Fonts Matter: Beyond Mere Text
At its core, a font is a set of characters (letters, numbers, symbols) sharing a consistent design. Yet, their impact extends far beyond simple legibility. For Tech professionals, fonts dictate user interface aesthetics, code readability in IDEs, and the visual appeal of applications. In the realm of Brand, typography is a cornerstone of identity. A carefully chosen font can convey professionalism, creativity, innovation, or tradition, instantly communicating a brand’s personality without a single image. Think of iconic brands; their logos and marketing materials are inextricably linked to specific typefaces. For individuals, a distinctive font can enhance personal branding on resumes, portfolios, or social media, making a lasting impression. From a Money perspective, the right font choice can influence conversion rates on a website, the perceived value of a product, or the trustworthiness of financial reports. Good typography builds trust and encourages engagement, directly impacting the bottom line.
Decoding Font File Types: TTF, OTF, and More
When you download a font, you’ll typically encounter specific file extensions. Understanding these is key to successful installation and optimal performance.
- TrueType Font (.ttf): Developed by Apple and Microsoft, TTF is one of the oldest and most common font formats. They are widely compatible across operating systems and software applications, making them a reliable choice for general use. TTF fonts contain both the screen and printer font data in a single file, ensuring consistency.
- OpenType Font (.otf): A more advanced and flexible format, OTF was developed jointly by Microsoft and Adobe. OpenType builds upon TrueType, offering enhanced features such as stylistic alternates, ligatures, small caps, old-style figures, and broader character sets (including support for multiple languages). OTF fonts are generally preferred by professional designers due to their advanced typographic capabilities and superior print quality. They are also cross-platform compatible.
- Web Open Font Format (.woff and .woff2): These formats are specifically designed for use on the web. They are essentially OpenType or TrueType fonts with compression and additional metadata, optimizing them for faster loading times on websites. While crucial for web development, WOFF files are not typically installed on your operating system for desktop application use.
- Embedded OpenType (.eot): An older Microsoft proprietary format for embedding fonts in web pages, primarily used by Internet Explorer. Less common now due to WOFF.
For desktop installation, your primary focus will be on .ttf and .otf files.
Sourcing Your Styles: Where to Find Quality Fonts
The internet offers a vast repository of fonts, both free and premium. The choice often depends on your budget, project requirements, and licensing needs.
- Free Font Repositories: Websites like Google Fonts, DaFont, Font Squirrel, and 1001 Free Fonts offer extensive libraries of free-to-download typefaces. While many are excellent, always check the licensing terms (e.g., personal use only, commercial use allowed with attribution, etc.) to avoid legal issues, especially for Brand projects.
- Premium Font Marketplaces: For professional quality, unique designs, and comprehensive licensing, consider platforms like Adobe Fonts (included with Creative Cloud subscriptions), MyFonts, Fontspring, and Creative Market. Investing in a premium font can significantly enhance your Brand‘s distinctiveness and often comes with robust support and licensing. This is where the Money aspect comes in – sometimes, a paid font is a necessary investment for a professional outcome.
- Custom Font Designers: For truly unique Brand identity, you might commission a bespoke typeface from a type designer. This is often a significant Money investment but provides unparalleled exclusivity.
Always download fonts from reputable sources to minimize the risk of malware or corrupted files, a key aspect of Digital Security and Tech best practices.
Step-by-Step Installation Guides Across Operating Systems
The process of installing fonts is relatively straightforward, but it varies slightly depending on your operating system. We’ll cover the most common platforms.
Installing Fonts on Windows: A Seamless Process
Windows provides a couple of intuitive ways to install fonts, catering to different user preferences. These instructions are applicable for Windows 10 and 11.
Method 1: Direct Installation (Recommended for Single/Few Fonts)
This is the quickest way to install one or a handful of fonts.
- Locate Your Downloaded Font Files: After downloading, fonts are usually in a compressed
.zipfolder. Navigate to your Downloads folder or wherever you saved the file. - Extract the Font Files: Right-click on the
.zipfolder and select “Extract All…” or use your preferred unzipping software. Choose a destination (often the same folder) and click “Extract.” This will reveal the.ttfor.otffont files. - Preview and Install:
- Find the extracted
.ttfor.otffile. - Right-click on the font file.
- From the context menu, select “Install” or “Install for all users.” “Install for all users” is generally recommended as it makes the font available to every user profile on your computer.
- A small window might pop up, briefly showing the font installation progress. If the font is already installed, Windows will prompt you to replace it.
- Find the extracted
Method 2: Using the Windows Font Settings (For Managing Multiple Fonts or Advanced Options)
This method gives you more control and is useful for managing your entire font library.
- Open Settings: Click the Start button, then click the gear icon to open “Settings.”
- Navigate to Personalization > Fonts: In the Settings window, click on “Personalization” in the left-hand menu. Then, select “Fonts” from the options on the right.
- Drag and Drop or Browse:
- You’ll see a section labeled “Add fonts” with a “Drag and drop to install” area. You can simply drag your extracted
.ttfor.otffont files directly into this area. - Alternatively, click the “Browse” button (if available) or simply paste the font files into
C:WindowsFonts(though dragging and dropping into Settings is generally easier and safer).
- You’ll see a section labeled “Add fonts” with a “Drag and drop to install” area. You can simply drag your extracted
- Confirmation: Once dropped, Windows will install the fonts, and they will appear in the list of available fonts below.
Once installed, close and reopen any applications (like Microsoft Word, Adobe Photoshop, or your browser) that you intend to use the new font in. This ensures the application refreshes its font list.
macOS Font Management: Elegance and Efficiency
Apple’s macOS offers a streamlined approach to font installation and management through its built-in application, Font Book.
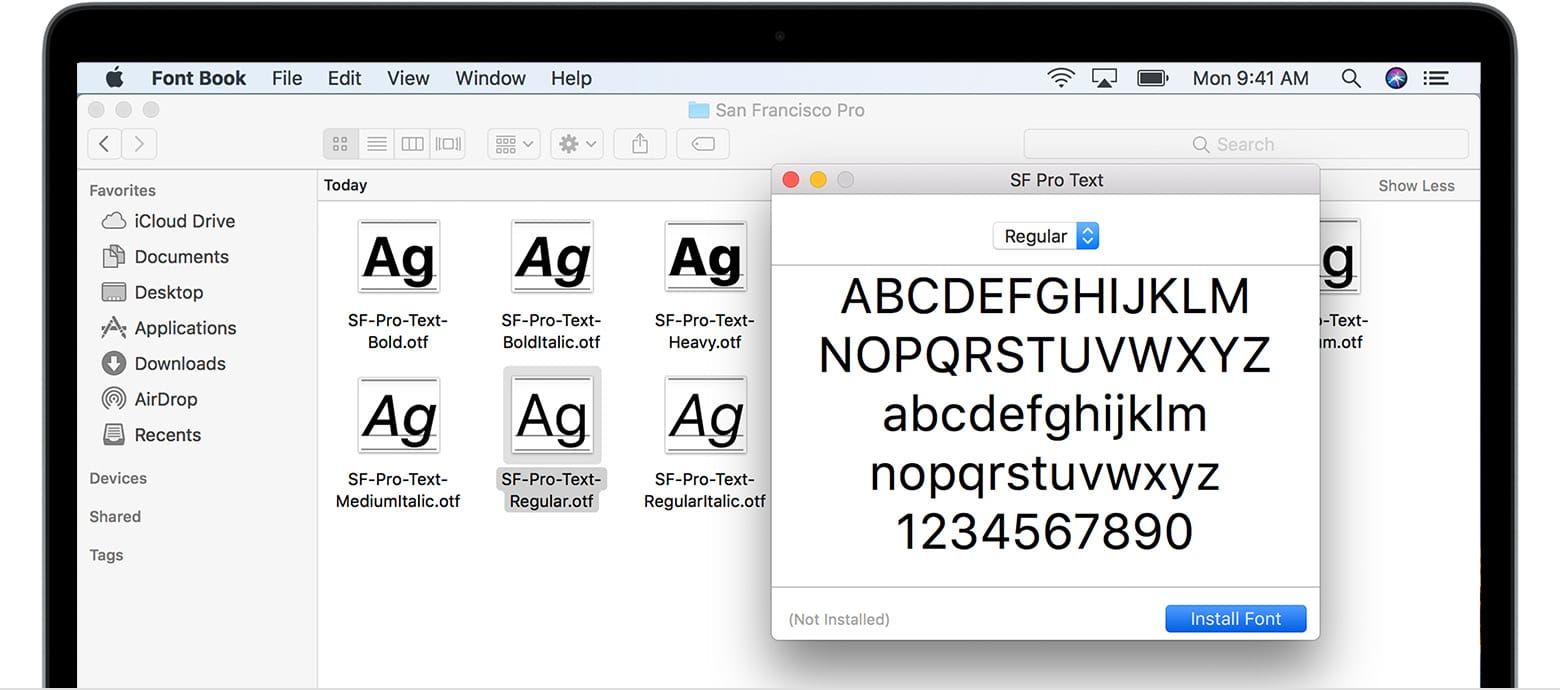
Method 1: Direct Installation via Font Book (Recommended)
This is the most common and simplest method for macOS users.
- Locate Your Downloaded Font Files: Just like Windows, your fonts will likely be in a
.zipfile. Unzip it by double-clicking the folder. - Open the Font File: Navigate to the extracted
.ttfor.otffile. - Double-Click the Font File: Double-clicking the font file will automatically open it in the “Font Book” application.
- Install Font: A preview window will appear showing the font. Click the “Install Font” button at the bottom right of the window.
- Validation: Font Book will automatically validate the font for errors (checking for duplicates or corrupted files). If issues are found, it will notify you. You can choose to proceed with caution or discard problematic fonts.
- Confirmation: Once installed, the font will appear in your Font Book library and be available across all your macOS applications.
Method 2: Manually Adding Fonts to Font Book
For installing multiple fonts or if you prefer managing through the application itself.
- Open Font Book: You can find Font Book in your Applications folder, or by searching for it using Spotlight (Command + Spacebar).
- Add Font:
- Click the “Add” (+) button in the Font Book toolbar.
- Navigate to your extracted font files, select them, and click “Open.”
- Alternatively, you can drag and drop font files directly into the Font Book window.
- Validation and Installation: Font Book will perform the validation and installation as described in Method 1.
After installation, quit and restart any applications you plan to use the new font in to ensure they recognize the change.
Embracing Open Source: Font Installation on Linux
Linux distributions offer flexibility, and font installation can be handled via graphical user interfaces or command line. We’ll focus on methods common to desktop environments like GNOME (Ubuntu, Fedora) and KDE (Kubunu).

Method 1: Using the Font Viewer (GUI Method for Single Fonts)
Most modern Linux distributions include a font viewer that simplifies installation.
- Locate Your Downloaded Font Files: Extract your
.ttfor.otffiles from any.ziparchives. - Double-Click the Font File: In your file manager (e.g., Nautilus for GNOME, Dolphin for KDE), double-click on the
.ttfor.otffile. - Install Button: A font viewer application will open, displaying a preview of the font. Look for an “Install” or “Install Font” button, usually in the top right corner or toolbar. Click it.
- Confirmation: The system will install the font. You might be prompted for your password.
Method 2: Manual Installation to User-Specific Directory (GUI/Terminal for Multiple Fonts)
This method installs fonts for your user profile only, not system-wide.
- Create a Fonts Directory: Open your Home folder. If it doesn’t already exist, create a hidden folder named
.fonts. You can do this via the terminal:
bash

mkdir -p ~/.fonts
(The~represents your home directory, and the.makes the folder hidden.) - Copy Font Files: Drag and drop or copy your extracted
.ttfor.otffiles into the~/.fontsdirectory. Via terminal:
bash

cp /path/to/your/downloaded_font.ttf ~/.fonts/
- Update Font Cache: To ensure applications recognize the new fonts, you need to refresh the font cache. Open a terminal (Ctrl+Alt+T) and run:
bash

fc-cache -fv
This command rebuilds the font information cache.
Method 3: System-Wide Installation (Terminal Method for All Users)
This method installs fonts for all users on the system and often requires administrator privileges.
- Create a Directory (Optional but Recommended): It’s good practice to create a specific folder for third-party fonts within the system’s font directories. For example, in
/usr/local/share/fonts/.
bash

sudo mkdir -p /usr/local/share/fonts/myfonts
- Copy Font Files: Copy your extracted font files into the new directory.
bash

sudo cp /path/to/your/downloaded_font.ttf /usr/local/share/fonts/myfonts/
- Set Permissions: Ensure correct permissions.
bash

sudo chmod -R 755 /usr/local/share/fonts/myfonts
- Update Font Cache: Refresh the font cache.
bash

sudo fc-cache -fv
As with other operating systems, restart applications to see the newly installed fonts.
Leveraging Your New Typefaces: Integration and Application
Installing a font is just the first step. The true power lies in using it effectively across your applications and understanding its broader impact.
Activating Fonts in Your Favorite Applications
Once a font is installed on your operating system, it becomes available to most applications that support custom fonts. This includes:
- Productivity Suites: Microsoft Office (Word, PowerPoint, Excel), Google Docs (via browser extensions or local client use), LibreOffice.
- Design Software: Adobe Creative Suite (Photoshop, Illustrator, InDesign), Affinity Suite (Designer, Photo, Publisher), GIMP, Inkscape.
- Web Browsers: While not directly used for system fonts, understanding web fonts (
.woff,.woff2) is critical for web Brand consistency. - Code Editors/IDEs: Many developers enjoy customizing their coding environment with specific fonts for better readability and a personalized Tech workflow.
Simply open your desired application, navigate to its font selection menu, and your newly installed typeface should appear in the list. If it doesn’t, a quick restart of the application is usually all it takes.
Beyond the Basics: Advanced Font Management Tips
For professionals who handle numerous fonts, basic installation might not be enough. Tech-savvy users and Brand custodians often benefit from font management software like Adobe Fonts (integrated with Creative Cloud), FontBase, or Suitcase Fusion. These tools allow you to:
- Preview Fonts: See how fonts look before installing them.
- Activate/Deactivate Fonts: Only activate fonts when needed, preventing system slowdowns from too many active fonts. This is crucial for maintaining Productivity.
- Organize Fonts: Tag, categorize, and create collections for different projects or clients, enhancing your Brand asset management.
- Find Duplicates: Identify and remove redundant font files.
- Sync Across Devices: Some managers offer cloud syncing for seamless font access across multiple workstations.
Such tools are a small Money investment that can significantly boost Productivity and organization for serious designers and content creators.
Troubleshooting and Best Practices for Font Enthusiasts
Even with a straightforward process, you might encounter minor hiccups. Here are some common issues and best practices to ensure a smooth font experience.
Common Installation Hurdles and Their Solutions
- Font Not Appearing in Applications:
- Solution: Close and reopen the application. Sometimes, a full system restart might be necessary, especially on older systems or after installing many fonts.
- Corrupted Font File:
- Solution: Redownload the font from the source. If the issue persists, try a different source or convert the font to another format using an online converter (use with caution and verify legitimacy).
- Duplicate Font Name:
- Solution: Your OS or font manager will usually detect duplicates. Choose to replace the existing font if the new one is an updated version, or keep both if they are distinct (e.g., different foundries with the same basic name).
- Permissions Issues (Linux):
- Solution: Ensure you used
sudofor system-wide installations and that file permissions (chmod) are correct. For user-specific installations, verify the.fontsdirectory exists in your home directory and has appropriate read/write permissions.
- Solution: Ensure you used
- System Slowdown:
- Solution: Having hundreds or thousands of active fonts can impact system performance. Use a font manager to activate only the fonts you need for current projects.
Font Licensing: Protecting Your Creative and Commercial Interests
This is a critical Money and Brand consideration. Not all fonts are created equal regarding their usage rights.
- Personal Use vs. Commercial Use: Many free fonts are “personal use only,” meaning you cannot use them for any project that generates income or is associated with a business (logos, marketing materials, client work). Always check the license agreement.
- Web vs. Desktop Licenses: Some fonts require separate licenses for web embedding versus desktop use.
- Number of Users/Installations: Commercial licenses often specify how many users are covered or how many devices the font can be installed on.
- Modifications: Some licenses restrict modification of the font.
Violating font licenses can lead to legal issues and financial penalties. For any Brand or commercial project, invest in appropriate licenses. This not only protects you legally but also supports the type designers who craft these valuable assets.
Curating Your Font Library: Organization for Optimal Performance
A well-organized font library is a hallmark of Productivity and a reflection of a professional Tech setup.
- Categorize: Group fonts by style (serif, sans-serif, script, display), project, or client.
- Delete Unused Fonts: Regularly review your library and remove fonts you no longer use. Deactivating them with a font manager is often better than outright deleting, in case you need them later.
- Backup: Font files are small but valuable. Include them in your regular backup routine to prevent loss.
The Broader Perspective: Fonts in Branding, Design, and Productivity
Our journey through font installation underscores a larger truth: typography is a powerful yet often underestimated element in the digital world.
The Brand Power of Typography
For any Brand, corporate or personal, typefaces are non-verbal communicators. They evoke emotions, establish authority, or project playfulness. A consistent and well-chosen font across all touchpoints – website, marketing collateral, social media, product packaging – reinforces Brand recognition and professionalism. This is why major companies often invest heavily in bespoke typefaces or carefully selected premium fonts. It’s a strategic Money investment that pays dividends in brand equity and distinctiveness.
Fonts and Your Digital Workflow: A Productivity Edge
Beyond aesthetics, fonts can directly impact Productivity. A comfortable and readable font in your code editor can reduce eye strain and improve coding efficiency. A clear, well-structured font in your documentation enhances comprehension. By taking control of your font library and knowing how to install and manage new typefaces, you’re not just customizing your system; you’re optimizing your entire digital workflow, ensuring that your tools align with your goals for maximum efficiency and creative output.
In conclusion, installing a downloaded font is a fundamental technical skill that bridges the gap between raw creative assets and their practical application. By understanding the underlying technologies, adhering to best practices, and recognizing the profound impact of typography on Tech, Brand, and even Money-related outcomes, you empower yourself to craft more compelling, consistent, and effective digital experiences. So go ahead, download that beautiful typeface, install it with confidence, and let your words truly resonate.
aViewFromTheCave is a participant in the Amazon Services LLC Associates Program, an affiliate advertising program designed to provide a means for sites to earn advertising fees by advertising and linking to Amazon.com. Amazon, the Amazon logo, AmazonSupply, and the AmazonSupply logo are trademarks of Amazon.com, Inc. or its affiliates. As an Amazon Associate we earn affiliate commissions from qualifying purchases.