In today’s digital age, the convergence of reliable hardware and intuitive software is paramount for productivity. For Mac users, integrating peripherals like printers often seems like a straightforward task, but sometimes specific steps are required to unlock the full potential of your device. Brother printers, renowned for their durability, efficiency, and array of features, are a popular choice for both home and office environments. This guide is designed to walk you through the process of installing your Brother printer on a Mac, ensuring a smooth setup experience, optimal performance, and hassle-free printing. We’ll cover various connection methods, essential troubleshooting, and tips to maximize your printer’s capabilities, all while highlighting the technological ease that Brother and Apple strive for.
Preparing for Installation: Essential Prerequisites for Success
Before diving into the actual installation process, a little preparation can save significant time and frustration. Ensuring you have all the necessary components and information at hand will pave the way for a quick and efficient setup. This foundational stage is critical for any technology implementation, laying the groundwork for seamless functionality and avoiding common pitfalls.
Gathering Your Equipment
First and foremost, confirm you have all the physical components required for your printer setup.
- Brother Printer: Make sure your printer is out of its packaging, has all protective tapes removed, and is loaded with paper and ink/toner cartridges according to the manufacturer’s instructions.
- Power Cable: The printer’s power cable is essential. Connect it to a wall outlet or a surge protector.
- USB Cable (if using a wired connection): A standard USB 2.0 or 3.0 A-to-B cable is typically used for direct connections. Most Brother printers include this, but if yours doesn’t, ensure you have one.
- Ethernet Cable (if using a wired network connection): For network printers, an Ethernet cable will connect your printer directly to your router or network switch.
- Your Mac: Ensure your MacBook, iMac, Mac mini, or Mac Pro is powered on, fully booted, and logged into an administrator account. You’ll need admin privileges to install drivers and add printers.
- Wi-Fi Network Name (SSID) and Password (if using a wireless connection): If you plan to connect your printer wirelessly, have your network’s SSID and password readily available. This information is usually found on a sticker on your router.
Software and System Requirements
Beyond the hardware, your Mac’s software environment plays a crucial role.
- Operating System: Ensure your Mac is running a relatively recent version of macOS. Brother typically provides drivers for current and several previous macOS versions. You can check your macOS version by clicking the Apple menu () > About This Mac. If your macOS is significantly outdated, consider updating it via System Settings/Preferences > Software Update to ensure compatibility and access to the latest security patches.
- Internet Connection: An active internet connection is highly recommended. macOS often automatically downloads necessary drivers, and having an internet connection ensures you can access Brother’s support website for the latest drivers, utilities, and firmware updates if needed. This also allows you to download Brother’s iPrint&Scan app, a valuable tool for managing your printer.
- Admin Access: As mentioned, you’ll need administrator rights on your Mac to install software and modify system settings.
Network Configuration (for Wireless/Wired Setup)
For network-connected printers (Wi-Fi or Ethernet), a stable network is key.
- Router Accessibility: Your Wi-Fi router or network switch should be easily accessible, especially if you plan to use WPS (Wi-Fi Protected Setup) for a wireless connection or an Ethernet cable for a wired network connection.
- Proximity: For wireless connections, ensure your printer is within a reasonable range of your Wi-Fi router to maintain a strong signal. While walls and floors can interfere, most modern routers offer decent coverage. A strong signal prevents dropped connections and slow printing.
By meticulously going through these preparatory steps, you establish a solid foundation, minimizing potential hiccups and streamlining the installation process. This forethought aligns with best practices in digital security and productivity, ensuring your investment in a Brother printer delivers maximum value from day one.
Step-by-Step Installation Methods
Brother printers offer various ways to connect to your Mac, each with its own set of advantages depending on your setup and preferences. We’ll cover the three most common methods: USB, Wi-Fi, and Ethernet. Understanding these options not only facilitates the initial setup but also allows you to choose the most efficient and convenient connection for your workflow, a testament to thoughtful brand design focusing on user flexibility.
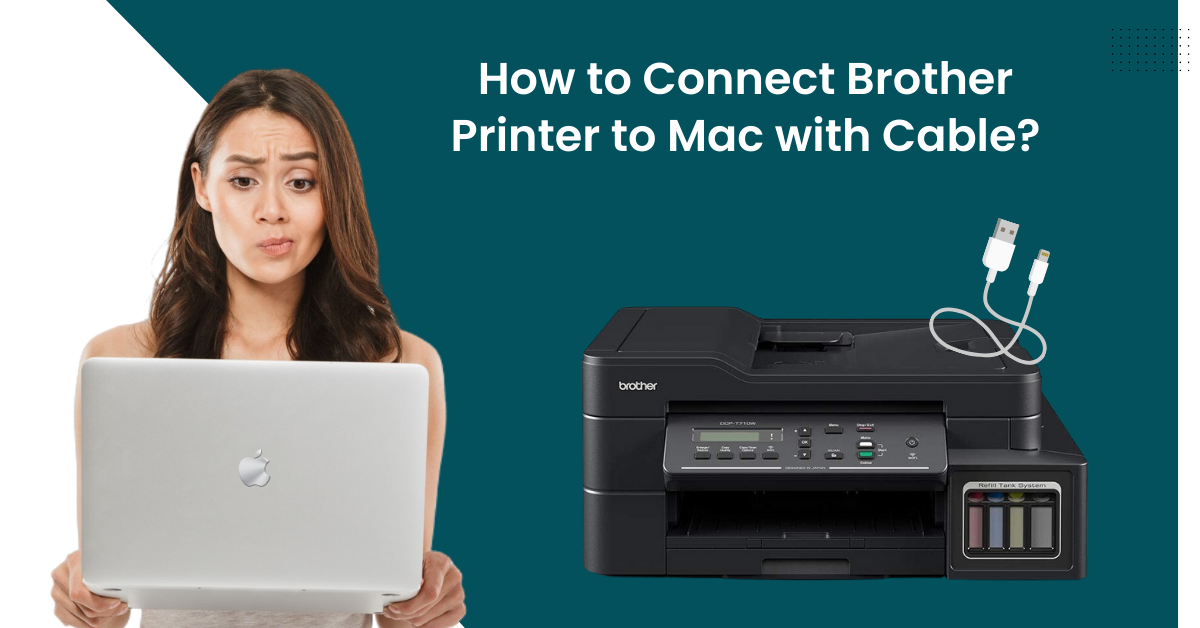
Method 1: USB Connection (Direct Wired)
The USB connection is the simplest and often the most reliable method for a single-user setup, providing a direct, fast link between your Mac and the printer.
- Power On Your Printer: Plug in your Brother printer and power it on. Wait for it to fully initialize.
- Connect USB Cable: Connect one end of the USB cable to your Brother printer (typically a square-shaped ‘B’ port) and the other end to an available USB port on your Mac.
- Automatic Detection (macOS): Your Mac should automatically detect the new hardware. In many cases, macOS will either automatically download the necessary drivers or prompt you to do so. A notification might appear asking if you want to add the printer.
- Add Printer via System Settings:
- Click on the Apple menu () in the top-left corner of your screen.
- Select System Settings (macOS Ventura and later) or System Preferences (macOS Monterey and earlier).
- Click on Printers & Scanners.
- Click the “+” button (or “Add Printer, Scanner, or Fax…”) located below the list of printers.
- Your Brother printer should appear in the list with a connection type like “USB” or “Brother USB MFC-XXXX”. Select it.
- In the “Use” dropdown menu, macOS will usually auto-select the correct Brother driver. If not, select “Brother CUPS Driver” or “Select Software…” to manually choose the appropriate driver for your model.
- Click Add.
- Test Print: Once added, your printer should appear in the “Printers & Scanners” list. Perform a test print to confirm functionality.
Method 2: Wi-Fi (Wireless) Connection
Wireless connectivity offers unparalleled flexibility, allowing you to place your printer almost anywhere within range of your Wi-Fi network and print from multiple devices. Brother printers typically offer a few ways to connect wirelessly.
Sub-Method A: Using the Printer’s Control Panel
This is the most common method and works for printers with a display screen.
- Power On and Access Menu: Power on your Brother printer. On the printer’s display panel, navigate to the Network or Wi-Fi settings.
- Select Wi-Fi Setup Wizard: Choose the WLAN or Wi-Fi Setup Wizard option.
- Scan for Networks: The printer will scan for available Wi-Fi networks. Select your network’s SSID (name) from the list.
- Enter Password: When prompted, enter your Wi-Fi network password (WPA/WPA2 key). Be careful with capitalization and special characters. Press OK or Connect.
- Confirmation: The printer should display a confirmation message that it has connected to the wireless network. Print a network configuration page from the printer’s menu to verify its IP address.
- Add Printer to Mac:
- Go to Apple menu () > System Settings/Preferences > Printers & Scanners.
- Click the “+” button.
- Your Brother printer should now appear in the list under “Bonjour” or “IP” with its network name. Select it.
- Verify the “Use” driver is correct (Brother CUPS Driver or Select Software…).
- Click Add.
Sub-Method B: Using WPS (Wi-Fi Protected Setup)
If your router supports WPS, this can be an even faster setup method, requiring no password input on the printer.
- Initiate WPS on Printer: On your Brother printer, navigate to the Network or Wi-Fi settings and select the WPS option.
- Activate WPS on Router: Within two minutes, press the WPS button on your Wi-Fi router. (The button might be labeled “WPS” or have a symbol of two arrows chasing each other).
- Confirmation: The printer and router will communicate and establish a connection. The printer will confirm successful connection.
- Add Printer to Mac: Follow step 6 from Sub-Method A to add the printer to your Mac.
Sub-Method C: Using Brother Utilities (Downloadable Software)
Brother often provides utility software that can guide you through wireless setup directly from your Mac.
- Download Software: Go to the official Brother support website for your specific printer model. Download the full “Driver & Software Package” for macOS.
- Run Installer: Open the downloaded package and follow the on-screen instructions. The installer will guide you through connecting the printer, often allowing you to choose between USB and Wi-Fi setup.
- Follow Prompts: If selecting Wi-Fi, it might temporarily connect via USB to transfer network settings, or it will guide you through the control panel steps.
- Completion: The utility will ensure the printer is added to your Mac and ready for use.
Method 3: Ethernet (Wired Network) Connection
For environments requiring maximum stability and speed, or when Wi-Fi is not available, an Ethernet connection is ideal. This method is common in business finance settings and larger office networks where consistent connectivity is critical.
- Connect Ethernet Cable: Plug one end of the Ethernet cable into the Ethernet port on your Brother printer and the other end into an available LAN port on your router or network switch.
- Power On Printer: Power on the printer and wait for it to establish a network connection. The network status lights on the printer’s Ethernet port should indicate activity.
- Add Printer to Mac:
- Go to Apple menu () > System Settings/Preferences > Printers & Scanners.
- Click the “+” button.
- Your Brother printer should appear in the list under “Bonjour” or “IP” with its network name or IP address. Select it.
- Ensure the “Use” driver is correctly identified.
- Click Add.
- Test Print: Send a test print job to confirm the connection.
Verifying Your Installation and Printing Your First Document
Once you’ve connected your Brother printer using your preferred method, the next crucial step is to verify that your Mac recognizes it correctly and that it’s ready to perform its primary function: printing. This final check ensures that all the technical configurations have successfully translated into a working solution, delivering on the promise of productivity.
Adding the Printer in System Settings

While the previous steps included adding the printer, sometimes manual verification or re-addition is necessary, especially if you encountered issues during automatic detection.
- Access Printers & Scanners:
- Click the Apple menu () in the top-left corner of your screen.
- Navigate to System Settings (macOS Ventura and later) or System Preferences (macOS Monterey and earlier).
- Click on Printers & Scanners.
- Confirm Printer Presence: Look for your Brother printer’s name in the left-hand list. If it’s there, it’s a good sign. If it’s not, or if it shows a generic name, you might need to add it manually:
- Click the “+” button at the bottom of the list.
- In the ensuing window, your printer should appear under the Default tab (for USB or network-detected printers via Bonjour) or the IP tab (if you need to enter its IP address manually for network printers).
- Select your Brother printer.
- Crucially, in the “Use” or “Print Using” dropdown menu, ensure the correct Brother driver is selected. macOS is usually good at auto-detecting, but sometimes it might default to a generic driver (like “Generic PCL Laser Printer”). If this happens, click “Select Software…” and find your specific Brother model from the list. If your model isn’t listed, you might need to download the full driver package from Brother’s website and run the installer.
- Click Add.
Conducting a Test Print
A test print is the ultimate confirmation that your installation was successful and that your printer is fully operational.
- Open a Document: Open any document or application that allows printing, such as Pages, Microsoft Word, Safari, or even a simple TextEdit document.
- Initiate Print Command:
- Go to File > Print in the application’s menu bar (or use the keyboard shortcut Command (⌘) + P).
- Select Your Printer: In the print dialog box that appears, ensure your newly installed Brother printer is selected from the dropdown menu (often labeled “Printer”).
- Print: Click the Print button.
Your Brother printer should now spring to life, printing the document. If it prints successfully, congratulations! Your Brother printer is fully installed and ready for use. If you encounter any issues, don’t worry – troubleshooting is a normal part of tech integration.
Common Troubleshooting Tips for Brother Printers on Mac
Even with the most meticulous preparation, sometimes issues arise during or after installation. These challenges are often minor and can be resolved with a few simple troubleshooting steps. Addressing these common problems effectively enhances your digital security and productivity, ensuring minimal downtime and maximum efficiency from your printer.
Printer Not Appearing in List
- Restart Everything: Turn off your printer, unplug it, restart your Mac, and restart your Wi-Fi router. Wait a minute or two, then plug everything back in and power on. This often clears temporary glitches.
- Check Physical Connections: Ensure all cables (USB, Ethernet, power) are securely plugged in at both ends. For Wi-Fi, confirm your printer is displaying a strong Wi-Fi signal indicator.
- Verify Network Connectivity (for Wi-Fi/Ethernet):
- Printer’s IP Address: Print a network configuration report from your printer’s menu to find its IP address.
- Ping Test: On your Mac, open Terminal (Applications > Utilities > Terminal) and type
ping [printer's IP address](e.g.,ping 192.168.1.100). If you receive replies, your Mac can “see” the printer on the network. If not, there’s a network issue. - Firewall: Temporarily disable any third-party firewalls on your Mac (or check their settings) to see if they’re blocking communication. macOS’s built-in firewall usually allows printer discovery.
- Manual IP Addition: If the printer has an IP address but doesn’t appear in the “Printers & Scanners” list automatically:
- In the “Add Printer” window, click the IP tab.
- For “Protocol,” choose “HP Jetdirect – Socket.”
- Enter the printer’s IP address in the “Address” field.
- In the “Use” dropdown, select the correct Brother driver.
- Click Add.
Connectivity Issues
- Wi-Fi Signal Strength: If your printer is far from your router, consider moving it closer or using a Wi-Fi extender.
- Router Settings: Check your router’s settings. Ensure “AP Isolation” or “Client Isolation” is disabled, as this prevents devices on the same network from seeing each other. Ensure your router’s firmware is up-to-date.
- Channel Interference: Wireless networks can suffer from interference. If your router has the option, try changing the Wi-Fi channel.
- Incorrect Wi-Fi Password: Double-check the Wi-Fi password entered on the printer. It’s case-sensitive.
Driver-Related Problems
- Outdated/Corrupt Drivers: Sometimes, macOS might install a generic driver, or an existing driver becomes corrupt.
- Delete and Re-add: In “Printers & Scanners,” select your Brother printer and click the “–” button to remove it. Then, try adding it again.
- Download Latest Drivers: Visit the official Brother support website (support.brother.com) for your specific printer model. Download and install the latest “Full Driver & Software Package” for your macOS version. This often includes crucial updates and utilities.
- CUPS Reset: If you have persistent driver issues, you can reset the macOS printing system:
- Go to System Settings/Preferences > Printers & Scanners.
- Right-click (or Control-click) on an empty area in the printers list.
- Select Reset Printing System…. This will remove all printers and drivers, giving you a clean slate to re-add your Brother printer.
Printing Errors and Quality Issues
- Check Print Queue: In “Printers & Scanners,” click on your printer. The “Open Print Queue…” button will show pending jobs. If a job is stuck, select it and try to resume or delete it.
- Ink/Toner Levels: Low ink or toner is a common cause of poor print quality or failed prints. Check the levels on your printer’s display or through Brother’s utility software.
- Paper Jams: Follow the instructions in your printer’s manual to clear any paper jams.
- Nozzle Check/Print Head Cleaning: If print quality is poor (streaks, missing colors), run a nozzle check pattern and then a print head cleaning cycle from your printer’s maintenance menu or Brother’s utility software.
- Firmware Update: Check Brother’s website for firmware updates for your printer. Firmware updates can resolve bugs and improve performance and compatibility.
By systematically working through these troubleshooting steps, you can often diagnose and resolve most common printer issues, restoring your Brother printer to full functionality and maintaining your workflow’s efficiency.
Optimizing Your Brother Printer Experience on Mac
Beyond basic installation, several strategies can help you get the most out of your Brother printer on your Mac, enhancing its longevity, security, and overall contribution to your productivity. These tips delve into the “Tech” and “Digital Security” aspects, ensuring your investment remains valuable over time.
Keeping Drivers Up-to-Date
Just like your macOS, printer drivers receive updates. These updates often include:
- Improved Compatibility: Ensuring seamless operation with the latest macOS versions.
- Bug Fixes: Resolving known issues that might cause printing errors or crashes.
- New Features: Sometimes adding support for new paper types, print quality modes, or enhanced security protocols.
- Performance Enhancements: Optimizing print speeds and efficiency.
Action: Regularly visit the official Brother support website for your specific printer model. Check the “Downloads” or “Drivers & Software” section for updated macOS drivers and firmware. While macOS often manages basic drivers, Brother’s full software packages offer more control and features.
Leveraging Brother Utilities and Software
Brother provides a suite of software tools designed to complement their hardware, offering capabilities beyond basic printing.
- Brother iPrint&Scan: This free application (available on the App Store and Brother’s website) is a powerful tool for managing your Brother printer/MFC. It allows you to:
- Print from your Mac: Directly print photos, documents, and web pages.
- Scan to your Mac: Easily scan documents and images, saving them in various formats.
- Check Printer Status: Monitor ink/toner levels, paper jams, and other operational statuses.
- Access Advanced Settings: Adjust scan resolutions, document types, and other printer-specific functions.
- Brother ControlCenter: Some older or more professional Brother models might utilize ControlCenter software for comprehensive management of scanning, faxing, and printing settings.
- BRAdmin Professional: For network administrators or those managing multiple Brother devices, BRAdmin Professional offers advanced network management capabilities, aligning with “Corporate Identity” and “Digital Security” in a larger setting.
Action: Download and explore these utilities. They often simplify complex tasks and unlock hidden features of your Brother printer, turning it into a more versatile tool for your digital life.
Digital Security Best Practices
Printers, especially network-connected ones, can be a potential vulnerability if not secured properly. Applying some digital security best practices ensures your data remains private and your network remains secure.
- Change Default Passwords: If your Brother printer has a web-based management interface (accessible via its IP address in a browser), change the default administrator password immediately. This prevents unauthorized access to printer settings and potentially stored print jobs.
- Enable Network Security: Ensure your Wi-Fi network uses strong encryption (WPA2 or WPA3). Avoid open networks for printer connections.
- Regular Firmware Updates: As mentioned, firmware updates often include security patches that close vulnerabilities. Make it a routine to check for and apply these.
- Printer Placement: For sensitive documents, consider the physical placement of your printer to prevent unauthorized individuals from accessing printouts.
- Secure Print Functionality: Many Brother business-class printers offer “Secure Print” features, where a PIN must be entered at the printer before a document is released. This is invaluable for confidentiality in shared office environments.
- Guest Network Isolation: If you have a guest Wi-Fi network, avoid connecting your main printer to it. Keep it on your secure private network.
By integrating these optimization and security practices, you not only ensure the smooth operation of your Brother printer but also maximize its value as a secure and efficient asset in your technology ecosystem. This proactive approach supports “Productivity” and “Digital Security,” ensuring your investment continues to pay dividends.

Conclusion
Installing a Brother printer on your Mac, whether via USB, Wi-Fi, or Ethernet, is a straightforward process when approached systematically. By following the preparation steps, executing the installation method of your choice, and verifying the setup, you can quickly integrate your new printer into your Mac environment.
Brother’s reputation for user-friendly interfaces and robust hardware, combined with macOS’s intuitive design, creates a powerful printing solution. Beyond the initial setup, remember to leverage Brother’s dedicated software like iPrint&Scan, keep your drivers and firmware updated, and implement digital security best practices. These steps not only enhance your productivity but also protect your digital assets, ensuring your Brother printer remains a reliable and secure workhorse for years to come.
With your Brother printer now seamlessly connected to your Mac, you’re equipped to handle everything from personal documents to professional reports, enjoying the full spectrum of features that modern printing technology has to offer. This guide empowers you to take control of your tech, making the most of your hardware investment and streamlining your digital workflow with confidence and ease.
aViewFromTheCave is a participant in the Amazon Services LLC Associates Program, an affiliate advertising program designed to provide a means for sites to earn advertising fees by advertising and linking to Amazon.com. Amazon, the Amazon logo, AmazonSupply, and the AmazonSupply logo are trademarks of Amazon.com, Inc. or its affiliates. As an Amazon Associate we earn affiliate commissions from qualifying purchases.