In the ever-evolving digital landscape, where technology consistently pushes the boundaries of creativity and productivity, the seemingly simple act of installing a font on your Mac holds surprising depth. For anyone working with design, content creation, branding, or even just seeking to personalize their digital workspace, mastering font management is an indispensable skill. A well-chosen typeface can transform a bland document into a compelling presentation, elevate a personal project to professional standards, or simply make daily digital interactions more aesthetically pleasing. This comprehensive guide will walk you through the essential steps of installing fonts on your macOS device, delve into the ‘why’ behind effective font management, and touch upon advanced considerations that impact everything from your personal brand to the efficiency of your tech workflow.
Why Font Management Matters for Mac Users
Beyond mere aesthetics, the proper selection and management of fonts on your Mac significantly impact various aspects of your digital life. From enhancing your creative output to ensuring your software runs smoothly, understanding the power of typography is key.
Enhancing Productivity and Creativity
For creatives – designers, writers, marketers, educators – fonts are not just decorative elements; they are fundamental tools. The right font can convey emotion, hierarchy, and personality, guiding the reader’s eye and enhancing comprehension. Imagine designing a brochure where the headline font clashes with the body text, or a presentation where readability is compromised by an unconventional typeface. These issues directly impede effective communication and demand time-consuming revisions.
By having a curated library of easily accessible fonts, you streamline your workflow. Instead of hunting for the perfect typeface or settling for default options, you can quickly implement fonts that align with your project’s goals. This efficiency translates directly into increased productivity, allowing you to focus on the core creative tasks rather than logistical hurdles. For professionals in fields like graphic design, video editing, or web development, a robust and well-organized font collection is as crucial as powerful software and hardware. It’s an investment in your creative toolkit, enabling you to produce higher quality work faster.
The Impact of Typography on Branding and Communication
In today’s digital-first world, branding extends far beyond a logo. Typography plays a pivotal role in establishing and maintaining a brand’s identity, whether it’s for a global corporation, a burgeoning startup, or an individual’s personal brand. Consistent use of specific fonts across all touchpoints – websites, social media, marketing materials, emails, and even internal documents – creates a cohesive and recognizable brand image.
Consider the distinct typography of major brands; their chosen fonts evoke specific feelings and associations. A tech company might opt for sleek, modern sans-serifs to project innovation and efficiency, while a luxury brand might use elegant serifs to convey sophistication and heritage. For individuals building a personal brand, selecting a signature font can communicate professionalism, creativity, or approachability. Mismanaged fonts, or the use of inconsistent typography, can dilute a brand’s message, confuse its audience, and undermine its credibility. Therefore, understanding how to properly install and deploy fonts is not just a technical skill but a strategic branding decision, directly impacting how your message is perceived and remembered.
Avoiding Common Pitfalls: Font Conflicts and Performance
While the allure of thousands of free fonts is strong, indiscriminately installing every appealing typeface can lead to significant technical headaches. macOS, like any operating system, has limits and specific ways of managing resources. Overloading your system with too many active fonts can degrade performance, slow down applications, and even lead to system instability.
More insidious are font conflicts. These occur when two different versions of the same font (or fonts with similar internal naming conventions) are installed, causing applications to behave unpredictably. Text might render incorrectly, specific fonts might refuse to activate, or software could crash entirely. Such issues are not only frustrating but also time-consuming to diagnose and resolve, directly impacting your productivity and potentially costing money in lost work hours. Proactive font management, including thoughtful installation and regular library maintenance, is a digital security measure for your system’s stability, ensuring that your Mac runs smoothly and your creative applications perform optimally.
Your Toolkit for Font Installation on macOS
Before diving into the installation process, it’s beneficial to understand the components involved, from the types of font files you’ll encounter to the built-in tools macOS provides.
Understanding Font Formats (TrueType, OpenType, Web Open Font Format)
Font files come in several primary formats, each with its characteristics and history. While macOS generally handles them seamlessly, a basic understanding can be helpful.
- TrueType Font (TTF): Developed by Apple in the late 1980s and later adopted by Microsoft, TTF is one of the most common font formats. It contains both screen and print outline data in a single file, making it highly compatible across different platforms and applications.
- OpenType Font (OTF): A successor to TrueType, developed jointly by Microsoft and Adobe, OpenType offers greater typographic sophistication. OTF fonts can contain up to 65,536 glyphs (characters), supporting extended character sets, ligatures, small caps, alternate characters, and other advanced typographic features. This makes OTF particularly valuable for professional design and multilingual projects. It’s often the preferred format for high-quality print and digital media.
- Web Open Font Format (WOFF/WOFF2): These formats are specifically designed for use on the web. They are essentially OpenType or TrueType fonts with added compression and metadata, optimized for faster loading times in web browsers. While you wouldn’t typically “install” a WOFF font on your desktop Mac for local applications, it’s important to recognize their role in web design and development.
- PostScript Type 1: An older format primarily used in professional publishing, PostScript fonts consist of two files: a screen font and a printer font. While still supported by some legacy applications, they are largely superseded by OpenType.
For most Mac users, you’ll primarily be dealing with TTF and OTF files for desktop installation.
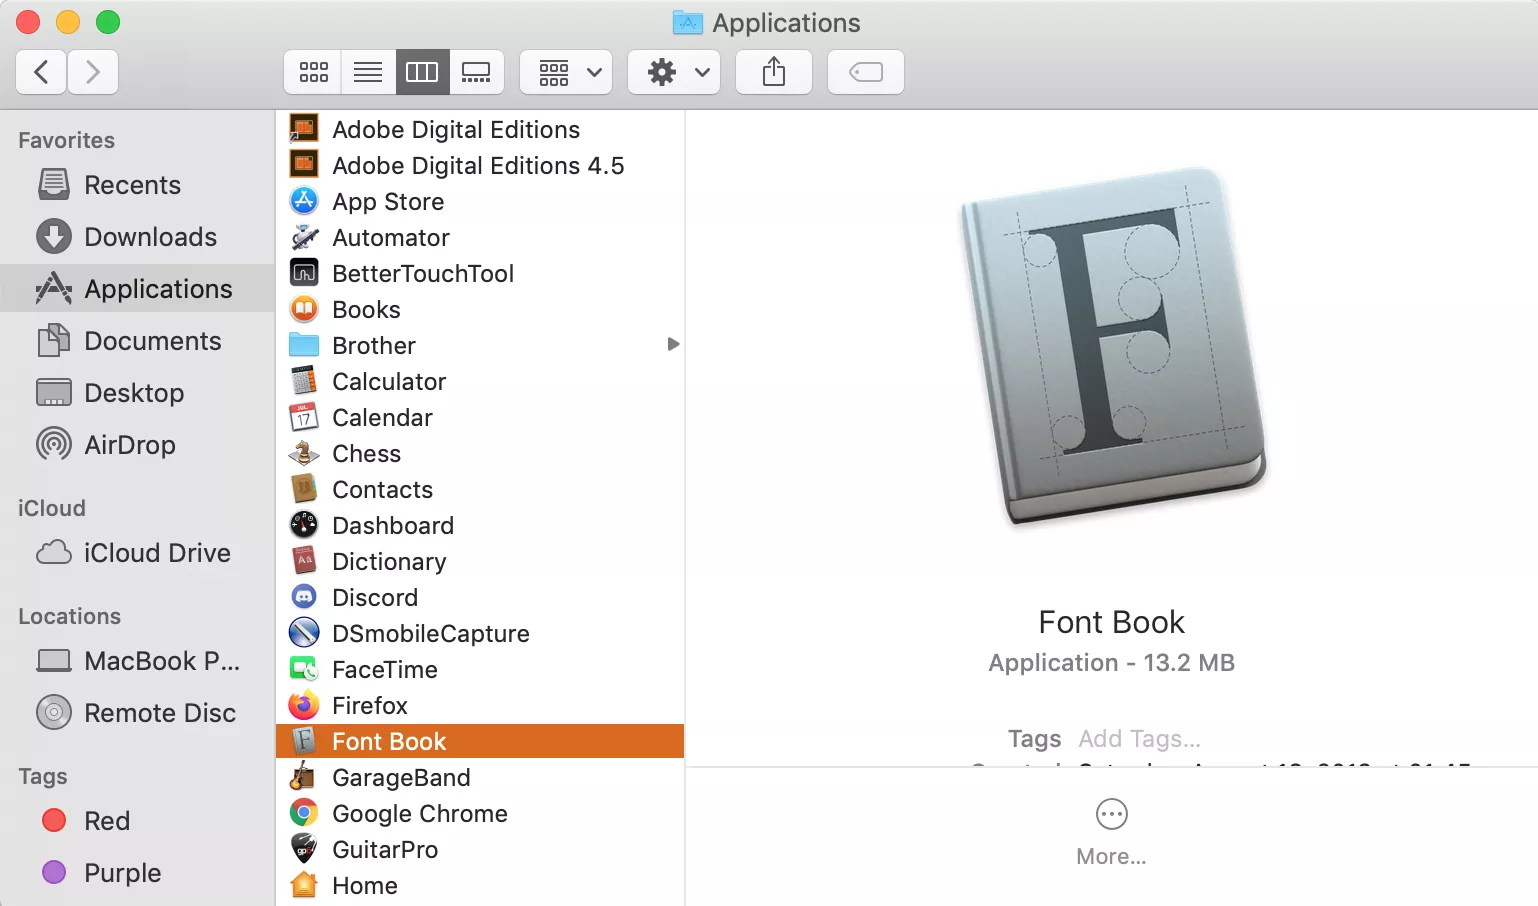
The Role of Font Book
Font Book is Apple’s native font management utility, pre-installed on every Mac. It’s your primary tool for installing, previewing, organizing, enabling, disabling, and validating fonts. Think of it as a central hub for all your typeface needs.
When you install a font, Font Book registers it with macOS, making it available across most applications, including Pages, Keynote, Microsoft Word, Adobe Creative Suite, and more. It also plays a crucial role in identifying and resolving font conflicts and duplicates, helping to maintain system stability. While there are powerful third-party font managers, Font Book is robust enough for most users and offers a straightforward, integrated experience.
Sourcing Fonts Safely and Responsibly
The internet is a treasure trove of fonts, both free and paid. However, not all sources are created equal. When downloading fonts, consider the following:
- Trusted Free Font Sites: Websites like Google Fonts, DaFont, Font Squirrel, and Font Space offer vast collections of free fonts. Google Fonts, in particular, is highly reliable, offering open-source fonts often used in web development and general design. Always check the licensing terms, as “free” often means “free for personal use” but might require a commercial license for business applications.
- Professional Font Foundries and Marketplaces: For high-quality, professionally designed fonts, especially for commercial projects, consider purchasing from reputable foundries like Adobe Fonts (included with Creative Cloud subscriptions), MyFonts, Fontspring, or individual type designers. These fonts come with clear licensing agreements, professional support, and are typically well-hinted for optimal display.
- Licensing: This is critical, especially for brand and money-related aspects. Before using any font in a commercial project (e.g., website, logo, product packaging), ensure you have the appropriate license. Using unlicensed fonts can lead to legal issues and significant financial penalties. Free fonts often have specific usage terms (e.g., “personal use only,” “attribution required”), so always read the fine print.
Downloading fonts from unknown or suspicious websites can pose security risks, as font files can theoretically contain malicious code. Always prioritize trusted sources to protect your system and data.
Step-by-Step: Installing Fonts on Your Mac
Installing fonts on a Mac is generally a straightforward process, thanks to macOS’s intuitive design and the functionality of Font Book. Here are the most common methods.
Method 1: The Drag-and-Drop Simplicity
This is often the quickest and easiest way to install a single font or a small batch of fonts.
- Locate Your Font Files: After downloading, fonts are usually compressed in a
.zipfile. Double-click the.zipfile to extract its contents. You’ll then see the individual font files, typically ending in.ttfor.otf. - Select and Drag: Select the font file(s) you wish to install.
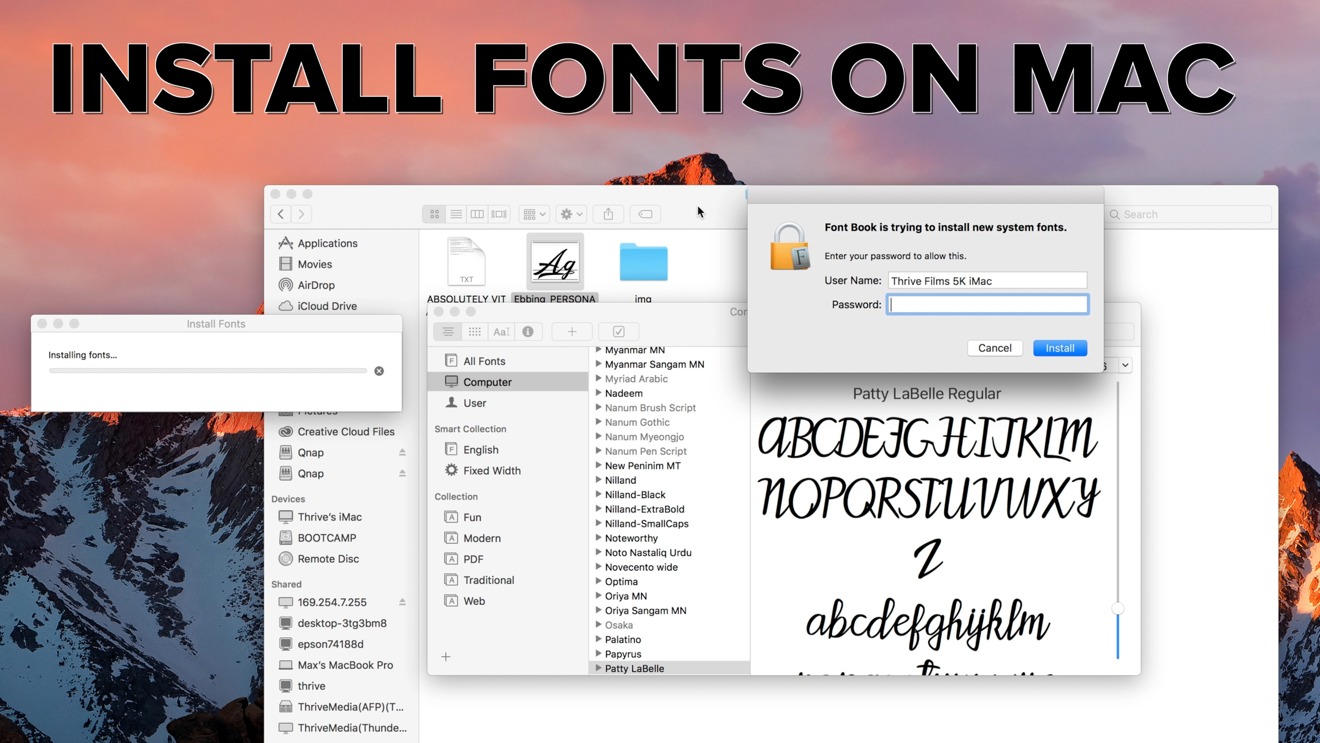
- Open Font Book: Drag the selected font file(s) directly onto the Font Book icon in your Dock or Applications folder. Alternatively, you can drag them into an open Font Book window.
- Confirm Installation: Font Book will open (if not already open) and display a dialog box with the font name(s) and a “Install” button. Click “Install.”
- Validation Check: Font Book will perform a quick validation check. If any issues are found (e.g., duplicates, corrupted files), it will alert you. Address any warnings or errors as prompted.
- Font Available: Once installed, the font will appear in your Font Book library and be available for use in most applications immediately.
Method 2: Using Font Book Directly
This method is useful when you want more control or if the drag-and-drop method doesn’t suit your workflow.
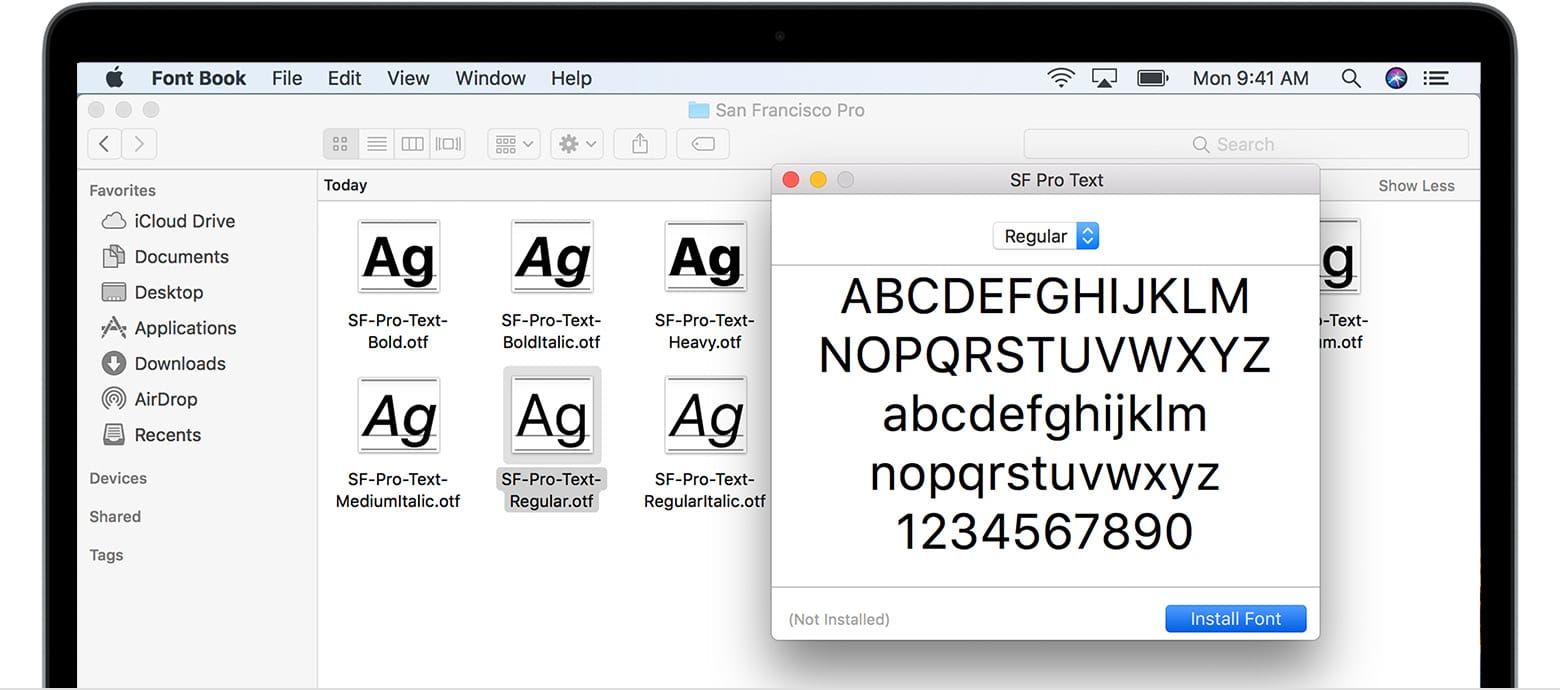
- Launch Font Book: Open Font Book from your Applications folder or via Spotlight Search (Command + Space, then type “Font Book”).
- Add Fonts: In the Font Book application, go to File > Add Fonts… (or click the “+” button in the toolbar).
- Navigate to Font Files: A file browser window will appear. Navigate to the location where your downloaded font files are stored.
- Select and Open: Select the font file(s) you wish to install and click “Open.”
- Confirm and Validate: Similar to Method 1, Font Book will prompt you to confirm the installation and perform a validation check.
- Font Available: The fonts will be added to your Font Book library and accessible in your applications.
Installing Multiple Fonts Simultaneously
Both methods described above allow for batch installation. When you locate your font files:
- Select All: Use Command + A to select all files in a folder.
- Select Multiple: Hold down the Command key and click on individual font files to select multiple non-contiguous files.
- Select Range: Click the first font file, then hold down the Shift key and click the last font file to select a contiguous range.
Once multiple files are selected, you can drag them to Font Book or use the “Add Fonts…” option, and Font Book will process them all at once.
Verifying and Validating Fonts
Font Book has a built-in feature to validate fonts, which is crucial for preventing conflicts and ensuring stability.
- Open Font Book.
- Select Fonts: Select the font(s) you want to validate. You can select individual fonts, a collection, or even all fonts in your library (File > Select All).
- Validate Fonts: Go to File > Validate Fonts.
- Review Results: Font Book will scan the selected fonts for common problems like corrupted data or duplicate entries. It will present a “Font Validation” window, highlighting any issues.
- Green Checkmark: The font passed validation.
- Yellow Exclamation Mark: There are minor issues, but the font might still be usable. Proceed with caution.
- Red “X”: The font has serious problems and should not be used. It’s often best to remove such fonts to prevent system instability.
Regularly validating your fonts, especially after batch installations or when encountering unexpected application behavior, is a good practice for maintaining a healthy font library and system.
Advanced Font Management and Troubleshooting
As your font library grows, or if you encounter issues, more advanced management techniques become necessary.
Deactivating and Removing Fonts
Simply because a font is installed doesn’t mean it needs to be active all the time. Deactivating fonts can improve system performance and prevent conflicts.
- Deactivate: In Font Book, select the font(s) you wish to deactivate. Right-click (or Control-click) and choose “Disable [Font Name]” or uncheck the checkbox next to the font name in the Font Book window. Deactivated fonts remain on your system but are not loaded, making them unavailable to applications. You can reactivate them anytime.
- Remove: To permanently remove a font from your system, select it in Font Book, right-click, and choose “Remove [Font Name].” Confirm your decision. This deletes the font file from your Mac. Be cautious when removing fonts, especially system fonts, as it can affect macOS functionality or applications. If unsure, deactivate rather than remove.
Resolving Font Conflicts and Duplicates
Font Book is excellent at flagging duplicates.
- Identify Duplicates: During validation or when viewing your library, Font Book will often show a warning triangle next to duplicate fonts.
- Resolve Duplicates: Select the font with the warning. In the information panel, Font Book will show details about the duplicate. You’ll typically have options to “Resolve Manually” or “Resolve Automatically.”
- Resolve Automatically: Font Book will attempt to resolve the conflict by disabling older or less complete versions, keeping the recommended one active.
- Resolve Manually: This allows you to inspect each duplicate and decide which version to keep active and which to disable or remove. For instance, you might prefer an OpenType version over a TrueType version.
Resolving duplicates prevents applications from becoming confused about which version of a font to use, thereby enhancing stability.
When to Use Third-Party Font Managers
While Font Book is excellent for basic needs, professional designers, agencies, or individuals managing very large font libraries (hundreds to thousands of fonts) often benefit from third-party font management software. Tools like Universal Type Client, Suitcase Fusion, or RightFont offer:
- Advanced Organization: More sophisticated tagging, categorization, and search capabilities.
- Font Auto-Activation: Automatically activate fonts needed by specific design documents (e.g., InDesign, Photoshop).
- Cloud Sync and Collaboration: Share and synchronize font libraries across multiple devices or team members, crucial for corporate identity and consistent branding across a team.
- More Robust Conflict Resolution: Better handling of complex font conflicts.
- Font Usage Tracking and Licensing Management: Help track where fonts are used and manage licensing compliance, important for financial and legal reasons in professional environments.
Investing in a professional font manager can be a smart financial decision for businesses heavily reliant on design, as it streamlines workflows, reduces errors, and ensures brand consistency.
Licensing Considerations for Commercial Use
Revisiting the “Money” aspect, font licensing is a critical, often overlooked, area. Just like software, fonts are intellectual property protected by copyright.
- Personal Use vs. Commercial Use: Many free fonts are “free for personal use” but require a commercial license for any business, organizational, or revenue-generating project. This includes company logos, marketing materials, websites, merchandise, and even social media posts for a brand.
- Types of Licenses: Licenses vary widely:
- Desktop License: For installing on a computer and using in applications for print or static images.
- Web License: For embedding fonts on a website using
@font-facerules. Often measured by page views. - App/eBook License: For embedding fonts in mobile apps or digital publications.
- Server License: For use on a server to generate dynamic content.
- Compliance: Failing to comply with font licenses can result in costly legal disputes, fines, and reputational damage. Always read the End User License Agreement (EULA) before using a font commercially. Budgeting for font licenses is an essential part of any professional design project or brand strategy.
Beyond Installation: Leveraging Fonts for Impact
Installing fonts is merely the first step. The true power lies in how you leverage these typographic tools to enhance your projects and communications.
Curating Your Font Library for Specific Projects
Instead of a monolithic collection, consider organizing your fonts into logical categories or “collections” within Font Book. You might have collections for:
- Brand Fonts: Your primary corporate identity fonts.
- Web Design: Fonts suitable for digital interfaces.
- Print Projects: High-quality fonts for brochures, posters, etc.
- Display Fonts: Unique, attention-grabbing fonts for headlines.
- Handwriting/Script: Fonts for personal touches.
- Seasonal/Holiday: Themed fonts for specific campaigns.
This systematic approach, informed by your brand strategy and tech usage, saves time and ensures consistency. It’s a productivity hack that keeps your creative workspace tidy and efficient.
The Synergy of Fonts and Design Tools
Your chosen fonts come alive within your design and productivity applications. Understanding how they interact with tools like Adobe Creative Suite (Photoshop, Illustrator, InDesign), Figma, Canva, or even Apple’s Pages and Keynote is crucial.
- Font Menus: Fonts will appear in the font selection menus of all compatible applications.
- Type Controls: Leverage the advanced typographic controls available in professional design software (e.g., kerning, tracking, leading, OpenType features) to fine-tune your text for optimal readability and aesthetic appeal.
- Consistency Across Platforms: If your team uses different operating systems or software, ensure your font choices are universally supported or that appropriate fallbacks are in place to maintain branding consistency. This foresight can save significant money and effort in revisions.
Staying Updated with Font Trends and Technologies
The world of typography is dynamic. New font technologies, like variable fonts (which allow for infinite variations within a single font file for weight, width, and other axes), are constantly emerging. Staying abreast of these trends can offer new creative possibilities and improve performance. Follow reputable design blogs, tech news, and font foundries to keep your knowledge current. This ongoing learning is part of maintaining a competitive edge in any design- or content-heavy field, directly contributing to the long-term success of your brand and the efficiency of your tech stack.
In conclusion, installing fonts on your Mac is a foundational skill that bridges technology, creativity, and brand strategy. By mastering this process, understanding the nuances of font formats and licensing, and adopting smart management practices, you not only enhance your personal productivity but also empower your creative endeavors and strengthen your digital presence. It’s a small technical step with significant repercussions for your overall digital success.
aViewFromTheCave is a participant in the Amazon Services LLC Associates Program, an affiliate advertising program designed to provide a means for sites to earn advertising fees by advertising and linking to Amazon.com. Amazon, the Amazon logo, AmazonSupply, and the AmazonSupply logo are trademarks of Amazon.com, Inc. or its affiliates. As an Amazon Associate we earn affiliate commissions from qualifying purchases.