In the vibrant world of PC gaming, few platforms are as ubiquitous as Steam. Valve’s digital storefront has become a digital second home for millions, housing extensive game libraries that range from indie darlings to AAA blockbusters. However, with modern game titles frequently demanding upwards of 100 gigabytes of storage – and some even pushing past 200GB – the sheer volume of data can quickly overwhelm even the most spacious hard drives. This common predicament often leads gamers to confront the inevitable question: “How do I change where Steam installs my games?”
Managing your game installation locations is not just about freeing up precious disk space; it’s a critical aspect of optimizing your gaming experience, ensuring peak performance, and maintaining a well-organized system. Whether you’re upgrading to a faster Solid State Drive (SSD), running low on space on your primary drive, or simply seeking a more streamlined way to organize your vast collection, understanding how to effectively manage Steam Library Folders is an essential skill for any PC gamer. This comprehensive guide will walk you through the process, from setting up new installation directories to seamlessly relocating existing titles, ensuring your gaming setup remains efficient, responsive, and ready for the next big adventure.
Why You Might Need to Change Your Steam Game Location
Before diving into the “how-to,” it’s crucial to understand the compelling reasons behind wanting to adjust your Steam game installation locations. These motivations often stem from common technological challenges and the desire for an enhanced user experience, aligning perfectly with the core principles of efficient tech management.
Storage Constraints: The Ever-Growing Game Library
The most immediate and obvious reason for relocating Steam games is the universal problem of limited storage. Modern games, with their high-resolution textures, intricate worlds, and extensive voice acting, consume enormous amounts of disk space. A handful of AAA titles can easily fill up a 500GB SSD, leaving little room for your operating system, essential applications, and other files. As new games are released and your existing library expands, actively managing where these games reside becomes paramount to prevent your primary drive from becoming completely full, which can lead to system slowdowns and instability. By moving less frequently played games or new installations to a secondary, higher-capacity drive, you ensure your main system drive has ample free space to operate optimally.
Performance Boost: Leveraging Faster Storage Solutions
The advent and increasing affordability of Solid State Drives (SSDs) have revolutionized PC performance. Unlike traditional Hard Disk Drives (HDDs) that rely on spinning platters and read/write heads, SSDs use flash memory, offering significantly faster data access speeds. This translates directly into tangible benefits for gaming: dramatically reduced loading screens, quicker texture pop-in, and an overall smoother in-game experience.
Many gamers initially install their operating system and core applications on a smaller, faster SSD, while larger, less performance-critical files might go onto a more capacious HDD. However, the performance benefits of an SSD are so pronounced for gaming that it often becomes desirable to install your most played or graphically intensive titles on an SSD, even if it’s not your primary system drive. Changing the installation location allows you to strategically place games on the drive that will offer the best performance, ensuring you’re not held back by slow loading times. For instance, moving a large open-world game from an HDD to an NVMe SSD can shave minutes off initial load times and significantly reduce stuttering during gameplay as new areas stream in.
Better Organization and System Management
Beyond pure space and speed, relocating games can contribute to a more organized and manageable system. Some users prefer to keep their gaming installations separate from their operating system and work-related applications. This logical separation can simplify backup procedures, making it easier to clone your OS drive without including massive game files, or to reinstall your OS without affecting your game library. Furthermore, if you maintain multiple drives for different purposes – perhaps one for games, one for media, and one for backups – directing Steam to specific drives helps maintain this structured approach, improving overall system clarity and efficiency. It also proves useful if you’re migrating your entire game library to a new PC or performing a clean install, as the game files can often be pointed to directly by Steam without needing a full re-download.
Preparing for System Upgrades or Migration
Finally, proactively managing game installation locations is invaluable when planning system upgrades or migrating to a new PC. If you’re replacing your old HDD with a new SSD, or moving your entire gaming setup to a brand-new machine, knowing how to transfer your Steam library folders efficiently can save you countless hours of re-downloading games. Steam’s library folder system is designed to facilitate this, allowing you to simply copy game folders to a new drive or system and then point Steam to them, rather than re-downloading hundreds of gigabytes of data. This foresight in managing your digital assets is a hallmark of good technical stewardship.
Setting Up New Steam Library Folders
Before you can move existing games or install new ones to a different drive, you first need to tell Steam where these new potential homes are. Steam uses a system of “Library Folders” to manage all your installed games. You can have multiple library folders across different drives, making it flexible for your storage needs. This process is straightforward and integrated directly into the Steam client.
Adding a New Steam Library Folder via the Steam Client
This is the foundational step for expanding your storage options for Steam games. It involves navigating Steam’s settings to designate a new directory as a valid installation location.
- Launch Steam: Open your Steam client application on your computer.
- Access Steam Settings:
- In the top-left corner of the Steam client, click on “Steam.”
- From the dropdown menu, select “Settings” (or “Preferences” on macOS).
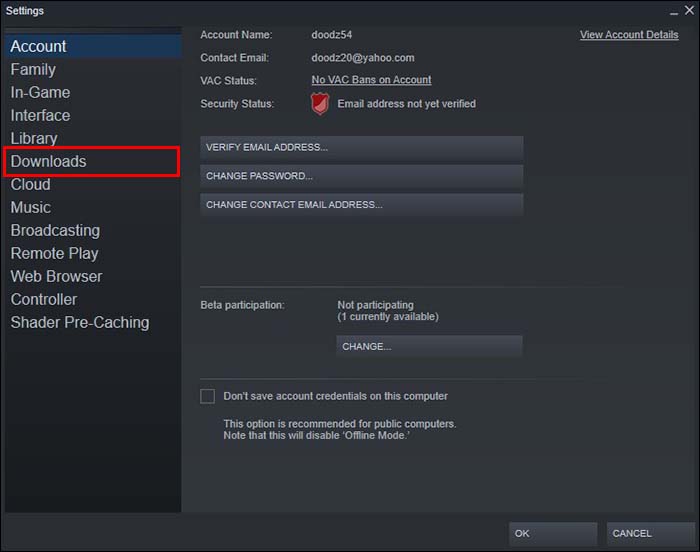
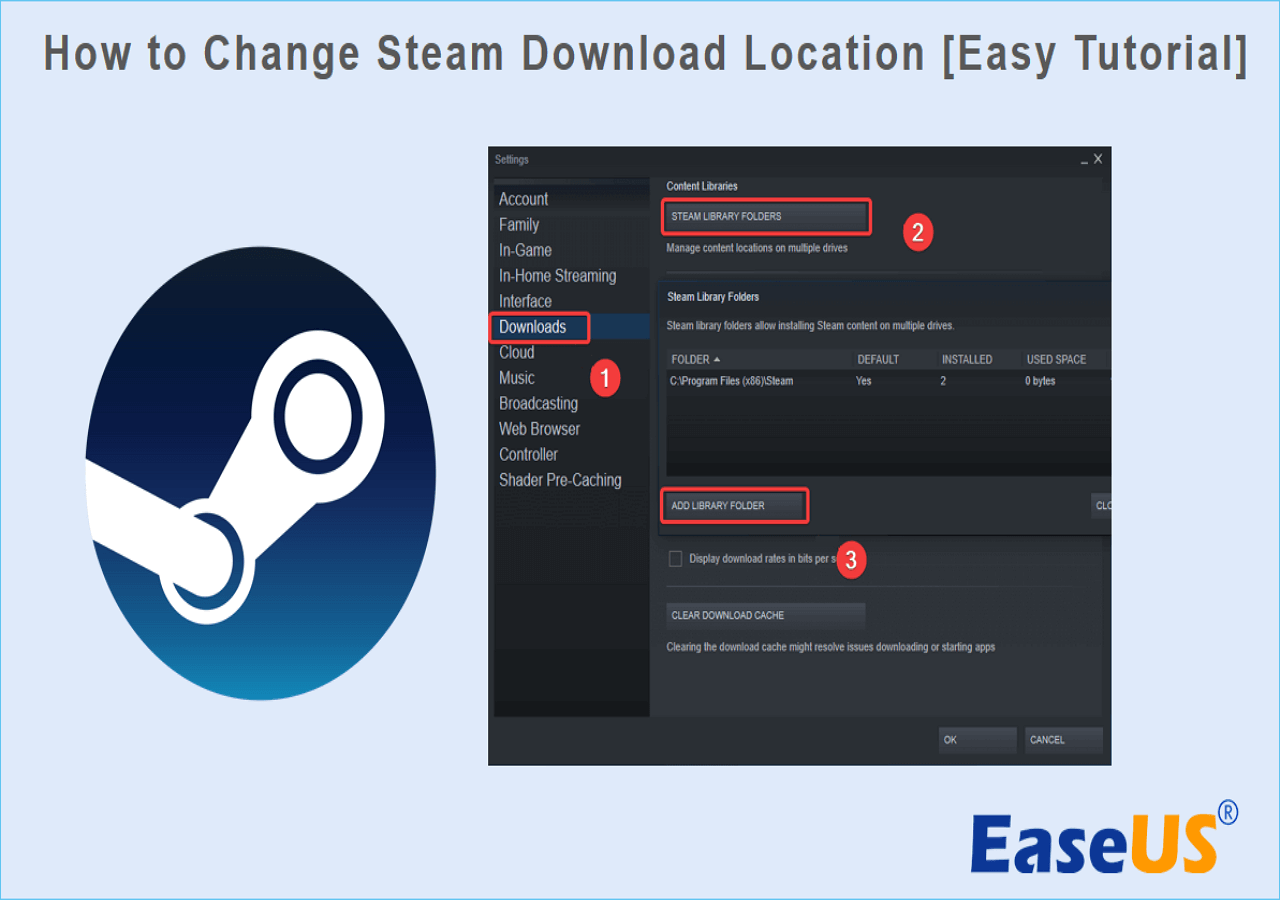
- Navigate to Downloads: In the Settings window, select “Downloads” from the left-hand menu.
- Open Steam Library Folders: Under the “Content Libraries” section, you’ll see a button labeled “Steam Library Folders” (or “Steam Library” on some older versions/OS). Click this button. This will open a new window that lists all your current Steam Library Folders. By default, you’ll typically see one on your C: drive.
- Add a New Library Folder:
- In the “Steam Library Folders” window, click the “+” icon (or “Add Library Folder” button) located at the top of the window.
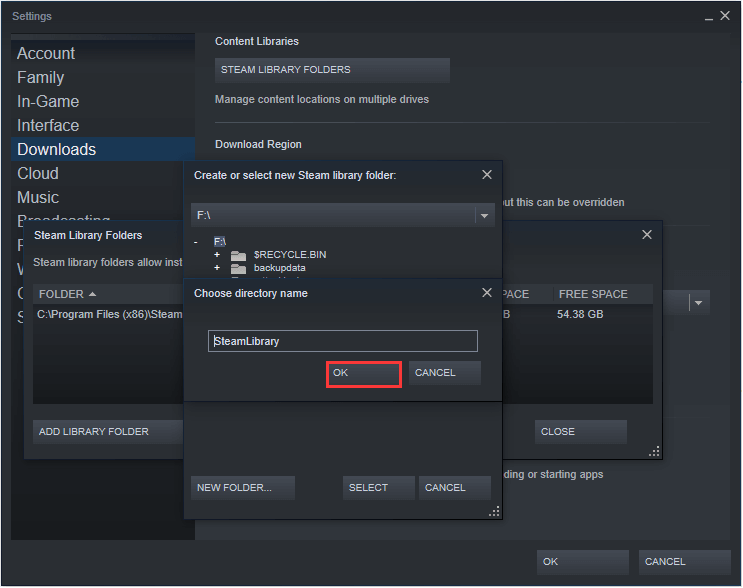
- A file browser window will appear. Navigate to the drive and folder where you want to create your new Steam Library. For instance, if you have a D: drive dedicated to games, you might select
D:SteamLibraryorD:GamesSteam. It’s good practice to create a dedicated empty folder for this, rather than choosing the root of a drive, to keep things organized. - Once you’ve selected or created your desired empty folder, click “Select” (or “OK”).
- Confirm Creation: Steam will then create the necessary directory structure within that chosen folder (e.g.,
SteamLibrary/steamapps/common). The new folder will now appear in your list of Steam Library Folders.
Pro-Tip: Ensure the drive you select has sufficient free space and is formatted correctly (typically NTFS for Windows). If you’re adding a new external drive, make sure it’s reliably connected and powered.
Designating a Default Installation Location for Future Games
Once you have multiple Steam Library Folders established, you can choose which one Steam should automatically default to when you install a new game. This saves you from having to manually select the location every time, especially if you have a preferred drive (like an SSD) for new installations.
- Return to Steam Library Folders: Follow steps 1-4 from the “Adding a New Steam Library Folder” section to get back to the “Steam Library Folders” window.
- Set as Default: In the list of your Steam Library Folders, right-click on the folder you wish to make the default.
- Select “Make Default Folder”: From the context menu that appears, select “Make Default Folder.” A small star icon (or a similar indicator) will appear next to the chosen folder, signifying it as the new default.
Now, whenever you click “Install” on a game from your Steam library, this designated folder will be pre-selected as the installation target. You can, of course, still manually choose a different library folder for any specific game during the installation process if needed. This flexibility ensures you maintain complete control over where your digital assets are stored.
Relocating Existing Steam Games to a New Drive
With your new Steam Library Folders ready, the next logical step is to move games you’ve already installed. Steam provides a convenient, built-in feature to do this for individual games, streamlining a process that once required more manual intervention. This method is generally recommended as it ensures all necessary files and registry entries are correctly updated.
Moving a Single Game Using Steam’s Built-in Feature
This is the most common and recommended method for relocating installed games, as it leverages Steam’s internal mechanisms to ensure a clean and complete transfer.
- Open Your Steam Library: Launch the Steam client and navigate to your “Library” tab, which lists all your owned games.
- Select the Game to Move: Locate the game you wish to move from the list. Right-click on its title.
- Access Game Properties: From the context menu, select “Properties.” This will open a new window with various settings for that specific game.
- Navigate to Local Files: In the Properties window, click on the “Local Files” tab on the left-hand side.
- Initiate the Move: Under the “Local Files” tab, you will see a button labeled “Move Install Folder…” Click this button.
- Choose New Destination: A small pop-up window will appear, displaying a dropdown menu with all your configured Steam Library Folders. Select the desired destination folder (the new library folder you created earlier).
- Confirm and Start Move: Click the “Move” button to begin the transfer process.
- Wait for Completion: Steam will then display a progress bar as it moves the game files from the old location to the new one. The time this takes will vary depending on the game’s size and the read/write speeds of your drives. It’s crucial not to close Steam or power off your computer during this process to prevent data corruption.
- Verification (Optional but Recommended): Once the move is complete, it’s a good practice to verify the integrity of the game files. You can do this by returning to the “Local Files” tab in the game’s Properties and clicking “Verify integrity of game files…”. This ensures no files were corrupted or missed during the transfer.
After the move is complete, the game will now be launched from its new location, and the space on your old drive will be freed up.
Considerations for Moving Multiple Games
While Steam’s built-in feature works flawlessly for individual games, moving a large number of games one by one can be time-consuming. Steam currently doesn’t offer a native bulk-move feature, but there are strategies to handle large-scale migrations efficiently:
- Sequential Individual Moves: For a manageable number of games (e.g., 5-10), simply moving them one by one using the method described above is the safest and most reliable approach. You can queue them up, allowing each to complete before starting the next.
- Planning New Installations: If you’re running out of space on your main drive, focus on moving only the largest or least-played games to free up space. For new game purchases, ensure your default library folder is set to your preferred drive.
- Advanced Manual Method (Use with Caution): In situations where Steam’s built-in mover might fail or for very specific scenarios (e.g., moving an entire library without Steam installed yet), a manual method involves:
- Cutting/Copying: Navigate to the
steamappscommonfolder within your original Steam Library. Cut (or copy) the entire game folder (e.g.,Cyberpunk 2077) to thesteamappscommonfolder within your new Steam Library. - Deleting
appmanifest: Go up one level to thesteamappsfolder in your original Steam Library. Find the correspondingappmanifest_XXXXXX.acffile for the game you just moved (whereXXXXXXis the game’s app ID, found in the game’s Steam store URL). Delete this manifest file from the original location. - “Install” Game in New Location: Go back to your Steam client. The game will now appear uninstalled. Click “Install.” Steam should detect the existing files in your new library folder and proceed to “Discover existing files” rather than re-downloading the entire game. This process might still involve downloading some missing files or performing a verification.
- Warning: This manual method is more prone to errors if not done precisely and is generally not recommended over Steam’s built-in mover unless absolutely necessary. Missing a manifest file or incorrectly copying can lead to Steam not recognizing the game, forcing a full re-download.
- Cutting/Copying: Navigate to the
For most users, the integrated “Move Install Folder” feature is robust and covers all necessary requirements for relocating games, ensuring data integrity and a seamless transition.
Managing and Troubleshooting Steam Library Folders
Beyond the initial setup and relocation, effectively managing your Steam Library Folders also involves regular maintenance, understanding how to address common issues, and adopting best practices for long-term system health. This proactive approach ensures your gaming experience remains smooth and problem-free.
Verifying Game Files After a Move
After moving a game, especially if you’re experiencing any odd behavior or crashes, it’s always a good idea to verify the integrity of the game files. This process checks all the game’s files against those on Steam’s servers and replaces any corrupted, missing, or incorrect files.
- Open Steam Library: Go to your Steam Library.
- Right-Click Game: Right-click on the game you just moved or are having issues with.
- Properties > Local Files: Select “Properties,” then navigate to the “Local Files” tab.
- Verify Integrity: Click “Verify integrity of game files…”. Steam will then scan your installation. This can take several minutes depending on the game’s size.
This simple step can resolve a multitude of issues that might arise from an interrupted move, a corrupt download, or even general drive errors.
Removing Obsolete Steam Library Folders
If you’ve migrated all games off an old drive, or you no longer want a specific folder to be a Steam Library location, you can remove it from Steam’s list. This cleans up your Steam settings and prevents accidental installations to that location.
- Access Steam Library Folders: Go to Steam > Settings > Downloads > Steam Library Folders.
- Right-Click and Remove: In the “Steam Library Folders” window, right-click on the folder you wish to remove.
- Select “Remove Library Folder”: Choose this option from the context menu.
- Confirm: Steam will ask for confirmation. Click “Yes.”
Important: You can only remove a library folder if it is empty. If there are still games installed within it, Steam will prompt you to move or uninstall them first. Also, you cannot remove the default Steam library folder without first setting another folder as the default.
Common Issues and Solutions
While Steam’s system is generally robust, you might occasionally encounter issues.
- “Error: Insufficient Disk Space”: Even if you have space on your target drive, ensure your source drive also has temporary space for the move process. Sometimes Steam requires space on both during the transfer. Always check both drives’ free space before initiating a large move.
- “Corrupted Files” or Game Not Launching: This often occurs if the move was interrupted (e.g., power outage, system crash). The first step is always to “Verify integrity of game files.” If that doesn’t work, you might have to uninstall and then reinstall the game to the desired location.
- Permissions Issues: If Steam is unable to create or write to a new library folder, it might be due to Windows (or macOS/Linux) permissions. Ensure your Steam installation, or the user account running Steam, has full read/write access to the target drive and folder. Running Steam as an administrator can sometimes resolve this temporarily, but it’s better to fix the underlying permissions.
- Missing
appmanifestfiles: If you manually moved files and Steam doesn’t detect them, it’s usually because theappmanifest_XXXXXX.acffile was not moved or was corrupted. These small text files tell Steam where the game is located and its installation status. Search for the correctappmanifestfile in your oldsteamappsfolder, copy it to the newsteamappsfolder, and then try “installing” the game again.
Best Practices for Game Storage and Management
To maintain an optimal gaming setup and avoid future storage headaches:
- Prioritize SSDs for Favorite Games: Install your most frequently played, graphically demanding, or competitive online games on your fastest SSDs for the best performance.
- Utilize HDDs for Archival: Use larger, slower HDDs for games you play less often, older titles, or those that aren’t heavily reliant on loading times.
- Monitor Disk Usage Regularly: Keep an eye on your drive usage. Tools like Windows’ built-in Storage Sense or third-party disk analysis tools can help identify large folders and files that are consuming space.
- Consider a Dedicated Gaming Drive: If possible, dedicate a large SSD (1TB or more) exclusively to games. This simplifies management and ensures top performance for your entire library.
- Regular Backups (Beyond Steam): While Steam handles game files, consider backing up your game save files separately, especially for older titles or those not using cloud saves. These are often located in your
Documentsfolder or game-specific directories withinAppData.
By understanding these principles and implementing these practices, you transform from a passive recipient of game installations into an active manager of your digital gaming estate. This not only enhances your immediate gameplay experience but also future-proofs your system against evolving storage demands and ensures longevity for your hardware and software investments.
In conclusion, knowing how to change where Steam installs games is a fundamental skill in today’s PC gaming landscape. It empowers you to overcome storage limitations, harness the power of faster drives, and maintain an organized system. Whether you’re moving a single game to an SSD for a performance boost or migrating your entire library to a new, larger drive, Steam’s built-in tools make the process surprisingly straightforward. By following the steps outlined in this guide and adopting smart storage management practices, you can ensure your gaming rig is always optimized, leaving you more time to enjoy your favorite titles without the frustration of technical roadblocks. Keep your drives lean, your games fast, and your adventures limitless!
aViewFromTheCave is a participant in the Amazon Services LLC Associates Program, an affiliate advertising program designed to provide a means for sites to earn advertising fees by advertising and linking to Amazon.com. Amazon, the Amazon logo, AmazonSupply, and the AmazonSupply logo are trademarks of Amazon.com, Inc. or its affiliates. As an Amazon Associate we earn affiliate commissions from qualifying purchases.