In an era dominated by modern operating systems like Windows 10 and 11, the thought of installing Windows 7 might seem anachronistic to many. Yet, for a significant segment of users, specific legacy hardware, proprietary software dependencies, or even a strong preference for its familiar interface keeps this venerable OS relevant. While Microsoft officially ended mainstream support for Windows 7 in January 2015 and extended security updates (ESU) in January 2023, leaving it vulnerable to new threats, its robust architecture and widespread compatibility mean it still finds a niche. This comprehensive guide will walk you through every step of installing Windows 7, ensuring a smooth process from preparation to post-installation, while also providing context regarding its contemporary usage and security implications. This article falls firmly under our “Tech” focus, offering a detailed tutorial for a specific software installation, while subtly touching upon “Digital Security” and “Productivity” considerations.

Why You Might Still Consider Windows 7 (and its Implications)
Despite its end-of-life status, Windows 7 holds a unique place in computing history, often lauded for its stability, performance, and user-friendly interface. For some, the Aero Glass aesthetic and intuitive Start Menu design represented a pinnacle of Microsoft’s desktop experience. However, its continued use in the current technological landscape comes with significant trade-offs, particularly concerning security and future compatibility.
Legacy System Compatibility
One of the primary reasons users or organizations might still opt for Windows 7 is its compatibility with older hardware and specialized legacy software. Many industrial machines, medical devices, scientific instruments, or specialized business applications were developed specifically for Windows 7 and either do not function correctly or incur prohibitive upgrade costs on newer operating systems. For these critical systems, migrating to a modern OS might disrupt established workflows or render expensive equipment obsolete. The stability and proven track record of Windows 7 on these older platforms make it a pragmatic, albeit temporary, solution to maintain operations.
User Preference and Productivity
A surprising number of individuals simply prefer Windows 7. They appreciate its uncluttered interface, the speed with which it runs on less powerful hardware, and their deep familiarity with its operation. For these users, switching to Windows 10 or 11 might involve a learning curve, perceived performance degradation on older machines, or a dislike for the new interface elements and integrated services. For personal “productivity” in these specific contexts, sticking with a comfortable and known environment can sometimes outweigh the desire for the latest features, even if it introduces security considerations.
Digital Security and The “Brand” of Legacy Software
It is crucial to emphasize that running an unsupported operating system carries substantial “digital security” risks. Without official security updates, your system becomes increasingly vulnerable to newly discovered exploits, malware, and viruses. While third-party antivirus software can offer a layer of protection, it cannot fully compensate for the lack of OS-level patches. For businesses, continuing to operate on Windows 7 can pose significant risks to data integrity, compliance with regulations, and overall business continuity – potentially impacting their brand reputation if a breach occurs. Therefore, any decision to install Windows 7 must be accompanied by a robust plan for network isolation, vigilant security practices, and a clear understanding of the risks involved. This guide is for those who understand these implications but nonetheless require Windows 7 for specific, often unavoidable, circumstances.
Essential Preparations Before Installation
Before embarking on the installation process, meticulous preparation is paramount. Skipping these preliminary steps can lead to data loss, frustrating errors, or a non-functional system. Think of this as laying a strong “brand strategy” for your system’s stability.
System Requirements Check
Ensure your computer meets the minimum specifications for Windows 7. While relatively modest by today’s standards, confirming these will prevent performance issues later.
- Processor: 1 gigahertz (GHz) or faster 32-bit (x86) or 64-bit (x64) processor.
- RAM: 1 gigabyte (GB) RAM (32-bit) or 2 GB RAM (64-bit).
- Hard Disk Space: 16 GB available hard disk space (32-bit) or 20 GB (64-bit).
- Graphics Card: DirectX 9 graphics device with WDDM 1.0 or higher driver.
- Optical Drive: DVD-R/W drive (if installing from DVD) or a USB port (if installing from USB).
Data Backup: A Crucial First Step
This cannot be stressed enough: back up all critical data from your hard drive before proceeding. Installing a new operating system, especially if you plan to reformat the drive, will erase all existing data. This includes documents, photos, videos, music, and any other files you value. Use an external hard drive, a cloud storage service (like Google Drive, OneDrive, or Dropbox), or network-attached storage (NAS) to secure your files. This proactive measure is your ultimate safety net and an essential part of responsible system management, protecting your “personal brand” of digital assets.
Creating Bootable Windows 7 Media (USB or DVD)
You’ll need a bootable installation medium. This can be a USB flash drive or a DVD.
- Obtaining the Windows 7 ISO: Since Microsoft no longer officially provides direct downloads for Windows 7 ISOs for general public, you might need to use a legally obtained ISO from a legitimate source or your original installation DVD. Ensure the ISO matches your Windows 7 product key (Home Premium, Professional, Ultimate, 32-bit or 64-bit).
- For USB Flash Drive:
- You’ll need a USB flash drive with at least 8GB of storage.
- Download a tool like Rufus (a popular, reliable, and free utility).
- Insert your USB drive. Launch Rufus.
- Select your USB drive under “Device.”
- Click “SELECT” next to “Boot selection” and choose your Windows 7 ISO file.
- Ensure “Partition scheme” and “Target system” are set correctly (typically MBR for BIOS or GPT for UEFI, though Windows 7 generally prefers MBR).
- Click “START” to begin the process. Be aware that the USB drive will be formatted, so ensure it has no important data.
- For DVD:
- You’ll need a blank, recordable DVD and a DVD burner.
- Use built-in Windows features (right-click the ISO and select “Burn disc image”) or a third-party burning software (like ImgBurn or Nero) to burn the ISO image to the DVD.
Gathering Necessary Drivers and Product Key
Before the installation, locate and download any essential drivers for your computer, especially network drivers (Ethernet or Wi-Fi). Without network drivers, you won’t be able to connect to the internet to download others post-installation. Visit your computer manufacturer’s website (e.g., Dell, HP, Lenovo, ASUS) and search for drivers specific to your model and Windows 7 (32-bit or 64-bit). Store these on a separate USB drive or external hard drive. Additionally, keep your Windows 7 product key handy – it’s typically a 25-character alphanumeric code.
Step-by-Step Windows 7 Installation Guide
With your preparations complete, you are now ready to begin the core installation process. This sequence of steps will take you from booting the installation media to the initial setup of your user environment.
Configuring BIOS/UEFI for Booting
Your computer needs to be told to boot from your newly created installation media (USB or DVD) instead of its current hard drive.
- Restart your computer. As it starts up, repeatedly press the designated key to enter the BIOS (Basic Input/Output System) or UEFI (Unified Extensible Firmware Interface) settings. Common keys include
F2,Del,F10,F12, orEsc(consult your computer’s manual or on-screen prompts). - Once in the BIOS/UEFI, navigate to the “Boot” tab or “Boot Order” section.
- Change the boot order to prioritize your USB drive or DVD drive as the first boot device.
- Save the changes (usually by pressing
F10) and exit BIOS/UEFI. Your computer will restart.
Initiating the Installation Process
As your computer restarts, it should boot from your installation media.
- When prompted “Press any key to boot from CD or DVD…” or similar, quickly press any key on your keyboard.
- The Windows 7 setup will load. You’ll see the “Starting Windows” screen.
- On the “Install Windows” screen, select your preferred language, time and currency format, and keyboard input method. Click “Next.”
- Click “Install now.”
- Read and accept the license terms. Click “Next.”
- You’ll be presented with two installation types: “Upgrade” and “Custom (advanced).” For a clean installation, which is generally recommended for optimal performance and to resolve existing issues, select “Custom (advanced).”
Partitioning Your Hard Drive
This is a critical step where you define how your hard drive space will be used.

- You’ll see a list of detected drives and partitions. If you have an existing Windows installation, you’ll see several partitions (e.g., System Reserved, Primary).
- For a clean installation: Select each existing partition one by one and click “Delete” (be absolutely certain you’ve backed up all data before doing this). This will turn all space into “Unallocated Space.”
- Once you have “Unallocated Space,” select it and click “New” to create a new partition. You can create one large partition for the entire OS, or multiple partitions (e.g., one for the OS and another for data).
- Allocate the desired size for your primary Windows partition (usually the largest). Windows 7 will automatically create a small “System Reserved” partition (around 100MB) if you create a new partition on unallocated space.
- Select the newly created primary partition (where Windows will be installed) and click “Format” to ensure it’s clean.
- Click “Next” to proceed.
Copying Files and Initial Setup
Windows will now begin copying files and performing the initial setup steps.
- The installer will copy Windows files, expand them, install features, and install updates (if included in the ISO). This process is fully automated and will take some time, involving several restarts. Do not interrupt it.
- After the initial file copying, the system will reboot and continue with the setup. You might see the “Setup is preparing your computer for first use” message.
User Account and System Configuration
After the reboots, you’ll be prompted to configure your user account and basic system settings.
- Type a user name and computer name. The user name is what you’ll use to log in, and the computer name identifies your PC on a network. Click “Next.”
- Set a password for your user account (highly recommended for security). You can also provide a password hint. Click “Next.”
- Enter your Windows 7 product key. You can skip this step and enter it later, but you’ll eventually need it to activate Windows. Click “Next.”
- Choose your Windows Update settings.
- “Use recommended settings” will install important and recommended updates.
- “Install important updates only” focuses on critical security and stability updates.
- “Ask me later” gives you control but postpones essential updates. Given Windows 7’s EOL, choosing “Ask me later” might be preferable if you plan to manually manage updates or use specific security measures.
- Review your time and date settings. Select your time zone. Click “Next.”
- Select your computer’s current location: Home network, Work network, or Public network. This configures network sharing and firewall settings. Choose based on your environment.
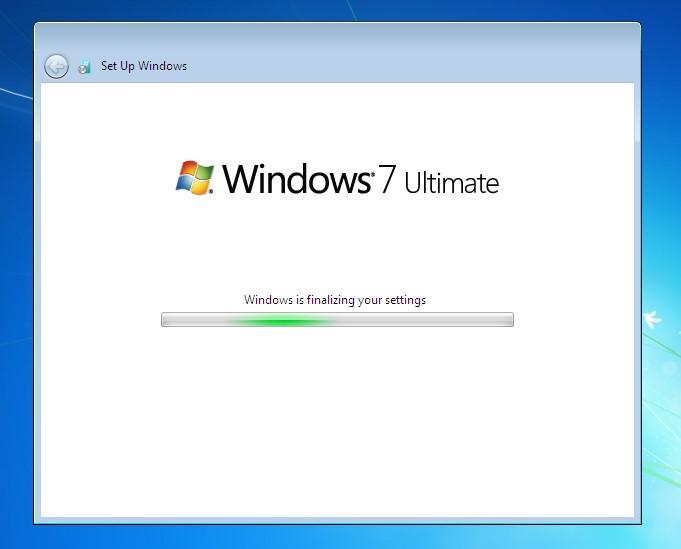
- Windows will finalize settings and prepare your desktop. This might take a few minutes.
- Congratulations! You should now see the Windows 7 desktop.
Post-Installation Procedures for Optimal Performance and Security
Installing Windows 7 is just the first step. To ensure your system runs smoothly, securely (as much as possible for an EOL OS), and efficiently, several crucial post-installation tasks must be completed. This section reinforces the ‘Tech’ focus, specifically ‘Software’ and ‘Digital Security’.
Installing Device Drivers
Even if your basic display and input devices are working, it’s highly probable that many of your computer’s components are using generic drivers or none at all. This impacts performance and functionality.
- Check Device Manager: Right-click “Computer,” select “Manage,” then go to “Device Manager.” Look for any devices with yellow exclamation marks, indicating missing or problematic drivers.
- Install Essential Drivers: Start with the drivers you downloaded earlier:
- Chipset Drivers: These are fundamental and should be installed first.
- Graphics Card Drivers: Crucial for display performance and resolution.
- Network (Ethernet/Wi-Fi) Drivers: If you don’t have internet access, install these first from your USB drive. Once connected, you can download others.
- Audio Drivers: For sound functionality.
- USB 3.0 Drivers: If your computer has USB 3.0 ports, these are often required for full speed.
- Other Peripheral Drivers: Webcam, card reader, printer, etc.
- Source: Always prioritize drivers from your computer manufacturer’s website. If you built your PC, go to the individual component manufacturers (e.g., NVIDIA/AMD for graphics, Intel/Realtek for network/audio).
Running Windows Updates
While Windows 7 is EOL, it’s still prudent to run Windows Update to pull down any critical updates released before January 2023, as well as any driver updates Microsoft might have distributed for compatible hardware.
- Go to the Start Menu, type “Windows Update,” and select it.
- Click “Check for updates” and install all important and recommended updates.
- Be prepared for this to take a significant amount of time and potentially involve multiple restarts, especially if your ISO is old.
Activating Windows 7
Activation confirms that your copy of Windows is genuine and legally licensed.
- Right-click “Computer” on the desktop or in the Start Menu, and select “Properties.”
- Scroll down to the “Windows activation” section.
- If it says “Windows is not activated,” click “Change product key” or “Activate Windows now.”
- Enter your 25-character product key.
- If you have an internet connection, Windows will attempt to activate online. If online activation fails (which can happen with older keys or if Microsoft’s activation servers for Win 7 are less robust), you may be prompted for phone activation. Follow the instructions to call the provided toll-free number and manually activate your system.
Essential Software and Security Measures
Finally, your system needs basic applications and a robust security setup, especially given the EOL status of Windows 7.
- Antivirus Software: This is non-negotiable. Install a reputable antivirus suite immediately (e.g., Avast, AVG, Bitdefender, Kaspersky, or even Microsoft Security Essentials if you prefer a lighter option, though its definitions might not be updated for new threats). Ensure it’s kept up-to-date.
- Web Browser: Install a modern, updated web browser (e.g., Google Chrome, Mozilla Firefox, or a chromium-based browser like Brave). Internet Explorer, the default browser, is outdated and poses significant security risks.
- Office Suite: Install your preferred office productivity suite (e.g., Microsoft Office, LibreOffice).
- Firewall: Windows Firewall is enabled by default. Ensure it remains active and configured correctly.
- Backup Solution: Re-establish a regular backup routine for your data, either to an external drive or cloud service. This safeguards against hardware failure and malware.
- Strict Security Habits: Practice caution when browsing the internet, opening email attachments, and downloading files. Given the OS vulnerabilities, user vigilance becomes even more critical. Consider isolating the Windows 7 machine from your main network if it’s used for highly sensitive data or transactions, creating a kind of “digital security brand” for that specific system.
Troubleshooting Common Installation Issues
Even with careful preparation, unforeseen issues can arise during or after installation. Here are some common problems and their solutions.
Boot Errors
- “No boot device found” / “Operating System not found”: This usually means the computer isn’t booting from the correct drive. Re-enter BIOS/UEFI and verify the boot order. Ensure your bootable media is properly connected and recognized.
- Infinite Boot Loop / Blue Screen of Death (BSOD) during installation: This can indicate corrupt installation media, incompatible hardware, or a faulty component (like RAM or hard drive). Try recreating your bootable media, testing RAM with a utility like Memtest86, or checking hard drive health.
- “Press any key to boot from CD or DVD…” keeps appearing: If you’ve already started the installation and the system reboots, don’t press any key. Let it boot from the hard drive to continue the setup.
Driver Problems
- No Internet connection post-install: The most common issue. Ensure you have installed your network adapter drivers from the manufacturer’s website. If you don’t have another computer, you might need to use a friend’s PC to download them onto a USB drive.
- Low resolution / Generic graphics driver: Install your dedicated graphics card drivers (NVIDIA, AMD) or integrated graphics drivers (Intel).
- Devices with yellow exclamation marks in Device Manager: This indicates missing or incorrect drivers. Systematically install all drivers from your PC manufacturer’s support website.
Activation Difficulties
- Product key not accepted: Double-check that you’ve entered the key correctly. Ensure the key matches the specific edition of Windows 7 you installed (Home Premium, Professional, Ultimate, 32-bit/64-bit).
- Online activation fails: If internet activation doesn’t work, try the phone activation option. This usually involves calling a toll-free number and following automated prompts to generate a confirmation ID.
- “This product key has been blocked”: Your key might be blacklisted or used on too many systems. You may need to acquire a new, legitimate product key.
Conclusion: Navigating the Legacy Landscape
Installing Windows 7 in the current computing climate is a decision often driven by specific requirements rather than a general preference for an older operating system. While it offers a familiar and stable environment for certain legacy applications and hardware, the significant lack of official security updates makes it a considerable risk for general internet use or storing sensitive data.
This guide has provided a comprehensive roadmap for a successful Windows 7 installation, from meticulous preparation to crucial post-installation steps and troubleshooting tips. For those who must run Windows 7, diligently following these instructions and implementing robust third-party security measures are paramount. However, we strongly recommend considering upgrading to a modern, supported operating system like Windows 10 or 11 whenever feasible to leverage ongoing security updates, new features, and broader software compatibility. Ultimately, understanding the technological landscape and making informed choices about your operating system is key to maintaining a secure and productive digital experience, aligning with our overarching goal of informed “Tech” decisions and “Digital Security” awareness.
aViewFromTheCave is a participant in the Amazon Services LLC Associates Program, an affiliate advertising program designed to provide a means for sites to earn advertising fees by advertising and linking to Amazon.com. Amazon, the Amazon logo, AmazonSupply, and the AmazonSupply logo are trademarks of Amazon.com, Inc. or its affiliates. As an Amazon Associate we earn affiliate commissions from qualifying purchases.