The world of technology, with its rapid advancements and ever-evolving landscape, often presents us with fascinating tools and platforms. For developers, system administrators, and even hobbyists working with Linux-based operating systems like Ubuntu, understanding how to install and manage essential software is a fundamental skill. One such cornerstone technology is Java, a powerful and versatile programming language that underpins a vast array of applications, from enterprise-level systems and web servers to mobile apps and scientific tools. If you’ve found yourself asking, “How do I install Java on Ubuntu?” you’re in the right place. This comprehensive guide will walk you through the process, demystifying the steps and providing you with the knowledge to get Java up and running on your Ubuntu system.

While the initial thought might seem purely technical, the implications of installing Java extend beyond mere software deployment. In the realm of Tech, having the correct Java Development Kit (JDK) or Java Runtime Environment (JRE) installed is crucial for leveraging a multitude of software, tools, and frameworks. For Brand building in the tech space, showcasing proficiency with industry-standard tools like Java can elevate your personal or corporate image. And when it comes to Money, whether you’re developing applications for online income, managing business finances for a software company, or investing in tech stocks, understanding the foundational technologies can provide a competitive edge.
This guide is designed to be accessible, breaking down the process into manageable sections. We’ll explore the different versions of Java available, the commands you’ll need to execute, and how to verify your installation. Whether you’re a seasoned Linux user or taking your first steps into the command line, this tutorial will equip you with the confidence to install Java on your Ubuntu machine.
Understanding Java Versions and Your Needs
Before diving into the installation process, it’s important to understand that “Java” isn’t a monolithic entity. There are different versions and distributions of Java, and choosing the right one depends on your specific requirements.
Java Development Kit (JDK) vs. Java Runtime Environment (JRE)
The first distinction you’ll encounter is between the Java Development Kit (JDK) and the Java Runtime Environment (JRE).
-
JRE (Java Runtime Environment): This is the bare minimum required to run Java applications. If you only need to execute pre-compiled Java programs (like many desktop applications or server-side processes), the JRE is sufficient. It includes the Java Virtual Machine (JVM), the Java class libraries, and other components that enable the execution of Java code.
-
JDK (Java Development Kit): This is a superset of the JRE and is designed for developers. The JDK includes everything in the JRE, plus a comprehensive set of tools for developing, debugging, and monitoring Java applications. These tools include the
javaccompiler (to compile Java source code into bytecode),jar(for packaging class files into archives),javadoc(for generating API documentation), and various debugging and profiling utilities.
For most users who are asking “how do I install Java on Ubuntu” with the intent of developing or running Java applications, the JDK is the more appropriate choice. It provides the full suite of tools necessary for the Java ecosystem.
OpenJDK vs. Oracle JDK
Another significant consideration is the distribution of Java you choose. The two most common are:
-
OpenJDK: This is an open-source implementation of the Java Platform, Standard Edition (Java SE). It’s the default Java development kit used by many Linux distributions, including Ubuntu, and is maintained by a community of developers. OpenJDK is free to use and distribute.
-
Oracle JDK: This is Oracle’s proprietary implementation of the Java SE. While historically it was free for development and production, Oracle has since changed its licensing model. For commercial use, Oracle JDK might require a paid license, especially for older versions or specific use cases. Oracle JDK often includes additional features and optimizations not present in OpenJDK, but for most general purposes, OpenJDK is more than adequate.
For the purposes of this guide and for ease of installation on Ubuntu, we will focus on installing OpenJDK. It’s readily available in Ubuntu’s repositories, making the process straightforward and ensuring compatibility with your system.
Java Versions: LTS and Latest
Java also has various versions. The most relevant for most users will be:
-
LTS (Long-Term Support) Versions: These versions receive updates and support for an extended period, typically several years. This makes them ideal for enterprise applications and projects where stability and long-term maintenance are critical. Examples include Java 8, Java 11, and Java 17.
-
Latest Versions: These are the most recent releases, often offering new features and performance improvements. However, they may have shorter support cycles.
When you install Java on Ubuntu, you’ll typically be presented with options to install different LTS versions or the latest stable version available in the Ubuntu repositories. For most development and general use, installing an LTS version like OpenJDK 11 or OpenJDK 17 is a solid choice.
Installing Java on Ubuntu Using the APT Package Manager
Ubuntu utilizes the Advanced Packaging Tool (APT) for managing software packages, making the installation process remarkably simple. We’ll use APT to install OpenJDK.
Step 1: Update Your Package List
Before installing any new software, it’s a best practice to update your system’s package list. This ensures that you’re aware of the latest available versions of software and dependencies.
Open your terminal application. You can usually find it by searching for “Terminal” in your Ubuntu applications menu. Once open, type the following command and press Enter:
sudo apt update
You will be prompted to enter your user password. Type it in (you won’t see any characters appear as you type) and press Enter. The sudo command allows you to run commands with superuser privileges, which are necessary for installing and managing system software.
Step 2: Search for Available Java Packages
Now that your package list is updated, you can search for available OpenJDK packages. This will help you identify the specific versions that are available for installation on your Ubuntu system.
To search for OpenJDK packages, use the following command:
sudo apt search openjdk
This command will display a list of all packages related to OpenJDK. You’ll likely see output that includes different versions, such as openjdk-11-jdk, openjdk-17-jdk, openjdk-21-jdk, and so on. You might also see entries for openjdk-*-jre if you only wanted the runtime environment.
Step 3: Install a Specific OpenJDK Version
Based on the search results, you can now install the desired OpenJDK version. Let’s assume you want to install OpenJDK 17 JDK, which is a popular LTS version.
To install OpenJDK 17 JDK, use the following command:
sudo apt install openjdk-17-jdk
If you prefer to install OpenJDK 11, you would use:
sudo apt install openjdk-11-jdk
And for the latest available version (at the time of this writing, it might be OpenJDK 21 or newer), you would use:
sudo apt install openjdk-21-jdk
APT will then show you a list of packages to be installed, including dependencies. It will ask you to confirm by typing Y and pressing Enter.
The installation process might take a few minutes, depending on your internet connection speed and your system’s performance.
Step 4: Verify Your Java Installation
Once the installation is complete, it’s crucial to verify that Java has been installed correctly and to check the active version.
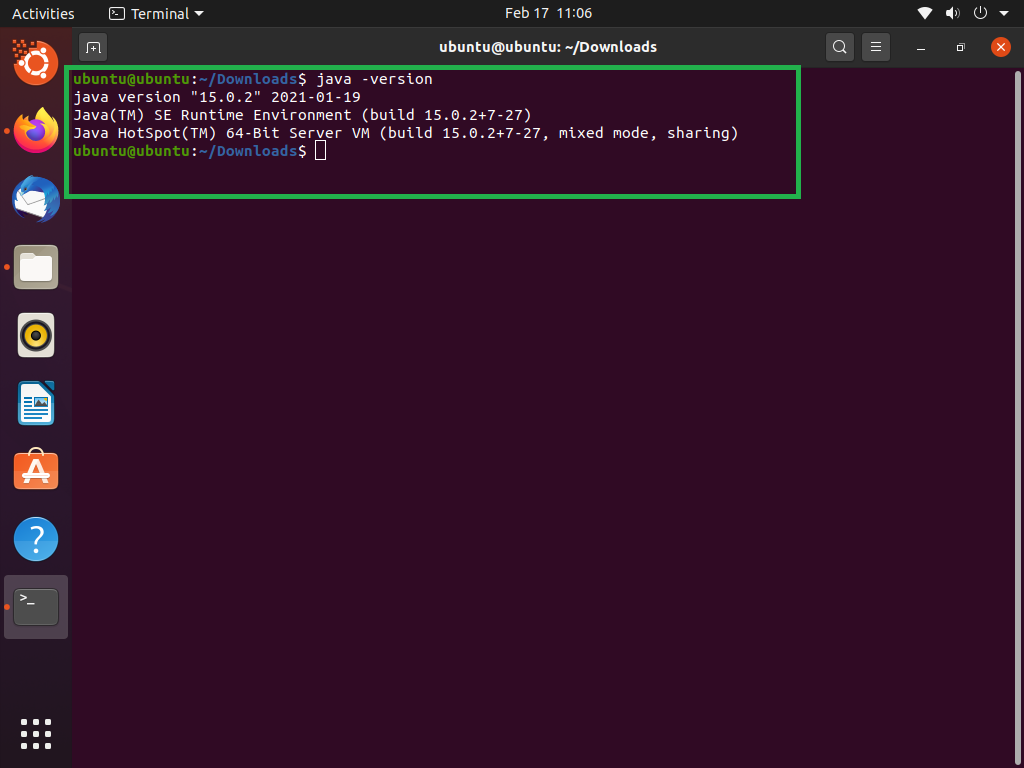
To check the installed Java version, use the following command:
java -version

This command should output information about the Java version you just installed, including the OpenJDK version number.
If you installed the JDK, you can also verify the compiler:
javac -version
This command should also display the version of the Java compiler that was installed along with the JDK.
Managing Multiple Java Versions on Ubuntu
It’s common for developers or system administrators to work with multiple Java versions on the same system. Ubuntu provides a convenient way to manage these different installations and switch between them as needed.
Using the update-alternatives Command
The update-alternatives command is a system utility that helps manage symbolic links for default commands. This is how Ubuntu keeps track of which version of a program is the “default” when multiple versions are installed.
Listing Available Java Versions
First, let’s see which Java versions update-alternatives recognizes:
sudo update-alternatives --config java
This command will list all installed Java executables that update-alternatives is aware of, along with their corresponding priority numbers. You’ll see output similar to this:
There are 2 choices for the alternative java (providing /usr/bin/java).

  Selection    Path                                            Priority   Status
------------------------------------------------------------
* 0            /usr/lib/jvm/java-11-openjdk-amd64/bin/java      1111      auto mode
  1            /usr/lib/jvm/java-11-openjdk-amd64/bin/java      1111      manual mode
  2            /usr/lib/jvm/java-17-openjdk-amd64/bin/java      1711      manual mode
In this example, both Java 11 and Java 17 are installed. The asterisk (*) indicates the currently active default version.
Setting the Default Java Version
To switch to a different Java version, you simply need to enter the number corresponding to your desired version when prompted. For instance, if you want to switch to Java 17 (which has priority 1711 in the example above), you would type 2 and press Enter.
sudo update-alternatives --config java
Follow the on-screen prompts to select your preferred Java version.
You can perform a similar operation for the Java compiler (javac) and other Java-related commands:
sudo update-alternatives --config javac
By mastering the update-alternatives command, you can seamlessly switch between different Java environments, a critical skill for maintaining flexibility and compatibility in your development workflow.
Setting the JAVA_HOME Environment Variable
Many Java applications and build tools rely on the JAVA_HOME environment variable to locate the Java installation. Setting this variable correctly ensures that these tools can find and use your Java Development Kit.
What is JAVA_HOME?
The JAVA_HOME environment variable is a system property that points to the root directory of your Java installation. For example, if you installed OpenJDK 17, JAVA_HOME might be set to /usr/lib/jvm/java-17-openjdk-amd64.
How to Set JAVA_HOME Permanently
To set JAVA_HOME permanently, you’ll typically edit your shell’s profile file. For most Ubuntu users, this is the .bashrc file in your home directory.
-
Open
.bashrc: Use a text editor to open the.bashrcfile:nano ~/.bashrc -
Find the Java Installation Path: You need to know the exact path to your Java installation. You can find this by looking at the output of
sudo update-alternatives --config javaor by navigating through your file system in/usr/lib/jvm/. Let’s assume for this example that your Java 17 installation path is/usr/lib/jvm/java-17-openjdk-amd64. -
Add the
JAVA_HOMEexport line: At the end of your.bashrcfile, add the following lines, replacing the path with your actual Java installation path:export JAVA_HOME=/usr/lib/jvm/java-17-openjdk-amd64 export PATH=$PATH:$JAVA_HOME/binThe first line sets the
JAVA_HOMEvariable. The second line appends the Javabindirectory to your system’sPATHenvironment variable, makingjavaandjavaccommands directly executable from anywhere in the terminal. -
Save and Exit:
- In
nano, pressCtrl + Oto save, thenEnterto confirm the filename, andCtrl + Xto exit.
- In
-
Apply the Changes: For the changes to take effect in your current terminal session, you need to “source” the
.bashrcfile:source ~/.bashrcAlternatively, you can simply close and reopen your terminal.
Verifying JAVA_HOME
To verify that JAVA_HOME has been set correctly, you can use the following command:
echo $JAVA_HOME
This should print the path to your Java installation. You can also try running java -version again to confirm that the correct version is still active.
Setting JAVA_HOME is a crucial step for ensuring that your Java development environment is properly configured and that all Java-dependent tools function as expected.
Conclusion
Installing Java on Ubuntu is a straightforward process that opens the door to a vast world of development opportunities. Whether you’re building complex enterprise applications, creating interactive web services, or simply running Java-based software, having a correctly installed and configured Java environment is paramount.
We’ve covered the essential steps: updating your package list, searching for available OpenJDK versions, installing your chosen JDK, and verifying the installation. Furthermore, we’ve explored how to manage multiple Java versions using update-alternatives and the critical task of setting the JAVA_HOME environment variable.
By following this guide, you’ve equipped yourself with the knowledge to confidently install and manage Java on your Ubuntu system. This fundamental skill not only enhances your Tech capabilities but also indirectly supports your endeavors in Brand building by demonstrating proficiency with key industry technologies and contributes to your understanding of the Money ecosystem by enabling you to engage with software that drives financial innovation. Happy coding!
aViewFromTheCave is a participant in the Amazon Services LLC Associates Program, an affiliate advertising program designed to provide a means for sites to earn advertising fees by advertising and linking to Amazon.com. Amazon, the Amazon logo, AmazonSupply, and the AmazonSupply logo are trademarks of Amazon.com, Inc. or its affiliates. As an Amazon Associate we earn affiliate commissions from qualifying purchases.