In an increasingly untethered world, the transition from wired to wireless peripherals represents more than just a convenience; it’s a strategic upgrade for any tech-savvy individual or business. A wireless mouse offers unparalleled freedom, decluttering your workspace and enhancing mobility, which directly contributes to productivity and a more streamlined digital experience. Whether you’re a professional navigating complex software, a student tackling assignments, or simply seeking a cleaner desk aesthetic, understanding how to properly install and optimize a wireless mouse is a fundamental skill. This guide will walk you through the entire process, from understanding the different types of wireless technology to troubleshooting common issues and maximizing your investment, ensuring you harness the full potential of your new peripheral.
Unlocking the Wireless Advantage: Why Go Cordless?
The decision to ditch the traditional wired mouse often boils down to a desire for greater flexibility and a more organized environment. The benefits extend beyond mere aesthetics, impacting how you interact with your digital world, your comfort, and even your overall efficiency.
Freedom, Aesthetics, and Modern Workspaces
One of the most immediate advantages of a wireless mouse is the liberation from restrictive cables. This freedom translates into several tangible benefits:
- Enhanced Mobility: Move your mouse freely across your desk without tugging on a cable or worrying about it getting tangled. This is particularly beneficial for large monitors or multi-monitor setups where precise, uninhibited movement is crucial. For presenters, a wireless mouse allows control from across the room, projecting a professional and prepared brand image.
- Decluttered Workspace: A clean desk is often a clear mind. Eliminating mouse cables instantly tidies your workspace, creating a more aesthetically pleasing and less distracting environment. This contributes to better focus and can subtly enhance your personal brand in a professional setting, signaling organization and attention to detail.
- Versatility: Wireless mice are ideal for various scenarios, from working on a laptop in a cafe to using a desktop setup at home. They easily switch between devices or even different rooms, offering a level of versatility that wired counterparts simply cannot match. This adaptability ensures your tech tools support your dynamic lifestyle, rather than restrict it.
Deciphering Wireless Technologies: Bluetooth vs. USB Receiver
Before diving into the installation, it’s crucial to understand the two primary types of wireless mice, as their installation methods differ significantly. Each technology offers distinct advantages and caters to different user preferences and device compatibility.
- USB Receiver (2.4 GHz RF Technology): This is the most common and often the simplest “plug-and-play” option. These mice come with a small USB dongle (often called a “unifying receiver” by brands like Logitech) that you plug into an available USB port on your computer. The mouse and receiver communicate via a 2.4 GHz radio frequency.
- Pros: Generally very reliable connection, minimal lag, easy setup (often no drivers needed beyond what the OS provides), and excellent compatibility with most computers (Windows, macOS, Linux). One receiver can sometimes connect multiple peripherals from the same brand (e.g., Logitech Unifying Receiver).
- Cons: Occupies a USB port, and the dongle can be lost. Not ideal for devices with limited USB ports (like many modern ultrabooks) or for tablets without USB-A ports.
- Bluetooth Technology: Bluetooth mice connect directly to your computer’s built-in Bluetooth module, eliminating the need for a separate USB receiver.
- Pros: Frees up USB ports, great for laptops/tablets with limited ports, and generally more power-efficient than 2.4 GHz RF (though this can vary by mouse). Ideal for a minimalist setup where you want to reduce the number of peripherals attached.
- Cons: Requires your computer to have Bluetooth capabilities (most modern ones do), can sometimes be slightly more prone to interference or lag compared to a dedicated RF receiver, and the pairing process is a bit more involved than just plugging in a dongle. Compatibility can sometimes be finicky with older or less common operating systems.
Understanding these distinctions will help you choose the right mouse for your needs and streamline the installation process. Both technologies are robust, but your specific devices and usage patterns will dictate which is the superior choice for your tech ecosystem.
The Step-by-Step Guide to Installation: From Unboxing to Clicking
Installing a wireless mouse is typically a straightforward process, designed for user-friendliness. However, a systematic approach ensures a smooth setup, regardless of the technology you’re using.
Getting Started: Batteries and Initial Setup
Every wireless mouse needs power. Most use AA or AAA batteries, while some newer models feature rechargeable internal batteries.
- Unpack Your Mouse: Carefully remove the mouse and any accessories (USB receiver, batteries, documentation) from its packaging.
- Insert Batteries (if applicable):
- Locate the battery compartment on the underside of the mouse. This is usually marked with an arrow or tab.
- Open the compartment cover.
- Insert the fresh batteries, paying close attention to the positive (+) and negative (-) terminals. Incorrect orientation is a common cause of initial non-functionality.
- Close the battery compartment securely.
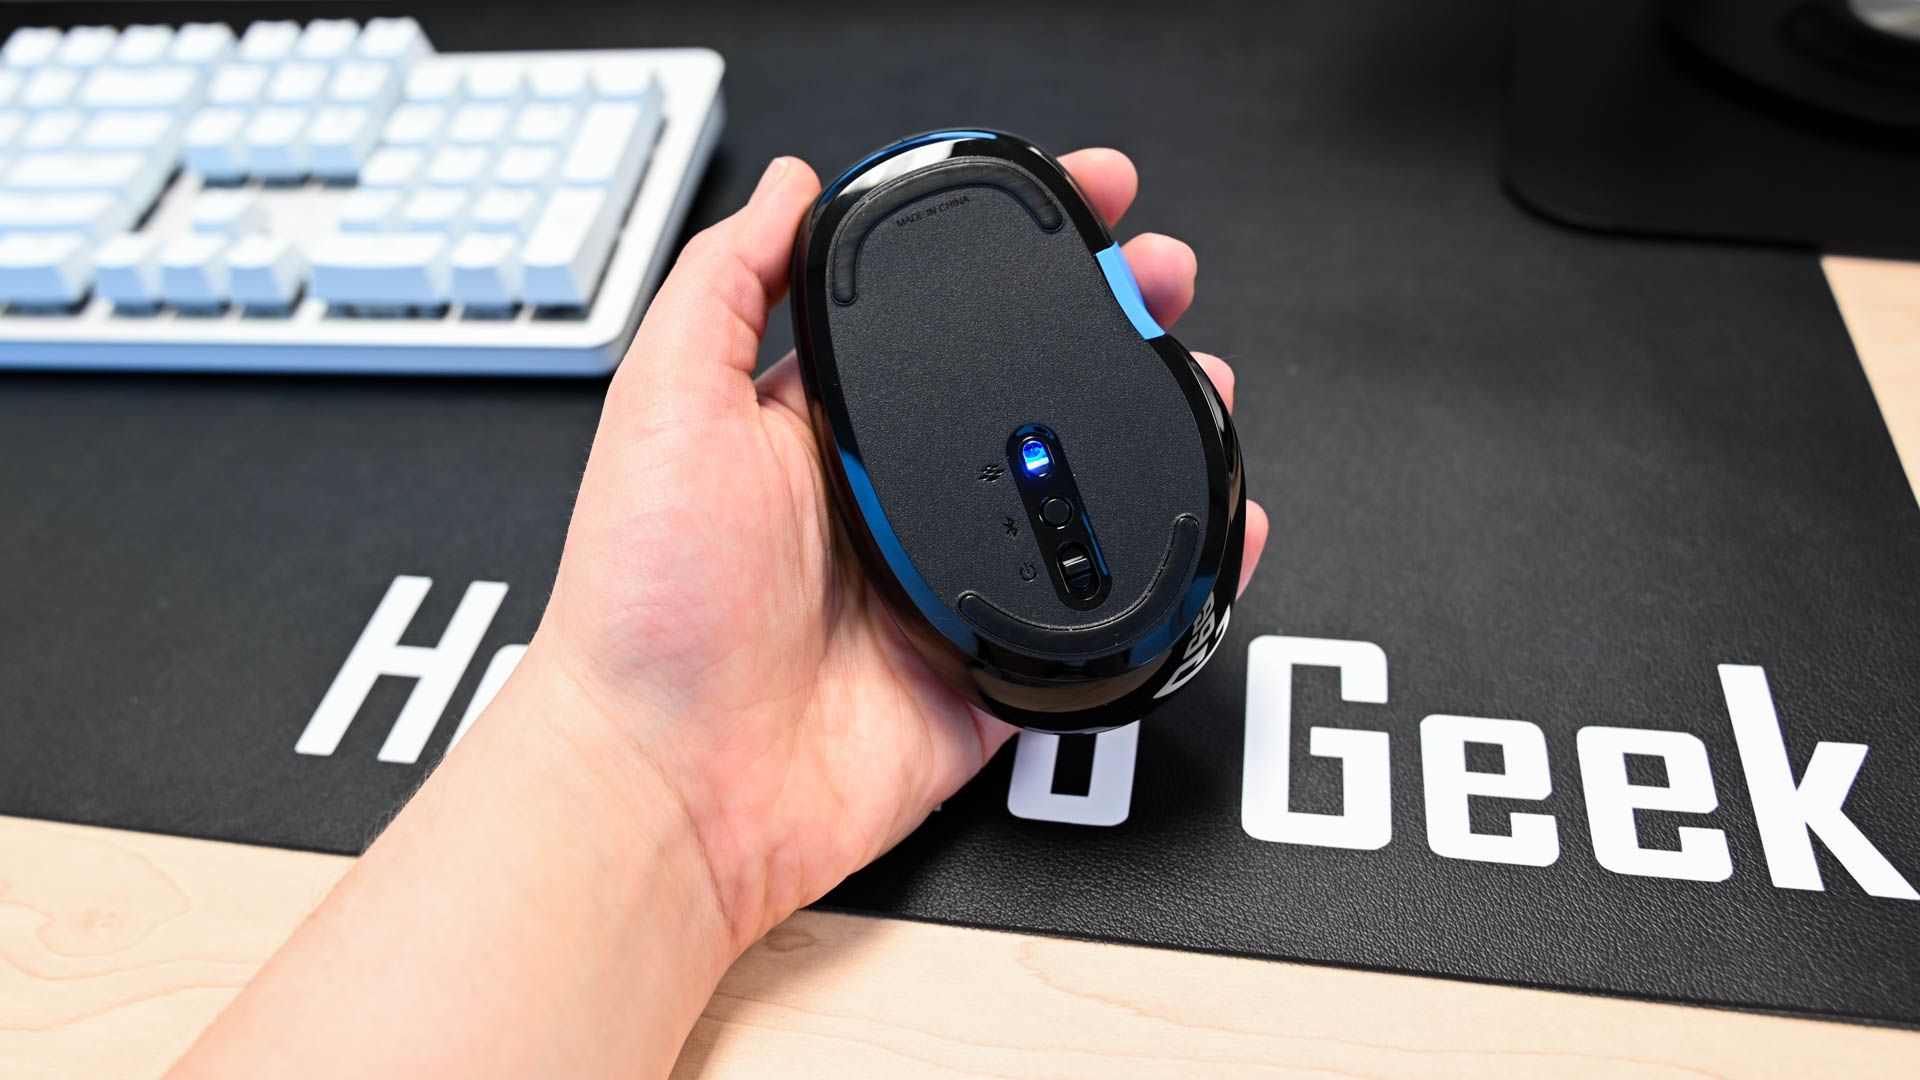
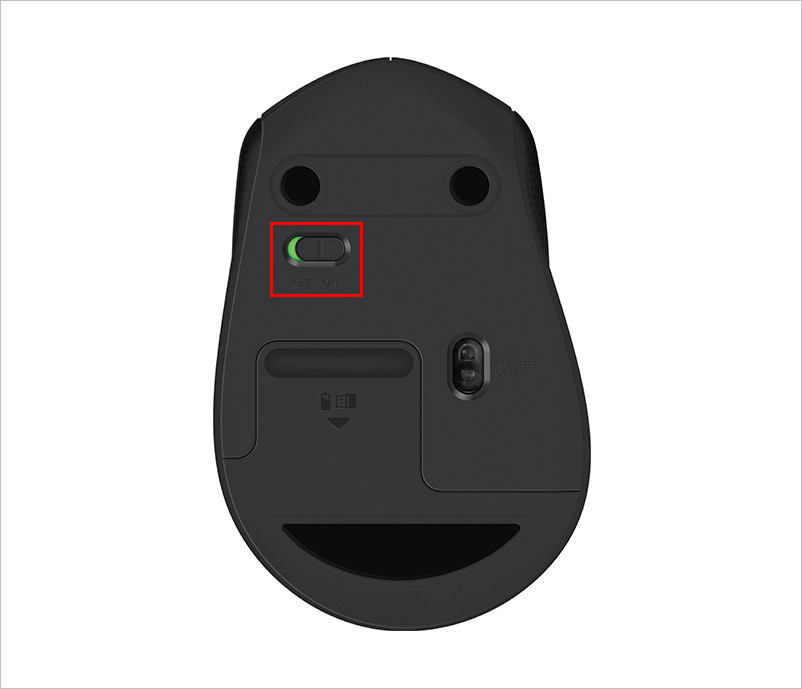
- Power On the Mouse: Most wireless mice have a small power switch, often on the underside. Slide it to the “ON” position. You might see an LED light illuminate briefly, indicating it’s powered on and ready to connect. If your mouse has a rechargeable battery, ensure it has sufficient charge or plug it in for a quick boost.
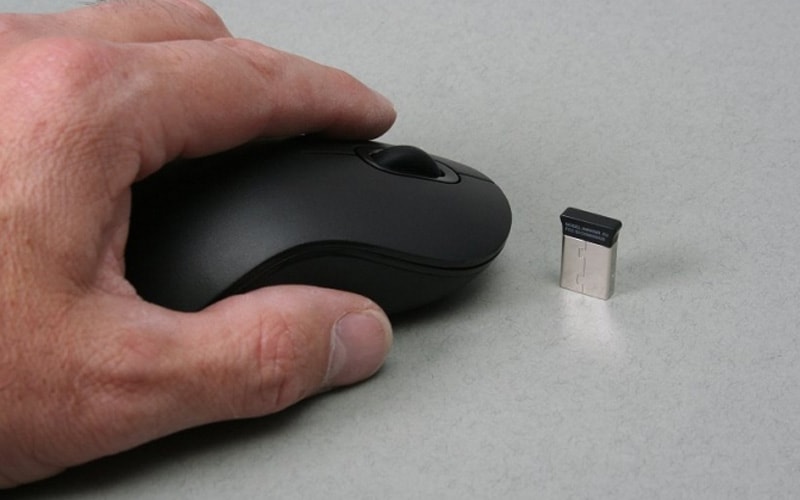
The USB Receiver Method: Plug-and-Play Simplicity
If your mouse came with a USB dongle, this is usually the quickest way to get started.
- Locate an Available USB Port: On your desktop, this will typically be on the front or back of the computer tower. For laptops, they are usually on the sides.
- Plug in the USB Receiver: Insert the small USB dongle firmly into the chosen USB port.
- Automatic Driver Installation: Your operating system (Windows, macOS, Linux) should automatically detect the new hardware. You’ll usually see a notification indicating that “Device driver software is being installed” or “Setting up a device.” This process typically takes a few seconds to a minute.
- Test Connectivity: Once the drivers are installed, try moving your mouse. The cursor on your screen should respond instantly. If it doesn’t, ensure the mouse is powered on and the receiver is fully inserted. Some mice might have a “connect” or “pair” button on the underside or on the receiver itself that you might need to press if the connection isn’t automatic, but this is less common with modern 2.4 GHz devices.
- Optimizing Placement: For desktop users, avoid plugging the receiver into a port far away or blocked by metal components, as this can sometimes degrade signal quality. A front USB port or a USB hub that’s easily accessible is often ideal. This simple tech tip ensures consistent performance.
Bluetooth Pairing: The True Cable-Free Experience
Connecting a Bluetooth mouse requires a few more steps, as you’re actively pairing two devices.
On Windows:
- Ensure Bluetooth is On:
- Click the Start Menu or search bar and type “Bluetooth & other devices settings.”
- In the settings window, ensure the Bluetooth toggle is set to “On.”
- Put Mouse in Pairing Mode:
- On the underside of your Bluetooth mouse, you’ll typically find a small button labeled “Pair,” “Connect,” or simply a Bluetooth symbol. Press and hold this button for a few seconds. The mouse’s LED indicator will usually start blinking rapidly, signaling it’s in pairing mode.
- Add the Device on Your PC:
- In the “Bluetooth & other devices settings” window, click “Add Bluetooth or other device.”
- Select “Bluetooth” from the options.
- Your computer will scan for available Bluetooth devices. When your mouse’s name appears (e.g., “Logitech MX Master 3” or “Microsoft Arc Mouse”), click on it.
- Follow any on-screen prompts. Once paired, the mouse’s LED will usually stop blinking and remain solid or turn off.
- Test Connectivity: Move your mouse; the cursor should now respond.
On macOS:
- Ensure Bluetooth is On:
- Click the Apple menu in the top-left corner.
- Go to “System Settings” (or “System Preferences” on older macOS versions).
- Click on “Bluetooth” in the sidebar.
- Ensure Bluetooth is turned “On.”
- Put Mouse in Pairing Mode: (Same as Windows) Press and hold the pairing button on your mouse until its LED blinks.
- Connect the Device on Your Mac:
- In the “Bluetooth” settings window, your Mac will automatically scan for devices.
- When your mouse appears in the list, click the “Connect” button next to its name.
- Follow any prompts. Once paired, the mouse’s LED will indicate a successful connection.
- Test Connectivity: Move your mouse to confirm it’s working.
Driver Software and Customization: Optimizing Your Pointer
While most wireless mice work out of the box with generic drivers, many manufacturers provide optional software that unlocks advanced features and customization options.
- Download Manufacturer Software: Visit the official website of your mouse’s brand (e.g., Logitech Options, Razer Synapse, Microsoft Mouse and Keyboard Center). Search for your specific mouse model and download the associated software.
- Install and Customize: Install the software and explore its features. You can often:
- Remap Buttons: Assign custom functions, macros, or keyboard shortcuts to extra mouse buttons, boosting your productivity.
- Adjust DPI/Sensitivity: Change the cursor speed and precision on the fly, tailoring it to different tasks (e.g., lower DPI for design work, higher for gaming).
- Create Profiles: Set up different configurations for specific applications, enhancing your workflow.
- Monitor Battery Life: Keep track of your mouse’s power levels and get notifications when batteries are low, preventing unexpected downtime.
- Update Firmware: Ensure your mouse’s internal software is up-to-date for optimal performance and bug fixes.
- Why Bother? Investing a little time in this step can significantly improve your user experience, making your wireless mouse a powerful extension of your tech setup rather than just a basic input device. This optimization can even be seen as a money-saving step, as it extends the effective life and utility of your hardware.
Troubleshooting, Maintenance, and Maximizing Your Investment
Even with a perfect setup, wireless peripherals can occasionally encounter hiccups. Knowing how to troubleshoot and maintain your mouse will save you time and frustration, protecting your investment.
Common Connectivity Woes and Quick Fixes
- No Movement/Laggy Cursor:
- Check Batteries: This is the most common culprit. Replace them or recharge your mouse.
- Power Cycle: Turn the mouse off, wait 10 seconds, then turn it back on.
- Reseat USB Receiver: Unplug the USB dongle and plug it back into a different USB port. For Bluetooth, try unpairing and re-pairing the mouse.
- Restart Computer: A simple reboot can often resolve driver conflicts or minor system glitches.
- Check Surfaces: Ensure you’re using the mouse on a suitable, non-reflective surface or a good mouse pad.
- Interference:
- Other Wireless Devices: 2.4 GHz Wi-Fi, other wireless mice/keyboards, or even microwaves can interfere. Try moving your computer or mouse away from these sources.
- USB 3.0 Interference: USB 3.0 ports can sometimes emit 2.4 GHz noise. If using a USB receiver, try plugging it into a USB 2.0 port or using a short USB extension cable to move the receiver away from the port.
- Mouse Not Detected:
- Driver Reinstallation: Go to Device Manager (Windows) or System Information (macOS), find your mouse under “Mice and other pointing devices,” uninstall the device, and then restart your computer to allow it to reinstall automatically.
- Check for Updates: Ensure your operating system and any mouse-specific software are up to date.
Power Management and Battery Life Extension
Batteries are the lifeline of your wireless mouse, and managing them wisely can save you money and prevent interruptions.
- Turn Off When Not in Use: If you’re going to be away from your computer for an extended period (e.g., overnight or a long meeting), flick the power switch to “OFF.”
- Automatic Sleep Mode: Most modern wireless mice enter a low-power sleep mode after a period of inactivity. Moving the mouse or clicking a button usually wakes it instantly.
- Use Quality Batteries: Reputable alkaline or rechargeable batteries often provide better performance and longer life. Investing a little more in good quality batteries can be a money-saver in the long run.
- Monitor Battery Indicators: Pay attention to any LED indicators on your mouse or notifications from its companion software that signal low battery.
- Consider Rechargeable Mice: If you find yourself constantly replacing batteries, a mouse with an integrated rechargeable battery might be a worthwhile investment, offering convenience and reducing environmental waste.
Choosing the Right Mouse: Ergonomics, Features, and Value
A wireless mouse is a tool, and like any tool, the right one for the job can significantly enhance your tech experience and productivity.
- Ergonomics: For prolonged use, consider an ergonomically designed mouse that fits comfortably in your hand. This is crucial for preventing wrist strain and repetitive stress injuries, a vital aspect of long-term productivity and well-being. Vertical mice or those with thumb rests can make a significant difference.
- DPI (Dots Per Inch): This indicates cursor sensitivity. Higher DPI means the cursor moves further with less physical mouse movement. Gamers and graphic designers often prefer higher DPI with on-the-fly adjustment capabilities.
- Programmable Buttons: Extra buttons can be programmed for specific functions, macros, or shortcuts, streamlining your workflow. This is a key feature for boosting productivity across various applications.
- Brand Reputation: Well-known brands like Logitech, Microsoft, Razer, and Apple often offer better build quality, support, and driver software. While they might be a higher initial investment, their reliability and longevity often provide superior value.
- Price vs. Features: Balance your budget with your needs. You don’t always need the most expensive mouse, but don’t compromise on essential features like comfort and reliability for the sake of saving a few dollars.
Longevity and Best Practices for Your Wireless Peripheral
Treating your wireless mouse with care will extend its lifespan and ensure consistent performance.
- Keep it Clean: Dust, dirt, and debris can accumulate in the sensor, scroll wheel, and buttons. Use a soft, dry cloth or compressed air to clean it regularly.
- Protect the Receiver: If using a USB dongle, avoid leaving it sticking out where it can be accidentally bumped or broken, especially with laptops. Many mice have a storage slot for the dongle when not in use.
- Avoid Extreme Conditions: Keep your mouse away from excessive heat, cold, or moisture, as these can damage internal components and batteries.
- Firmware Updates: Periodically check for firmware updates through the manufacturer’s software. These updates can improve performance, fix bugs, and even add new features.
Installing a wireless mouse is a simple yet impactful upgrade to your digital setup. By understanding the technologies, following the installation steps carefully, and adopting good maintenance practices, you’ll enjoy a clutter-free, efficient, and productive computing experience. This small tech enhancement can significantly contribute to your overall workflow, reflecting positively on your brand of efficiency and maximizing your money‘s worth.
aViewFromTheCave is a participant in the Amazon Services LLC Associates Program, an affiliate advertising program designed to provide a means for sites to earn advertising fees by advertising and linking to Amazon.com. Amazon, the Amazon logo, AmazonSupply, and the AmazonSupply logo are trademarks of Amazon.com, Inc. or its affiliates. As an Amazon Associate we earn affiliate commissions from qualifying purchases.