
In the ever-evolving landscape of technology, understanding how to manage and utilize various file types is crucial. Among these, JAR files hold a special place, particularly within the Java ecosystem. If you’ve ever encountered a .jar file and wondered “how do I install a JAR file?”, you’re not alone. This guide will demystify JAR files, their purpose, and the various methods for their installation, catering to both novice users and seasoned developers. We’ll explore the technical underpinnings, the practical applications, and even touch upon how managing such files can indirectly impact your personal finance and brand perception in the tech world.

Understanding JAR Files: More Than Just a Compressed Archive
Before we dive into the installation process, it’s essential to grasp what a JAR file truly is. JAR, an acronym for Java Archive, is fundamentally a package file format. Developed by Sun Microsystems (now owned by Oracle), it’s built upon the ZIP file format. This means that, at its core, a JAR file is simply a collection of multiple files compressed into a single entity. However, its significance extends far beyond simple compression.
What Makes a JAR File Special?
The power of a JAR file lies in its ability to bundle Java classes, associated metadata, and resources (like text, images, or configuration files) that are necessary to run a Java application or applet. Think of it as a self-contained unit for Java code. This packaging offers several advantages:
- Portability: A single JAR file can be easily distributed and run on any system that has a Java Runtime Environment (JRE) installed, regardless of the operating system. This is a cornerstone of Java’s “write once, run anywhere” philosophy.
- Efficiency: By compressing multiple files, JARs reduce the number of files that need to be downloaded or managed, leading to faster load times and simpler distribution.
- Security: JAR files can be digitally signed, allowing users to verify the authenticity and integrity of the code. This is a critical aspect of digital security, ensuring that the software you’re running hasn’t been tampered with.
- Extensibility: JAR files are often used to extend the functionality of existing Java applications. For instance, many plugins and add-ons for popular software are distributed as JAR files.
Common Use Cases for JAR Files
You’ll encounter JAR files in a variety of contexts:
- Desktop Applications: Many standalone Java applications are distributed as JAR files. Double-clicking them (if properly configured) can launch the application directly.
- Libraries and Frameworks: Developers often package reusable code into JAR files, which can then be imported into their projects. This is fundamental to building complex applications efficiently.
- Applets: While less common now, Java applets, which were small applications that ran within a web browser, were also distributed as JAR files.
- Game Modding: For many Java-based games, mods and custom content are distributed as JAR files.
Installing and Running JAR Files: A Multi-Faceted Approach
The question “how do I install a JAR file?” doesn’t always imply a traditional software installation process with an “installer.exe” or a graphical wizard. Often, it refers to making the JAR file executable or integrating its functionality into another application. The method you employ will depend on the type of JAR file and its intended use.
Method 1: Running a Standalone Executable JAR File
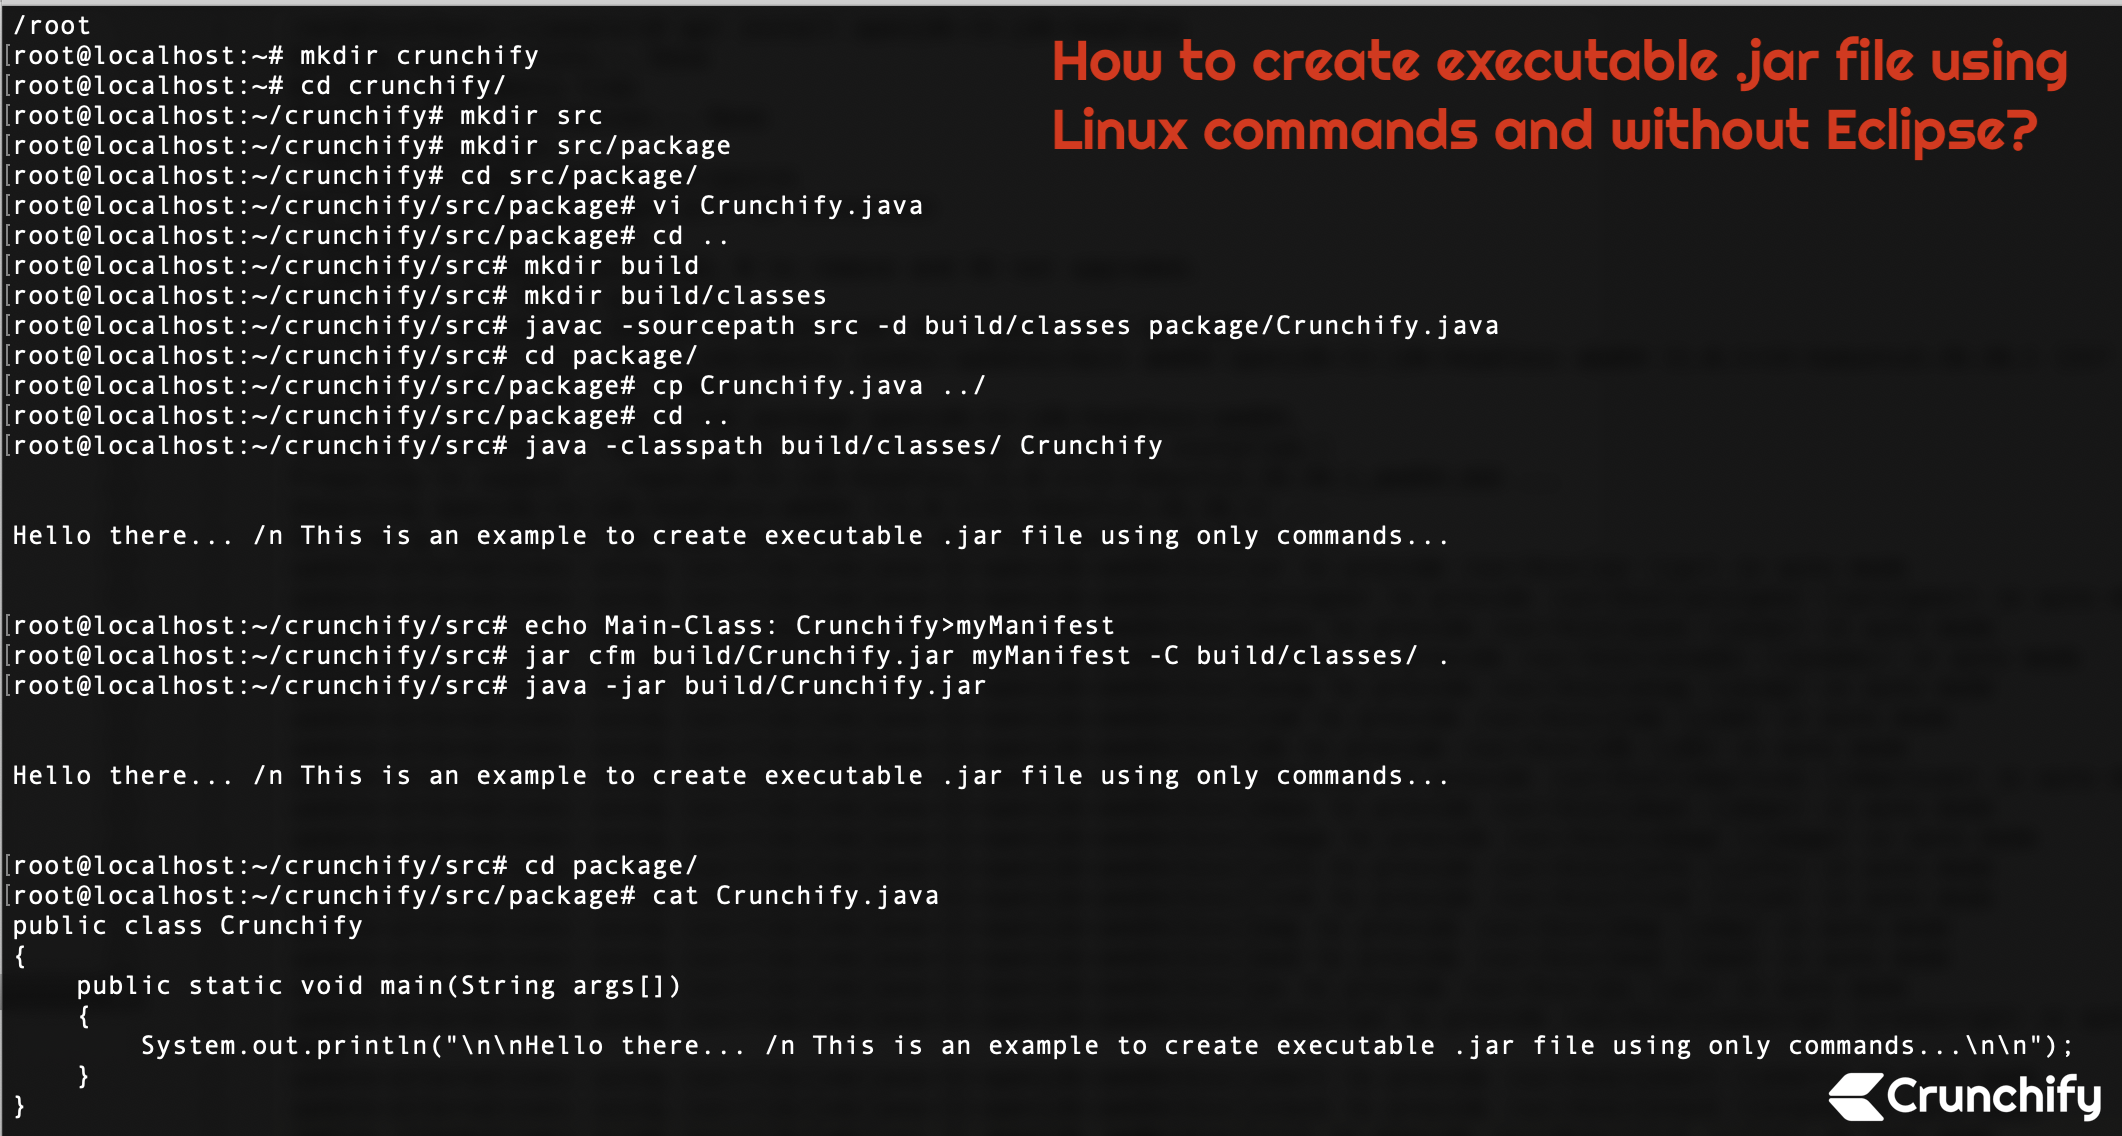
Many JAR files are designed to be run directly. If a JAR file contains a MANIFEST.MF file that specifies a Main-Class attribute, it’s considered an executable JAR.
Prerequisites: The Java Runtime Environment (JRE)
Before you can run any JAR file, your system must have the Java Runtime Environment (JRE) installed. The JRE provides the Java Virtual Machine (JVM), which is responsible for executing Java code.
-
Checking for JRE Installation:
- Windows: Open the Command Prompt and type
java -version. If Java is installed, you’ll see version information. If not, you’ll receive an error. - macOS: Open the Terminal and type
java -version. - Linux: Open a terminal and type
java -version.
- Windows: Open the Command Prompt and type
-
Installing the JRE: If you don’t have the JRE installed, you’ll need to download and install it from the official Oracle Java website or an open-source alternative like OpenJDK. Follow the on-screen instructions for your operating system.
Executing the JAR File
Once the JRE is installed, you can run an executable JAR file in a few ways:
-
Double-Clicking (Windows/macOS): On most systems, if the JRE is correctly associated with
.jarfiles, you can simply double-click the JAR file. The JVM will launch and execute the application defined in the JAR. If this doesn’t work, it might mean the file association isn’t set up, or the JAR isn’t marked as executable. -
Using the Command Line (All OS): This is the most reliable method and provides more control.
- Open your system’s command-line interface (Command Prompt on Windows, Terminal on macOS/Linux).
- Navigate to the directory where your JAR file is located using the
cdcommand. For example:cd C:UsersYourNameDownloads - Once you’re in the correct directory, execute the JAR file using the
java -jarcommand followed by the JAR file’s name:
bash

java -jar YourApplication.jar
ReplaceYourApplication.jarwith the actual name of your JAR file.
This command tells the Java Virtual Machine to execute the JAR file as a standalone application.
Method 2: Adding a JAR File as a Library to a Project
Often, you won’t be “installing” a JAR file in the traditional sense, but rather incorporating its functionality into your own Java development project. This is where JAR files shine as reusable components.

In an Integrated Development Environment (IDE)
Most modern Java IDEs (like IntelliJ IDEA, Eclipse, or NetBeans) make it very simple to add JAR files as libraries to your project.
- Locate Project Settings: Find the project properties or build path settings within your IDE.
- Add External JARs: There will typically be an option to “Add External JARs” or “Import JARs.”
- Select the JAR File: Browse your file system and select the JAR file you want to include.
- Rebuild Project: After adding the JAR, you’ll usually need to rebuild your project for the IDE to recognize the new library and its classes.
Once added, the classes within the JAR file will be available for you to import and use in your Java code, allowing you to leverage existing functionalities without rewriting them. This is a core concept in efficient software development and directly relates to productivity.
Using Build Tools (Maven/Gradle)
For more complex projects, build automation tools like Maven and Gradle are indispensable. They manage dependencies, including JAR files, automatically.
-
Maven: If you’re using Maven, you’ll typically add the JAR as a dependency in your
pom.xmlfile. If the JAR is hosted in a public repository (like Maven Central), you simply declare its coordinates. If it’s a local JAR not in a repository, you can install it into your local Maven repository or reference it directly.- To add a local JAR as a dependency:
xml

<dependency>

    <groupId>com.example</groupId>

    <artifactId>my-local-jar</artifactId>

    <version>1.0</version>

    <scope>system</scope>

    <systemPath>${project.basedir}/lib/YourLocalJAR.jar</systemPath>

</dependency>
(EnsureYourLocalJAR.jaris placed in alibfolder relative to yourpom.xml).
- To add a local JAR as a dependency:
-
Gradle: For Gradle projects, you’d add the dependency to your
build.gradlefile. Similar to Maven, public repository dependencies are straightforward. For local JARs, you can add them to alibsdirectory and declare them.- To add local JARs:
gradle

dependencies {

    implementation files('libs/YourLocalJAR.jar')

}
(EnsureYourLocalJAR.jaris placed in alibsfolder relative to yourbuild.gradle).
- To add local JARs:
Build tools streamline dependency management, preventing version conflicts and simplifying the build process, which is a significant productivity booster for developers.
Method 3: Installing JAR Files for Specific Applications (e.g., Minecraft Mods)
Certain applications use JAR files in a more specific way, often for extending their functionality through plugins or mods. Minecraft is a prime example.
Installing Minecraft Mods
For many older versions of Minecraft, mods were installed by directly placing their JAR files into the mods folder within the Minecraft game directory. However, this often required a mod loader like Forge or Fabric.
- Install a Mod Loader: Download and install the appropriate version of a mod loader (e.g., Forge or Fabric) for your Minecraft version. This usually involves running a special installer JAR provided by the mod loader itself.
- Locate the Mods Folder: After installing the mod loader, a
modsfolder will be created in your Minecraft installation directory. - Place the Mod JAR: Download the desired mod (which is typically a JAR file) and place it directly into this
modsfolder. - Launch Minecraft: Start Minecraft using the profile created by your mod loader. The mods should now be active.
Important Note: The modding scene evolves rapidly. Always follow the specific installation instructions provided by the mod author and the mod loader, as procedures can vary.
This method highlights how a single file format can be a gateway to entirely new experiences, directly impacting a user’s engagement with a product and potentially their personal brand as a content creator or enthusiast.
Troubleshooting Common JAR File Issues
While installing and running JAR files is generally straightforward, you might encounter a few common problems:
- “Java Runtime Environment not found” or similar errors: This means the JRE is not installed or not properly configured in your system’s PATH. Revisit the JRE installation section.
- JAR file doesn’t open when double-clicked: The file association might be incorrect. You can manually associate
.jarfiles with thejava.exeexecutable (found in your JRE’sbindirectory). Alternatively, always use thejava -jarcommand. - “Could not find or load main class” error: This indicates that the JAR file is not marked as executable (lacks a proper
MANIFEST.MFwith aMain-Classentry) or the specified class doesn’t exist within the JAR. If you intended to run it as an application, ensure it’s an executable JAR. If you intended to use it as a library, this error isn’t relevant for running. - Security warnings: If you download a JAR file from an untrusted source, your system or browser might warn you. Always download software from reputable sources to avoid malware. This ties directly into digital security.
The Broader Impact: JARs, Productivity, and Your Brand
Understanding how to manage JAR files isn’t just a technicality; it’s a skill that contributes to your overall effectiveness and presence in the tech world.
- Enhanced Productivity: For developers, efficiently incorporating libraries via JARs dramatically speeds up development cycles. For users, being able to install and run various Java applications and tools directly contributes to their productivity.
- Personal Branding: In the tech community, being knowledgeable about software management, including understanding file formats like JARs, can enhance your credibility. Being able to troubleshoot issues and integrate tools seamlessly can be a valuable asset in collaborations and projects, contributing to your personal brand.
- Financial Implications: While not a direct monetary transaction, efficiency gained through proper software management can translate to saved time (which is money) for professionals. For businesses, using well-packaged libraries can reduce development costs and time-to-market. Furthermore, understanding how software is built and distributed can inform investment decisions in technology companies.
Conclusion
The “how do I install a JAR file” question, while seemingly simple, opens the door to understanding a fundamental aspect of the Java ecosystem. Whether you’re a user looking to run a standalone application, a developer integrating libraries, or a hobbyist diving into game modding, the methods are accessible. By understanding the nature of JAR files and the prerequisites, particularly the Java Runtime Environment, you can confidently navigate their installation and utilization. This knowledge not only empowers you technically but also subtly enhances your productivity and strengthens your standing within the dynamic world of technology.
aViewFromTheCave is a participant in the Amazon Services LLC Associates Program, an affiliate advertising program designed to provide a means for sites to earn advertising fees by advertising and linking to Amazon.com. Amazon, the Amazon logo, AmazonSupply, and the AmazonSupply logo are trademarks of Amazon.com, Inc. or its affiliates. As an Amazon Associate we earn affiliate commissions from qualifying purchases.