In the bustling digital landscape of macOS, the .dmg file is a familiar sight. It’s the digital equivalent of an installation disc, a container that delivers software to your Mac. For many users, particularly those new to the Apple ecosystem or simply trying to maintain a tidy digital life, a crucial question often arises once an application is successfully installed: “Can I delete this .dmg file now, or do I need to keep it?” The short answer is almost always yes, you can and should delete them. However, understanding why this is the case, how to do it safely, and the rare instances where retention might be beneficial, forms the bedrock of good digital hygiene and efficient system management.
This comprehensive guide will demystify .dmg files, walk you through the proper installation and deletion processes, and equip you with the knowledge to manage your digital downloads effectively, ultimately contributing to a faster, cleaner, and more organized macOS experience.
Understanding DMG Files: The macOS Installation Standard
Before we dive into deletion, let’s first grasp what a .dmg file truly is and its role in the macOS software delivery pipeline. This understanding is key to confidently managing these files without fear of inadvertently compromising your system or installed applications.
What Exactly is a DMG File?
A .dmg file, which stands for “Apple Disk Image,” is a proprietary disk image format commonly used in macOS for distributing software. Think of it as a virtual hard drive or a digital package that contains all the necessary files for an application. When you download an application for your Mac, it very often comes wrapped in a .dmg file.
Unlike .exe files in Windows, which are executable installers that run a program to install software, .dmg files are designed to be mounted as a virtual disk on your macOS system. This mounting process makes the contents of the .dmg file appear on your desktop or in Finder as if it were an external drive, complete with the application icon and sometimes a shortcut to your Applications folder. This method provides a secure and organized way to distribute software, ensuring that all components are kept together and verifying the integrity of the download. It can also include license agreements, readme files, and custom backgrounds, creating a branded and user-friendly installation experience.
The format itself is quite versatile. It supports compression, encryption, and partitioning, making it a robust container for various types of data, not just applications. However, its primary use case for the average Mac user is undoubtedly software distribution.
The Typical Installation Workflow
The process of installing software from a .dmg file is remarkably straightforward, a testament to Apple’s focus on user experience. Here’s the common sequence of events:
- Download: You download the
.dmgfile from a developer’s website or a trusted source. It typically lands in your “Downloads” folder. - Open/Mount: Double-clicking the
.dmgfile initiates the mounting process. macOS reads the disk image, and within moments, a new icon appears on your desktop (or in the Finder sidebar under “Locations”), representing the mounted disk image. A Finder window usually opens automatically, displaying the contents of the.dmg. - Drag-and-Drop Installation: The most common installation method involves simply dragging the application icon from the
.dmgwindow directly into your “Applications” folder. Often, the.dmgitself provides a convenient alias (shortcut) to the Applications folder, making this step even easier. For more complex installations, the.dmgmight contain an actual installer package (a.pkgfile) that you would double-click to launch a guided installation wizard, much like on Windows. - Eject: Once the application is successfully moved to your Applications folder, the software is installed. At this point, it’s crucial to “eject” the virtual disk image, just as you would an external hard drive or USB stick. You can do this by dragging the disk image icon from your desktop to the Trash (it will change to an eject symbol), right-clicking the icon and selecting “Eject,” or clicking the eject button next to its name in the Finder sidebar. Ejecting ensures that the system safely unmounts the virtual disk.
- Launch: You can now launch the newly installed application from your Applications folder, Launchpad, or by searching with Spotlight.
Understanding this workflow clarifies why the .dmg file itself is often temporary. It’s merely the delivery mechanism, not the installed application itself.
The Definitive Answer: To Delete or Not to Delete?
With a clear understanding of what .dmg files are and how they facilitate software installation, we can now address the central question with confidence.
Why Deleting is Generally Recommended
In the vast majority of cases, once you have successfully installed an application from a .dmg file and ejected the disk image, the .dmg file itself becomes redundant. It has served its purpose: delivering the application. The installed application now resides in your Applications folder and operates independently of the original .dmg file.
Think of it like an empty cardboard box. You receive a new gadget in a box. You take the gadget out, set it up, and it works. Do you need to keep the box indefinitely? Probably not, unless you intend to return or move the gadget soon. The .dmg file is that box. Once its contents are unpacked and placed where they belong (your Applications folder), the box can be discarded.
The Benefits of Removing Redundant Files
Deleting .dmg files offers several tangible benefits, contributing to a healthier and more efficient macOS environment:
- Free Up Disk Space: This is arguably the most significant advantage.
.dmgfiles, especially for larger applications, can range from tens of megabytes to several gigabytes in size. Keeping them unnecessarily can quickly accumulate wasted storage space, particularly on Macs with smaller SSDs. Regularly deleting them ensures that your valuable disk space is reserved for actual applications, documents, photos, and other active data. For users working with large media files or numerous applications, this can make a noticeable difference in system performance and storage availability. - Declutter Your Downloads Folder: The “Downloads” folder can quickly become a digital graveyard of forgotten installers, archives, and temporary files. Regularly deleting
.dmgfiles helps keep this folder tidy, making it easier to find files you genuinely need and improving overall digital organization. A cluttered Downloads folder can also lead to confusion, as you might accidentally try to open an old installer instead of the actual application. - Improve System Performance (Indirectly): While a single
.dmgfile won’t significantly impact performance, a system burdened with excessive clutter and nearing its storage capacity can experience slowdowns. Keeping disk usage in check contributes to overall system health, allowing macOS to operate more smoothly, manage virtual memory more efficiently, and perform routine maintenance tasks without bottlenecks. - Enhance Digital Security and Privacy: Though less direct, removing old installer files reduces the potential attack surface. While
.dmgfiles from reputable sources are generally safe, keeping an archive of old installers, especially if downloaded from less trusted sites, could theoretically pose a minor security risk if they were ever compromised or contained hidden malicious code (though this is rare for standard.dmgfiles). More practically, fewer files to sift through means less chance of accidentally opening something unintended.
In essence, deleting .dmg files is a simple yet effective practice for maintaining a lean, fast, and organized Mac.
Safe and Sound Deletion: A Step-by-Step Guide
Deleting .dmg files is straightforward, but it’s important to follow the correct procedure to ensure you’re not deleting the actual installed application and that the virtual disk image is properly unmounted.
Ejecting the Disk Image
This is a critical first step often overlooked by new users. Before you even think about deleting the .dmg file itself, you must eject the mounted disk image. As mentioned, when you double-click a .dmg file, it mounts as a virtual volume. This virtual volume is what you interact with to drag the application to your Applications folder.
Here’s how to properly eject it:
- From the Desktop: If the disk image icon is visible on your desktop, simply drag it to the Trash can in your Dock. Don’t worry, the Trash icon will change to an “Eject” symbol. Releasing it will unmount the disk image.
- From Finder Sidebar: In any Finder window, look under the “Locations” section in the sidebar. You’ll see the name of the mounted disk image (e.g., “Google Chrome,” “Visual Studio Code”). Click the small “Eject” symbol (an upward-pointing arrow with a line underneath) next to its name.
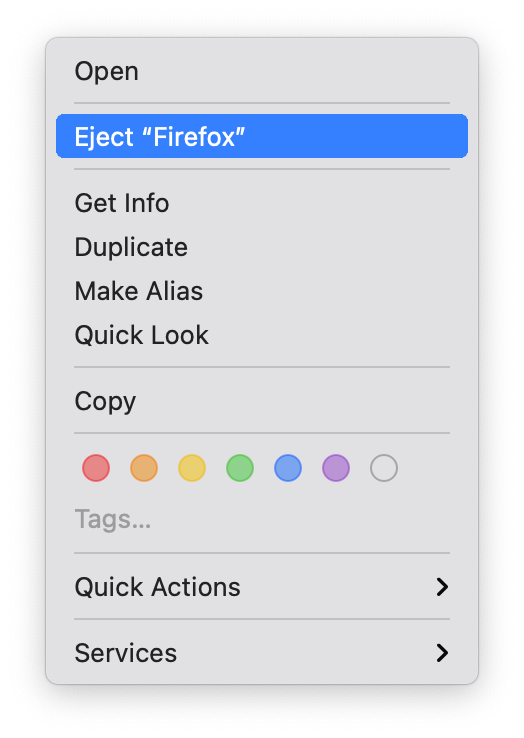
- Right-Click (Context Menu): Right-click (or Control-click) the disk image icon on your desktop or in the Finder sidebar, and select “Eject [Disk Image Name]” from the contextual menu.
Once ejected, the disk image icon will disappear from your desktop and Finder sidebar, confirming that the virtual volume has been safely disconnected. This action does not delete the original .dmg file; it merely closes the virtual disk.

Moving to Trash and Emptying
After successfully ejecting the disk image, the original .dmg file remains in your “Downloads” folder (or wherever you initially saved it). Now you can safely delete this file.
- Locate the .dmg file: Navigate to your “Downloads” folder, typically found in your Home directory, or wherever you explicitly saved the file.
- Drag to Trash: Click and drag the
.dmgfile (e.g.,application-name.dmg) from its location directly into the Trash icon in your Dock. - Empty the Trash: For the file to be permanently removed and its disk space reclaimed, you need to empty the Trash. You can do this by:
- Right-clicking (or Control-clicking) the Trash icon in the Dock and selecting “Empty Trash.”
- Opening the Trash (by clicking its icon) and then clicking the “Empty” button in the upper-right corner of the window.
- Using the keyboard shortcut
Shift + Command + Delete(this will prompt a confirmation dialog).
Important Note: Make absolutely sure you are dragging the .dmg file to the Trash after ejection, and not the actual application from your Applications folder. Deleting the application itself would, of course, remove the software you just installed. This distinction is crucial for new users.
When Keeping Your DMG Files Makes Sense (and When It Doesn’t)
While the general advice is to delete .dmg files post-installation, there are specific scenarios where retaining them can be advantageous. Understanding these exceptions will help you make informed decisions for your digital workflow.
Scenarios for Retention: Backup and Reinstallation
There are a few legitimate reasons why you might choose to keep a .dmg file, at least temporarily:
- For Reinstallation: If you frequently reinstall macOS, set up new Macs, or uninstall and reinstall specific applications, keeping the
.dmgfile saves you the trouble of redownloading it every time. This is especially true for large applications or if your internet connection is slow or capped. Having a local copy means instant reinstallation without relying on internet availability or speed. - Archiving Specific Versions: Sometimes, a new version of an application might introduce unwanted changes, remove features, or have compatibility issues with your system or other software. Keeping the
.dmgfor an older, stable version allows you to revert if necessary. This is particularly relevant for professional users of specific software tools. - Offline Access/Limited Internet: If you anticipate needing to install software on a Mac without an internet connection, or if you have limited or expensive data, keeping the
.dmgfiles locally is a practical solution. - Backup Strategy: As part of a robust backup strategy, you might choose to archive important
.dmgfiles to an external hard drive or cloud storage. This ensures you always have access to installers, even if a developer removes an old version from their website.
If you decide to keep .dmg files for these reasons, it’s best to move them out of your “Downloads” folder into a dedicated “Software Installers” or “Archives” folder, ideally on an external drive or a separate partition, to maintain your primary drive’s cleanliness.
Scenarios for Immediate Deletion: Saving Space and Security
Conversely, there are strong reasons to delete most .dmg files immediately:
- Abundant Disk Space: If your Mac has ample storage (e.g., 1TB or more SSD) and the
.dmgfiles are relatively small, the impact on space might seem negligible. However, cumulative small files can add up, and the principle of digital decluttering still applies. Why keep something you don’t need? - Regular Internet Access: For most users with reliable high-speed internet, redownloading an application is a minor inconvenience compared to the benefits of a clutter-free hard drive. Developers also frequently update their software, so an older
.dmgmight quickly become outdated anyway. - Security Updates: If you’re keeping
.dmgfiles for reinstallation, be mindful that they might contain older, unpatched versions of software. Reinstalling from an old.dmgmeans you’ll then need to immediately update the application, which negates some of the time-saving benefits. - Temporary Files: Many
.dmgfiles are for applications you might try once and then decide not to keep. Deleting their installers right away is part of a “try-and-discard” approach that prevents accumulation.
The Myth of Necessary Retention
A common misconception, especially among users transitioning from other operating systems, is that the .dmg file needs to be present for the application to function. This is simply not true for macOS applications installed via the drag-and-drop method. Once the application bundle is copied to your Applications folder, it contains everything it needs to run. The .dmg file is merely the transportation vehicle, not part of the application’s engine.
Furthermore, some users worry that deleting the .dmg might affect future updates. This is also false. macOS applications, whether updated via the App Store or through their internal update mechanisms, do not rely on the original .dmg file for updates. Updates are typically downloaded and applied directly to the installed application.
Best Practices for Managing Your Digital Downloads
Effective management of .dmg files extends beyond simple deletion. It’s part of a broader strategy for maintaining a healthy and efficient macOS system. Incorporating these best practices can significantly enhance your digital productivity and peace of mind.
Locating and Organizing Your DMG Library
Over time, you might accumulate a collection of .dmg files, perhaps scattered across your Downloads folder, desktop, or even email attachments. A little effort in organization can save you headaches later.
- Regularly Check Your Downloads Folder: Make it a habit to periodically review your “Downloads” folder. This is the primary culprit for
.dmgfile accumulation. Delete any.dmgfiles you no longer need. - Use Smart Folders (Finder): For advanced users, Smart Folders can be incredibly useful. You can create a Smart Folder that automatically gathers all files ending with
.dmgon your entire drive or within specific folders.- Open Finder.
- Go to
File > New Smart Folder. - Click the
+button to add a search criterion. - Set the criteria to
KindisOther...then typeDisk Imageand select it, or simplyNamecontains.dmg. - Save this Smart Folder to your Finder sidebar for quick access. This allows you to see all your
.dmgfiles in one place, making bulk deletion or organization much easier.
- Dedicated Installer Folder (for keepers): If you opt to keep certain
.dmgfiles for reinstallation purposes, create a dedicated folder for them. Label it something clear like “Software Installers” or “Archived Apps.” Consider storing this folder on an external drive or cloud storage to keep your primary startup disk lean.
Automated Cleanup Tools (Optional)
For those who prefer a more hands-off approach, several third-party utilities can help manage and clean up your Mac, including identifying and recommending the deletion of old .dmg files. Tools like CleanMyMac X, DaisyDisk, or OnyX often have features that scan your drive for “junk files,” which can include redundant .dmg installers.
While these tools can be powerful, exercise caution and review what they suggest deleting. Always ensure you understand what a tool is doing before allowing it to remove files, especially if you have specific .dmg files you intend to keep. For most users, manual deletion and a disciplined approach to checking the Downloads folder are perfectly sufficient.

A Proactive Approach to Digital Decluttering
Beyond just .dmg files, cultivating a habit of digital decluttering can transform your macOS experience.
- Immediate Deletion Habit: After installing any application, make it a part of your routine to immediately eject the disk image and then move the
.dmgfile to the Trash. This prevents accumulation from the start. - Review Before Keeping: If you’re tempted to keep a
.dmgfile, ask yourself: “Do I truly need this for reinstallation, or will I just redownload the latest version if needed?” Be honest about your usage patterns. - Cloud Storage for Archives: For
.dmgfiles you legitimately need to archive (e.g., specific older versions of software), consider offloading them to cloud storage services like iCloud Drive, Dropbox, or Google Drive. This keeps them accessible without consuming local disk space. - Regular Maintenance Schedule: Set a reminder to perform a quick “digital sweep” of your Mac every month or quarter. This includes checking your Downloads folder, emptying the Trash, and reviewing large files.
By adopting these practices, you move beyond simply reacting to a cluttered system to proactively maintaining a streamlined and efficient digital environment. This not only frees up valuable disk space but also contributes to a smoother, more enjoyable computing experience, allowing you to focus on productivity rather than file management.
In conclusion, the answer to “can you delete .dmg files after installing” is a resounding yes. It’s a simple, safe, and highly recommended practice for keeping your macOS system tidy, efficient, and free from unnecessary clutter. By understanding their purpose, following proper deletion steps, and applying intelligent management strategies, you can ensure your Mac remains a lean, mean, productivity machine.