
Installing Windows on a personal computer, whether it’s a brand-new build, a refurbished machine, or simply a system in need of a fresh start, is a fundamental skill for any tech enthusiast or professional. It’s a process that can seem daunting at first, involving various steps from creating bootable media to configuring system settings, but with a clear, step-by-step guide, it becomes an accessible task. This comprehensive tutorial will walk you through everything you need to know to successfully install Windows on your PC, ensuring a smooth and optimized operating system experience from the get-go.
A fresh Windows installation can breathe new life into an aging machine, resolve persistent software issues, eliminate stubborn viruses, or simply provide a clean slate for new projects. For those building a PC from scratch, it’s the crucial final step that brings all the hardware components to life. Understanding the nuances of this process, from preparing your installation media to configuring post-installation essentials, empowers you to maintain and manage your own digital environment effectively. We’ll delve into each stage, providing insights and tips to make your installation a success, aligning with the website’s focus on technology tutorials and productivity.
Preparing for a Seamless Windows Installation
Before you even think about booting from a USB drive, meticulous preparation is key. This initial phase sets the foundation for a hassle-free installation, preventing potential roadblocks and data loss. Skipping these crucial steps can lead to frustration, extended downtime, or even irreparable damage to your existing data.
Understanding Your Installation Scenario
The way you approach your Windows installation can vary significantly based on your current situation. Are you:
- Building a new PC? In this case, you’ll be installing Windows on a completely blank drive, which simplifies some steps related to data backup and existing partitions.
- Upgrading from an older Windows version (e.g., Windows 7/8.1 to Windows 10/11)? Here, you might opt for an “upgrade” installation to retain files and applications, though a “clean install” is often recommended for better performance.
- Reinstalling Windows on a PC that already has it? This is usually done to fix performance issues, remove malware, or clear out accumulated clutter. A clean install is almost always the best choice here.
- Installing Windows on a second drive in an existing PC? You’ll need to be careful with drive selection to avoid overwriting your primary operating system.
Identifying your scenario helps tailor the subsequent steps, particularly regarding data backup and drive partitioning.
Essential Tools and Preparations
To ensure a smooth installation, gather the following before you begin:
- A Computer with Internet Access: You’ll need this to download the Windows ISO file and the Media Creation Tool. This can be your current PC (if you’re reinstalling) or a different working computer.
- A USB Flash Drive (8GB or larger): This will be your bootable installation media. Ensure it’s empty or that you’ve backed up its contents, as it will be completely erased during the bootable media creation process. For Windows 11, a 16GB or larger drive is recommended.
- Your Windows Product Key: While you can often install Windows without immediately entering a product key (it will run in an unactivated state for a period), having it handy saves a step later. If you’re reinstalling on a machine that previously had an activated digital license for Windows 10 or 11, you might not even need the key; Windows will automatically reactivate once connected to the internet. For new licenses, you’ll typically find it on a sticker on your PC, in an email from an online retailer, or on the packaging if you bought a physical copy.
- Stable Internet Connection: Crucial for downloading installation files and, later, for activating Windows and downloading updates.
- Enough Time: Don’t rush the process. Allocate a few hours to ensure you can follow each step carefully without interruption.
Backing Up Your Data: A Non-Negotiable Step
This is arguably the most critical step, especially if you’re reinstalling Windows on a drive that contains personal files. A clean installation will erase everything on the chosen drive. If you skip this, you risk losing precious documents, photos, videos, and other data permanently.
Here’s how to approach data backup:
- External Hard Drive: The most common and reliable method. Copy all your important folders (Documents, Pictures, Videos, Music, Desktop, Downloads) from your user profile to an external drive.
- Cloud Storage: Services like Google Drive, OneDrive, Dropbox, or iCloud offer convenient ways to back up files, especially if you have an active subscription with ample storage. Ensure all your critical data is synced before proceeding.
- Network Attached Storage (NAS): If you have a home network server, this is another excellent option for backing up large volumes of data.
- System Image (Advanced): For those who want to restore their entire system exactly as it was, creating a full system image backup using Windows’ built-in tools or third-party software can be useful. However, for a clean install, simply backing up individual files is usually sufficient.
Crucial Advice: Double-check that your backups are complete and accessible before you proceed with any installation steps that involve erasing data.
Creating Your Windows Bootable Media
Once your preparations are complete and your data is safe, the next step is to create the bootable media. This USB drive will contain all the necessary files to start the Windows installation process on your target PC.
Utilizing the Official Windows Media Creation Tool
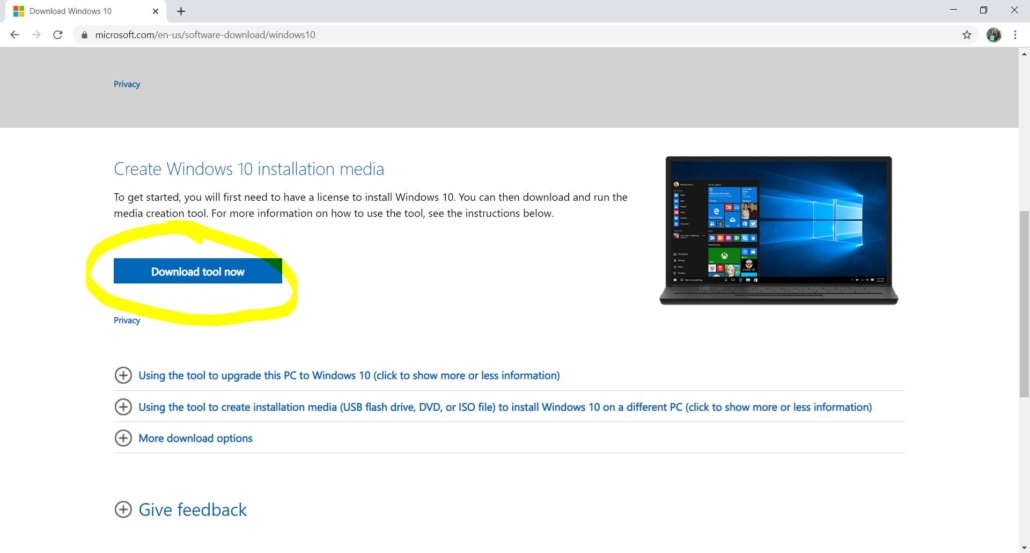
For most users, the simplest and most recommended method is to use Microsoft’s official Media Creation Tool. This tool automates the process of downloading the correct Windows ISO file and properly formatting your USB drive to be bootable.
- Download the Tool: Go to Microsoft’s official Windows download page (search “Windows 10/11 download” on Google) and download the Media Creation Tool executable. Ensure you download the version corresponding to the Windows version you intend to install (Windows 10 or Windows 11).
- Run the Tool: Insert your USB flash drive into an available port. Run the downloaded
MediaCreationTool.exefile. Accept the license terms. - Choose “Create installation media (USB flash drive, DVD, or ISO file) for another PC.” Click “Next.”
- Select Language, Architecture, and Edition: The tool will usually recommend options based on the PC you’re currently running it on. You can uncheck “Use recommended options for this PC” if you need to choose different settings (e.g., creating a 64-bit installer on a 32-bit machine, or for a different language). Click “Next.”
- Choose USB Flash Drive: Select the “USB flash drive” option. Click “Next.”
- Select Your USB Drive: From the list of available drives, carefully select your USB flash drive. Be extremely cautious here, as selecting the wrong drive will erase its contents. Click “Next.”
- Download and Create: The tool will now download the Windows files and create the bootable USB drive. This process can take a significant amount of time depending on your internet speed and the speed of your USB drive. Do not remove the USB drive until the process is complete.
- Finish: Once completed, you’ll see a confirmation message. You can now safely remove the USB drive.
Advanced Bootable USB Creation with Rufus (Optional)
For users who need more control over the bootable media creation process, or who are working with ISO files downloaded from other sources (e.g., MSDN subscriptions), Rufus is an excellent third-party utility.
- Download Rufus: Download the latest version of Rufus from its official website (
rufus.ie). It’s a portable application, so no installation is required. - Download Windows ISO: If you’re not using the Media Creation Tool, you’ll need to manually download the Windows ISO file.
- Run Rufus: Insert your USB drive and launch Rufus.
- Select Device: In the “Device” dropdown, select your USB flash drive. Again, double-check this selection.
- Select Boot Selection: Click the “SELECT” button next to “Boot selection” and browse to your downloaded Windows ISO file.
- Image Option (for Windows 11): If installing Windows 11, Rufus might offer options to bypass TPM 2.0 and Secure Boot requirements. Use these with caution and only if your hardware truly doesn’t meet the requirements, as they might affect future updates.
- Partition Scheme and Target System: For modern PCs (manufactured after 2010), select “GPT” for the Partition scheme and “UEFI (non CSM)” for the Target system. For older legacy systems, “MBR” and “BIOS (or UEFI-CSM)” might be necessary. When in doubt, GPT/UEFI is usually the correct choice.
- File System and Cluster size: Leave these at their default values (NTFS usually).
- Start: Click “START.” Rufus will warn you that all data on the USB drive will be destroyed. Confirm to proceed.
- Wait: The process will take some time. Once completed, you can close Rufus and safely remove the USB drive.
Navigating the BIOS/UEFI and Initiating Installation
With your bootable USB drive ready, the next step is to instruct your computer to start from this drive instead of its internal hard drive. This involves accessing your system’s firmware settings.
Accessing Your System’s Firmware Settings
BIOS (Basic Input/Output System) and its successor, UEFI (Unified Extensible Firmware Interface), are the firmware interfaces that your computer uses to start up. You need to access these to change the boot order.
- Insert the USB: With your PC powered off, insert the bootable USB drive into an available USB port.
- Power On and Press Key: Power on your computer. Immediately and repeatedly press the key that grants access to your BIOS/UEFI settings or the boot menu. This key varies by manufacturer:
- Dell: F2 (BIOS Setup), F12 (Boot Menu)
- HP: F10 (BIOS Setup), F9 (Boot Menu)
- Lenovo: F1 or F2 (BIOS Setup), F12 (Boot Menu), or the Novo button (a small button on the side for some models)
- Acer: F2 (BIOS Setup), F12 (Boot Menu)
- Asus: DEL or F2 (BIOS Setup)
- Microsoft Surface: Volume Up button
- Custom Builds (Motherboard dependent): DEL or F2 are most common.
You might see a brief message on the screen during startup indicating which key to press. If not, consult your motherboard or PC manual.
Configuring the Boot Order
Once inside the BIOS/UEFI utility, navigate to the “Boot” or “Boot Options” section.
- Locate Boot Priority: Find the setting that controls the boot order or boot priority.
- Set USB as First: Change the boot order so that your USB drive (it might be listed as “USB HDD,” “Removable Device,” or by its brand name) is the first device in the boot sequence.
- Save and Exit: Save your changes (often F10) and exit the BIOS/UEFI. Your computer will restart and should now boot from the USB drive.
Alternatively, use the Boot Menu: Many systems offer a “Boot Menu” (accessed via a different key, like F12 or F9) that allows you to temporarily select a boot device without changing the permanent boot order in BIOS/UEFI. This is often more convenient if you only need to boot from USB once.
The Step-by-Step Windows Installation Process
Once your PC boots from the USB drive, you’ll enter the Windows Setup environment. This is where the core installation takes place.
Initial Setup and Language Selection
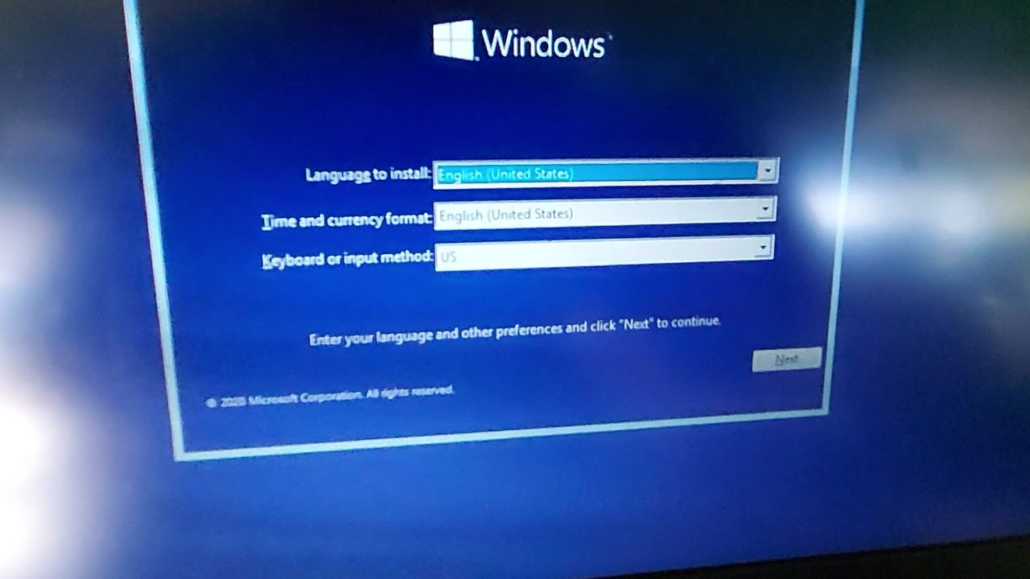
- Windows Setup Screen: The first screen you’ll see is the “Windows Setup” window.
- Language, Time, and Keyboard: Select your preferred language to install, time and currency format, and keyboard or input method. Click “Next.”
- Install Now: Click the “Install now” button.
Entering Your Product Key (or Skipping for Later)
- Activate Windows: You’ll be prompted to enter your product key.
- If you have it: Enter your 25-character product key and click “Next.”
- If you don’t have it (or are reinstalling with a digital license): Click “I don’t have a product key.” Windows will install, and you can activate it later after connecting to the internet, especially if your PC has a digital license tied to your hardware.
- Select Operating System (if applicable): If your product key covers multiple Windows editions (e.g., Home and Pro), you might be asked to select the version you want to install. Choose the correct one and click “Next.”
- License Terms: Read and accept the Microsoft Software License Terms. Check the box and click “Next.”

Choosing Installation Type: Upgrade vs. Custom
This is a critical decision point.
- Which type of installation do you want?:
- Upgrade: Install Windows and keep files, settings, and applications: This option is typically used when you’re upgrading from an older version of Windows to a newer one (e.g., Windows 7 to 10) and want to retain your existing data and programs. This option is generally only available if you start the installation from within your existing Windows operating system. If you’ve booted from USB, this option will usually be greyed out or give you a warning that you cannot perform an upgrade.
- Custom: Install Windows only (advanced): This is the option you almost always want for a clean installation, especially when booting from a USB drive. It allows you to format partitions and start fresh. Select this.
Disk Partitioning and Drive Selection
This is where you tell Windows where to install itself. Exercise extreme caution here to avoid formatting the wrong drive and losing data.
- Where do you want to install Windows?: You’ll see a list of drives and partitions.
- Identify Your Target Drive: If you have multiple drives, carefully identify the drive where you want to install Windows. Look at the drive numbers, total size, and free space.
- Delete Existing Partitions (for a truly clean install):
- For the drive you’ve selected for Windows, highlight each existing partition (e.g., “System Reserved,” “Primary,” “Recovery”) and click “Delete.” Confirm any warnings.
- Repeat until the entire drive is shown as “Unallocated Space.” This ensures no old system files interfere.
- Warning: Deleting partitions will permanently erase all data on them.
- Create New Partition (Optional, but recommended):
- Select the “Unallocated Space” of your target drive.
- Click “New.” Windows will usually suggest creating a new primary partition using the maximum available space and will also create necessary small system partitions (EFI, Recovery). Click “Apply” and “OK.”
- Select Primary Partition: Ensure the newly created “Primary” partition (or the largest one if you didn’t delete/recreate) on your target drive is selected. This is where Windows will be installed.
- Click “Next.”
The Core Installation Phase
Windows will now begin copying files and installing itself.
- Copying Windows files: (This is quick)
- Getting files ready for installation: (This takes a while)
- Installing features:
- Installing updates:
- Finishing up:
During this phase, your computer will restart multiple times. Do NOT remove the USB drive until the first restart after “Finishing up.” After the first restart, once the Windows logo appears, it’s generally safe to remove the USB drive to prevent it from booting back into the installer. If you leave it in, make sure your BIOS/UEFI boot order prioritizes the internal drive after the first restart, or simply use the boot menu as mentioned earlier.
Initial User Account and Privacy Settings
After the installation phase and subsequent reboots, you’ll be greeted by the Out-of-Box Experience (OOBE), where you configure basic settings.
- Region and Keyboard Layout: Confirm your region and keyboard layout.
- Connect to a Network: Connect to your Wi-Fi or Ethernet network. This is crucial for updates and activation.
- Sign in with Microsoft Account (or create local account):
- Windows encourages signing in with a Microsoft account. This links your device to your OneDrive, Outlook, and other Microsoft services.
- If you prefer a local account (Windows 10 Pro or Windows 11 Enterprise/Education only by default), you might have to disconnect from the internet or choose an option like “Offline account” or “Skip for now” to bypass the Microsoft account requirement. For Windows 11 Home/Pro, a Microsoft account and internet connection are generally required during OOBE, though workarounds exist.
- Create a PIN: Set up a PIN for faster login.
- Privacy Settings: Review and adjust the privacy settings (Location, Find my device, Diagnostic data, Inking & typing, Tailored experiences, Advertising ID). Microsoft defaults to collecting more data; you can usually turn off most of these if you prefer.
- Additional Settings (Windows 11): You might see prompts for device usage, OneDrive backup, etc. Make your choices.
- “Hi” Screen: After a few more moments of “getting things ready,” you’ll reach your Windows desktop!
Congratulations, you’ve successfully installed Windows!
Post-Installation Essentials for Optimal Performance
Installing Windows is just the first step. To ensure your system runs smoothly, securely, and efficiently, there are several crucial post-installation tasks. These steps are vital for unlocking your PC’s full potential and safeguarding your digital life.
Installing Device Drivers for Peak Performance
Drivers are software components that allow your operating system to communicate with your hardware (graphics card, motherboard chipset, network adapter, sound card, etc.). Without the correct drivers, hardware may not function correctly or at all.
- Check Device Manager: Right-click the Start button and select “Device Manager.” Look for any devices with yellow exclamation marks. These indicate missing or incorrectly installed drivers.
- Motherboard Chipset Drivers: This is the most critical driver. Visit your motherboard manufacturer’s website (e.g., Asus, MSI, Gigabyte, ASRock) or your PC manufacturer’s website (Dell, HP, Lenovo). Download and install the latest chipset drivers for your specific model and Windows version.
- Graphics Card Drivers: For optimal display and gaming performance, download the latest drivers directly from NVIDIA, AMD, or Intel, depending on your GPU.
- Network Drivers: If your internet isn’t working, you’ll need to install the LAN/Wi-Fi drivers first, perhaps by transferring them via another computer and a USB drive.
- Other Drivers: Install drivers for audio, Bluetooth, USB controllers, and any other peripherals.
- Driver Update Utilities (Optional): Some manufacturers provide utilities that scan and install all necessary drivers for your system. Use these cautiously, sticking to official tools.
Running Windows Updates
Windows Updates are crucial for security patches, bug fixes, and new features.
- Access Windows Update: Go to “Settings” > “Windows Update” (Windows 11) or “Update & Security” > “Windows Update” (Windows 10).
- Check for Updates: Click “Check for updates.”
- Install All Pending Updates: Download and install all available updates. This might require several restarts and repeated checks until no more updates are found. Keep checking until your system reports “You’re up to date.”
Installing Essential Software and Security Measures
A fresh Windows install is barebones. You’ll need to install your everyday applications.
- Web Browser: Download and install your preferred browser (Chrome, Firefox, Edge, Brave, etc.).
- Antivirus/Antimalware: While Windows Defender is built-in and offers decent protection, you might prefer a third-party solution. Ensure your system is protected from threats.
- Productivity Suite: Install Microsoft Office, LibreOffice, Google Workspace apps, etc., as needed for work or personal use.
- Utility Software: Consider tools like a PDF reader, archive utility (7-Zip, WinRAR), media player (VLC), and any other specific software you use regularly.
- Ninite.com (Pro Tip): For quickly installing multiple common applications at once, check out Ninite.com. It allows you to select several popular free programs, and it will download and install them all in one go, without annoying toolbars or extra junk.
Configuring Backup Solutions
Even after a clean install, proactive backup is essential.
- Enable File History (Windows 10) or OneDrive PC Folder Backup (Windows 11): These built-in features can automatically back up your important user folders to an external drive or OneDrive, respectively.
- Cloud Storage Sync: Ensure your preferred cloud storage (OneDrive, Google Drive, Dropbox) is set up and syncing your critical files.
- Regular System Backups: Consider setting up a routine for full system image backups, especially before major software changes or hardware upgrades.
Common Troubleshooting and Expert Tips
Even with careful preparation, issues can arise. Knowing how to troubleshoot and optimize your system can save you a lot of time and frustration.
Addressing Installation Errors
- “Windows cannot be installed to this disk…”: This usually indicates an issue with the partition style (GPT vs. MBR) or the drive format.
- If the error specifies GPT/MBR, restart the installation, and in the disk partitioning step, delete all partitions on the target drive, then create new ones. If that doesn’t work, re-create the bootable USB using Rufus and specify the correct partition scheme (GPT for UEFI, MBR for Legacy BIOS).
- Ensure the drive is connected properly.
- “Missing media driver”: This can happen with newer NVMe SSDs, particularly if the Windows ISO is older. You might need to manually download the storage controller drivers from your motherboard manufacturer and load them during the installation process (there’s a “Load driver” option on the disk selection screen).
- Random Restarts/Freezes: Could indicate faulty hardware (RAM, CPU, PSU) or corrupted installation media. Re-create the bootable USB and test your RAM.
- Slow Installation: Could be a slow USB drive, a slow hard drive, or an older CPU. Be patient.
Performance Optimization Post-Install
- Disable Unnecessary Startup Programs: Press
Ctrl+Shift+Escto open Task Manager, go to the “Startup” tab, and disable programs you don’t need running immediately after boot. - Adjust Visual Effects: In “System Properties” (search for “adjust the appearance and performance of Windows”), you can choose “Adjust for best performance” to disable some visual animations that consume resources.
- Disk Cleanup: Regularly use the built-in Disk Cleanup tool to remove temporary files.
- Defragment Hard Drives (HDD only): If you still use a traditional Hard Disk Drive (HDD), defragmenting it occasionally can improve performance. SSDs do not need defragmentation; in fact, it can reduce their lifespan.
- Keep Drivers Updated: Periodically check for updated drivers, especially for your graphics card.
- Monitor Resource Usage: Use Task Manager to identify applications consuming excessive CPU, RAM, or disk resources.
When to Reinstall Windows
While powerful, Windows can accumulate digital clutter, slow down, or become unstable over time. Consider a fresh installation if:
- Persistent Performance Issues: Your PC is consistently slow, freezes, or crashes, and other troubleshooting (driver updates, malware scans, disk cleanup) hasn’t helped.
- Stubborn Malware/Viruses: If you suspect deep-seated malware that standard antivirus tools can’t remove.
- Major Hardware Changes: Installing a new motherboard or CPU often benefits from a clean Windows installation to avoid driver conflicts.
- Selling or Donating Your PC: A clean install ensures all your personal data is securely erased, protecting your privacy.
- Major Software Conflicts: If repeated software installations and uninstallations have led to system instability.
A fresh installation, though time-consuming, is often the most effective solution for many complex Windows problems, providing a clean, responsive, and secure operating environment.
By following this comprehensive guide, you’ll be well-equipped to install Windows on any PC with confidence, ensuring a robust foundation for all your computing needs. This knowledge is not just about installing an OS; it’s about mastering your digital environment and ensuring peak performance and security for your technology investments.
aViewFromTheCave is a participant in the Amazon Services LLC Associates Program, an affiliate advertising program designed to provide a means for sites to earn advertising fees by advertising and linking to Amazon.com. Amazon, the Amazon logo, AmazonSupply, and the AmazonSupply logo are trademarks of Amazon.com, Inc. or its affiliates. As an Amazon Associate we earn affiliate commissions from qualifying purchases.