In the ever-evolving landscape of operating systems, Windows 11 Pro stands as a robust, secure, and highly efficient platform designed to meet the demands of professionals, businesses, and power users alike. Moving to a new operating system, or performing a clean installation, can seem daunting, but it’s an empowering step towards optimizing your digital workspace. This guide will walk you through every critical stage of installing Windows 11 Pro, ensuring a seamless transition and a powerful new foundation for your productivity, digital security, and technological innovation.
Whether you’re setting up a new machine, upgrading an existing system for better performance, or simply seeking a fresh start to declutter your digital life, a clean installation of Windows 11 Pro offers unparalleled benefits. It strips away old software conflicts, eliminates bloatware, and provides a pristine environment ready to tackle your most demanding tasks. For professionals, this translates directly into enhanced productivity, fortified digital security, and access to advanced features that streamline workflows and safeguard valuable data.
Why Choose Windows 11 Pro? Understanding Its Edge for Productivity and Security
Windows 11 represents a significant leap forward in operating system design and functionality, and the Pro edition takes these advancements even further. It’s not merely a cosmetic overhaul; it’s a strategic platform built for the modern professional environment, offering features that directly impact efficiency, data integrity, and system management.
Core Advantages for Businesses and Advanced Users
Windows 11 Pro distinguishes itself with a suite of features tailored for the demands of business and advanced individual users. These aren’t just minor enhancements; they are fundamental tools that underpin a secure, productive, and manageable computing experience.
- Enhanced Digital Security with BitLocker: One of the most compelling reasons to opt for Windows 11 Pro is the inclusion of BitLocker drive encryption. In an age where data breaches are increasingly common, protecting sensitive information is paramount. BitLocker encrypts your entire hard drive, making it virtually inaccessible to unauthorized parties even if your device is lost or stolen. For businesses handling confidential client data or professionals dealing with proprietary information, this feature alone can justify the Pro upgrade, offering peace of mind and significantly bolstering your digital security posture. It’s a cornerstone of compliance and reputation management, factors that directly influence a brand’s standing.
- Advanced Device Management with Group Policy: For IT administrators and power users managing multiple devices, Group Policy is an invaluable tool. It allows for centralized configuration management of users and computers within an Active Directory environment. This means you can enforce security settings, deploy software, manage updates, and restrict functionalities across an entire network from a single point. This level of control is essential for maintaining consistent security protocols, reducing support overhead, and ensuring that all devices adhere to corporate standards, ultimately impacting business finance by optimizing IT resources.
- Seamless Connectivity with Remote Desktop: The ability to access your desktop remotely is a game-changer for flexibility and productivity. Windows 11 Pro includes Remote Desktop functionality, allowing you to connect to your work PC from virtually anywhere, using any compatible device. Whether you’re working from home, traveling, or need to access files and applications on your primary workstation, Remote Desktop ensures continuity and immediate access to your entire digital arsenal. This fosters hybrid work models and ensures that critical tasks are never truly out of reach.
- Virtualization with Hyper-V: Hyper-V, Microsoft’s native hypervisor, is included in Windows 11 Pro. This feature enables you to create and run virtual machines directly on your computer. For developers, testers, or professionals who need to run different operating systems or isolated environments (e.g., for legacy software, testing new applications, or secure browsing), Hyper-V is indispensable. It allows for efficient resource utilization and prevents conflicts between different software setups, offering a sandbox for experimentation without affecting your primary OS. This is a powerful tool for productivity, allowing for parallel workflows and robust testing environments without investing in multiple physical machines.
- Business Store Integration and Assigned Access: Windows 11 Pro also facilitates easier deployment of applications through the Microsoft Business Store and offers Assigned Access. Assigned Access allows you to lock down a Windows device to run only one specific app, creating a kiosk-like experience – perfect for public terminals, retail displays, or specialized workstations. These features cater directly to operational efficiency and specific business needs, highlighting its value beyond individual use.
The Rationale Behind a Clean Installation
While an in-place upgrade might seem like the simpler route, a clean installation of Windows 11 Pro offers profound benefits that significantly enhance performance, stability, and your overall computing experience.
- Optimal Performance and Stability: Over time, an operating system accumulates residual files, registry entries, and remnants of uninstalled programs. An upgrade carries this digital baggage forward. A clean install, by contrast, wipes the slate clean, removing all previous clutter and bloatware. This results in a fresh, lean operating system that boots faster, runs smoother, and is less prone to crashes or performance degradation. For critical business applications or intensive creative work, this performance boost is invaluable.
- Elimination of Software Conflicts and Bloatware: Many pre-built systems come bundled with unnecessary applications (bloatware) that consume resources and can even pose security risks. A clean installation allows you to start fresh, installing only the software you truly need. This not only frees up disk space and system memory but also reduces the potential for software conflicts that can lead to frustrating errors and system instability.
- Enhanced Security from a Fresh Start: Old operating systems can harbor hidden malware or vulnerabilities that might persist through an upgrade. A clean install ensures that your system starts with the latest security patches and a clean registry, creating a more secure foundation. Combined with the Pro features like BitLocker, this provides a formidable defense against modern digital threats. This directly impacts digital security and protects your brand’s reputation by preventing data loss or system compromise.
- Troubleshooting and System Restoration: Sometimes, an operating system becomes so bogged down with issues that troubleshooting becomes an endless cycle. A clean install is often the most effective solution, providing a guaranteed fresh start that resolves deep-seated problems without hours of diagnostic work. It’s the ultimate reset button, ensuring your investment in Windows 11 Pro delivers maximum value.
Essential Pre-Installation Preparations: Setting the Stage for a Seamless Setup
Before embarking on the installation journey, meticulous preparation is key. Skipping these vital steps can lead to frustrating roadblocks, data loss, or a compromised installation. Think of it as laying the groundwork for a robust and secure digital infrastructure.
Meeting System Requirements: TPM 2.0 and Secure Boot Explained
Windows 11 introduced stricter hardware requirements, primarily focusing on security and modern architecture. Understanding and meeting these is non-negotiable for a successful installation.
- Trusted Platform Module (TPM) 2.0: This is perhaps the most discussed requirement. TPM 2.0 is a cryptographic processor that provides hardware-level security functions, essential for features like BitLocker, Windows Hello, and overall system integrity. It’s designed to protect cryptographic keys and other sensitive data, making your system more resistant to boot-level attacks.
- How to Check: Press
Win + R, typetpm.msc, and press Enter. The TPM Management console will show if TPM is present, its version, and if it’s ready for use. If it says “Compatible TPM cannot be found,” you might need to enable it in your motherboard’s BIOS/UEFI settings. - Enabling TPM: Access your computer’s BIOS/UEFI (usually by pressing Del, F2, F10, or F12 during boot-up). Look for settings related to “Security,” “Boot,” or “Advanced.” The option might be named “Intel Platform Trust Technology (PTT),” “AMD fTPM,” or simply “TPM Device.” Enable it and save changes.
- How to Check: Press
- Secure Boot: This UEFI firmware feature ensures that your PC only boots using software (like drivers and OS boot loaders) trusted by the PC manufacturer. It prevents malicious software from loading during the startup process, enhancing system security.
- How to Check: Press
Win + R, typemsinfo32, and press Enter to open System Information. Look for “Secure Boot State.” It should say “On.” If it says “Off” or “Unsupported,” you’ll need to enable it in your BIOS/UEFI. - Enabling Secure Boot: In your BIOS/UEFI settings, navigate to the “Boot” or “Security” section. Find “Secure Boot” and set it to “Enabled.” You might need to disable “CSM” or “Legacy Boot” first, as Secure Boot typically requires UEFI mode.
- How to Check: Press
- Other Core Requirements:
- Processor: 1 GHz or faster with 2 or more cores on a compatible 64-bit processor or System on a Chip (SoC).
- RAM: 4 GB or greater.
- Storage: 64 GB or greater available space. An SSD is highly recommended for optimal performance.
- Graphics Card: Compatible with DirectX 12 or later with WDDM 2.0 driver.
- Display: High definition (720p) display that is greater than 9” diagonally, 8 bits per color channel.
- Internet Connection: Required for initial setup and ongoing updates.
Data Backup and Creating Your Installation Media
This is perhaps the most critical step. A clean installation will erase all data on the target drive. Do not proceed without a comprehensive backup.
- Backup Your Data: Before anything else, back up all important files, documents, photos, videos, and any other data you cannot afford to lose.
- External Drive: Use an external hard drive or SSD. Copy your user folders (Documents, Pictures, Videos, Music, Downloads, Desktop) and any other custom locations where you store data.
- Cloud Storage: Utilize services like OneDrive, Google Drive, Dropbox, or iCloud for automated cloud backups.
- Disk Imaging Software: For a more comprehensive backup, consider disk imaging software that can create a complete image of your current drive, allowing for full system restoration if needed.
- Creating Windows 11 Pro Installation Media: You’ll need a bootable USB drive (at least 8GB) containing the Windows 11 Pro installer.
- Microsoft Media Creation Tool (Recommended): This is the easiest and most reliable method.
- Go to the official Microsoft Windows 11 download page.
- Under “Create Windows 11 Installation Media,” download the tool.
- Run the tool, accept the terms, select “Create installation media (USB flash drive, DVD, or ISO file) for another PC.”
- Choose your language, edition (Windows 11, which includes Pro), and architecture (64-bit).
- Select “USB flash drive” and pick your connected USB drive. The tool will download the ISO and make the drive bootable.
- Direct ISO Download (Advanced): You can also download the Windows 11 Pro ISO file directly from Microsoft.
- On the same download page, under “Download Windows 11 Disk Image (ISO),” select “Windows 11” and confirm.
- Choose your product language and confirm.
- Download the 64-bit ISO file.
- Once downloaded, you’ll need a tool like Rufus to create a bootable USB drive from the ISO. Rufus offers more advanced options, including bypassing TPM/Secure Boot checks during media creation, though this is generally not recommended for a standard installation.
- Microsoft Media Creation Tool (Recommended): This is the easiest and most reliable method.
Gathering Your Digital Arsenal: Product Keys and Network Readiness
Beyond the installation media and backups, a few other items will ensure a smooth post-installation experience.
- Windows 11 Pro Product Key: Have your Windows 11 Pro product key ready. If you’re upgrading from an activated Windows 10 Pro, you might not need to enter it immediately as activation can occur digitally. However, for a fresh install on a new machine, it’s essential. The key is usually found on a sticker on your PC, in an email from an online retailer, or linked to your Microsoft account.
- Stable Internet Connection: A reliable internet connection is crucial. It’s needed for initial setup (especially if you’re setting up a Microsoft account), downloading the latest drivers, and applying critical Windows updates immediately after installation.
- Essential Drivers: While Windows 11 includes many generic drivers, it’s a good practice to download the latest chipset, graphics card, and network (Wi-Fi/Ethernet) drivers from your motherboard or laptop manufacturer’s website beforehand. Store them on a separate USB drive or your backup drive. This is especially important for network drivers, as you won’t have internet access to download them if Windows doesn’t provide a compatible one out of the box.
- List of Essential Software: Make a list of all the applications you need to reinstall (e.g., Office suite, web browsers, specialized business software, creative tools, AI tools, communication apps). Having this list helps streamline the post-installation setup and ensures you don’t miss anything important for your productivity.
Step-by-Step Installation: Guiding You Through the Windows 11 Pro Setup Process
With your preparations complete, it’s time to dive into the core installation process. This sequence will guide you from booting your machine to reaching the Windows 11 Pro desktop.
Configuring BIOS/UEFI for Booting and Security Features
For your computer to recognize and boot from the USB installation media, and to meet Windows 11’s security requirements, you’ll likely need to adjust settings in your BIOS/UEFI firmware.
- Enter BIOS/UEFI: Restart your computer and repeatedly press the designated key to enter BIOS/UEFI setup. Common keys include
Delete,F2,F10,F12, orEsc. The specific key often flashes on the screen during startup. - Enable TPM 2.0 and Secure Boot:
- Navigate to the “Security” or “Advanced” section.
- Locate “TPM Device,” “Intel PTT,” or “AMD fTPM” and ensure it is “Enabled.”
- Find “Secure Boot” and set it to “Enabled.” You might need to disable “CSM” (Compatibility Support Module) or “Legacy Boot” first if it’s enabled, as Secure Boot requires UEFI mode. Ensure your system is set to UEFI mode instead of Legacy.
- Set Boot Priority:
- Go to the “Boot” section.
- Change the boot order to prioritize your USB drive (it might appear as “UEFI: [USB Drive Name]”) as the first boot device.
- Save changes and exit BIOS/UEFI (usually by pressing
F10). Your computer will restart and attempt to boot from the USB drive.
Navigating the Windows Setup Wizard: From Boot to Desktop
Once your PC boots from the USB drive, the Windows 11 Pro installation wizard will begin. Follow these steps carefully:
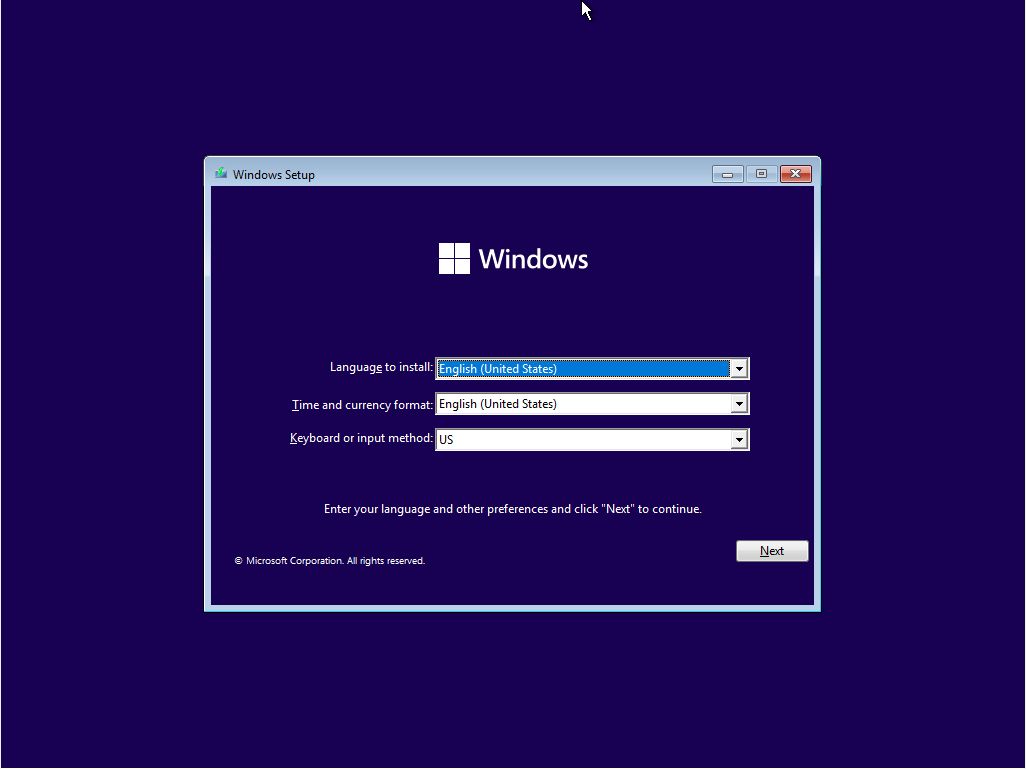
- Initial Setup Screen:
- Select your preferred “Language to install,” “Time and currency format,” and “Keyboard or input method.” Click “Next.”
- Click “Install now.”
- Product Key:
- Enter your Windows 11 Pro product key when prompted.
- If you don’t have one readily available or are confident your device has a digital license, you can click “I don’t have a product key” to continue. You can activate Windows later.
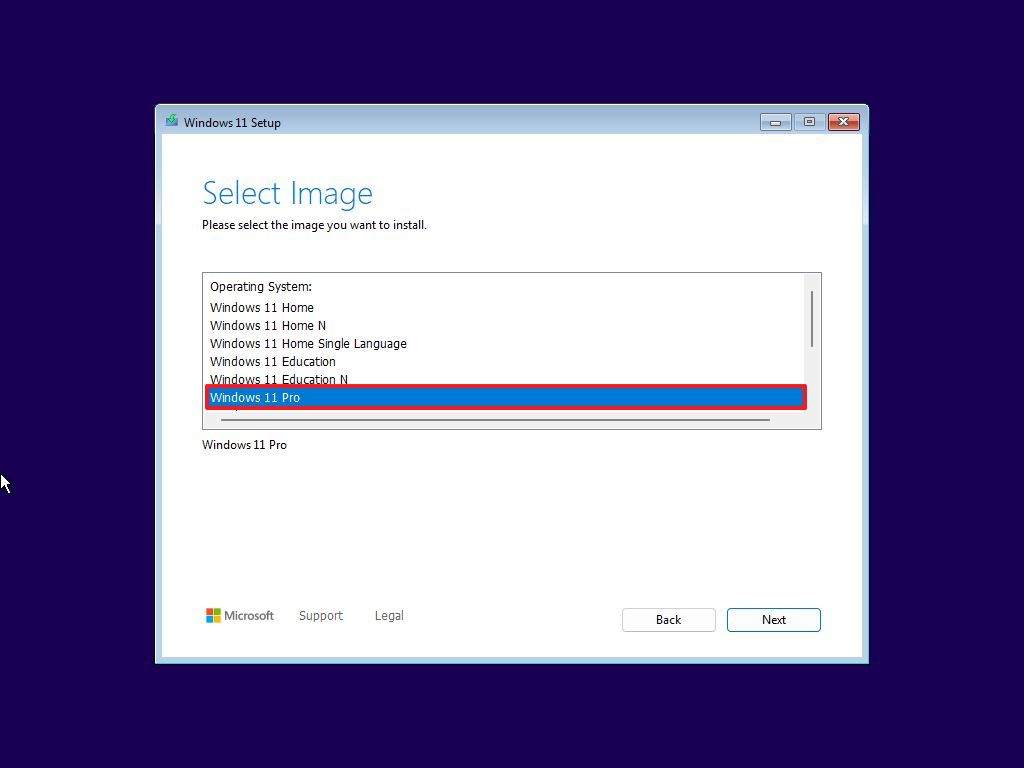
- Choose Operating System (if applicable): If your installation media contains multiple versions, select “Windows 11 Pro” and click “Next.”
- Accept License Terms: Read the Microsoft Software License Terms, check the “I accept the license terms” box, and click “Next.”
- Choose Installation Type:
- Select “Custom: Install Windows only (advanced).” This is crucial for a clean installation. Do NOT choose “Upgrade” as it preserves existing files and programs, defeating the purpose of a clean install.
- Partitioning and Formatting the Drive:
- You’ll see a list of drives and partitions. To perform a truly clean install, you’ll need to delete existing partitions on the drive where you want to install Windows.
- Select each partition on your target drive (e.g., “Drive 0 Partition 1,” “Drive 0 Partition 2,” etc.) and click “Delete” for each one. Be absolutely sure you are deleting partitions on the correct drive, as this action is irreversible and will erase all data.
- Once all partitions are deleted, you should have “Drive 0 Unallocated Space.”
- Select the “Unallocated Space” and click “New” to create a new partition. Windows will typically suggest the maximum available size. Click “Apply” and then “OK” if prompted to create additional system partitions.
- Select the largest partition (usually named “Drive 0 Partition X: Primary”) and click “Next.” The installer will automatically format it and begin copying files.
- Copying Files and Initial Reboots: Windows will now copy installation files, install features, and install updates. Your computer will restart several times during this process. Do not remove the USB drive until after the final restart when you see the out-of-box experience (OOBE) setup screen.
Initial Configuration and First Boot Optimizations
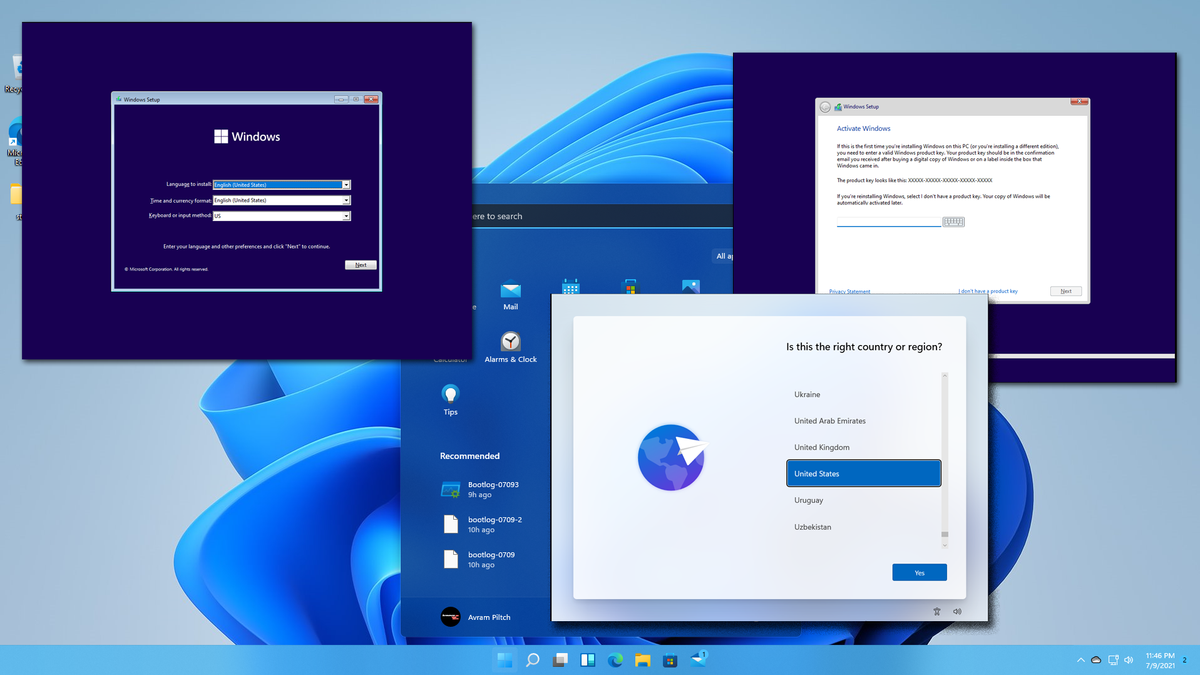
After the final restart, you’ll be greeted by the Windows 11 Pro out-of-box experience (OOBE).
- Region and Keyboard Layout: Select your country/region and keyboard layout. You can add a second keyboard layout if needed.
- Network Connection: Connect to a Wi-Fi network or plug in an Ethernet cable. An internet connection is often required to proceed with account setup.
- Name Your Device: Give your PC a descriptive name (e.g., “Workstation-Pro,” “MyLaptop”).
- How will you set up this device? Choose “Set up for work or school” for Windows 11 Pro to access advanced features like Active Directory or Microsoft Entra ID (formerly Azure AD) join. If you’re a single user but want Pro features, you can still choose “Set up for personal use” but will typically still be prompted for a Microsoft Account.
- Sign in with your Microsoft account: Enter your Microsoft account email address, phone number, or Skype name. If you don’t have one, you can create one. For business environments, you might sign in with an organizational account.
- Local Account (Workaround): If you absolutely need a local account without an internet connection or don’t want to link a Microsoft account initially, you might need to bypass the network connection step if available (often by pressing Shift + F10 and typing
oobebypassnroand rebooting), though Microsoft makes this harder in Windows 11. For Pro, using a Microsoft or organizational account is standard.
- Local Account (Workaround): If you absolutely need a local account without an internet connection or don’t want to link a Microsoft account initially, you might need to bypass the network connection step if available (often by pressing Shift + F10 and typing
- Create a PIN: Set up a PIN for faster, more secure sign-ins.
- Privacy Settings: Review the privacy settings (Location, Find my device, Diagnostic data, Inking & typing, Tailored experiences, Advertising ID). Adjust them to your preference for digital security and data sharing, then click “Accept.”
- Customize Your Experience: Windows might ask how you plan to use your device (e.g., Gaming, Creativity, School, Business). This helps tailor recommendations, though it’s optional.
- OneDrive Setup: Decide whether to use OneDrive for cloud backup of your files.
- Windows Updates and Finalizing: Windows will perform final checks and download any pending updates. This may take a few minutes.
- Welcome to Desktop: Eventually, you’ll be presented with the Windows 11 Pro desktop. Congratulations!
Post-Installation Essentials: Optimizing Your New Windows 11 Pro Environment
Your fresh Windows 11 Pro installation is now complete, but the work isn’t over. Several crucial steps remain to ensure your system is fully optimized, secure, and ready for productive use.
Driver Installation and System Updates: Ensuring Peak Performance
Drivers are the vital software that allows your hardware components to communicate effectively with the operating system. Updates ensure security, stability, and access to the latest features.
- Install Essential Drivers:
- Check Device Manager: Right-click the Start button and select “Device Manager.” Look for any devices with yellow exclamation marks, indicating missing or outdated drivers.
- Manufacturer Websites: Visit your computer or motherboard manufacturer’s website (e.g., Dell, HP, ASUS, MSI, Gigabyte). Download the latest chipset, graphics card (Intel, NVIDIA, AMD), network (Wi-Fi and Ethernet), and audio drivers specifically for Windows 11 and your model. Install them one by one, rebooting as needed. Start with the chipset drivers first.
- Graphics Drivers: Always get these from the GPU manufacturer’s site (NVIDIA, AMD, Intel) for the best performance in gaming, video editing, or other graphics-intensive tasks.
- Run Windows Update:
- Go to
Settings > Windows Update. Click “Check for updates.” - Download and install all available updates, including optional updates that might contain additional drivers. This is crucial for digital security, patching vulnerabilities, and ensuring system stability. You may need to restart your PC multiple times. Keep checking until no more updates are found.
- Go to
- Update Microsoft Store Apps: Open the Microsoft Store, go to “Library,” and click “Get updates” to ensure all pre-installed apps are current.
Securing and Personalizing Your Workspace: Tools for Productivity and Peace of Mind
With drivers and updates handled, focus on securing your system and tailoring it to your workflow.
- Activate Windows (if not already):
- Go to
Settings > System > Activation. If it’s not activated, enter your product key or troubleshoot with the activation troubleshooter.
- Go to
- Enable BitLocker (for Pro users):
- For robust digital security, especially on laptops or sensitive workstations, enable BitLocker.
- Search for “Manage BitLocker” in the Start Menu. Follow the prompts to encrypt your OS drive. Make sure to back up your recovery key (to your Microsoft account, a file, or print it).
- Install Antivirus/Anti-Malware Software:
- While Windows Defender is robust, consider a third-party antivirus solution if you have specific needs or preferences, especially in a corporate environment. Ensure it’s reputable and kept updated.
- Install Your Essential Software:
- Refer to the list you made earlier. Install your web browsers, productivity suites (Microsoft Office, Google Workspace apps), communication tools (Teams, Slack), creative software (Adobe Creative Cloud), AI tools, and any specialized business applications. Download them directly from official sources to avoid malware.
- Restore Your Backed-Up Data:
- Copy your personal files (documents, pictures, videos) from your backup drive or cloud storage back to their respective locations on your new Windows 11 Pro installation.
- Personalize Your Desktop:
- Customize your desktop background, theme, colors, and Start Menu layout. Pin your frequently used apps to the Taskbar for quick access. Optimize your notification settings to minimize distractions and enhance productivity.
- Configure Sync Settings:
- If you use a Microsoft account, review
Settings > Accounts > Windows backupto configure preferences for syncing settings, passwords, and preferences across your devices.
- If you use a Microsoft account, review
- Explore Productivity Features:
- Familiarize yourself with Windows 11’s new features like Snap Layouts and Groups for multitasking, Widgets for quick information access, and the improved Microsoft Teams integration. These tools are designed to boost your efficiency and streamline your workflow, directly impacting your daily productivity and potentially your online income strategies if you leverage these tools effectively.
Troubleshooting Common Installation Hurdles and Final Thoughts
Even with meticulous preparation, you might encounter issues. Knowing how to address them quickly can save you significant time and frustration.
Addressing Persistent Installation Errors
- TPM/Secure Boot Errors: If Windows 11 setup keeps complaining about TPM or Secure Boot, double-check your BIOS/UEFI settings. Ensure you’re in UEFI mode (not Legacy BIOS) and that both TPM 2.0 and Secure Boot are explicitly enabled. Some systems might require “CSM” or “Legacy Support” to be disabled first.
- “No Device Drivers Were Found”: This usually means the installer can’t find drivers for your storage controller (NVMe drives, RAID configurations). Download the appropriate storage drivers from your motherboard manufacturer’s website to another USB drive. During installation, when prompted, click “Load driver” and point to the driver files on that USB drive.
- Disk Partitioning Errors: If you struggle to delete or create partitions, ensure you’re working with the correct drive. Disconnect any other unnecessary drives temporarily. If the disk is very old, it might have issues, or you might need to use
diskpartfrom the command prompt (Shift + F10 during setup) to clean the drive (select disk X,clean). Usecleanwith extreme caution as it wipes the entire disk. - Installation Freezes or Reboots Unexpectedly: This could indicate faulty RAM, an unstable CPU overclock, or a problem with your installation media. Try recreating the USB media, test your RAM with a diagnostic tool (like MemTest86), and ensure your CPU is running at stock speeds.
Maximizing Your Windows 11 Pro Experience
Installing Windows 11 Pro is just the beginning. To truly leverage its power, embrace ongoing optimization and exploration.
- Regular Maintenance: Implement a routine of checking for Windows Updates, updating drivers, running disk cleanup, and performing system scans with your antivirus. Regular maintenance keeps your system running smoothly and securely.
- Explore Advanced Features: Dive deeper into features like Group Policy Editor (
gpedit.msc) for fine-grained system control, Hyper-V for virtualization projects, and Windows Sandbox for secure application testing. These tools offer significant value for advanced users and can further enhance your digital security and productivity. - Stay Informed on Tech Trends: Keep an eye on the latest technology trends, especially new AI tools and software integrations that are constantly being developed for Windows. Microsoft is continuously evolving Windows 11, and staying updated can unlock new efficiencies and capabilities for your work.
- Network with Professionals: Engage in tech communities and forums. Sharing experiences and tips with other IT professionals and power users can uncover hidden gems and best practices for managing your Windows 11 Pro environment.
A clean installation of Windows 11 Pro provides a powerful, secure, and efficient foundation for all your computing needs. By following this comprehensive guide, you’ve not only installed a modern operating system but also laid the groundwork for enhanced productivity, robust digital security, and a system optimized for the demands of today’s technology-driven world. Embrace the fresh start, explore the advanced features, and enjoy a seamless, high-performance computing experience that truly empowers your professional and personal endeavors.
aViewFromTheCave is a participant in the Amazon Services LLC Associates Program, an affiliate advertising program designed to provide a means for sites to earn advertising fees by advertising and linking to Amazon.com. Amazon, the Amazon logo, AmazonSupply, and the AmazonSupply logo are trademarks of Amazon.com, Inc. or its affiliates. As an Amazon Associate we earn affiliate commissions from qualifying purchases.