In the ever-evolving landscape of technology, developers are the architects of our digital future. From the innovative apps that streamline our daily lives to the robust enterprise systems that power global industries, software development stands at the core of progress. At the heart of this creation process often lies a powerful and versatile tool: Visual Studio. More than just an Integrated Development Environment (IDE), Visual Studio is a comprehensive ecosystem designed to empower developers across various platforms, languages, and project types. For anyone looking to dive into the world of coding, enhance their existing skills, or optimize their workflow, understanding how to properly install and configure Visual Studio is an indispensable first step.
This guide will walk you through the entire process, from understanding what Visual Studio offers to the final touches of setting up your development environment. We’ll not only cover the technical “how-to” but also explore why Visual Studio remains a cornerstone of professional development, how mastering it can bolster your personal brand in the tech sector, and even its implications for your career and financial growth. Whether you’re a budding enthusiast or an experienced developer migrating to a new machine, preparing to embark on an ambitious project, this detailed tutorial ensures you can confidently install Visual Studio and unlock its full potential.
Understanding Visual Studio: More Than Just an IDE
Visual Studio, developed by Microsoft, is widely recognized as one of the most comprehensive IDEs available today. Its robust feature set and versatility make it a go-to choice for a vast spectrum of developers and organizations. However, to truly appreciate the installation process, it’s essential to first grasp the magnitude of what this software offers and its strategic importance in the current tech climate.
The Powerhouse for Modern Development
At its core, Visual Studio is designed to facilitate every stage of the software development lifecycle. It offers an unparalleled suite of tools for coding, debugging, testing, and deploying applications across various platforms. From desktop applications built with .NET (like WPF or WinForms) to cross-platform mobile apps using Xamarin, cloud services with Azure, web development with ASP.NET, and even game development with Unity, Visual Studio provides integrated support. This broad compatibility means that a single IDE can cater to diverse project requirements, significantly reducing the learning curve and context switching that often plague multi-tool environments.
The IDE’s intelligent code editor, known as IntelliSense, offers real-time suggestions, error detection, and code completion, drastically improving productivity and reducing syntax errors. Its powerful debugger allows developers to step through code, inspect variables, and identify issues with remarkable precision. Integrated version control features, particularly with Git, ensure seamless collaboration and project management. Furthermore, the constant evolution of Visual Studio, incorporating new technologies like AI-assisted coding through GitHub Copilot, positions it at the forefront of technology trends, making it an indispensable tool for staying competitive.
Visual Studio’s Place in the Tech Ecosystem
In the grand tapestry of the tech ecosystem, Visual Studio holds a prominent and often foundational position. It’s not just a tool; it’s a platform that enables innovation across various technology trends. For businesses, adopting Visual Studio often means leveraging a stable, well-supported, and continuously updated development environment that integrates seamlessly with other Microsoft technologies and cloud services like Azure. This integration is crucial for digital security, ensuring that applications built are not only functional but also secure and compliant with modern standards.
From the perspective of software development, Visual Studio encourages best practices. Its comprehensive testing frameworks help ensure code quality, while its deployment tools simplify the often-complex process of getting an application into production. For organizations large and small, standardizing on Visual Studio can streamline workflows, enhance team collaboration, and ultimately accelerate product delivery. This strategic alignment with industry standards and future-proof technologies makes Visual Studio a critical asset for any entity serious about its digital footprint and technological advancement.
Why Your Personal Brand Benefits from Mastering Visual Studio
Beyond its technical capabilities, proficiency in Visual Studio can significantly elevate your personal brand within the tech community. In today’s competitive job market, demonstrating mastery of industry-standard tools is as important as possessing theoretical knowledge. Visual Studio is a recognized benchmark for professional developers, especially in corporate environments where Microsoft technologies are prevalent.
Listing Visual Studio expertise on your resume or professional profile signals to potential employers that you are capable of working on complex projects, are familiar with robust development practices, and can integrate into established teams. Furthermore, active engagement with Visual Studio’s extensive ecosystem, including contributing to open-source projects, developing extensions, or simply sharing your knowledge in online forums, positions you as a valuable contributor to the tech dialogue. This dedication not only showcases your skills but also your commitment to continuous learning and professional growth, which are highly attractive qualities for any hiring manager. Mastering this tool doesn’t just enable you to build software; it enables you to build a stronger, more credible personal brand as a competent and reliable developer.
Preparing for Installation: Essential Prerequisites and Considerations
Before you dive headfirst into the installation process, a bit of preparation can save you considerable time and potential frustration. Just as an architect reviews blueprints before construction begins, understanding the foundational requirements and making informed decisions beforehand will ensure a smooth and successful Visual Studio setup. This phase is crucial for optimizing your development environment right from the start.
Meeting System Requirements
Visual Studio is a powerful application, and as such, it requires adequate system resources to run optimally. While modern machines typically meet these specifications, it’s always wise to verify them beforehand. Key considerations include:
- Operating System: Visual Studio generally requires a 64-bit operating system such as Windows 10 version 1909 or higher, Windows 11, or Windows Server 2019/2022. Earlier versions of Windows or 32-bit systems are typically not supported for the latest versions.
- Processor: A 1.8 GHz or faster processor is recommended, with quad-core or higher processors for better performance.
- RAM: A minimum of 4 GB RAM is required, but 8 GB or more is highly recommended, especially if you plan to work with multiple projects, large solutions, or memory-intensive tasks like mobile development or game development. 16 GB or higher will provide the best experience.
- Hard Disk Space: This is a crucial factor. Visual Studio can consume a significant amount of disk space, depending on the workloads and components you choose to install. A full installation with multiple workloads can easily exceed 50-100 GB. It’s recommended to have at least 20-50 GB of free space before installation, ideally on a Solid State Drive (SSD) for vastly improved performance during compilation and application loading.
- Screen Resolution: A display with a resolution of 1280×720 or higher is recommended for an optimal user experience.
Ensure your system meets or exceeds these recommendations. An underpowered machine can lead to a sluggish development experience, impacting your productivity and overall enjoyment of coding.
Choosing the Right Visual Studio Edition
Visual Studio comes in several editions, each tailored to different user needs and budgets. Understanding these differences is vital for making the right choice:
- Visual Studio Community: This is the free, fully-featured IDE for students, open-source contributors, and individual developers. It offers almost all the functionalities of the professional version and is perfect for learning, personal projects, and small team development (under specific revenue/user limitations for commercial use). For most individual users and small startups, this is the ideal choice.
- Visual Studio Professional: Aimed at small to medium-sized teams and professional developers, this paid edition includes additional features like CodeLens, advanced testing tools, and enhanced collaboration capabilities. It requires a subscription.
- Visual Studio Enterprise: The most comprehensive and expensive edition, designed for large enterprises and complex solutions. It includes all Professional features plus advanced testing, debugging, profiling, architecture and modeling tools, and extensive support options. This is typically used by large corporate entities.
For the purpose of installation, the process is largely identical across editions, but your choice will impact available features and licensing. For most independent developers or those just starting, Visual Studio Community is the logical and highly capable choice.
Pre-Installation Checklist: Optimizing for Success
Before initiating the installer, a few final checks can prevent common issues:
- Internet Connection: A stable and fast internet connection is essential. Visual Studio downloads many components during installation, and a slow connection can prolong the process significantly.
- Administrator Privileges: Ensure you have administrator rights on your machine, as the installation requires system-level changes.
- Close Other Applications: Close any unnecessary applications to free up system resources and avoid conflicts during the installation.
- Antivirus/Firewall: Temporarily disabling your antivirus or firewall might be necessary in some rare cases if it interferes with the download or installation of certain components. Remember to re-enable them immediately after installation.
- Backup: While installing Visual Studio is generally safe, it’s always good practice to have recent backups of important files, especially if you’re making significant changes to your system.
By diligently going through this preparation phase, you lay a solid foundation for a seamless Visual Studio installation, ensuring that your development environment is robust, efficient, and ready to tackle any coding challenge you throw at it.
The Step-by-Step Installation Process
With your preparations complete, it’s time to embark on the core process: installing Visual Studio. This section will guide you through each critical step, from obtaining the installer to making crucial decisions about the components you’ll need. Paying close attention to these details will ensure your IDE is perfectly tailored to your development goals.
Downloading the Visual Studio Installer
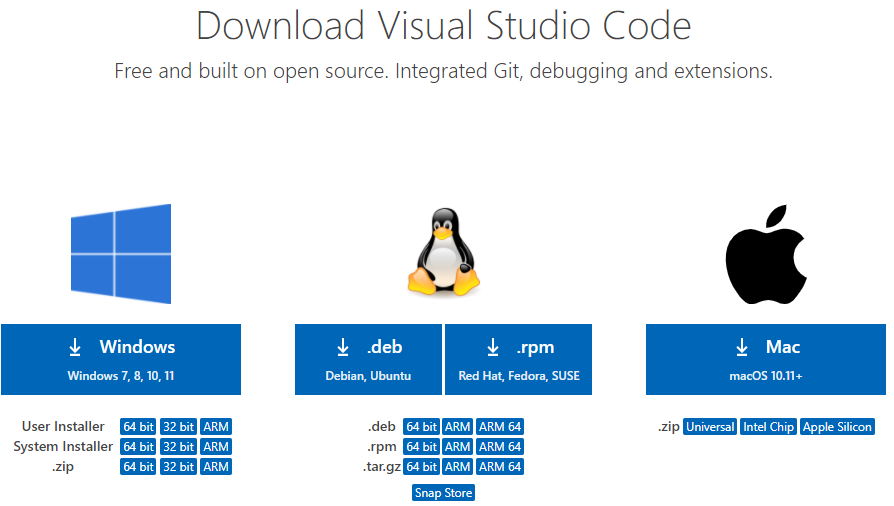
The journey begins at the official source. Always download Visual Studio directly from Microsoft’s website to ensure you receive a legitimate, secure, and up-to-date version.
- Navigate to the Official Website: Open your web browser and go to the official Visual Studio download page (usually visualstudio.microsoft.com/downloads).
- Select Your Edition: You will see options for Visual Studio Community, Professional, and Enterprise. As discussed, for most individuals, the “Community” edition is the recommended starting point due to its full feature set and free availability for eligible users. Click the “Free download” button under the Visual Studio Community section.
- Save the Installer: A small executable file (e.g.,
vs_community.exe) will be downloaded. Save this file to a convenient location, such as your Downloads folder. This file is not the full IDE; it’s a bootstrap installer that manages the actual download and installation of components.
Navigating the Workload Selection: Tailoring Your Development Environment
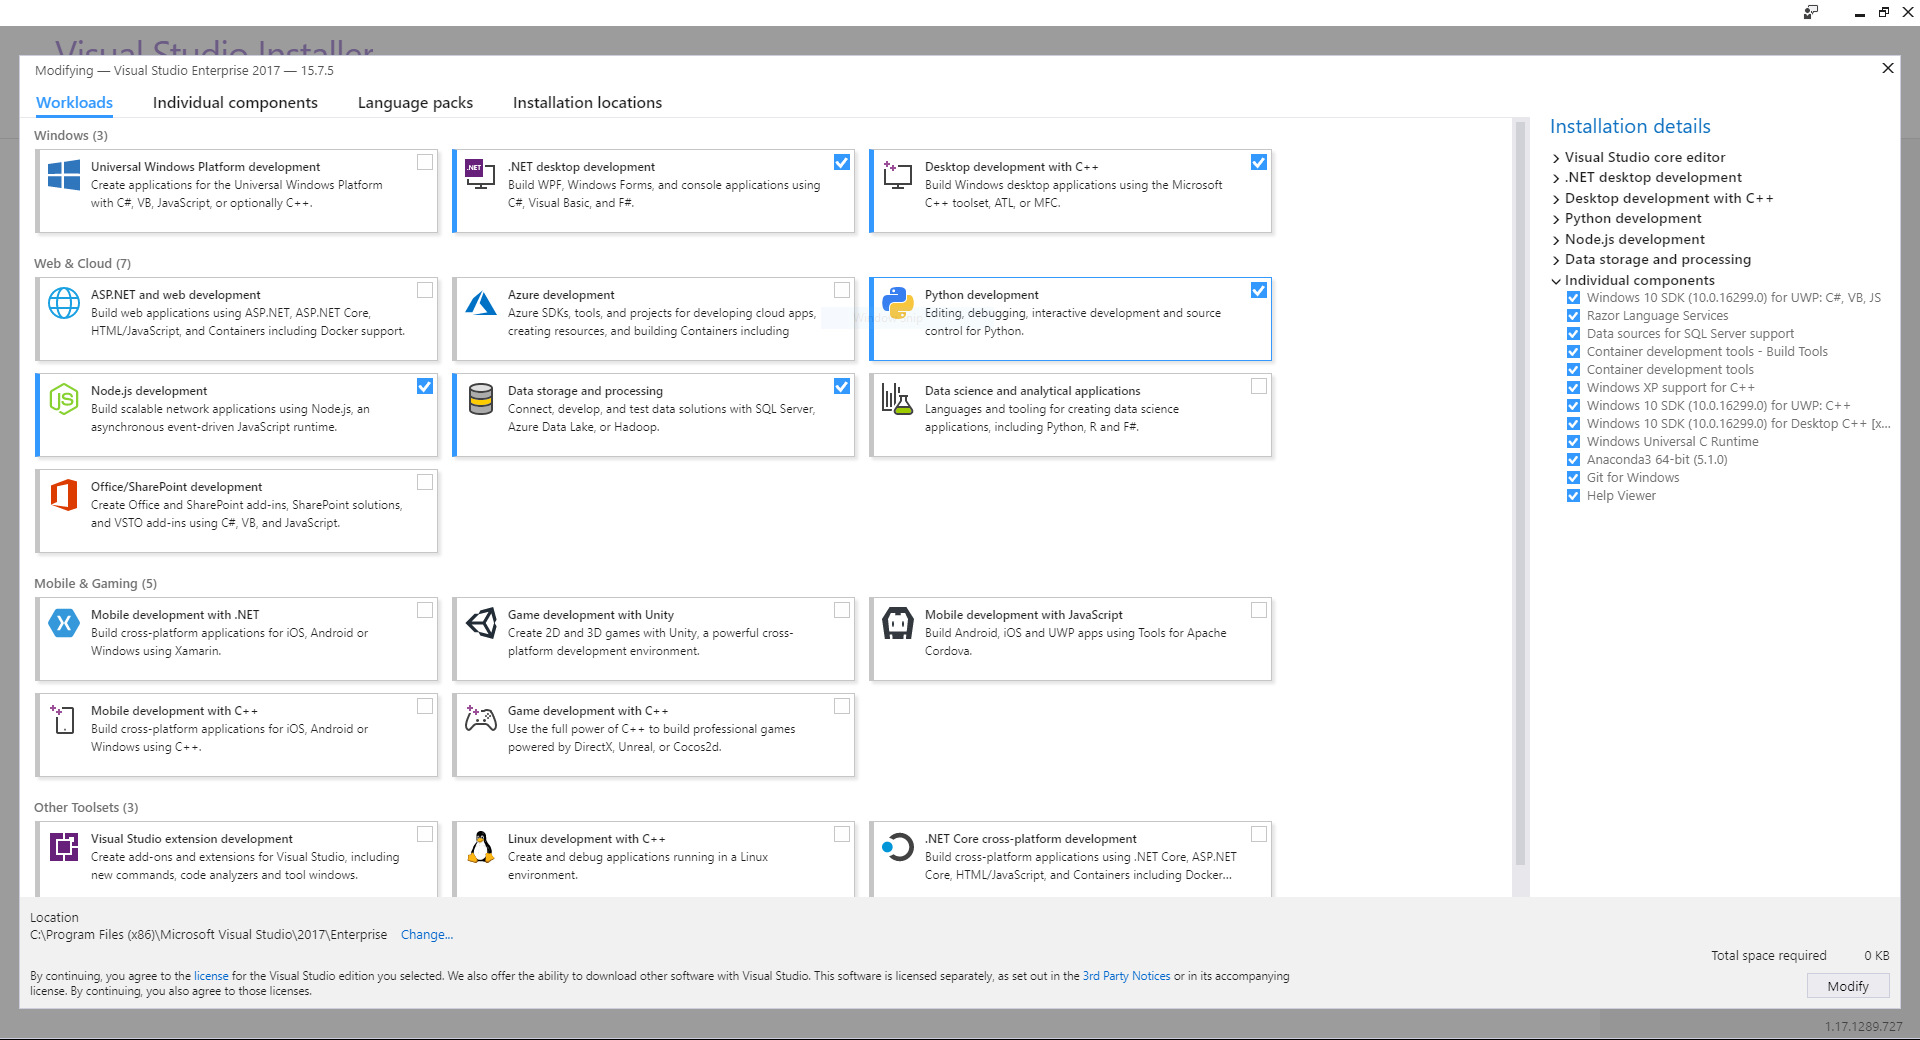
Once the installer executable is downloaded, double-click it to begin the process. The Visual Studio Installer will first perform some initial setup and then present you with the most critical decision point: selecting your workloads. Workloads are pre-configured groups of components, tools, and SDKs designed for specific development scenarios. This modular approach allows you to install only what you need, saving disk space and reducing installation time.
- Initial Setup: The installer will launch and prompt you to agree to the terms and conditions. Click “Continue.” It will download a few initial files to prepare for the main installation.
- Workloads Tab: After the initial download, you’ll be presented with the “Workloads” tab. This is where you choose the development types you’ll be engaging in. Common workloads include:
- Desktop development with C++: For building Windows desktop applications using C++, Win32, MFC, and more.
- .NET desktop development: For creating Windows desktop apps with C#, VB.NET, or F# using WPF, WinForms, and UWP.
- ASP.NET and web development: Essential for building web applications, APIs, and microservices using ASP.NET Core, Node.js, and client-side frameworks.
- Azure development: For building cloud-native applications and services that integrate with Microsoft Azure.
- Mobile development with .NET: For cross-platform mobile app development (iOS, Android) using Xamarin.
- Game development with Unity: For creating 2D and 3D games using the Unity engine.
- Python development / Node.js development / Data storage and processing: For specific language or data-focused tasks.
Carefully review the workloads and check the boxes for those relevant to your current and anticipated projects. Remember, you can always modify your installation later to add or remove workloads.
- Individual Components (Optional but Recommended): Next to the “Workloads” tab, you’ll find “Individual components.” While workloads cover most needs, this tab allows for fine-grained control. You might use it to:
- Select specific versions of .NET SDKs.
- Add language packs.
- Install additional tools not bundled in a workload, like specific C++ compilers or debugging tools.
- Integrate AI tools or machine learning components.
For beginners, sticking to workloads is often sufficient. However, if you have specific requirements, this tab provides the flexibility.
- Language Packs (Optional): If you prefer Visual Studio’s UI in a language other than English, navigate to the “Language packs” tab and select your preferred language.
- Installation Location: Under the “Installation locations” tab, you can choose where Visual Studio and its components will be installed. While the default location is usually fine, if you have multiple drives, consider installing it on an SSD for performance benefits.
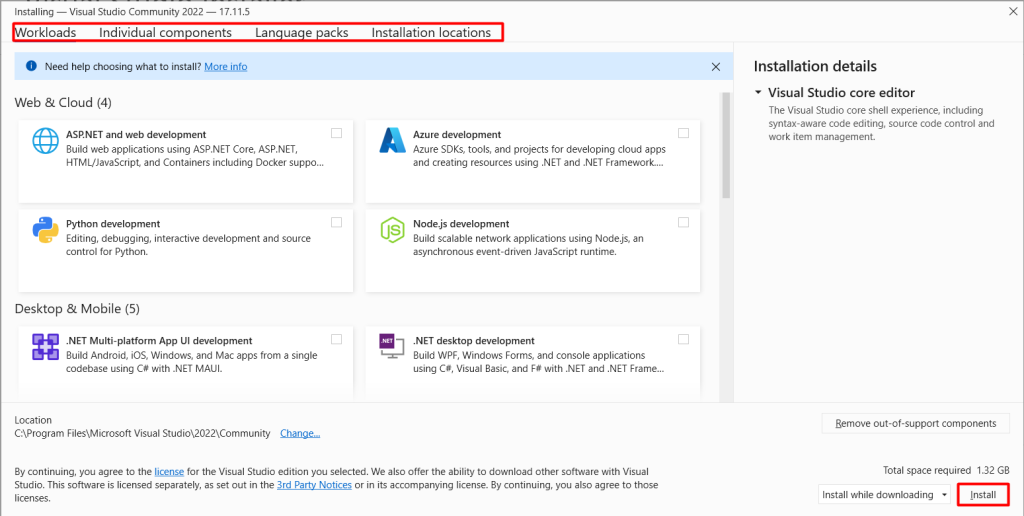
- Review and Install: Once you’ve selected your desired workloads and components, the installer will display the total download size and required disk space. Review this information. If everything looks correct, click the “Install” button.
Initiating and Monitoring the Installation
After clicking “Install,” Visual Studio will begin downloading and installing the selected components. This process can take a considerable amount of time, ranging from 30 minutes to several hours, depending on your internet speed, the number of selected workloads, and your system’s performance.
- Download and Install Progress: The installer window will display a progress bar, showing the download and installation status. It will cycle through “Downloading,” “Verifying,” and “Installing” stages for various packages.
- Patience is Key: Resist the urge to interrupt the process. Let it run its course. You can minimize the installer window and continue with other tasks, but avoid heavy CPU/disk usage that might slow down the installation.
- Completion: Once the installation is complete, the installer will inform you that Visual Studio is ready. You will typically see an “Launch” button.
Congratulations! The bulk of the installation is now behind you. You’ve successfully configured and installed the core Visual Studio environment tailored to your development needs.
Post-Installation: Configuration, Customization, and First Steps
Installing Visual Studio is a significant milestone, but the journey doesn’t end there. To truly maximize its potential and ensure a productive, secure, and personalized development experience, a few post-installation steps are essential. This phase focuses on refining your environment, staying updated, and leveraging advanced features that enhance your coding journey and contribute to your digital security and overall productivity.
Initial Setup and Account Integration
The first time you launch Visual Studio, you’ll be greeted with a setup wizard that allows you to personalize your experience.
- First Launch: Click the “Launch” button from the installer or find “Visual Studio” in your Start Menu.
- Sign In: You’ll be prompted to sign in with a Microsoft account. This is highly recommended, especially for Visual Studio Community edition users, as it’s required for full feature access and to comply with the license terms. Signing in also allows you to sync your settings across multiple installations and devices, a great productivity booster. If you don’t have a Microsoft account, you can create one for free.
- Development Settings: After signing in, you’ll be asked to choose a “Development Settings” profile (e.g., General, C#, C++, Web Development). This choice optimizes the IDE’s layout, shortcuts, and default project templates for your primary development focus. You can change this later.
- Color Theme: Select your preferred color theme (e.g., Light, Dark, Blue, Blue (Extra Contrast)). The “Dark” theme is popular among developers for reducing eye strain. This, too, can be changed later through Tools > Options.
- Start Developing: Once these initial choices are made, Visual Studio will load, and you’ll be presented with the start window, ready to create your first project or open an existing one.
Exploring Extensions and Enhancing Productivity
Visual Studio’s power is significantly amplified by its vast ecosystem of extensions. These add-ons provide extra functionalities, integrate with other tools, and offer specialized features that can dramatically enhance your productivity and tailor the IDE to your specific workflow.
- Accessing Extensions: Go to
Extensions > Manage Extensionsin the Visual Studio menu bar. This will open the “Manage Extensions” window, where you can browse, install, update, or disable extensions. - Online Gallery: In the “Online” section, you’ll find the Visual Studio Marketplace, teeming with thousands of extensions. Popular extensions often include:
- Productivity Tools: Enhancements for code navigation, refactoring, and quality.
- Theme Packs: Custom themes beyond the default options.
- Specific Framework Support: Tools for frameworks not fully covered by default workloads.
- Version Control Integrations: Deeper integration with Git clients or other VCS.
- AI Tools: Increasingly, extensions like GitHub Copilot (if not already integrated) offer AI-powered code suggestions, transforming the coding experience. While some of these might be paid services, the productivity gains can justify the investment, especially when considering the “money” aspect – faster development directly translates to more value.
- Installation and Restart: To install an extension, simply click “Download.” It will be scheduled for installation, and you’ll need to close all Visual Studio instances for the VSIX Installer to run and complete the setup.
- Careful Selection: While extensions are great, installing too many unnecessary ones can sometimes slow down the IDE. Choose extensions that genuinely add value to your specific development tasks.
Leveraging the right extensions not only boosts your personal productivity but also refines your personal brand as a developer who optimizes their tools for peak performance.
Keeping Your Environment Secure and Up-to-Date
In the fast-paced tech world, security and staying current are paramount. Regularly updating Visual Studio is crucial for digital security, performance improvements, and access to the latest features and bug fixes.
- Checking for Updates: Go to
Help > Check for Updatesin the Visual Studio menu bar. The Visual Studio Installer will launch and notify you if updates are available. - Applying Updates: If updates are found, click “Update” in the installer. This process is similar to the initial installation, downloading and applying necessary files. It’s often quicker than a full installation.
- Why Update?:
- Digital Security: Updates frequently include patches for security vulnerabilities, protecting your development environment and the applications you build from potential threats.
- Performance and Stability: Microsoft continuously refines Visual Studio, offering performance enhancements and bug fixes that improve the overall stability and speed of the IDE.
- New Features and Language Support: Updates introduce new features, support for the latest programming language versions (e.g., C# upgrades), and compatibility with new frameworks and platforms.
- Productivity: Leveraging new features and improved tools contributes directly to your productivity, allowing you to write better code faster.
- Frequency: It’s a good practice to check for updates regularly, perhaps once a month or whenever you notice a notification from Visual Studio.
By keeping Visual Studio updated, you ensure that your development environment remains secure, performant, and equipped with the cutting-edge tools necessary to thrive in the ever-evolving technology landscape. This attention to detail reflects a professional approach that strengthens both your work and your personal brand.
Maximizing Your Visual Studio Investment: Career & Financial Implications
Installing and learning Visual Studio is more than just acquiring a software tool; it’s an investment in your career and potential financial future. In a world increasingly driven by software, the ability to effectively create and manage applications translates directly into tangible professional and monetary benefits. Understanding these broader implications can motivate you to delve deeper into mastering this powerful IDE.
Unlocking Career Opportunities
Proficiency in Visual Studio opens doors to a vast array of career opportunities across various industries. Microsoft technologies, particularly .NET and Azure, are foundational in many enterprise environments. Businesses large and small rely on developers who can build robust, scalable, and secure applications using these tools.
- High Demand: Roles such as C# Developer, .NET Engineer, Azure Cloud Developer, and Xamarin Mobile Developer are consistently in high demand. These positions are often associated with competitive salaries and strong job security due to the critical nature of the software they create.
- Versatility: Visual Studio’s support for multiple languages and platforms (web, desktop, mobile, cloud, games, AI/ML) means that mastering it provides a versatile skill set. You’re not just limited to one niche; you can pivot to different areas of development as your interests or market demands change.
- Corporate Branding: Many global corporations, recognizing Microsoft’s robust ecosystem, prioritize hiring developers familiar with Visual Studio. Becoming proficient aligns you with these corporate identities and enhances your brand as a professional capable of contributing to large-scale, enterprise-grade projects.
- Startup and Innovation: Even in the startup world, where agility is key, Visual Studio and its underlying technologies offer powerful frameworks for rapid prototyping and deployment, making you an attractive asset to innovative ventures.
Learning Visual Studio is a direct path to becoming a sought-after professional in the tech industry, providing the foundation for a rewarding and dynamic career.
Leveraging Productivity for Financial Gain
The integrated features and powerful tools within Visual Studio are designed to maximize developer productivity. This efficiency directly translates into financial benefits, whether you’re working for an employer, freelancing, or building your own ventures.
- Increased Efficiency: Features like IntelliSense, robust debugging, integrated testing, and refactoring tools help you write cleaner code faster, identify and fix bugs more efficiently, and manage complex projects with greater ease.
- Higher Output: More efficient coding means you can complete projects in less time. For salaried employees, this can lead to faster promotions, higher bonuses, and recognition as a high-value contributor. For freelancers, it means taking on more projects, delivering them quicker, and thus increasing your hourly or project-based income.
- Reduced Costs: For businesses, developers proficient in Visual Studio help reduce development costs by minimizing errors, accelerating time-to-market, and requiring fewer resources for maintenance. If you’re building your own business applications, this directly impacts your bottom line.
- Monetizing Skills: With Visual Studio, you can create applications that generate online income. This could range from building mobile apps to sell on app stores, developing web services that charge subscription fees, or creating desktop utilities that solve specific problems for paying customers. The investment in learning Visual Studio becomes a direct enabler for side hustles and entrepreneurial ventures.
Every optimization, every bug prevented, and every hour saved through Visual Studio’s capabilities contributes to a more productive, and ultimately, more profitable development journey.
Visual Studio as a Foundation for Future Tech Ventures
For those with entrepreneurial aspirations, Visual Studio serves as an excellent foundation for launching future tech ventures. Its comprehensive toolkit allows individuals or small teams to develop sophisticated applications without the need for an extensive array of disparate tools.
- From Idea to Product: Whether you envision an AI-powered data analysis tool, a secure e-commerce platform, or an educational gaming app, Visual Studio provides the necessary environment to bring these ideas to life. You can design, code, test, and even deploy your applications directly from the IDE.
- Scalability with Cloud: Its deep integration with Azure means that applications built in Visual Studio can easily scale to meet growing user demands, providing a robust backbone for any successful online business. This is crucial for managing financial growth as your user base expands.
- Innovation with AI Tools: With the increasing integration of AI tools and machine learning capabilities into Visual Studio and its extensions, developers are empowered to build intelligent applications that can offer unique value propositions, potentially leading to lucrative new businesses or services.
- Strong Community Support: The vast Visual Studio community and extensive Microsoft documentation provide a wealth of resources, ensuring that you’re never alone when facing a technical challenge. This support network is invaluable for solo developers or small startups navigating the complexities of product development.
In essence, installing and mastering Visual Studio is not just about mastering a piece of software; it’s about equipping yourself with a powerful financial tool that can open doors to new career paths, boost your earning potential, and serve as the launchpad for your next great tech innovation. It’s an investment that pays dividends in skill, opportunity, and financial return.
aViewFromTheCave is a participant in the Amazon Services LLC Associates Program, an affiliate advertising program designed to provide a means for sites to earn advertising fees by advertising and linking to Amazon.com. Amazon, the Amazon logo, AmazonSupply, and the AmazonSupply logo are trademarks of Amazon.com, Inc. or its affiliates. As an Amazon Associate we earn affiliate commissions from qualifying purchases.