
Upgrading your computer’s graphics processing unit (GPU), commonly known as a video card, can dramatically enhance its performance, especially for gaming, video editing, graphic design, and even everyday multitasking. The process might seem daunting to the uninitiated, but with a clear understanding of the steps involved and a bit of careful handling, installing a new video card is a relatively straightforward DIY project. This guide will walk you through everything you need to know, from preparing your system to physically installing the card and ensuring it’s recognized by your operating system.
Before diving into the physical installation, it’s crucial to understand the role of a video card and why an upgrade might be beneficial. The video card is responsible for rendering images, videos, and animations on your display. While every computer has some form of graphics processing, integrated graphics (built into the CPU) are generally sufficient for basic tasks. However, for graphically intensive applications, a dedicated video card with its own powerful processing unit and dedicated memory (VRAM) is essential. This guide assumes you have already purchased a compatible video card and are ready to embark on the installation process.
Preparing for the Installation: What You’ll Need and Why
Before you even think about opening your computer case, thorough preparation is key to a smooth and successful installation. This involves gathering the necessary tools, understanding your existing system’s compatibility, and taking crucial safety precautions to protect both yourself and your hardware.
Essential Tools and Safety Precautions
The good news is that you don’t need a specialized toolkit to install a video card. Most of the items you’ll need are likely already in your home or can be acquired easily.
- Phillips Head Screwdriver: This is the most critical tool. Most computer components are secured with Phillips head screws. Ensure you have one that fits snugly into the screw heads to avoid stripping them. A magnetic tip can be incredibly helpful for picking up dropped screws.
- Anti-Static Wrist Strap: Static electricity is the arch-nemesis of computer components. A simple static discharge can fry delicate circuitry. An anti-static wrist strap connects you to the grounded metal of your computer case, safely discharging any static buildup before it can damage your hardware.
- Work Surface: Choose a well-lit, clean, and non-carpeted surface for your work. Carpets are notorious for generating static electricity. A wooden table or a workbench is ideal.
- Small Container or Tray: To hold screws and small parts, preventing them from getting lost.
- Clean, Lint-Free Cloth: For gently wiping down components if necessary. Avoid using paper towels, as they can leave behind fibers.
- Your New Video Card: Of course, you’ll need the star of the show. Handle it by its edges or heatsink, avoiding touching the gold connectors or any exposed circuitry.
- Computer Case Manual (Optional but Recommended): If you’re unfamiliar with your specific computer case, its manual can provide helpful diagrams for opening the case and identifying component locations.
- Power Supply Unit (PSU) Wattage and Connectors: This is a critical compatibility check. Ensure your new video card’s power requirements are met by your PSU. Many high-performance GPUs require additional power connectors (e.g., 6-pin or 8-pin PCIe power connectors) directly from the PSU. Check your GPU’s specifications and your PSU’s available connectors.
- Motherboard Slot Compatibility: Video cards utilize the PCIe (Peripheral Component Interconnect Express) slot on your motherboard. Most modern motherboards have at least one PCIe x16 slot, which is the standard for full-sized graphics cards. Ensure your motherboard has a compatible slot and that it’s not obstructed by other components.
Safety First:
- Power Down and Unplug: Before doing anything, completely shut down your computer. Then, unplug the power cord from the wall outlet. It’s also a good practice to press and hold the power button for a few seconds after unplugging to discharge any residual power in the capacitors.
- Ground Yourself: Always wear your anti-static wrist strap, ensuring it’s securely attached to your wrist and the unpainted metal of your computer case. If you don’t have a strap, periodically touch a grounded metal object (like the unpainted metal of your computer case) to discharge static.
- Handle Components with Care: Avoid touching the gold connectors (where the card plugs into the motherboard) or any exposed chips on the video card. Always hold the card by its edges or the heatsink assembly.
Understanding Your Current System’s Limitations and Requirements
Before you purchase a new video card, or even after you have it, it’s vital to understand your computer’s current specifications to ensure compatibility and prevent bottlenecking.
- Power Supply Unit (PSU) Wattage: This is arguably the most important consideration. High-performance video cards are power-hungry. Check the recommended PSU wattage for your new GPU. You can find this information on the manufacturer’s website or the product packaging. If your current PSU is insufficient, you’ll need to upgrade it as well. This is a more involved process and might be beyond the scope of a basic GPU installation guide, but it’s a necessary consideration for those seeking significant upgrades.
- Physical Dimensions: Modern graphics cards can be quite large, often taking up two or even three expansion slots on your motherboard and extending significantly into the chassis. Measure the available space in your computer case to ensure the new card will fit without colliding with hard drive cages, other expansion cards, or cables.
- Motherboard PCIe Slot: As mentioned earlier, ensure you have a PCIe x16 slot available. Most modern motherboards do. However, some older or very compact motherboards might have limitations.
- CPU Bottlenecking: While a powerful new GPU can drastically improve performance, a significantly older or less powerful CPU can become a bottleneck. This means the CPU won’t be able to feed data to the GPU fast enough, limiting its potential. While not an immediate installation barrier, it’s a performance consideration for future upgrades.
The Step-by-Step Installation Process
With your tools gathered and your system prepared, you’re ready to begin the physical installation of your new video card. This involves safely removing your old card (if applicable) and installing the new one into its designated slot.
Removing the Old Video Card (If Applicable)
If you’re replacing an existing dedicated video card, this is the first physical step.
- Locate the Old Card: Open your computer case (refer to your case manual if needed). The video card is typically the largest expansion card plugged into one of the long slots on the motherboard. It will likely have fans attached to it and ports on the back of the case.
- Disconnect Power Cables: If your old card has any external power cables connected to it from the PSU, carefully unplug them. These often have clips that need to be pressed.
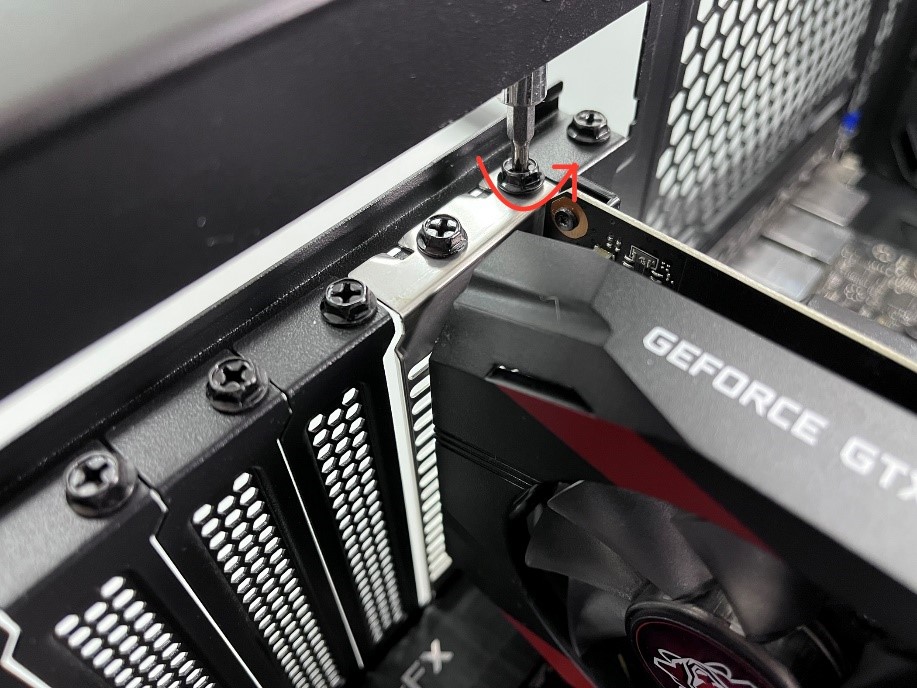
- Unscrew the Card from the Case: The video card is usually secured to the back of the computer case with one or two screws. Remove these screws.
- Release the PCIe Slot Latch: Most PCIe slots have a small latch or clip at the end that secures the card. Gently press or pull this latch to release the card. Be careful not to force it.
- Gently Remove the Card: With the screws removed and the latch released, carefully and evenly pull the video card straight up and out of the PCIe slot. Avoid wiggling it excessively.
Installing the New Video Card
This is the core of the process. Follow these steps carefully to install your new GPU.
- Prepare the Expansion Slot: On the back of your computer case, you’ll see metal brackets corresponding to the expansion slots. If you’re replacing a card, remove the bracket(s) that align with the slot your new card will occupy. If you’re adding a card to a new slot, you’ll need to remove these brackets entirely. Many brackets are held in by screws, while others might be break-off pieces.
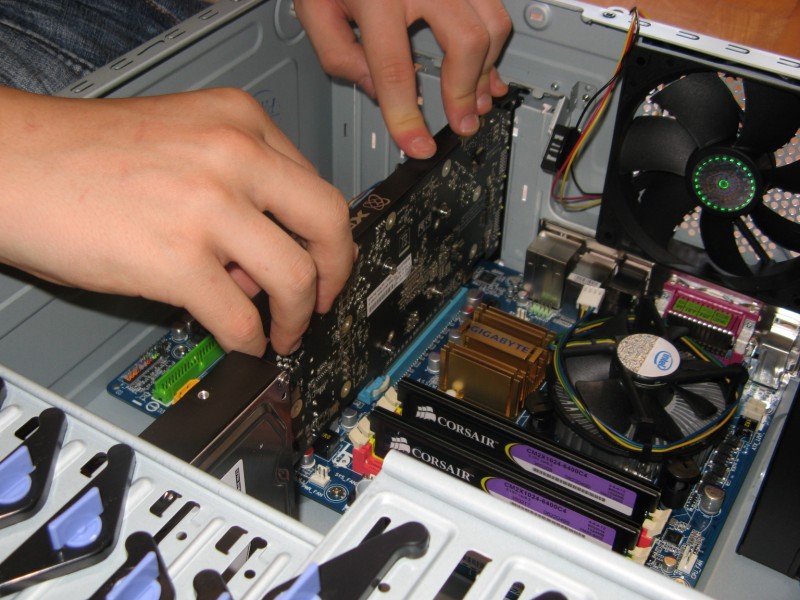
- Align the New Card: Carefully align the gold connectors on the bottom of your new video card with the PCIe x16 slot on your motherboard. Ensure the card is oriented correctly; it will only fit one way.
- Seat the Card: Gently but firmly press the video card down into the PCIe slot. You should feel and hear it click into place as the latch engages. Ensure it’s fully seated and not at an angle.
- Secure the Card to the Case: Reinstall the screws you removed earlier to secure the card’s bracket to the computer case. This provides physical stability.
- Connect Power Cables: If your new video card requires auxiliary power (which most dedicated cards do), connect the appropriate PCIe power cables from your PSU to the connectors on the video card. Ensure they are fully plugged in.
- Double-Check Connections: Before closing the case, take a moment to ensure all power cables are securely connected, the video card is firmly seated, and no other components have been dislodged.
Post-Installation: Drivers and Final Checks
Once the physical installation is complete, your computer won’t automatically recognize or utilize the full capabilities of your new video card. This is where software comes into play.
Installing the Graphics Drivers
This is a crucial step for optimal performance and stability. Drivers are small pieces of software that allow your operating system to communicate effectively with your hardware.
- Boot Up Your Computer: With the new video card installed, reconnect your monitor to one of the ports on the new video card (not the motherboard). Power on your computer.
- Windows Detection (or Lack Thereof): Your operating system will likely detect new hardware. It might install a basic, generic driver that allows for display output but won’t unlock the full potential of your GPU.
- Download the Latest Drivers: The best place to get the latest drivers is directly from the manufacturer’s website:
- NVIDIA: Visit NVIDIA’s driver download page.
- AMD: Visit AMD’s driver download page.
- Intel (for integrated graphics, less common for dedicated cards): Visit Intel’s driver download page.
You’ll need to know the exact model of your new video card and your operating system (e.g., Windows 10 64-bit).
- Run the Installer: Once downloaded, run the driver installer executable. Follow the on-screen prompts. You’ll typically have the option for a “Express” or “Custom” installation. For most users, the “Express” installation is fine. The screen may flash or go black and reappear during the driver installation process – this is normal.
- Restart Your Computer: After the driver installation is complete, it’s essential to restart your computer for the changes to take effect.

Verifying the Installation and Performance
After restarting, you’ll want to ensure everything is working correctly and that your system recognizes the new hardware.
- Check Device Manager: In Windows, right-click the Start button and select “Device Manager.” Expand the “Display adapters” section. You should see your new video card listed there, not a generic display adapter or your old card. If you see a yellow exclamation mark next to it, there might be a driver issue or a hardware problem.
- Display Resolution and Refresh Rate: Right-click on your desktop and select “Display settings.” Ensure you can select your monitor’s native resolution and the highest available refresh rate.
- Run a Benchmark (Optional but Recommended): To truly gauge the performance improvement, consider running a graphics benchmark. Programs like 3DMark, Unigine Heaven, or Unigine Superposition can stress your GPU and provide a score that you can compare to online results for similar hardware. This helps confirm your card is performing as expected.
- Test Your Applications: Launch your favorite games or demanding applications (e.g., video editing software). Observe the frame rates, loading times, and overall visual smoothness.
Troubleshooting Common Issues:
- No Display: Ensure the monitor is plugged into the new GPU, not the motherboard. Double-check that the GPU is fully seated in the PCIe slot and that all power connectors are attached.
- Computer Won’t Boot: This could indicate a power supply issue (insufficient wattage), a short circuit due to improper installation, or a faulty component.
- Performance Issues or Artifacts: Outdated or corrupt drivers are a common culprit. Reinstall the latest drivers. If the problem persists, ensure your PSU is adequate and that the GPU is properly cooled.
- Device Manager Errors: Right-click the device with the error and select “Update driver.” If that doesn’t work, try uninstalling the device and reinstalling the drivers from scratch.
By following these steps diligently, you can successfully install a new video card and breathe new life into your computer’s visual capabilities, opening up a world of enhanced gaming, creative potential, and a smoother overall digital experience.
aViewFromTheCave is a participant in the Amazon Services LLC Associates Program, an affiliate advertising program designed to provide a means for sites to earn advertising fees by advertising and linking to Amazon.com. Amazon, the Amazon logo, AmazonSupply, and the AmazonSupply logo are trademarks of Amazon.com, Inc. or its affiliates. As an Amazon Associate we earn affiliate commissions from qualifying purchases.