In the dynamic world of technology, GitHub stands as a colossal monument to collaborative software development. It’s more than just a code repository; it’s a vibrant ecosystem where millions of developers worldwide share, build, and innovate. For anyone deeply embedded in the tech sphere – from casual users eager for the latest app features to seasoned developers seeking specific tools or contributing to open-source projects – understanding how to navigate and install software directly from GitHub is an indispensable skill. This guide will demystify the process, equipping you with the knowledge to harness the immense power of GitHub, whether you’re looking for bleeding-edge utilities, custom solutions, or simply want to explore the heart of open-source innovation.

Understanding GitHub and Its Value Proposition
Before diving into the mechanics of installation, it’s crucial to grasp what GitHub is and why it has become such a cornerstone of modern software development. Its influence extends far beyond mere code storage, touching upon technology trends, productivity, and even the financial aspects of software acquisition.
What is GitHub and Why Does It Matter?
At its core, GitHub is a web-based platform built around Git, a distributed version control system. This means it allows multiple developers to work on the same project simultaneously without conflicts, tracking every change, who made it, and when. This functionality makes it ideal for managing complex software projects, ensuring transparency, and facilitating seamless collaboration. From a broader perspective, GitHub is the world’s largest host of source code, home to millions of projects ranging from tiny scripts to massive operating systems.
For tech enthusiasts, GitHub matters because it provides a direct window into the development process. You can see the code, track its evolution, report bugs, and even suggest improvements. For businesses, it offers a robust platform for managing internal projects, fostering team collaboration, and leveraging open-source components, often leading to significant cost savings compared to proprietary solutions. Its role in shaping digital security through peer review and rapid patching of vulnerabilities is also paramount, ensuring that many foundational tools remain robust and trustworthy.
The Advantages of Installing from GitHub
While many software applications are available through traditional app stores or official websites, installing directly from GitHub offers a unique set of advantages, particularly for those who desire greater control, customization, or access to the latest innovations.
Firstly, access to cutting-edge features is a major draw. GitHub repositories often host the absolute latest versions of software, including features and bug fixes that haven’t yet made it into stable releases or official distributions. This means you can be among the first to experience new functionalities. Secondly, community support and transparency are inherent. Most GitHub projects have an “Issues” section where users can report problems, ask questions, and engage directly with developers. This direct line of communication can be invaluable for troubleshooting and understanding a project’s nuances.
Thirdly, for those with technical proficiency, GitHub provides the ultimate customization opportunity. By obtaining the source code, you can modify it to suit your specific needs, add features, or integrate it with other tools in ways that pre-compiled binaries might not allow. This level of control is empowering and aligns perfectly with the hacker ethos of understanding and adapting technology. Finally, for individuals interested in personal branding or career development in tech, understanding GitHub and contributing to open-source projects demonstrates valuable skills and commitment, which can be a significant asset for online income generation through freelancing or securing desirable tech roles. The ability to deploy open-source tools can also indirectly save money by avoiding expensive licenses for proprietary software, making it a smart financial choice for startups and individual users alike.
Essential Prerequisites for GitHub Installations
Before you embark on your journey to install software directly from GitHub, a foundational understanding of certain tools and concepts is essential. Equipping your system correctly and familiarizing yourself with GitHub’s structure will streamline the installation process and prevent common roadblocks.
Setting Up Your Development Environment
The vast majority of software installations from GitHub, especially when building from source, require a functional development environment. The core tool you’ll need is Git itself.
1. Installing Git: Git is the version control system that GitHub uses. You’ll use Git commands in your terminal or command prompt to interact with repositories.
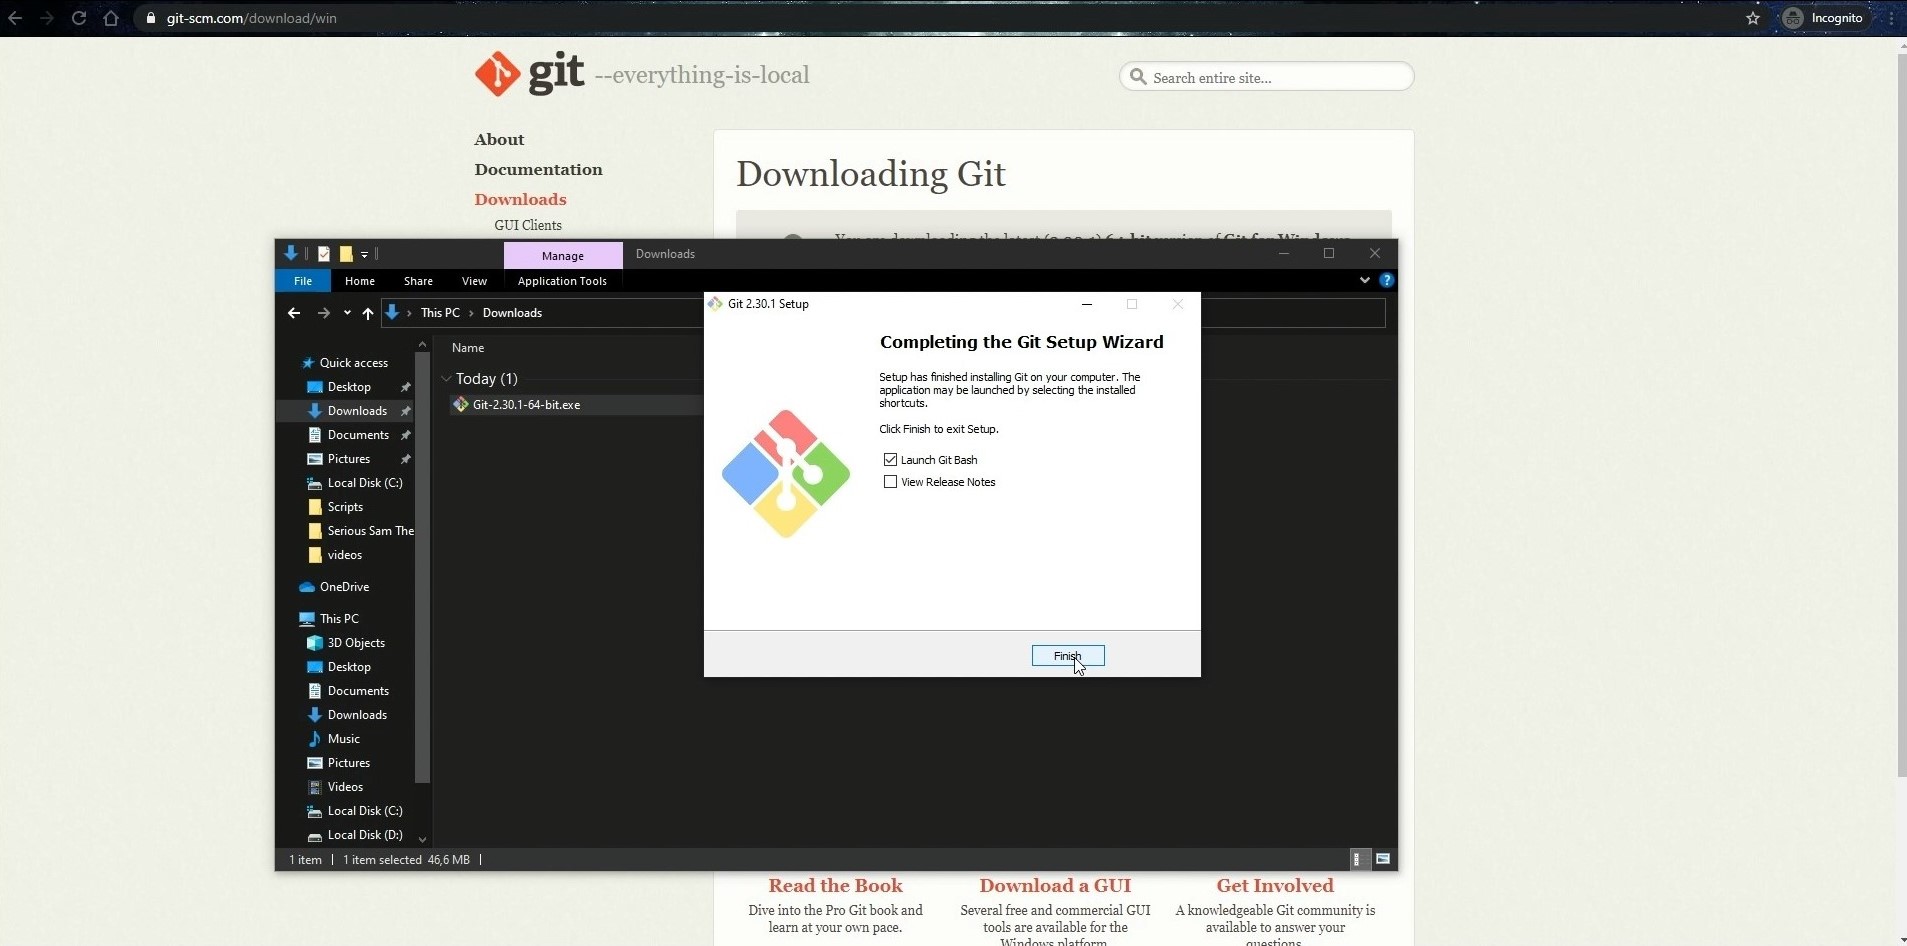
* Windows: Download the Git installer from git-scm.com. Follow the installation wizard, generally accepting the default options. This will also install Git Bash, a powerful command-line interface.
* macOS: Git often comes pre-installed. You can check by typing git --version in Terminal. If not, install Xcode Command Line Tools (xcode-select --install) or use Homebrew (brew install git).
* Linux: Use your distribution’s package manager. For Debian/Ubuntu, sudo apt update && sudo apt install git. For Fedora, sudo dnf install git. For Arch, sudo pacman -S git.
2. Understanding the Command Line: Most GitHub interactions happen via the command line. Basic commands like cd (change directory), ls (list files – Linux/macOS) or dir (list files – Windows), mkdir (make directory), and pwd (print working directory) are fundamental. Proficiency here enhances productivity and makes troubleshooting easier.
3. Installing Build Tools and Runtimes: The specific build tools you need depend entirely on the software you’re trying to install. Common examples include:
* C/C++ projects: GCC (GNU Compiler Collection) or Clang. On Windows, MinGW or MSVC; on macOS, Xcode Command Line Tools; on Linux, build-essential.
* Python projects: Python interpreter (3.x recommended), pip (Python package installer).
* Node.js projects: Node.js runtime and npm (Node Package Manager) or yarn.
* Java projects: Java Development Kit (JDK), Maven, or Gradle.
* Rust projects: Rust toolchain (via rustup).
Always check the project’s README.md or INSTALL.md file for specific dependency requirements. Missing these tools is a common reason for failed installations.
Navigating GitHub Repositories
Before you can install anything, you need to know how to find it and understand its structure on GitHub. A well-organized repository provides all the information you need.
1. Finding the Repository: You can use GitHub’s search bar to find projects by name, topic, or even programming language. Once you find a project, click on its name to navigate to its main page.
2. The README.md File: This is the most critical file in any GitHub repository. It’s usually the first thing you see and acts as the project’s homepage. A good README.md will contain:
* A description of the project.
* Installation instructions (often detailed).
* Usage examples.
* Dependency lists.
* Contribution guidelines.
* License information.
Always read the README.md thoroughly before attempting installation.
3. “Releases” Section: For many projects, particularly user-facing applications, developers will provide pre-compiled binaries in the “Releases” section. This is typically found on the right sidebar or under a tab labeled “Releases.” These are often the easiest way to install software without compiling it yourself.
4. “Issues” and “Pull Requests” Tabs: These sections are vital for community engagement.
* Issues: Where users report bugs, suggest features, or ask for help. Checking existing issues can often provide solutions to common installation problems.
* Pull Requests: Where developers submit changes to the project. Observing these can give you insight into active development.
5. License Files: Always pay attention to the license file (e.g., LICENSE, LICENSE.md). This outlines how you are legally allowed to use, modify, and distribute the software. Understanding open-source licenses (like MIT, GPL, Apache) is crucial for both personal and corporate use, especially regarding intellectual property and brand reputation.
Step-by-Step Methods for Installing Software from GitHub
With your environment set up and a basic understanding of GitHub navigation, you’re ready to explore the primary methods for installing software. Each method caters to different scenarios, from quick installs of pre-built applications to hands-on compilation for advanced customization.
Method 1: Installing Pre-compiled Binaries (The Easiest Route)
This method is ideal for users who simply want to use the software without delving into its source code or compilation process. It’s akin to downloading an executable from any official website.
Steps:
- Navigate to the Repository: Go to the GitHub repository of the software you wish to install.
- Locate the “Releases” Section: Look for the “Releases” link on the right sidebar, or sometimes at the top of the repository under a tab. Click on it.
- Find the Latest Release: Typically, the latest stable release will be at the top.
- Download the Appropriate Binary: Under the “Assets” section of the release, you’ll find various files. These are the pre-compiled binaries.
- Windows: Look for
.exe,.msi, or.zipfiles. Download the executable or installer. - macOS: Look for
.dmg(disk image),.pkg(package installer), or.zipfiles. - Linux: You might find
.deb(for Debian/Ubuntu),.rpm(for Fedora/RHEL), or compressed archives like.tar.gzor.zipcontaining pre-built binaries. Sometimes, there are universal AppImage files.
- Windows: Look for
- Install/Extract the Software:
- Executables/Installers (.exe, .msi, .dmg, .pkg): Run the downloaded file and follow the on-screen instructions, much like installing any other application.
- Compressed Archives (.zip, .tar.gz): Extract the contents to a directory of your choice. Inside, you’ll usually find the executable file that you can run directly. For Linux, you might need to make the executable permission with
chmod +x <filename>before running it. - Linux Package Managers (.deb, .rpm): Install using your system’s package manager (e.g.,
sudo dpkg -i your-package.debfor.deb, orsudo rpm -i your-package.rpmfor.rpm).
This method is the quickest and most straightforward, requiring minimal technical expertise beyond basic file management.
Method 2: Building from Source Using Git Clone (For Customization and Development)
This method is for users who want the latest, unreleased features, need to customize the software, or plan to contribute to its development. It involves downloading the source code and compiling it on your local machine. This is where your development environment becomes crucial.
Steps:
- Navigate to the Repository: Go to the GitHub repository page.
- Copy the Repository URL: Look for the green “Code” button (usually on the right side, above the file list). Click it and copy the HTTPS URL (or SSH if you’ve set up SSH keys). It will look something like
https://github.com/username/repository.git. - Open Your Terminal/Command Prompt: Navigate to the directory where you want to store the project using
cd. - Clone the Repository: Use the
git clonecommand followed by the copied URL:
bash

git clone https://github.com/username/repository.git
This command downloads all the source code to a new directory named after the repository. - Navigate into the Project Directory:
bash

cd repository
- Read the
README.mdorINSTALL.md: This step is critical. Every project is different. TheREADME.mdwill provide specific instructions for installing dependencies and building the software. Look for sections like “Installation,” “Building,” or “Development Setup.” - Install Dependencies: Based on the
README.md, install any required libraries or packages. Examples:- Python:
pip install -r requirements.txt(after ensuring you have Python and pip installed). - Node.js:
npm installoryarn install(after installing Node.js). - C/C++: You might need to install development libraries (
sudo apt install libsome-devon Linux).
- Python:
- Build the Software: Again, consult the
README.mdfor specific build commands. Common examples include:make(for projects using Makefiles)cmake . && make(for projects using CMake)npm run buildoryarn build(for Node.js projects)python setup.py install(for Python packages)go build(for Go projects)cargo build(for Rust projects)
This step compiles the source code into an executable application or library.
- Run/Install the Software: After building, the
README.mdwill usually tell you how to run the software or where to find the newly compiled executable. Sometimes, an additionalmake installor equivalent command is needed to place the software in standard system directories.
This method offers the most flexibility and is often necessary for niche tools or for contributing to open-source projects, aligning with the “Tech” and “Brand” aspects of contributing to a community.
Method 3: Utilizing Package Managers (Where Available)
While not a direct “install from GitHub” method in the same vein as cloning, many open-source projects hosted on GitHub are also distributed via system-specific package managers. This is often the most convenient and recommended way to install popular GitHub-hosted software if it’s available.
How it Works: Developers of a GitHub project might create packages for popular operating system package managers. When you use a package manager, you’re usually installing from the package manager’s repositories, which in turn are maintained by the community or project developers, packaging versions of the software that originated on GitHub.
Common Package Managers:
- Homebrew (macOS): A fantastic package manager for macOS.
- Installation:
/bin/bash -c "$(curl -fsSL https://raw.githubusercontent.com/Homebrew/install/HEAD/install.sh)" - To install software:
brew install <software_name>(e.g.,brew install git,brew install htop).
- Installation:
- APT (Debian/Ubuntu Linux): The standard package manager for Debian-based distributions.
- Installation:
sudo apt update && sudo apt install <software_name>(e.g.,sudo apt install neofetch).
- Installation:
- YUM/DNF (Fedora/RHEL/CentOS Linux): Package managers for Red Hat-based distributions.
- Installation:
sudo dnf install <software_name>orsudo yum install <software_name>(e.g.,sudo dnf install vim).
- Installation:
- Chocolatey (Windows): A popular package manager for Windows.
- Installation: Follow instructions on chocolatey.org.
- To install software:
choco install <software_name>(e.g.,choco install vscode).
Advantages:
- Simplicity: One-line commands.
- Dependency Management: Automatically handles and installs all necessary dependencies.
- Updates: Easy to update all installed software with a single command (e.g.,
brew upgrade,sudo apt upgrade). - System Integration: Ensures software is installed in standard locations and integrates well with the operating system.
Always check the project’s README.md for whether it recommends installation via a package manager, as this is often the path of least resistance for users.
Troubleshooting Common Issues and Best Practices
Installing software, especially from source, can sometimes present challenges. Knowing how to troubleshoot and adopting best practices will significantly improve your success rate and productivity.
Debugging Installation Problems
When an installation fails, don’t despair. Most errors are common and have well-documented solutions.
- Read the Error Messages Carefully: The terminal output often contains clues about what went wrong. Look for keywords like “permission denied,” “command not found,” “dependency missing,” “error,” or “failed.”
- Check Dependencies: A very common issue is missing dependencies or build tools. Reread the
README.mdand ensure all prerequisites are installed. For C/C++ projects, ensure you have compilers. For Python, ensure you’re using the correct Python version and havepipinstalled. - Permission Issues: “Permission denied” errors usually mean you’re trying to write to a protected directory.
- For system-wide installations on Linux/macOS, you might need
sudo(e.g.,sudo make install). Usesudocautiously. - Ensure the directory you’re cloning into has proper write permissions.
- For system-wide installations on Linux/macOS, you might need
- Consult the GitHub Issues Tab: Before searching elsewhere, check the “Issues” tab on the project’s GitHub page. Someone else has likely encountered the same problem, and a solution might already be posted.
- Search Online: If the issue isn’t on GitHub, copy the exact error message and paste it into a search engine (Google, Stack Overflow). This often leads to solutions from the broader developer community.
- Clean and Retry: Sometimes, a failed build can leave behind temporary files that interfere with subsequent attempts. Look for a
make cleancommand in theREADME.mdor manually delete the build artifacts before trying again. - Seek Help: If all else fails, consider opening a new issue on the project’s GitHub page, providing as much detail as possible about your system, the steps you took, and the full error message. This contributes to the community and can help others.
Maintaining and Updating Your GitHub Software
Software is constantly evolving, and staying updated is crucial for security, features, and performance.
- For Cloned Repositories: If you installed from source using
git clone, updating is straightforward:
bash

cd /path/to/your/repository

git pull origin main # or 'master', depending on the branch name
After pulling the latest changes, you will likely need to re-build the software using the same build commands you used for the initial installation (e.g.,make,npm run build). Always check theREADME.mdfor specific update instructions, as sometimes dependencies change. - For Pre-compiled Binaries: Keep an eye on the “Releases” section of the GitHub repository. When a new version is released, download the new binary and replace your old installation or follow any provided upgrade instructions.
- For Package Manager Installations: This is the easiest to update:
- Homebrew:
brew update && brew upgrade - APT:
sudo apt update && sudo apt upgrade - DNF/YUM:
sudo dnf updateorsudo yum update - Chocolatey:
choco upgrade all
- Homebrew:
Regular updates are a digital security best practice and ensure you benefit from ongoing development, maintaining the productivity and efficiency of your tools.
Security Considerations and Responsible Usage
While GitHub is a hub of innovation, it’s also a public platform. Responsible usage is paramount.
- Verify Sources: Always be cautious when downloading and running executables from unknown repositories. Prioritize projects from well-known organizations, projects with many contributors, or those with a strong community presence. Look for signs of active maintenance (recent commits, resolved issues).
- Understand Licenses: Before using software, especially in a commercial context, ensure you understand its license. Open-source licenses dictate how you can use, modify, and distribute the code. This is crucial for corporate identity and avoiding legal pitfalls.
- Review Code (if possible): For critical applications, if you have the skills, briefly review the source code for anything suspicious, especially before running
sudocommands or granting extensive permissions. - Isolate Development Environments: For experimental or potentially risky projects, consider using virtual machines or Docker containers to isolate the installation from your main system. This enhances digital security.
- Contribute Back: The spirit of open source thrives on contribution. If you find a bug, fix it. If you add a feature, share it. Contributing to a project not only enhances your personal brand but also strengthens the entire open-source ecosystem, fostering better software for everyone.
By embracing these best practices, you can confidently navigate the vast landscape of GitHub, leveraging its power to enhance your technological toolkit, boost your productivity, and contribute to the collaborative future of software development. This knowledge not only saves money by providing access to free, powerful tools but also empowers you to be an active participant in the ever-evolving tech world.
aViewFromTheCave is a participant in the Amazon Services LLC Associates Program, an affiliate advertising program designed to provide a means for sites to earn advertising fees by advertising and linking to Amazon.com. Amazon, the Amazon logo, AmazonSupply, and the AmazonSupply logo are trademarks of Amazon.com, Inc. or its affiliates. As an Amazon Associate we earn affiliate commissions from qualifying purchases.