
Ubuntu, renowned for its stability, robust security features, and extensive community support, has long been a favored operating environment for developers, system administrators, and technology enthusiasts alike. When it comes to programming languages, Python stands as an undisputed giant, powering everything from web development and data science to artificial intelligence, machine learning, and automation scripts. Its versatility, readability, and vast ecosystem of libraries make it an indispensable tool in the modern tech landscape.
This comprehensive guide is designed to walk you through the process of installing Python on your Ubuntu system. Whether you’re a seasoned developer setting up a new machine, a data scientist diving into complex analytics, or a curious beginner taking your first steps into coding, understanding how to properly install and manage Python versions is fundamental. We’ll explore various installation methods, discuss the critical role of virtual environments for maintaining project isolation, and provide insights into common pitfalls and best practices to ensure a smooth and productive development experience. By the end of this tutorial, you’ll have a fully functional Python setup, ready to tackle any project you envision, harnessing the power of a clean, efficient, and well-organized development environment.
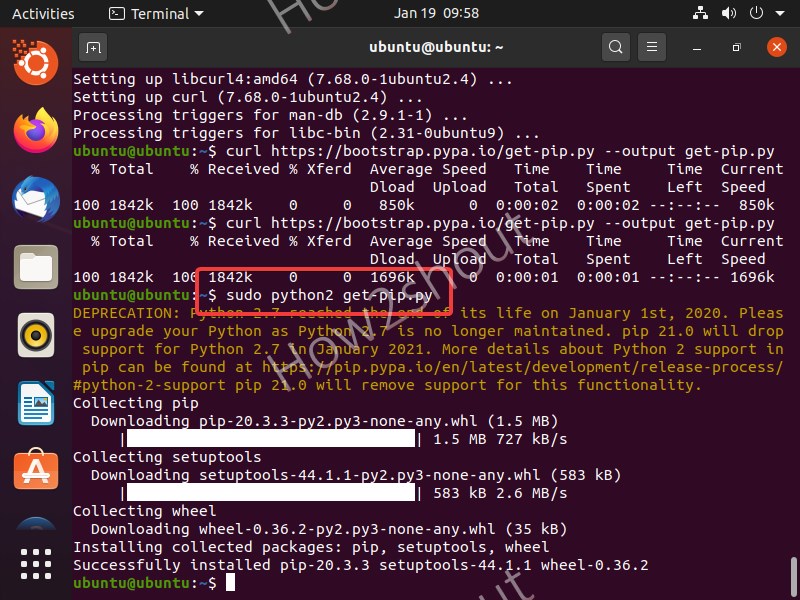
Understanding Python on Ubuntu: Why It Matters
Before we dive into the nitty-gritty of installation, it’s crucial to understand why Python on Ubuntu is such a powerful combination and what foundational concepts you need to grasp for a successful setup. This section will clarify Python’s dominance, Ubuntu’s role as a development platform, and the essential distinction between Python 2 and Python 3.
The Ubiquity of Python in Modern Tech
Python’s meteoric rise to prominence isn’t a fluke; it’s a testament to its incredible adaptability and the productivity it offers developers. From the sophisticated algorithms driving AI tools and machine learning models to the robust backends of popular web applications, Python is everywhere. Frameworks like Django and Flask make web development a breeze, while libraries such as NumPy, Pandas, and Scikit-learn form the backbone of data analysis and scientific computing. Beyond these, Python excels in scripting, automation, network programming, and even game development. For anyone looking to engage with modern technology trends, learn new software paradigms, or build powerful applications, Python is an essential skill, and installing it correctly is your first step into a world of endless possibilities. A well-configured Python environment directly translates to increased productivity, allowing you to focus on coding rather than wrestling with system configurations.
Ubuntu as a Preferred Development Environment
Ubuntu’s appeal to developers is multifaceted. As a Debian-based Linux distribution, it offers a secure, stable, and highly customizable operating system. Its open-source nature means a vast community contributes to its development, ensuring continuous improvement, comprehensive documentation, and readily available solutions for common issues. For those working with software, the command-line interface (CLI) is a powerful ally, and Ubuntu’s apt package manager simplifies the installation and management of software, including various Python versions and their dependencies. This robust environment makes Ubuntu an ideal choice for hosting your Python development, whether you’re building a simple script or a complex, enterprise-grade application. Its stability ensures that your development environment remains consistent, minimizing unexpected disruptions, which is a key factor in maximizing digital productivity.
Python 2 vs. Python 3: A Crucial Distinction
For many years, the Python community grappled with a significant transition from Python 2 to Python 3. While Python 2 was widely adopted, its official end-of-life was January 1, 2020. This means Python 2 no longer receives official support, security updates, or bug fixes. Continuing to use Python 2 for new projects is strongly discouraged due to security vulnerabilities and a lack of modern features.
Python 3 is the present and future of the language. All new projects should unequivocally use Python 3. Ubuntu, recognizing this, typically includes a Python 3 installation by default, often symlinked as python3. However, older Ubuntu versions or systems with legacy software might still have Python 2 installed, often symlinked as python. It’s crucial to be aware of this distinction and always explicitly use python3 or pip3 to ensure you’re interacting with the correct version. This distinction is vital for digital security and for leveraging the latest features and libraries available in the Python ecosystem.
Preparing Your Ubuntu System for Python Installation
Before embarking on any major software installation, it’s a good practice to prepare your system. This involves checking for existing Python installations and ensuring your system’s package list and installed packages are up to date. These preliminary steps prevent conflicts, ensure you’re working with the latest stable dependencies, and lay a solid foundation for a seamless installation.
Checking for Existing Python Installations
Most modern Ubuntu installations come with Python 3 pre-installed. It’s rare for a system to lack Python entirely. However, the specific version might vary depending on your Ubuntu release. You can check which versions are already present by opening your terminal (Ctrl+Alt+T) and running the following commands:
python --version
python2 --version
python3 --version
python --version: On older systems, this might point to Python 2.x. On newer systems, it might not be defined or point to Python 3.x if an alias has been set.python2 --version: If Python 2 is installed, this command will show its version (e.g., Python 2.7.18).python3 --version: This command will display the installed Python 3 version (e.g., Python 3.8.10 or Python 3.10.6).
Knowing what’s already there helps you decide if you need to install a specific new version or if the existing one suffices. It also helps you avoid conflicts later, especially if you plan to install multiple Python versions.
Updating System Packages
Keeping your system’s package list updated and upgrading existing packages is a critical step before installing new software. This ensures that you have access to the latest versions of dependencies that Python might require and helps mitigate potential security vulnerabilities and compatibility issues.
Open your terminal and execute the following commands:
sudo apt update
sudo apt upgrade -y
sudo apt update: This command fetches the latest package information from all configured repositories. It doesn’t install or upgrade any packages but updates the local index of available packages.sudo apt upgrade -y: This command then upgrades all installed packages to their latest available versions based on the updated package list. The-yflag automatically confirms any prompts, making the process non-interactive.
Performing these updates ensures your system is in optimal condition and has the necessary foundations for a successful Python installation, aligning with best practices for digital security and system maintenance.
Core Installation Methods: Choosing Your Path
Ubuntu offers several ways to install Python, each with its own advantages and suitable for different scenarios. The method you choose will depend on your specific needs: whether you prioritize stability, require the absolute latest version, or need granular control over the build process.
Method 1: Installing Python via APT (Recommended for Stability)
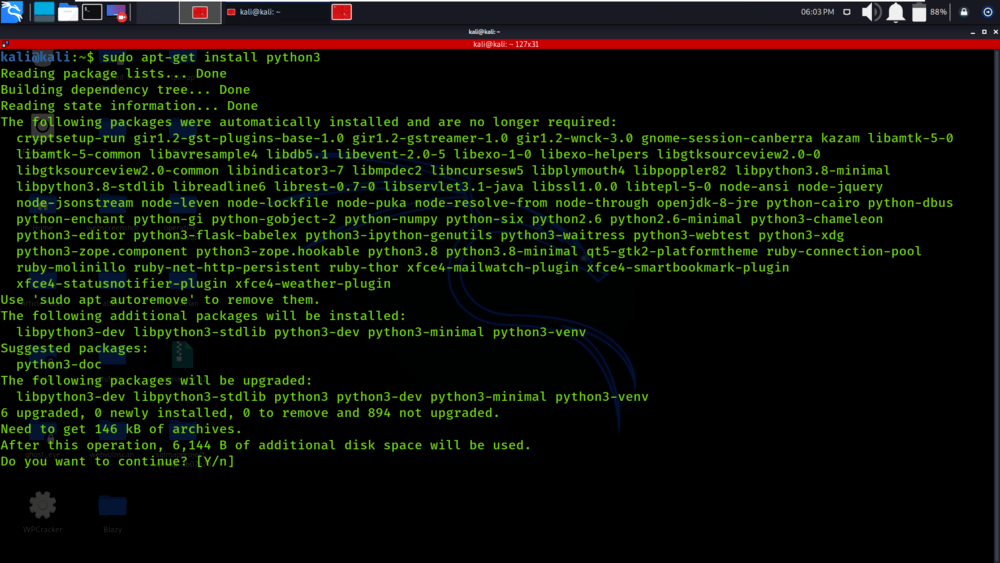
This is the simplest and most recommended method for most users. Ubuntu’s default repositories contain stable, well-tested Python packages that are fully integrated with the operating system. While these versions might not always be the absolute latest, they offer excellent stability and compatibility with other system components.
-
Install Python 3:
Since Python 3 is typically pre-installed, you might only need to ensure it’s available or install additional components.sudo apt install python3This command will install the default Python 3 version available in your Ubuntu release’s repositories.
-
Install pip (Python’s Package Installer):
pipis the standard package manager for Python, used to install and manage libraries and frameworks. It’s an indispensable tool for any Python developer.sudo apt install python3-pipThis command installs
pipspecifically for Python 3. -
Verify the Installation:
Confirm that both Python 3 and pip are correctly installed and accessible:
bash

python3 --version

pip3 --version
You should see output similar toPython 3.x.xandpip x.x.x.
This method is ideal for beginners and users who need a stable, well-maintained Python environment without the need for the very latest release. It prioritizes ease of use and system compatibility, contributing to a hassle-free development workflow.
Method 2: Installing Newer Python Versions with PPA (Deadsnakes)
If you require a more recent Python 3 version than what’s available in Ubuntu’s default repositories, the “deadsnakes” PPA (Personal Package Archive) is an excellent resource. This PPA provides newer, unofficial Python builds, allowing you to install specific Python versions without compiling from source.
-
Add the Deadsnakes PPA:
First, you need to add the PPA to your system’s software sources.sudo add-apt-repository ppa:deadsnakes/ppa sudo apt updateThe
add-apt-repositorycommand adds the PPA, andsudo apt updaterefreshes your package list to include the new repository. -
Install the Desired Python Version:
Now you can install a specific Python version, for example, Python 3.10 or Python 3.11:sudo apt install python3.10 # or for Python 3.11 sudo apt install python3.11Replace
python3.10orpython3.11with the specific version you need. -
Install pip for the Specific Version:
It’s crucial to installpipfor the specific Python version you just installed.
bash

sudo apt install python3.10-venv python3.10-dev
Whilepipis often installed with the core Python package via PPA, installing*-venvand*-devensures all necessary development tools and virtual environment support are present. You can then ensurepipis installed via:
bash

sudo apt install python3.10-pip
Verify it:
bash

python3.10 --version

pip3.10 --version
This method is perfect for developers who need to work with specific, more recent Python versions for projects that demand the latest features or libraries. It offers a good balance between ease of installation and access to cutting-edge releases.
Method 3: Compiling Python from Source (For Advanced Users)
Compiling Python from source gives you the most control over the installation process, allowing you to configure specific build options, apply patches, or install the absolute latest release directly from Python’s official source code. However, it is also the most complex method and generally recommended only for advanced users or specific development scenarios.
- Install Build Dependencies:
You’ll need several development libraries to compile Python successfully.
bash

sudo apt update

sudo apt install build-essential zlib1g-dev libncurses5-dev libgdbm-dev libnss3-dev libssl-dev libreadline-dev libffi-dev wget
-
Download the Python Source Code:
Visit the official Python website (python.org) to find the download link for the desired version’s Gzipped tarball (e.g., Python 3.12.0).wget https://www.python.org/ftp/python/3.12.0/Python-3.12.0.tgz tar -xf Python-3.12.0.tgz cd Python-3.12.0Note: Replace
3.12.0with your desired version. -
Configure and Compile:
./configure --enable-optimizations
make -j $(nproc)
./configure --enable-optimizations: This command prepares the build, enabling profile-guided optimizations for better performance.make -j $(nproc): This compiles the source code.$(nproc)uses all available CPU cores, speeding up the compilation.
-
Install Python:
Crucially, usealtinstallto prevent overwriting the system’s default Python installation. Usingmake installcould break system utilities that rely on the default Python version.sudo make altinstallThis command installs the compiled Python version alongside existing ones, creating separate executables (e.g.,
python3.12,pip3.12). -
Verify the Installation:
bash

python3.12 --version

pip3.12 --version
You should see the newly installed version number.
Compiling from source offers unparalleled control but demands a deeper understanding of system configurations. It’s often used for bleeding-edge features, specific testing, or when a precise custom build is required.
Mastering Python Environments: Isolation and Productivity
Regardless of how you install Python, managing your project dependencies is paramount for maintaining a clean, stable, and productive development workflow. Python’s ecosystem provides powerful tools to create isolated environments, preventing “dependency hell” and ensuring your projects run smoothly.
The Power of Virtual Environments (venv)
A virtual environment is a self-contained directory that holds a specific Python interpreter and its own set of installed packages. This isolation means that different projects can use different versions of the same library without conflicting with each other or with the system-wide Python installation. For instance, Project A might require Django 3.2, while Project B needs Django 4.0; virtual environments make this coexistence seamless. This is a cornerstone of efficient software development and a major boost to productivity.
-
Create a Virtual Environment:
Navigate to your project directory. If you don’t have one, create it.mkdir my_python_project cd my_python_project python3 -m venv venv_namepython3 -m venv venv_name: This command uses thevenvmodule (built into Python 3) to create a new virtual environment namedvenv_namewithin your current directory. You can name it anything, butvenvor.venvis common.
-
Activate the Virtual Environment:
To start using the isolated environment, you need to activate it.source venv_name/bin/activateYour terminal prompt will change to indicate that the virtual environment is active (e.g.,
(venv_name) user@ubuntu:~/my_python_project$). Now, anypip installcommands will install packages only into this environment. -
Install Packages within the Environment:
With the environment active, install your project’s dependencies:pip install requests pandas numpyThese packages will only be available when
venv_nameis active. -
Deactivate the Virtual Environment:
Once you’re done working on the project, you can exit the virtual environment:
bash

deactivate
Your terminal prompt will return to its normal state.
Always using virtual environments is a best practice that drastically improves development efficiency, avoids conflicts, and ensures that your projects are portable and reproducible. It’s a key aspect of managing software projects effectively and preventing issues related to incompatible dependencies.
Using pyenv for Version Management (Advanced)
While venv manages package isolation for a single Python version, pyenv is a powerful tool for managing multiple Python versions on the same system. If you work on projects that require different Python interpreters (e.g., Python 3.8 for an older legacy app and Python 3.11 for a new one), pyenv allows you to switch between them effortlessly.
-
Install
pyenv:
You can installpyenvusinggitor a package manager. Here’s thegitmethod:sudo apt update; sudo apt install make build-essential libssl-dev zlib1g-dev libbz2-dev libreadline-dev libsqlite3-dev wget curl llvm libncursesw5-dev xz-utils tk-dev libxml2-dev libxmlsec1-dev libffi-dev liblzma-dev curl https://pyenv.run | bashFollow the instructions to add
pyenvto your shell’s environment variables (usually by adding lines to~/.bashrcor~/.zshrcand then runningsource ~/.bashrc). -
Install Python Versions with
pyenv:
Oncepyenvis installed and configured, you can install any Python version it supports:pyenv install 3.9.10 pyenv install 3.11.4 -
Set Global or Local Python Versions:
- Global: Set a default Python version for your shell:
bash

pyenv global 3.11.4
- Local: Set a specific Python version for a particular project directory (this will override the global setting when you’re in that directory):
bash

cd my_new_project

pyenv local 3.11.4
Now, when you runpythonorpython3inmy_new_project, it will use Python 3.11.4.
- Global: Set a default Python version for your shell:
pyenv offers unparalleled flexibility for developers who juggle multiple Python projects with diverse version requirements. It streamlines the process of switching between environments, significantly boosting productivity when dealing with complex, multi-version development landscapes.
Verifying Your Installation and Next Steps
Once you’ve installed Python and learned about virtual environments, the final steps involve verifying everything is working as expected and understanding what to do next to kickstart your development journey.
Confirming Python and Pip Installation
After any installation method, it’s crucial to verify that the chosen Python version and its associated pip are correctly installed and accessible from your terminal.
-
Check Python Version:
If you installed usingaptfor a default version:python3 --versionIf you installed a specific version via PPA or source:
python3.10 --version # or python3.11, python3.12 etc.You should see the version number you intended to install.
-
Check Pip Version:
Similarly, verifypip:pip3 --versionOr for specific versions:
pip3.10 --versionThis confirms
pipis correctly associated with your Python installation. -
Run a Simple Python Script:
To further confirm your Python interpreter is functioning, create a small test file:
bash

nano hello_python.py
Add the following content:
python

print("Hello, Python on Ubuntu!")
Save and exit (Ctrl+X,Y,Enter). Then run it:
bash

python3 hello_python.py
You should see the outputHello, Python on Ubuntu!. This confirms your Python installation is fully operational.
Essential Post-Installation Setup
With Python successfully installed, consider these steps to enhance your development environment:
-
Set up an Alias (Optional but Recommended): On some systems,
pythonmight still point to Python 2 or be undefined. You can create an alias in your~/.bashrc(or~/.zshrc) to makepythonalways refer topython3:echo "alias python=python3" >> ~/.bashrc source ~/.bashrcNow, typing
pythonwill executepython3. -
Choose an IDE or Text Editor: For serious development, a good Integrated Development Environment (IDE) or a feature-rich text editor is invaluable. Popular choices include:
- VS Code: Free, lightweight, highly customizable, and has excellent Python extensions.
- PyCharm: A powerful, dedicated Python IDE (Community Edition is free) with advanced features for debugging, testing, and project management.
- Sublime Text / Atom: General-purpose text editors with strong Python support via plugins.
-
Learn Essential Libraries: Depending on your interests, begin exploring fundamental Python libraries:
- Web Development: Django, Flask
- Data Science/AI: NumPy, Pandas, Matplotlib, Scikit-learn, TensorFlow, PyTorch
- Automation/Scripting:
os,sys,requests
Troubleshooting Common Installation Issues
Even with careful steps, you might encounter issues. Here are some common ones and their solutions:
-
“Command not found” for
python3orpip3:- Solution: This usually means Python or pip isn’t in your system’s
PATH. Recheck your installation steps. If you compiled from source, ensure you usedsudo make altinstall. If usingpyenv, ensure it’s correctly initialized in your shell’s config file (.bashrc,.zshrc).
- Solution: This usually means Python or pip isn’t in your system’s
-
pipPermissions Errors (Permission denied):- Problem: Trying to install packages globally without
sudo. - Solution: Never use
sudo pip installunless you are specifically installing a system-wide tool (which is rare). Instead, always use virtual environments (see “The Power of Virtual Environments” section). Once activated,pip installworks withoutsudo.
- Problem: Trying to install packages globally without
-
Confusing Python 2 and Python 3:
- Problem: Accidentally running Python 2 instead of Python 3.
- Solution: Always explicitly use
python3andpip3. If you’ve set an alias (alias python=python3), thenpythonwill work. Always verify withpython --version.
-
Missing Development Headers for
pip install:- Problem: When installing certain Python packages (especially those with C extensions),
pipmight complain about missing header files (e.g.,Python.h). - Solution: Install the Python development headers:
sudo apt install python3-dev(orpython3.10-devfor specific versions).
- Problem: When installing certain Python packages (especially those with C extensions),
By understanding these common issues and their resolutions, you can maintain a robust and secure development environment, enhancing your overall productivity and minimizing downtime due to technical hurdles.
Conclusion
Installing Python on Ubuntu is a foundational step for anyone looking to delve into the vast world of programming, data science, artificial intelligence, or general software development. This guide has provided you with a comprehensive overview of various installation methods, from the simplicity of apt to the precision of compiling from source, alongside advanced tools like pyenv for version management. Most importantly, we’ve emphasized the critical role of virtual environments, such as venv, in fostering isolated, clean, and highly productive development workflows, preventing dependency conflicts and ensuring project reproducibility.
With your Python environment now meticulously set up, the real journey begins. You are equipped to explore the latest technology trends, build innovative AI tools, craft efficient web applications, and automate complex tasks. Remember, maintaining a well-organized and updated development setup, coupled with the consistent use of virtual environments, is key to maximizing your productivity and security as a developer. Embrace the power of Python and Ubuntu, and unlock your potential in the ever-evolving digital landscape. Happy coding!
aViewFromTheCave is a participant in the Amazon Services LLC Associates Program, an affiliate advertising program designed to provide a means for sites to earn advertising fees by advertising and linking to Amazon.com. Amazon, the Amazon logo, AmazonSupply, and the AmazonSupply logo are trademarks of Amazon.com, Inc. or its affiliates. As an Amazon Associate we earn affiliate commissions from qualifying purchases.