For Mac users, the process of installing new software is generally straightforward, designed to be intuitive and user-friendly. However, depending on the type of application and its distribution method, the installation steps can vary. Whether you’re looking to boost your productivity, explore the latest AI tools, refine your brand’s digital presence, or manage your personal finances more effectively, understanding how to get software onto your Mac is a fundamental skill. This guide will walk you through the most common installation methods, from the App Store to manual downloads, ensuring you can confidently equip your Mac with the tools you need.
The beauty of macOS lies in its consistent user experience. Apple prioritizes simplicity, and this extends to software installation. Most applications follow a predictable pattern, making it easy to get up and running quickly. We’ll cover everything from the simplest drag-and-drop installations to more involved processes requiring specific installers. By the end of this article, you’ll be well-versed in installing a wide range of applications, from the latest cutting-edge tech gadgets and software reviews to tools that can enhance your personal branding and financial management.
Understanding Software Distribution Methods on Mac
Before diving into the “how-to,” it’s essential to understand the different ways software is made available for macOS. Each method has its own installation nuances, but all are designed with the user in mind. Recognizing these differences will help you anticipate the steps involved and troubleshoot any potential issues.
The Mac App Store: The Easiest and Safest Route
The Mac App Store is Apple’s curated digital storefront, akin to its mobile counterpart on iOS. This is by far the most common and recommended method for installing applications on your Mac.
Why the App Store is Preferred:
- Security and Reliability: Every application submitted to the App Store undergoes a rigorous review process by Apple. This significantly reduces the risk of downloading malware, viruses, or poorly coded software. You can be confident that the apps you find here are legitimate and have met Apple’s quality standards.
- Simplicity of Installation: Installing an app from the App Store is as simple as a single click. You search for the app, click “Get” or the price button, authenticate with your Apple ID, and the app downloads and installs automatically.
- Automatic Updates: Apps downloaded from the App Store are automatically updated in the background (or with your permission). This ensures you always have the latest features, security patches, and bug fixes without manual intervention.
- Centralized Management: All your App Store purchases and downloads are linked to your Apple ID, making it easy to re-download apps on a new Mac or restore them after an upgrade.
How to Install from the Mac App Store:
- Open the App Store: You can find the App Store icon in your Dock or by searching for it using Spotlight (Command + Spacebar, then type “App Store”).
- Search for Your App: Use the search bar at the top left of the App Store window to find the application you want. You can also browse categories or featured apps.
- View App Details: Click on the app’s name to view its description, screenshots, user reviews, and system requirements.
- Download or Purchase: If the app is free, you’ll see a “Get” button. If it’s a paid app, you’ll see its price. Click the respective button.
- Authenticate: You will be prompted to enter your Apple ID password or use Touch ID/Face ID (if your Mac supports it) to authorize the download.
- Installation: The app will download to your Applications folder and install automatically. You’ll see its progress in the Dock. Once installed, you can launch it from your Applications folder or by searching with Spotlight.
Direct Downloads: .DMG Files and Installation Packages
While the App Store is ideal for many applications, some developers prefer to distribute their software directly from their websites. This often involves downloading a disk image file (.dmg) or an installer package (.pkg).
Understanding .DMG Files:
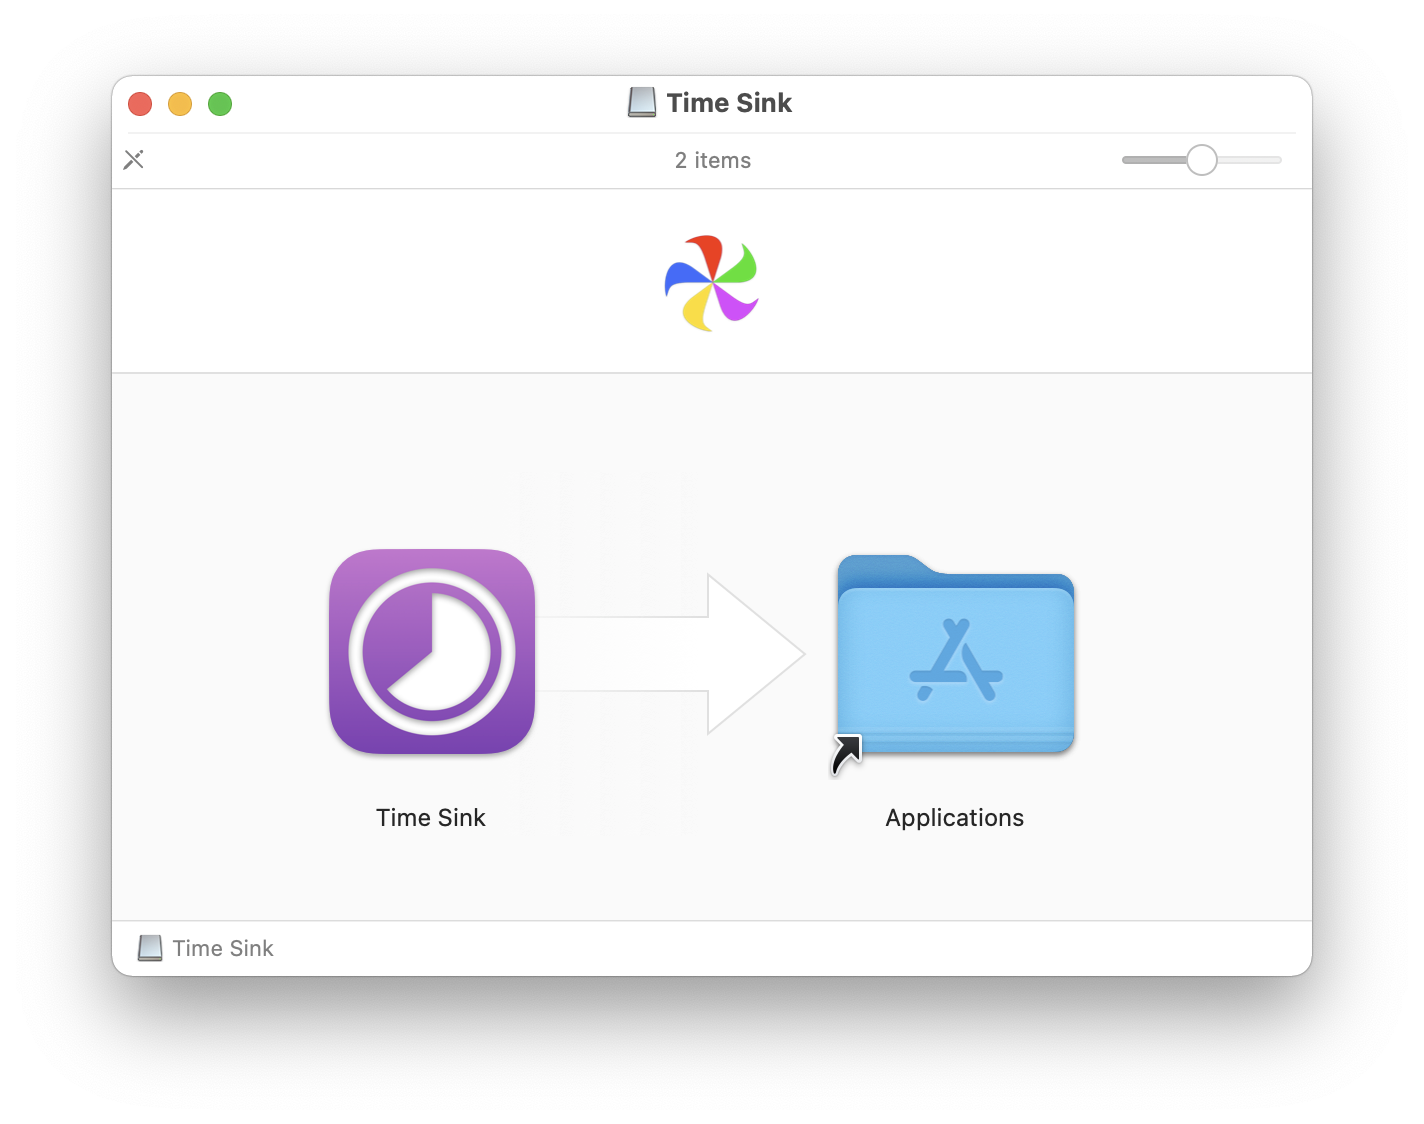
A .dmg file is essentially a virtual disk image that contains the application. When you open a .dmg file, it mounts like an external drive on your Mac, showing you the contents, typically the application itself and sometimes a shortcut to your Applications folder.
How to Install from a .DMG File:
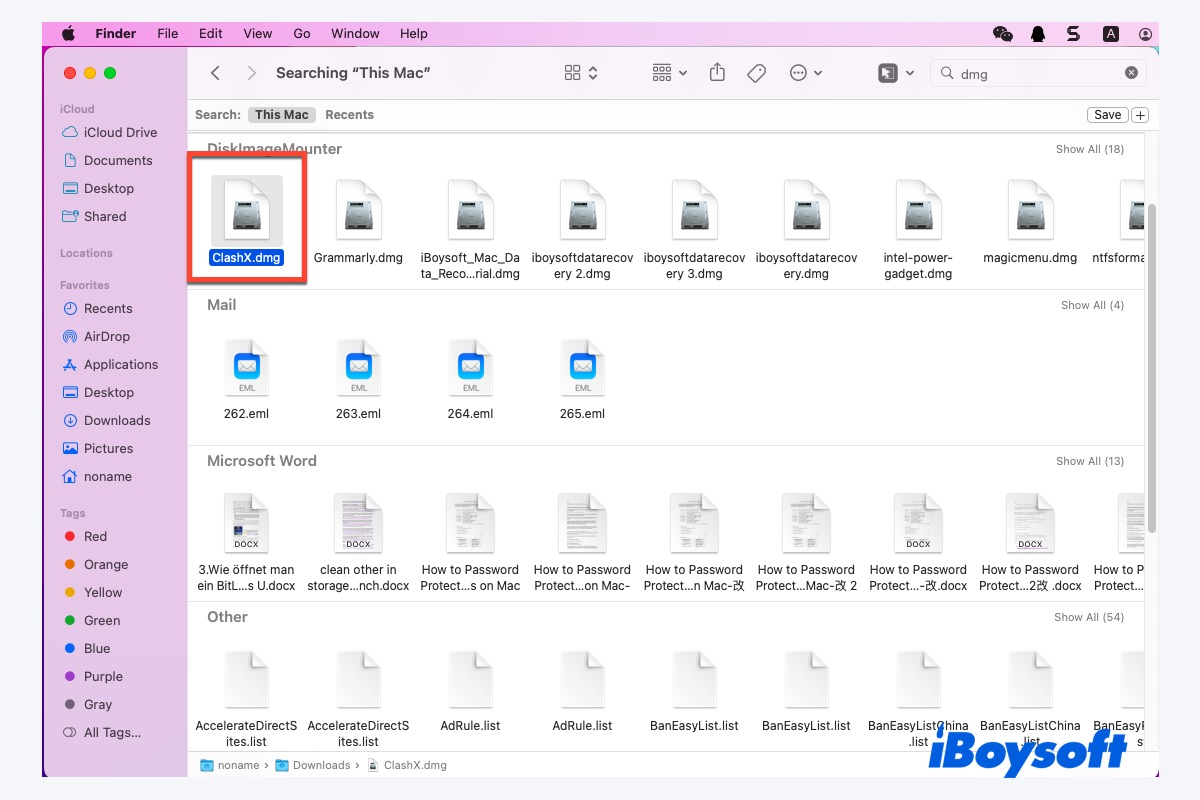
- Download the .DMG: Go to the developer’s official website and download the .dmg file for the macOS version of the application. Be sure to download from trusted sources to avoid malware.
- Open the .DMG: Locate the downloaded .dmg file (usually in your Downloads folder) and double-click it. The file will mount, and a new window will appear, showing its contents.
- Drag and Drop: In most cases, the window will display the application icon and a shortcut to your Applications folder. To install the app, simply drag the application icon into the Applications folder shortcut.
- Eject the Disk Image: Once the app is copied, you can eject the virtual disk image. You’ll see its icon in the Finder sidebar or on your Desktop. Click the eject icon next to it, or right-click (Control-click) the mounted disk image icon and select “Eject.”
- Launch the Application: The application is now installed and can be found in your Applications folder or launched via Spotlight.
- Delete the .DMG: You can now delete the original .dmg file to save disk space.
Understanding .PKG Files:
A .pkg file is an installer package. When you double-click a .pkg file, it launches a traditional installer application that guides you through a series of steps, much like you might find on Windows.
How to Install from a .PKG File:
- Download the .PKG: Download the installer package from the developer’s website.
- Open the .PKG: Locate the downloaded .pkg file and double-click it.
- Follow the Installer Prompts: The installer will launch. You’ll typically need to agree to license agreements, choose an installation location (usually the default is fine), and enter your administrator password to authorize the installation.
- Complete Installation: The installer will copy the necessary files to your system. Once complete, you’ll receive a confirmation message.
- Launch the Application: The application is now installed and can be found in your Applications folder or launched via Spotlight.
- Delete the .PKG: You can typically delete the installer package after the installation is complete.
Command Line Installations: Homebrew and Terminal
For more advanced users, particularly those working with development tools, AI frameworks, or specific utilities, command-line installation via Homebrew is a powerful and efficient method.
What is Homebrew?
Homebrew is a free and open-source package manager for macOS that simplifies the installation of software that Apple does not officially provide. It’s widely used by developers and tech enthusiasts.
How to Install Software Using Homebrew:
-
Install Homebrew: If you don’t have Homebrew installed, you’ll need to do so first. Open the Terminal application (Applications > Utilities > Terminal) and paste the following command, then press Enter:
/bin/bash -c "$(curl -fsSL https://raw.githubusercontent.com/Homebrew/install/HEAD/install.sh)"Follow the on-screen prompts to complete the installation, which may include entering your administrator password.
-
Update Homebrew: It’s good practice to update Homebrew and its package definitions regularly:
brew update -
Search for Software: To find a specific application, you can use the
brew searchcommand. For example, to search for Git:
```bash
brew search git
```
-
Install Software: Once you’ve identified the package you want, use the
brew installcommand. For example, to install Git:brew install gitHomebrew will download the necessary files, compile them if required, and install the software in a standardized location on your Mac, making it accessible from the command line and often creating symbolic links so it appears in your Applications folder as well.
-
Uninstall Software: To remove software installed via Homebrew:
brew uninstall <package_name>
When to Use Command Line Installations:
- Developer Tools: Essential for installing programming languages (Python, Node.js, Ruby), version control systems (Git), compilers, and other development utilities.
- System Utilities: Many advanced command-line tools for system administration, networking, and automation are available through Homebrew.
- AI and Machine Learning Frameworks: Libraries and tools for AI development are often best managed and installed via Homebrew.
- Customization and Power Users: For those who prefer to manage their software environment from the Terminal.
Managing Your Installed Applications
Once you’ve installed software, it’s important to know how to manage it effectively. This includes understanding where applications are stored, how to uninstall them, and keeping them up to date.
Locating and Launching Applications
By default, most applications installed via the App Store, .dmg files (dragged into Applications), and Homebrew are placed in the /Applications folder.
- Finder: You can access your Applications folder directly by clicking “Applications” in the Finder sidebar.
- Launchpad: This is a full-screen grid of all your installed applications. Click its icon in the Dock.
- Spotlight Search: The quickest way to launch an app is often by pressing Command + Spacebar to open Spotlight, typing the name of the application, and pressing Enter.
Uninstalling Applications
Properly uninstalling applications ensures that you remove all associated files and free up disk space.
-
App Store Apps:
- Open Launchpad.
- Click and hold on any app icon until they start to jiggle.
- Click the “X” icon that appears on the app you wish to uninstall.
- Confirm the deletion.
-
Apps from .DMG files (Drag-and-Drop):
- Open your /Applications folder in Finder.
- Locate the application you want to uninstall.
- Drag the application icon to the Trash in your Dock.
- Empty the Trash (right-click on the Trash icon and select “Empty Trash”).
Note: Some applications may leave behind preference files or support files. For a more thorough uninstallation, you might consider using a dedicated uninstaller app, though this is rarely necessary for most typical Mac applications.
-
Apps from .PKG installers:
- Many .pkg installers provide an uninstaller within the application itself, often found in the application’s folder within /Applications or by launching the main app and looking for an “Uninstall” option in its menus (e.g., File or Help).
- If no uninstaller is provided, you would typically follow the drag-to-Trash method as with .dmg files.
-
Apps Installed via Homebrew:
- Use the
brew uninstall <package_name>command in Terminal, as mentioned earlier.
- Use the
Keeping Software Updated
Keeping your software updated is crucial for security, performance, and accessing the latest features.
- Mac App Store: Updates are usually managed automatically. You can check for updates manually by opening the App Store, clicking “Updates” in the sidebar, and then clicking “Update All” or individual “Update” buttons.
- Third-Party Apps (Non-App Store):
- Auto-Update Features: Many applications have built-in auto-update features. Check the app’s preferences or settings for an option like “Automatically check for updates.”
- Manual Checks: Periodically visit the developer’s website for the app to see if a new version is available.
- Homebrew: Run
brew updatefollowed bybrew upgradeto update all your Homebrew-installed packages.
Troubleshooting Common Installation Issues
While Mac installations are generally smooth, you might occasionally encounter problems. Here are a few common issues and their solutions:
“App Can’t Be Opened Because It Is from an Unidentified Developer.”
This is a security feature in macOS. To bypass it for an app you trust:
- Locate the application icon.
- Control-click (or right-click) the application icon.
- Select “Open” from the contextual menu.
- In the dialog box that appears, click “Open” again.
- You will only need to do this the first time you open the app.
“Installation Failed” or “Corrupted Download”
- Check Your Internet Connection: Ensure you have a stable internet connection.
- Redownload: The download might have been interrupted or corrupted. Delete the downloaded file and download it again from the official source.
- Disk Space: Make sure you have enough free space on your Mac’s hard drive for the installation.
- System Requirements: Verify that your Mac meets the minimum system requirements for the software you’re trying to install.

App Doesn’t Launch After Installation
- Restart Your Mac: A simple restart can often resolve temporary glitches.
- Reinstall the Application: Uninstall the app completely and then try installing it again.
- Check for Updates: Ensure you have the latest version of the app and that your macOS is up to date.
- Conflicting Software: In rare cases, other software on your Mac might interfere. Try closing other running applications before launching the problematic one.
By familiarizing yourself with these installation methods and troubleshooting tips, you’ll be well-equipped to install any software you need, whether it’s for enhancing your tech workflow, building your brand, or managing your finances, all on your Mac. Enjoy exploring the vast ecosystem of applications available for macOS!
aViewFromTheCave is a participant in the Amazon Services LLC Associates Program, an affiliate advertising program designed to provide a means for sites to earn advertising fees by advertising and linking to Amazon.com. Amazon, the Amazon logo, AmazonSupply, and the AmazonSupply logo are trademarks of Amazon.com, Inc. or its affiliates. As an Amazon Associate we earn affiliate commissions from qualifying purchases.