
In the fast-evolving landscape of modern web development, Node.js stands as a foundational technology, empowering developers to build scalable network applications with JavaScript. Its unique ability to run JavaScript on the server-side, coupled with its asynchronous, event-driven architecture, has made it indispensable for everything from real-time applications and APIs to microservices and command-line tools. Complementing Node.js is npm (Node Package Manager), the world’s largest software registry, providing access to a vast ecosystem of reusable code modules.
For developers and system administrators alike, setting up a robust development environment is paramount. Ubuntu, a popular and powerful open-source operating system, is often the go-to choice for its stability, extensive community support, and ease of use. This guide will walk you through various methods of installing Node.js and npm on Ubuntu, detailing each approach, its advantages, and providing clear, step-by-step instructions. Whether you’re aiming for quick setup, the latest features, or ultimate version control, we have a method tailored for your needs.
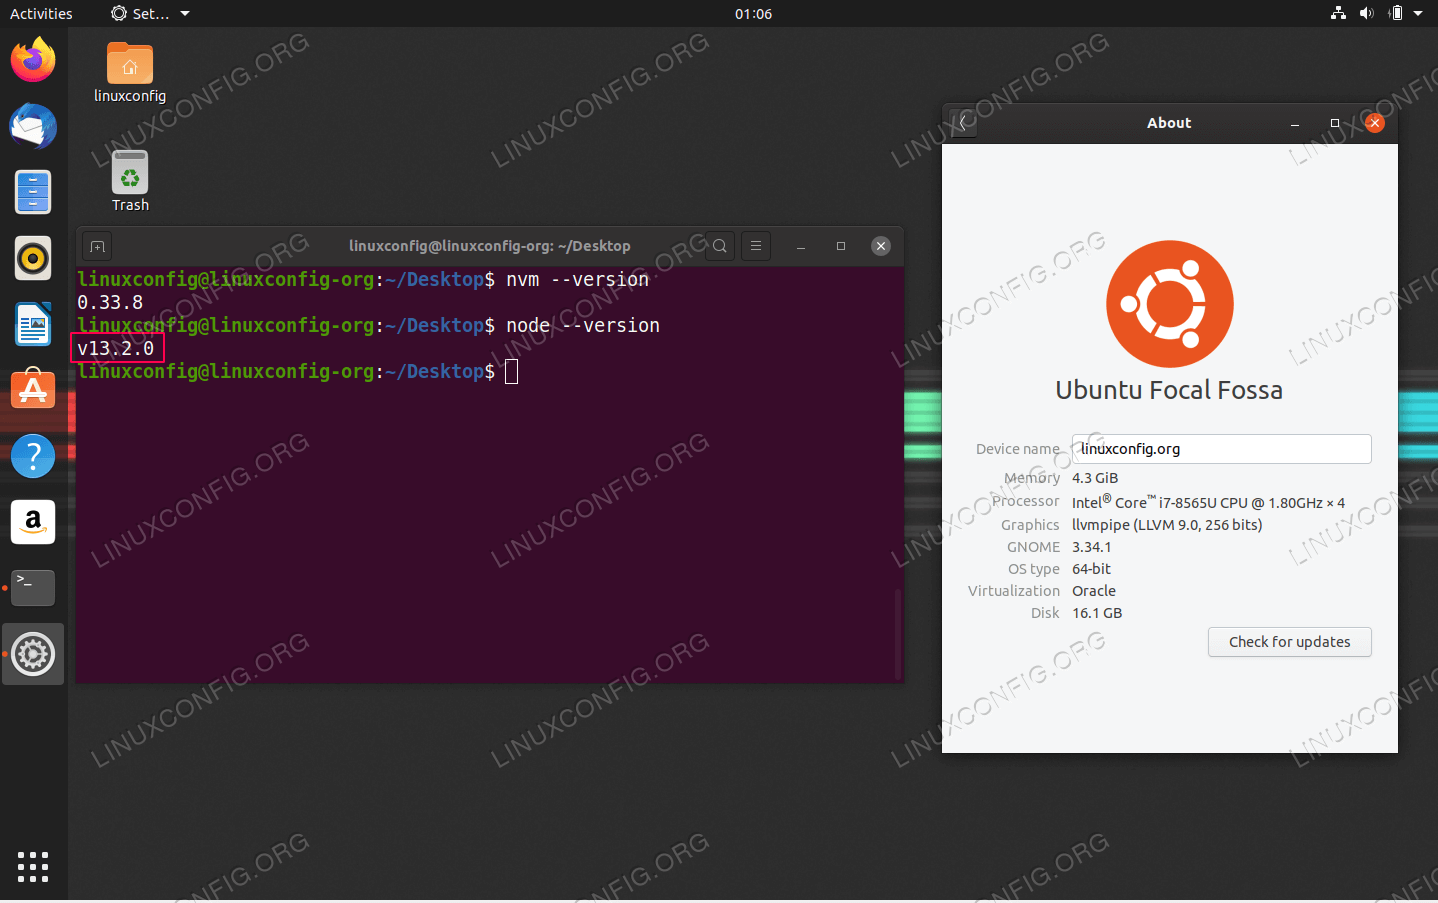
Understanding Node.js and Its Ecosystem
Before diving into the installation process, it’s beneficial to grasp what Node.js is, why it’s so widely adopted, and the crucial role npm plays within its ecosystem. This foundational understanding will help you appreciate the different installation methods and choose the one that best suits your project requirements.
What is Node.js?
At its core, Node.js is an open-source, cross-platform JavaScript runtime environment that executes JavaScript code outside a web browser. Built on Google Chrome’s V8 JavaScript engine, Node.js allows developers to use JavaScript for server-side programming, database interactions, and building command-line tools. This “JavaScript everywhere” paradigm streamlines development workflows, as both frontend and backend logic can be written in a single language. Its non-blocking I/O model and event-driven architecture make it exceptionally efficient for data-intensive real-time applications, often outperforming traditional server technologies in specific use cases. Developers leverage Node.js to create robust web servers, intricate APIs, streaming applications, and much more, driving innovation across various digital platforms.
The Role of npm: Node Package Manager
No discussion of Node.js is complete without mentioning npm, the Node Package Manager. npm is the default package manager for Node.js and is essential for managing dependencies and sharing reusable code. Think of it as an expansive library of pre-written modules and tools that you can easily incorporate into your projects. When you create a Node.js project, npm helps you define its dependencies in a package.json file, allowing other developers to quickly set up your project by simply running npm install. Beyond managing project-specific dependencies, npm also allows you to install global packages, which are command-line tools accessible from anywhere on your system. It’s the backbone of the Node.js ecosystem, fostering collaboration and accelerating development by providing access to millions of open-source packages.
Why Ubuntu for Node.js Development?
Ubuntu has emerged as a preferred operating system for developers, and for good reason. Its Debian-based architecture provides a robust and secure foundation, while its open-source nature means a vast community contributes to its continuous improvement and support. For Node.js development, Ubuntu offers several compelling advantages:
- Stability and Reliability: Ubuntu is known for its rock-solid stability, making it an ideal environment for long-running server applications and development workstations.
- Extensive Package Repositories: Its
aptpackage manager provides easy access to a wealth of software, often keeping critical development tools updated. - Developer-Friendly Tools: Ubuntu comes pre-equipped with many utilities developers need and offers straightforward installation for others, including compilers, version control systems, and text editors.
- Strong Community Support: Should you encounter any issues, Ubuntu’s massive global community provides extensive documentation, forums, and online resources for troubleshooting.
- Cloud Integration: Ubuntu is a dominant OS in cloud environments, meaning your local development setup can closely mirror your production deployment, reducing potential “it worked on my machine” headaches.
For these reasons, choosing Ubuntu as your Node.js development platform is a strategic decision that promises a smooth and productive workflow.
Choosing Your Node.js Installation Method on Ubuntu
Installing Node.js on Ubuntu offers flexibility, with several methods catering to different needs. Each approach has its own set of advantages and is suitable for particular scenarios. Understanding these distinctions will help you select the most appropriate method for your development environment.
Method 1: Quick Setup with APT (Ubuntu’s Default Package Manager)
The apt (Advanced Package Tool) system is Ubuntu’s native way of managing software packages. Installing Node.js via apt is often the quickest and simplest method, especially for those new to Node.js or when you need a stable, albeit not always the absolute latest, version. It’s convenient because it integrates directly with Ubuntu’s system-wide package management. The primary advantage here is ease of maintenance; updates can be handled through standard system updates. However, the Node.js version available in Ubuntu’s default repositories can sometimes lag behind the latest official releases, which might be a concern if your project requires cutting-edge features or specific newer versions.
Method 2: Accessing the Latest Versions with NodeSource
For developers who require more recent Node.js versions than what’s typically found in Ubuntu’s default repositories, adding the NodeSource PPA (Personal Package Archive) is an excellent solution. NodeSource maintains up-to-date repositories for various Node.js versions, allowing you to install specific major releases (e.g., Node.js 18.x, 20.x, etc.) using apt after adding their PPA. This method strikes a balance between ease of use (still leveraging apt) and access to newer features and performance improvements. It’s generally recommended for production environments or development teams that need to stay current without sacrificing the convenience of a system-wide package manager.
Method 3: Empowering Version Management with NVM (Node Version Manager)
For seasoned developers or those working on multiple projects with varying Node.js version requirements, NVM (Node Version Manager) is arguably the most powerful and flexible installation method. NVM allows you to install, manage, and switch between multiple Node.js versions on the same machine. This is incredibly useful for testing compatibility, maintaining legacy projects, or developing new applications that demand the absolute latest features. Instead of a single system-wide Node.js installation, NVM installs Node.js within your user’s home directory, avoiding potential conflicts with system packages and granting greater control over permissions. While it involves a few more initial setup steps, the long-term benefits of version control and isolation are immense.
Step-by-Step Installation Guides
Now that we’ve explored the different installation philosophies, let’s get hands-on with the practical steps for each method.
Installing Node.js via APT
This method is ideal for a quick setup, providing a stable version of Node.js readily available in Ubuntu’s default repositories.
Updating Your Package List
Before installing any new software, it’s always good practice to update your local package index. This ensures you’re fetching the latest available package information.
sudo apt update
Executing the Installation
Once your package list is updated, you can install Node.js and npm using a single command:
sudo apt install nodejs npm
The sudo command grants administrative privileges, apt install is the command to install packages, and nodejs and npm are the packages we want to install. The system will prompt you to confirm the installation and any additional dependencies. Type Y and press Enter.
Verifying Your Installation
After the installation completes, you can verify that Node.js and npm have been successfully installed and check their versions:
node -v
npm -v
You should see output similar to v12.22.9 (or whatever stable version your Ubuntu repository provides) for Node.js and 6.14.15 for npm.
Addressing Potential nodejs vs node Conflicts (Optional)
In some older Ubuntu distributions, the executable for Node.js was named nodejs, while the node command might have been used by another package (like Node.js’s “amateur packet radio” daemon). This led to a conflict where node -v wouldn’t work, and you’d have to use nodejs -v. Modern Ubuntu versions and the nodejs package in the repositories now correctly link node to the Node.js executable. However, if you ever encounter node: command not found after installing via apt, you might need to create a symbolic link:
sudo ln -s /usr/bin/nodejs /usr/bin/node
This command creates a symlink, allowing you to use node instead of nodejs.
Installing Node.js via NodeSource PPA
This method is recommended for accessing more recent and specific versions of Node.js while still benefiting from apt package management.
Adding the NodeSource Repository
First, you need to install curl if you don’t already have it. curl is a command-line tool for transferring data with URLs.
sudo apt install curl
Next, you will download and run the setup script from NodeSource. This script will add the appropriate NodeSource repository to your system’s sources.list.d directory and update your apt package index. Important: Replace 20.x in the command below with the specific Node.js version you wish to install (e.g., 18.x, 22.x, etc.). You can find available versions on the NodeSource GitHub repository.
curl -fsSL https://deb.nodesource.com/setup_20.x | sudo -E bash -
The -fsSL flags tell curl to be silent, fail silently, and follow redirects. sudo -E bash - executes the script with root privileges while preserving your current environment variables, which is important for the script to correctly identify your system.
Performing the Installation
Once the NodeSource repository is added, you can install Node.js (and npm, which comes bundled with Node.js in this distribution) using apt:
sudo apt install nodejs
This command will fetch the specified Node.js version from the NodeSource repository.
Confirming Your Node.js and npm Versions
Verify the installation by checking the versions:
node -v
npm -v
You should now see the Node.js version you selected (e.g., v20.x.x) and its corresponding npm version. This method typically bundles the node executable correctly, so a symbolic link should not be necessary.
Installing and Managing Node.js with NVM
NVM provides unparalleled flexibility for managing multiple Node.js versions. This is the recommended method for developers who work on diverse projects.
Prerequisites: Installing curl and git (if needed)
You’ll need curl to download NVM and git for some operations, although curl is usually sufficient for the initial NVM installation.

sudo apt install curl git
Downloading and Installing NVM
Use curl to download and run the NVM installation script. It’s always a good idea to check the NVM GitHub page for the latest installation script command, but typically it looks like this:
curl -o- https://raw.githubusercontent.com/nvm-sh/nvm/v0.39.7/install.sh | bash
Note: Always verify the latest NVM version from its official GitHub repository (e.g., nvm-sh/nvm) and update the v0.39.7 tag accordingly.
This script clones the NVM repository to ~/.nvm, adds the necessary source lines to your shell’s profile file (e.g., ~/.bashrc, ~/.zshrc, or ~/.profile), and then sources those files.
Activating NVM in Your Shell
After running the installation script, you either need to restart your terminal session or manually source your shell’s profile file for NVM to be immediately available.
source ~/.bashrc # Or ~/.zshrc or ~/.profile depending on your shell
Now, verify NVM is installed correctly:
nvm --version
You should see the NVM version number.
Installing Specific Node.js Versions with NVM
With NVM active, you can install any Node.js version.
To install the latest LTS (Long Term Support) version:
nvm install --lts
To install a specific version (e.g., Node.js 20):
nvm install 20
To install the latest stable version:
nvm install node
You can install multiple versions. For example, if you need Node.js 18 for an older project:
nvm install 18
Setting a Default Node.js Version
After installing multiple versions, you can set a default version that NVM will use whenever you open a new shell:
nvm alias default 20
This command sets Node.js version 20 as the default.
Switching Between Node.js Versions
To switch to a different installed version for your current shell session:
nvm use 18
To see all installed versions and which one is currently active:
nvm ls
The active version will be highlighted (e.g., with an arrow ->).
Updating and Uninstalling Node.js Versions via NVM
To update a specific version (e.g., to the latest patch of Node.js 20), you’d typically reinstall it:
nvm install 20 --reinstall-packages-from=node # Installs the latest 20.x.x and migrates global packages
To uninstall a version you no longer need:
nvm uninstall 18
NVM’s flexibility makes it a powerful tool for developers navigating diverse project requirements.
Post-Installation Best Practices and Troubleshooting
Once Node.js and npm are installed, a few best practices and troubleshooting tips can help ensure a smooth development experience.
Keeping Node.js and npm Updated
Regularly updating your Node.js and npm installations is crucial for security, performance, and access to new features.
-
For APT Installations (System-wide):
sudo apt update
sudo apt upgrade nodejs npm
This will update Node.js and npm to the latest versions available in your configured repositories (either Ubuntu’s default or NodeSource’s).
-
For NVM Installations:
NVM simplifies updates by allowing you to install newer versions and then switch to them.
bash

nvm install 22  # Install the new version (e.g., Node.js 22)

nvm use 22      # Switch to it

nvm alias default 22 # Make it the default

nvm uninstall 20 # Uninstall the older version if no longer needed
To update npm for a specific Node.js version installed via NVM (though npm usually updates withnvm install):
bash

npm install -g npm@latest
This command updates npm itself globally for the currently active Node.js version.
Managing Global npm Packages
When installing npm packages globally (using the -g flag, e.g., npm install -g nodemon), they are available as command-line tools across your system.
-
With APT/NodeSource Installations: Global packages are typically installed in
/usr/local/lib/node_modules. You might needsudoto install global packages (sudo npm install -g <package>), which can pose security risks if you’re not careful. A common workaround for permission issues withoutsudois to change npm’s default directory, but this can be complex. -
With NVM Installations: One of NVM’s biggest advantages is that global packages are installed within your user’s NVM directory (
~/.nvm/versions/node/<version>/lib/node_modules). This means you do not needsudoto install global packages, significantly improving security and simplifying management. Each Node.js version managed by NVM has its own set of global packages, which is excellent for isolation.
Common Issues and Solutions
-
node: command not foundornpm: command not found:- Reason: Node.js or npm is not in your system’s PATH.
- Solution:
- If using
apt, ensure the symbolic link fromnodejstonodeis present (sudo ln -s /usr/bin/nodejs /usr/bin/node). - If using NVM, ensure NVM is sourced in your shell’s profile (
source ~/.bashrc) and thatnvm use <version>has been run for the current session. Restarting your terminal often resolves NVM path issues.
- If using
-
Permission Errors when installing global packages (without NVM):
- Reason: npm is trying to write to a system-owned directory (e.g.,
/usr/local) without appropriate permissions. - Solution: Use NVM! It isolates installations to your user directory. If you must use a system-wide Node.js without NVM, you can configure npm to install global packages in your home directory, but this setup is more involved than just using NVM. Alternatively, if you understand the risks, you can use
sudo npm install -g <package>, but this is generally discouraged for development.
- Reason: npm is trying to write to a system-owned directory (e.g.,
-
Outdated Node.js/npm versions (for APT installs):
- Reason: Ubuntu’s default repositories provide older, more stable versions.
- Solution: Switch to the NodeSource PPA or NVM for access to the latest releases.
Uninstalling Node.js and NVM
If you need to remove Node.js or NVM from your system:
-
For APT Installations (System-wide):
sudo apt purge nodejs npm sudo apt autoremovepurgeremoves the packages and their configuration files, whileautoremoveremoves any orphaned dependencies. -
For NVM Installations:
First, remove all Node.js versions installed by NVM:
bash

nvm uninstall --all
Then, remove NVM itself by deleting its directory and relevant lines from your shell’s profile file (e.g.,~/.bashrc).
bash

rm -rf ~/.nvm
Edit your~/.bashrc(or~/.zshrc,~/.profile) and remove lines that look like:
bash

export NVM_DIR="$HOME/.nvm"

[ -s "$NVM_DIR/nvm.sh" ] && . "$NVM_DIR/nvm.sh" # This loads nvm

[ -s "$NVM_DIR/bash_completion" ] && . "$NVM_DIR/bash_completion" # This loads nvm bash_completion
Finally, restart your terminal.

Conclusion: Embracing Your Node.js Journey on Ubuntu
Installing Node.js on Ubuntu is a fundamental step for any developer looking to leverage the power of JavaScript for server-side applications. We’ve explored three primary methods: the straightforward apt package manager for stable, easy installations; the NodeSource PPA for accessing the latest official releases while retaining apt convenience; and the highly recommended NVM, which provides unparalleled flexibility for managing multiple Node.js versions for diverse project requirements.
For most developers, especially those working on various projects or needing specific Node.js versions, NVM offers the most robust and hassle-free experience. Its ability to switch between environments without system-wide conflicts is invaluable. However, if you only need one stable version and prefer simplicity, the NodeSource PPA via apt is an excellent choice.
With Node.js and npm successfully installed, you’re now equipped to dive into the vast ecosystem of JavaScript development. Whether you’re building a REST API, a real-time chat application, or a sophisticated command-line tool, your Ubuntu environment is ready to support your ambitions. Start exploring npm packages, experiment with frameworks like Express.js or NestJS, and begin creating innovative solutions. The journey into Node.js development on Ubuntu is rich with possibilities, and with this guide, you’ve taken the essential first step. Happy coding!
aViewFromTheCave is a participant in the Amazon Services LLC Associates Program, an affiliate advertising program designed to provide a means for sites to earn advertising fees by advertising and linking to Amazon.com. Amazon, the Amazon logo, AmazonSupply, and the AmazonSupply logo are trademarks of Amazon.com, Inc. or its affiliates. As an Amazon Associate we earn affiliate commissions from qualifying purchases.