Embarking on the journey to install a new operating system (OS) on your personal computer can feel like a significant undertaking, but it’s a fundamental skill for anyone looking to refresh their hardware, unlock new features, or simply improve performance. Whether you’re looking to upgrade from an older version of Windows, switch to Linux, or even explore macOS on compatible hardware, the process, while detailed, is remarkably achievable with the right guidance. This comprehensive guide will walk you through every step, from preparation to the final reboot, ensuring a smooth and successful OS installation.

The decision to install a new OS often stems from various motivations. Perhaps your current system is sluggish, plagued by errors, or no longer supported with critical security updates. Alternatively, you might be drawn to the unique capabilities, cost-effectiveness, or open-source nature of a different OS. Regardless of your reasons, understanding the nuances of the installation process is key to avoiding potential pitfalls and maximizing the benefits of your new digital environment.
This guide is designed to cater to a broad audience, encompassing beginners and those with some technical familiarity. We’ll break down the process into manageable sections, covering everything from backing up your data to configuring your new OS.
## Preparing for the OS Installation
Before you even think about booting from an installation media, meticulous preparation is paramount. This phase is often overlooked, yet it’s the most critical for a successful and stress-free installation. Skipping these steps can lead to data loss, compatibility issues, or a frustratingly incomplete setup.
### Understanding Your Hardware and Software Needs
The first crucial step is to assess your hardware’s compatibility with the operating system you intend to install. Each OS has specific minimum and recommended hardware requirements, including processor speed, RAM, storage space, and graphics capabilities. Visiting the official website of your chosen OS is essential. Look for their system requirements section and compare it against your PC’s specifications.
CPU: Ensure your processor meets or exceeds the minimum requirements. Modern operating systems often leverage multi-core processors for better performance.
RAM: The amount of Random Access Memory (RAM) significantly impacts your system’s responsiveness. More RAM generally means smoother multitasking and better handling of demanding applications.
Storage: You’ll need sufficient free space on your hard drive or SSD for the OS installation and for your applications and files. Be generous; it’s better to have too much space than too little.
Graphics Card: While some OS installations can work with basic graphics, a dedicated graphics card will be necessary for optimal performance in demanding tasks like gaming or video editing. Check if your graphics card is supported and if specific drivers are recommended.
UEFI/BIOS Settings: Modern PCs use UEFI (Unified Extensible Firmware Interface) instead of traditional BIOS. Understanding how to access and navigate your system’s UEFI/BIOS settings is crucial for booting from your installation media.
Beyond hardware, consider the software you rely on. Will your essential applications be compatible with the new OS? Many popular programs are cross-platform, but specialized software might have OS-specific versions or require an alternative. Researching this beforehand can save you a lot of hassle post-installation.
### Backing Up Your Precious Data
This is, without question, the most vital preparation step. Installing a new operating system, especially if it involves formatting your drive, will erase everything currently on your computer. Losing your personal files, photos, documents, and important projects can be devastating.
Methods for Data Backup:
- External Hard Drives or SSDs: This is the most straightforward and common method. Copy your important files and folders to an external storage device. Ensure the backup drive has enough capacity.
- Cloud Storage Services: Platforms like Google Drive, Dropbox, OneDrive, or iCloud offer convenient ways to back up your files. While convenient for access across devices, large backups can take time and may require a subscription for sufficient storage.
- Network Attached Storage (NAS): For a more robust home backup solution, a NAS device allows you to store and access files over your home network.
- Backup Software: Dedicated backup software can automate the process, allowing you to create full system images or selective file backups. Some operating systems come with built-in backup utilities.
What to Back Up:
- Documents: All your personal and work-related documents.
- Photos and Videos: Cherished memories that are irreplaceable.
- Music and Media Files: Your personal media library.
- Application Data: Settings, profiles, and saved games for your applications. Sometimes, application-specific backup utilities are available.
- Browser Bookmarks and Passwords: While browsers often sync these, a manual backup can be a lifesaver.
Once your data is safely backed up, perform a quick check to ensure you can access and open the files from your backup location. This confirms the integrity of your backup.
### Obtaining Your New Operating System and Installation Media
You’ll need a way to install the new OS. This typically involves creating a bootable USB drive or, less commonly nowadays, a DVD.
Download the OS Image:
- Windows: You can download the Windows Media Creation Tool from the official Microsoft website. This tool allows you to download the latest Windows ISO image and create a bootable USB drive directly.
- Linux: Most Linux distributions offer downloadable ISO images from their official websites (e.g., Ubuntu, Fedora, Debian).
- macOS: Installing macOS on non-Apple hardware (Hackintosh) is a complex and unsupported process, often requiring specific procedures and software not covered in this general guide.
Create Bootable Media:
-
For Windows and most Linux distributions: You’ll need a USB flash drive (at least 8GB, preferably 16GB or more) and a tool to write the ISO image to it. Popular free tools include Rufus (for Windows) and balenaEtcher (cross-platform).
- Download the chosen tool.
- Insert your USB drive.
- Launch the tool and select your downloaded OS ISO image.
- Choose your USB drive as the target.
- Start the process. This will format the USB drive and copy the OS files, making it bootable.
-
DVD (less common): If your PC has a DVD drive and you prefer this method, you can burn the ISO image to a blank DVD using your operating system’s built-in disc burning tools or third-party software.
Ensure your bootable media is properly created and that you have it readily available before proceeding to the installation itself.
## The Installation Process: Step-by-Step
With all preparations complete, you’re ready to begin the actual installation. This is where you’ll boot your PC from the installation media and follow the on-screen prompts.

### Booting from Your Installation Media
This is the first technical hurdle. Your computer’s boot order determines which device it tries to boot from first. By default, it’s usually your hard drive. You need to change this to prioritize your USB drive or DVD.
- Insert your bootable USB drive or DVD into your PC.
- Restart your computer.
- Access the Boot Menu or UEFI/BIOS Settings: As your PC starts to boot, you’ll see a message on the screen indicating which key to press to enter the Boot Menu or Setup (UEFI/BIOS). Common keys include
F2,F10,F12,Del, orEsc. You might need to be quick to press the correct key.- Boot Menu: If you enter the Boot Menu, you’ll see a list of bootable devices. Select your USB drive or DVD drive from the list and press
Enter. - UEFI/BIOS Settings: If you enter the UEFI/BIOS, navigate to the “Boot” or “Boot Order” section. Here, you’ll change the priority to make your USB drive or DVD drive the first boot device. Save your changes and exit the UEFI/BIOS. Your computer will then restart.
- Boot Menu: If you enter the Boot Menu, you’ll see a list of bootable devices. Select your USB drive or DVD drive from the list and press
- “Press any key to boot from USB…”: If the installation is set up correctly, you’ll likely see a message prompting you to “Press any key to boot from CD or DVD…” or similar for USB. Press any key quickly to proceed. If you miss this prompt, your computer will boot from its existing OS, and you’ll need to restart and try again.
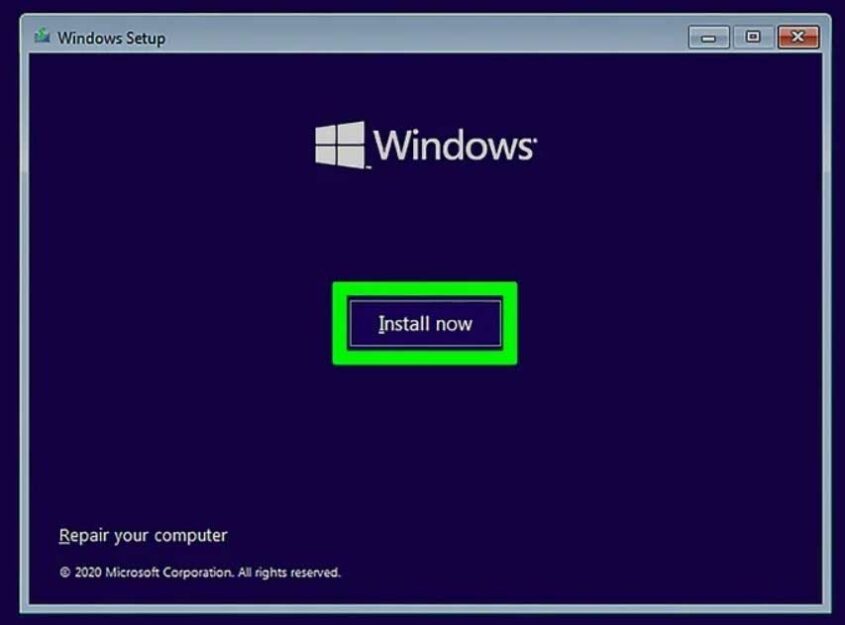
Once you successfully boot from the installation media, you’ll see the installer interface for your chosen operating system.
### Configuring Installation Options
The initial screens of the OS installer will guide you through essential configuration steps.
- Language, Time, and Keyboard Layout: Select your preferred language, time zone, and keyboard input method. These settings will apply throughout the installation and to your new OS.
- Product Key (Windows): For Windows, you’ll typically be prompted for a product key. You can often enter it at this stage or choose to “I don’t have a product key” and activate Windows later.
- License Terms: Read and accept the software license agreement.
- Installation Type: This is a crucial choice:
- Upgrade: This option attempts to install the new OS over your existing one, preserving your files, settings, and applications. It’s convenient but can sometimes lead to issues if the existing OS is unstable. It’s also only available for specific OS version upgrades (e.g., Windows 10 to Windows 11).
- Custom (Advanced) / Clean Install: This option allows you to partition your drive, format existing partitions, and install the OS fresh. This is generally the recommended method for a clean slate, optimal performance, and to resolve persistent issues. This is where you’ll choose where to install the OS.
### Disk Partitioning and Formatting
If you chose the “Custom” installation type, you’ll be presented with options to manage your storage drives.
- Identify Your Target Drive: You’ll see a list of drives and their partitions. Carefully identify the drive where you want to install the new OS. If you’re performing a clean install, you’ll likely want to format the primary partition of that drive.
- Formatting: Select the partition where you want to install the OS and choose the “Format” option. This will erase all data on that partition. Be absolutely certain you’ve selected the correct partition before formatting.
- Creating New Partitions (Optional): For advanced users, you can create new partitions for specific purposes (e.g., a separate partition for your OS and another for your personal files). This can simplify future reinstalls.
- Selecting Installation Location: After formatting or creating partitions, select the desired partition for the OS installation and click “Next.”
The installer will then begin copying files to your hard drive. This process can take anywhere from 10 minutes to over an hour, depending on your hardware and the speed of your installation media.
### Initial Setup and Configuration
Once the core OS files are copied, your computer will likely restart. You might need to remove the USB drive or ensure your boot order is set back to your hard drive to boot into the newly installed OS. The system will then guide you through the final setup.
- Region and Keyboard Settings: Confirm or adjust these settings.
- Network Connection: Connect to your Wi-Fi or wired network. This is often required for updates and account setup.
- Account Creation:
- Windows: You’ll be prompted to create a user account. You can sign in with a Microsoft account or create a local account.
- Linux: You’ll create a username and password for your primary user account.
- Privacy Settings: Review and configure privacy options, such as location services, diagnostic data sharing, and ad personalization.
- Cortana/Siri/Other Assistants: You may be asked if you want to set up voice assistants.
- Updates: The OS will likely check for and install critical updates automatically.
After completing these steps, you’ll be greeted by your new desktop. Congratulations, you’ve successfully installed a new operating system!
## Post-Installation Essentials and Optimization
Your new OS is installed, but the journey isn’t quite over. Several crucial steps will ensure your system is secure, functional, and optimized for performance.
### Installing Drivers
While modern operating systems come with a vast array of built-in drivers, your hardware might perform optimally with specific, manufacturer-provided drivers. These drivers are essential for your graphics card, sound card, network adapter, and other peripherals to function correctly and at their best.
- Identify Missing Drivers: Check your Device Manager (in Windows, search for “Device Manager”) for any devices with yellow exclamation marks, indicating a problem or a missing driver.
- Manufacturer Websites: Visit the support or download sections of your motherboard manufacturer’s website, your graphics card manufacturer’s website (NVIDIA, AMD, Intel), and any other component manufacturers.
- Download and Install: Download the latest drivers for your specific hardware models and your newly installed OS version. Install them one by one, restarting your computer after each major driver installation (especially for graphics and chipset drivers).
- Windows Update: Sometimes, Windows Update can find and install necessary drivers automatically. Keep it running after the initial installation.
### System Updates and Security
Keeping your operating system up-to-date is non-negotiable for security and performance.
- Run System Updates: Immediately after driver installation, go to your OS’s update settings (e.g., Windows Update, Software Updater in Linux) and check for available updates. Install all recommended and critical updates. This often includes security patches that protect against malware and exploits.
- Install Antivirus/Antimalware Software: If you installed Windows, it comes with Windows Defender, a capable built-in antivirus. Ensure it’s running and up-to-date. If you prefer a third-party solution, install your preferred antivirus program. For Linux, while generally more secure by design, consider installing an antivirus if you handle Windows files or are concerned about specific threats.
- Configure Firewall: Ensure your OS firewall is enabled and configured correctly. Both Windows and Linux have robust built-in firewalls.
### Software Installation and Customization
Now you can start installing your favorite applications and personalizing your new environment.
- Essential Software: Install your web browser, office suite, media players, communication tools, and any other software you use daily.
- Personalization: Customize your desktop background, theme, icons, and taskbar settings to your liking. This is where you make the OS truly yours.
- System Optimization:
- Disk Cleanup: Run disk cleanup tools to remove temporary files and free up space.
- Startup Programs: Review and disable unnecessary programs that launch at startup, as this can significantly speed up boot times.
- Performance Settings: Explore OS-specific performance tuning options, though for most users, a clean installation and up-to-date drivers are sufficient.
By meticulously following these steps, from preparation to post-installation optimization, you can ensure a smooth, secure, and efficient experience with your newly installed operating system. Enjoy the renewed performance and capabilities of your PC!
aViewFromTheCave is a participant in the Amazon Services LLC Associates Program, an affiliate advertising program designed to provide a means for sites to earn advertising fees by advertising and linking to Amazon.com. Amazon, the Amazon logo, AmazonSupply, and the AmazonSupply logo are trademarks of Amazon.com, Inc. or its affiliates. As an Amazon Associate we earn affiliate commissions from qualifying purchases.