Upgrading your computer’s Central Processing Unit (CPU) is one of the most impactful ways to breathe new life into your existing system, significantly boosting its performance, responsiveness, and overall capability. Whether you’re a gamer seeking smoother frame rates, a creative professional demanding faster rendering times, or simply a power user frustrated by sluggish operations, a new CPU can be the key to unlocking your PC’s true potential. This guide will walk you through the entire process of installing a new CPU, from initial preparation to the final boot-up, ensuring a successful and seamless upgrade.
Understanding Your Current System and CPU Compatibility
Before you even think about purchasing a new CPU, a crucial first step is to understand your current system’s specifications and, most importantly, its CPU socket compatibility. Attempting to install a CPU that doesn’t physically fit your motherboard’s socket is a common and costly mistake.
Identifying Your Motherboard and CPU Socket
Your motherboard is the central hub of your computer, and the CPU socket is a specific type of connector on the motherboard where the CPU is installed. Different CPU manufacturers (primarily Intel and AMD) use different socket designs, and even within a single manufacturer, socket types can change with different generations of processors.
To identify your current motherboard and CPU socket:
- Using System Information (Windows):
- Press the
Windows key + Rto open the Run dialog box. - Type
msinfo32and press Enter. - In the System Information window, look for “BaseBoard Product” (your motherboard model) and “Processor” (your current CPU model).
- You can then search online for your motherboard model followed by “socket type” to determine the compatible socket.
- Press the
- Using Third-Party Software: Tools like CPU-Z are excellent for gathering detailed hardware information. Download and run CPU-Z, and it will clearly display your motherboard manufacturer, model, and the CPU socket type.
- Physically Inspecting Your Motherboard (for experienced users): If you’re comfortable opening your computer case, the CPU socket is a prominent square or rectangular component on the motherboard, usually covered by a heatsink and fan. You can often find the socket type printed directly on the motherboard near the socket itself.
Checking Motherboard BIOS/UEFI Compatibility
Even if a CPU physically fits your motherboard’s socket, it doesn’t guarantee it will work. Motherboards have a BIOS (Basic Input/Output System) or UEFI (Unified Extensible Firmware Interface) – firmware that initializes your hardware during startup. This firmware needs to have support for the new CPU you intend to install.
- Motherboard Manufacturer’s Website: This is your most reliable source. Navigate to the support section of your motherboard manufacturer’s website. Find your specific motherboard model and look for a “CPU Support List” or “Compatibility List.” This list will detail which CPUs are supported by your motherboard and, crucially, which BIOS/UEFI version is required for each supported CPU.
- Updating Your BIOS/UEFI: If your motherboard supports the new CPU but requires a newer BIOS/UEFI version, you must update it before installing the new CPU. Failing to do so can result in your system not booting at all. The process for updating BIOS/UEFI varies by manufacturer, but it generally involves downloading the correct firmware from their website, transferring it to a USB drive, and accessing the BIOS/UEFI settings during boot-up to initiate the update. Exercise extreme caution during BIOS/UEFI updates, as an interruption or error can brick your motherboard.
Preparing for the CPU Installation
With your compatible CPU identified and your motherboard’s BIOS/UEFI up-to-date, it’s time to gather your tools and prepare your workspace. This preparation phase is crucial for a smooth and safe installation.
Essential Tools and Materials
- New CPU: Ensure you have the correct CPU that is compatible with your motherboard socket and has been verified on the motherboard’s support list.
- Anti-static Wrist Strap: This is a non-negotiable item. CPUs and other computer components are extremely sensitive to electrostatic discharge (ESD), which can permanently damage them. A wrist strap grounds you to the computer case, preventing static buildup.
- Thermal Paste: While many new CPUs come with a heatsink that has pre-applied thermal paste, it’s always good to have a tube of aftermarket thermal paste on hand. High-quality thermal paste can improve heat dissipation, leading to better performance and longevity.
- Small Phillips Head Screwdriver: For removing and reattaching the CPU cooler.
- Isopropyl Alcohol (90% or higher) and Lint-Free Cloths: For cleaning off old thermal paste from the heatsink and CPU if it’s not pre-applied on the new one.
- Compressed Air Can: For cleaning dust from the motherboard and CPU socket.
- Your Motherboard Manual: This will be invaluable for specific instructions regarding your CPU cooler and socket.
- A Clean, Well-Lit Workspace: Avoid carpeting, as it’s a major source of static electricity.
Safely Opening Your Computer Case and Grounding Yourself
- Power Down Completely: Shut down your computer through the operating system. Then, turn off the power supply unit (PSU) using the switch on the back of the case. Finally, unplug the power cord from the wall outlet.
- Discharge Residual Power: Press and hold the computer’s power button for about 15-30 seconds. This helps discharge any remaining power in the capacitors.
- Open the Case: Most computer cases have side panels secured by screws on the back. Remove these screws and slide or lift off the side panel. Refer to your case manual if you’re unsure.
- Ground Yourself: Put on your anti-static wrist strap. Secure the metal clip to an unpainted metal part of your computer’s chassis. Ensure the strap is snug against your skin.
The CPU Installation Process: Step-by-Step
Now for the main event. Follow these steps carefully to ensure a successful CPU installation.
Removing the Old CPU Cooler and CPU
- Identify the CPU Cooler: The CPU cooler is the large heatsink and fan assembly directly above the CPU.
- Disconnect Fan Cable: Locate the CPU fan cable plugged into the “CPU_FAN” header on your motherboard and gently unplug it.
- Remove the Cooler: The method for removing the cooler depends on its mounting mechanism.
- Screws: Many coolers are secured with screws. Unscrew them in a diagonal pattern (like loosening lug nuts on a car wheel) to ensure even pressure release.
- Clips/Levers: Some stock coolers use plastic clips or metal levers. Carefully disengage these.
- Backplate: Some coolers have a backplate that attaches to the motherboard. You may need to access the rear of the motherboard for this.
- Gently Remove the Cooler: Once the cooler is detached, gently twist it slightly to break the seal of the thermal paste, then lift it straight up. Do not force it. If it’s stuck, a gentle wiggle should suffice.
- Clean the Old Thermal Paste:
- From the Heatsink: Use isopropyl alcohol and a lint-free cloth to thoroughly clean the base of the heatsink.
- From the Motherboard (if any residue): If any paste got on the motherboard, carefully clean it with alcohol and a lint-free cloth.
- Remove the Old CPU:
- Locate the CPU Socket Lever: On the CPU socket, you’ll find a small metal lever.
- Release the Lever: Gently push down and to the side to unlatch the lever. This will lift a retention bracket that holds the CPU in place.
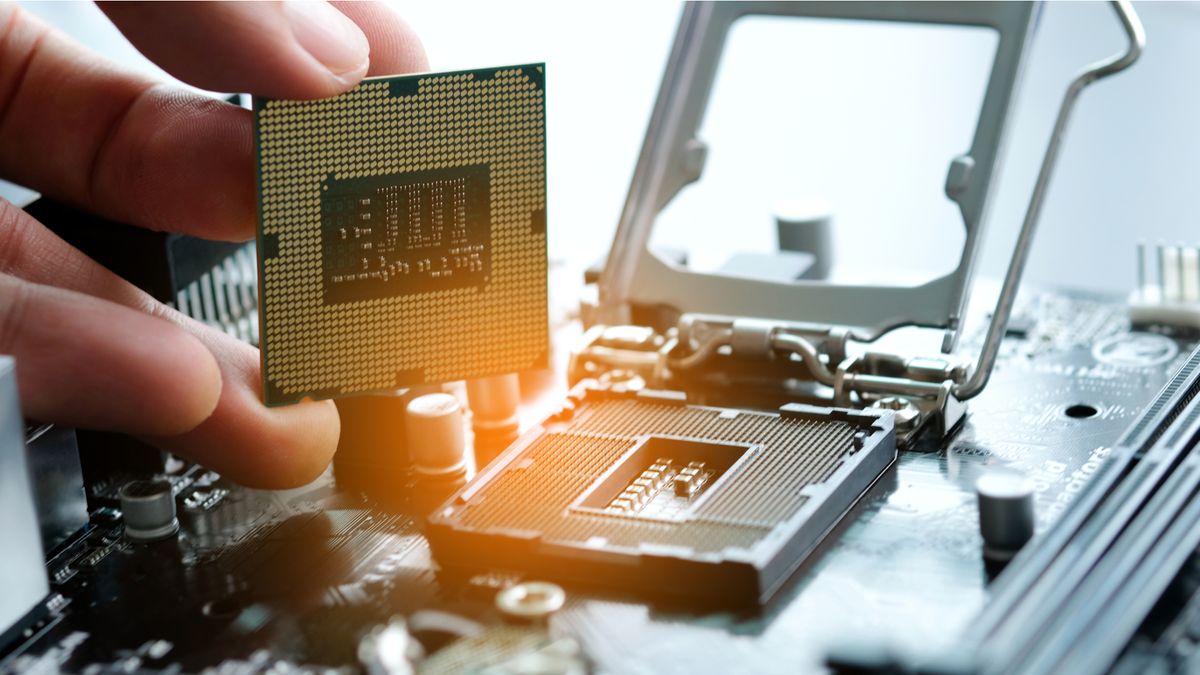
- Lift Out the Old CPU: The CPU can now be gently lifted straight up. Handle it by the edges only. Avoid touching the pins on the bottom (AMD) or the contact pads on the bottom (Intel).
Installing the New CPU
- Prepare the CPU Socket:
- Remove Dust: Use a can of compressed air to blow out any dust from the CPU socket.
- Inspect for Bent Pins (AMD): If you have an AMD CPU, carefully inspect the pins in the socket for any signs of bending. If you find any, you may need to very gently try to straighten them with a very fine-tipped tool (like a mechanical pencil lead), but this is a delicate operation. Intel CPUs have pads on the CPU itself, not pins in the socket.
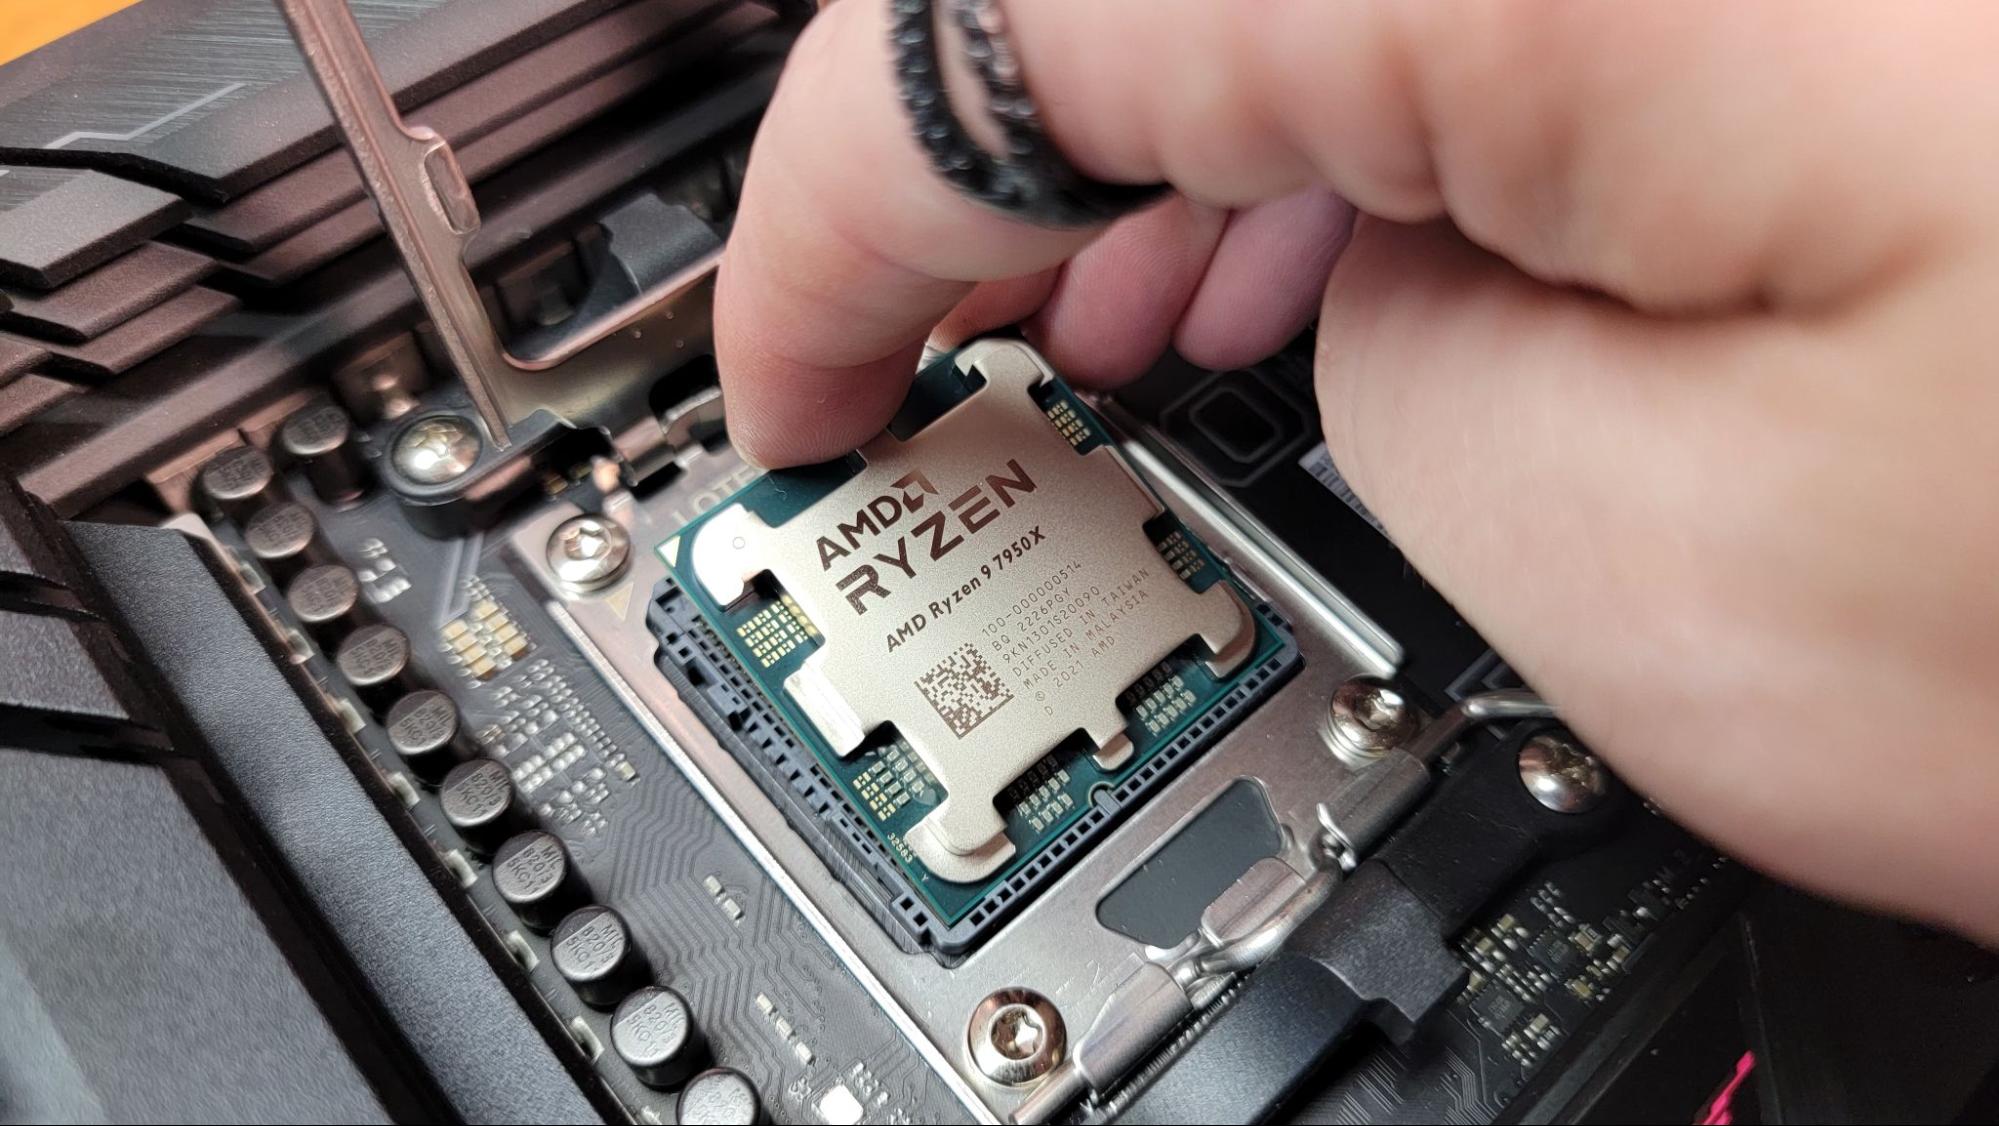
- Align the New CPU:
- Intel CPUs: Look for a small golden triangle or notch on one corner of the CPU. This triangle/notch corresponds to a similar mark on the CPU socket.
- AMD CPUs: Look for a small triangle on one corner of the CPU. This triangle corresponds to a similar notch on the CPU socket.
- Crucially, do not force the CPU. It should drop into the socket with minimal effort when aligned correctly. If it doesn’t go in, re-check your alignment. Forcing it will likely bend pins.
- Secure the New CPU:
- Intel CPUs: Once the CPU is seated, gently lower the retention bracket and secure it by pushing the lever back into its original locked position.
- AMD CPUs: Once the CPU is seated, gently lower the retention bracket and secure it by pushing the lever back into its original locked position.
- Apply Thermal Paste (if not pre-applied):
- Recommended Amount: A pea-sized amount in the center of the CPU is usually sufficient. Some prefer a thin, even spread using an applicator. Avoid too much, as it can ooze out and make a mess.
- If your new cooler has pre-applied paste, skip this step.
Installing the New CPU Cooler
- Position the Cooler: Carefully align the CPU cooler with the mounting holes or clips on the motherboard.
- Secure the Cooler: Follow the cooler’s manual for specific instructions.
- Screws: Tighten screws in a diagonal pattern to ensure even pressure.
- Clips/Levers: Secure the clips or levers according to the manual.
- Backplate: If your cooler uses a backplate, ensure it’s properly seated on the rear of the motherboard before proceeding.
- Reconnect the Fan Cable: Plug the CPU cooler’s fan cable back into the “CPU_FAN” header on the motherboard.
Post-Installation Steps and Troubleshooting
With the physical installation complete, it’s time to close up your system, boot it up, and verify the installation.
Closing Up and Initial Boot
- Double-Check Connections: Ensure all cables are securely plugged in, especially the CPU fan.
- Reattach the Side Panel: Carefully slide or place the side panel back onto your computer case and secure it with the screws.
- Connect Peripherals and Power: Plug in your monitor, keyboard, mouse, and finally, the power cord.
- Power On: Turn on the power supply switch on the back of the case, then press the power button on the front of your computer.
Verifying the Installation and Monitoring Temperatures
- BIOS/UEFI Check: Upon booting, your computer should enter the BIOS/UEFI setup. The first screen often displays basic system information, including the CPU model. Confirm that your new CPU is recognized correctly. You can usually exit the BIOS/UEFI without saving changes to proceed to booting your operating system.
- Operating System Boot: If the BIOS/UEFI recognizes the CPU, proceed to boot into your operating system (Windows, macOS, Linux).
- CPU-Z or Task Manager: Once your OS has booted, you can further verify the CPU installation:
- Task Manager (Windows): Press
Ctrl + Shift + Escto open Task Manager, go to the “Performance” tab, and select “CPU.” You should see your new CPU model and its core count. - CPU-Z: As mentioned earlier, CPU-Z provides detailed information about your CPU, motherboard, and RAM.
- Task Manager (Windows): Press
- Monitor Temperatures: This is critical. Overheating is the biggest threat to a new CPU.
- BIOS/UEFI: Many BIOS/UEFI setups display CPU temperatures.
- Software Monitoring: Download a reputable hardware monitoring tool like HWMonitor, Core Temp, or MSI Afterburner. Run these tools and observe your CPU temperatures under idle conditions and then under load (e.g., by running a benchmark or a demanding game).
- Safe Temperatures: Idle temperatures should typically be between 30-50°C. Under heavy load, they ideally shouldn’t exceed 70-80°C, though this can vary by CPU model. If temperatures are consistently high, double-check your cooler installation, thermal paste application, and ensure adequate case airflow.
Common Troubleshooting Steps
- No Boot / No POST (Power-On Self-Test):
- Reseat the CPU: Power down, unplug, and carefully remove and reinsert the CPU, ensuring proper alignment and that the retention bracket is fully secured.
- Check RAM: Ensure RAM modules are properly seated. Sometimes, incorrect RAM seating can prevent a POST.
- Check Cooler Fan: Make sure the CPU cooler fan is connected to the “CPU_FAN” header. Some motherboards will not boot if they don’t detect a CPU fan.
- BIOS/UEFI Version: Re-confirm that your BIOS/UEFI is updated to the version required for your new CPU.
- Clear CMOS: This resets your BIOS/UEFI settings to their defaults. Refer to your motherboard manual for instructions on how to do this (usually involves a jumper or removing the CMOS battery for a short period).
- System Instability / Crashes:
- Overheating: As mentioned, monitor temperatures. If they’re too high, re-evaluate cooler installation.
- Driver Issues: Ensure you have the latest chipset drivers installed from your motherboard manufacturer’s website.
- RAM Compatibility: While less common with CPU upgrades, sometimes new CPUs can expose existing RAM issues.

Final Touches and Enjoying Your New Performance
Once your system boots reliably and temperatures are within acceptable ranges, you’ve successfully upgraded your CPU! You should immediately notice a difference in your computer’s speed and responsiveness. Enjoy the faster loading times, smoother multitasking, and enhanced performance in your favorite applications and games.
Upgrading your CPU can be a rewarding experience, saving you the cost of an entirely new system while delivering a significant performance boost. By following these steps carefully and taking the necessary precautions, you can confidently tackle this upgrade and enjoy a faster, more capable PC.
aViewFromTheCave is a participant in the Amazon Services LLC Associates Program, an affiliate advertising program designed to provide a means for sites to earn advertising fees by advertising and linking to Amazon.com. Amazon, the Amazon logo, AmazonSupply, and the AmazonSupply logo are trademarks of Amazon.com, Inc. or its affiliates. As an Amazon Associate we earn affiliate commissions from qualifying purchases.