
In the dynamic world of technology, data reigns supreme. Whether you’re building a personal portfolio website, developing a sophisticated e-commerce platform, or managing vast datasets for business intelligence, a robust and reliable database system is indispensable. Among the myriad options available, MySQL stands out as a preeminent open-source relational database management system (RDBMS), renowned for its speed, reliability, and ease of use. Paired with Ubuntu, a popular and powerful Linux distribution favored by developers and system administrators alike, you have a formidable foundation for any data-driven project.
This comprehensive guide will walk you through the process of installing MySQL on Ubuntu, providing not just the commands but also the essential context, security considerations, and best practices that empower you to leverage this technology effectively. For anyone deeply involved in Tech, aiming to build a strong Brand presence through reliable applications, or seeking to optimize operations for better Money management, understanding core infrastructure like MySQL is a fundamental step.
The Foundation: Understanding MySQL and Ubuntu
Before we dive into the installation process, it’s crucial to understand why MySQL and Ubuntu form such a powerful combination and how they contribute to the broader technology ecosystem.
Why MySQL? The Database Powerhouse
MySQL has been a cornerstone of the web for decades, powering everything from small blogs to massive enterprise applications. Its enduring popularity stems from several key advantages:
- Open Source and Free: As an open-source solution, MySQL offers significant cost savings compared to proprietary database systems, making it accessible for startups, individual developers, and large corporations alike. This aspect directly impacts “Money” by reducing infrastructure expenditure.
- Reliability and Performance: MySQL is known for its stability and high performance, even under heavy loads. Its mature architecture and continuous development ensure that it can handle critical data with efficiency and integrity.
- Scalability: MySQL can be scaled both vertically (more powerful hardware) and horizontally (distributing data across multiple servers) to meet growing demands, making it suitable for projects that anticipate future expansion.
- Flexibility and Compatibility: It supports a wide range of programming languages (PHP, Python, Java, Node.js, Ruby, C++, etc.) and operating systems, making it highly versatile for various development stacks.
- Robust Feature Set: MySQL offers advanced features such as replication, clustering, full-text indexing, and a variety of storage engines (like InnoDB for transactional integrity), catering to diverse application requirements.
- Community Support: A vast global community of developers and users provides extensive documentation, forums, and resources, making it easy to find solutions and best practices.
For businesses looking to build a digital presence (Brand) or individuals developing innovative AI Tools and Apps (Tech), MySQL provides the necessary backbone to store user data, product information, analytics, and more.
Why Ubuntu? A Developer’s Favorite OS
Ubuntu, developed by Canonical, is one of the most widely used Linux distributions, particularly in server environments and for developers. Its popularity is well-earned:
- Stability and Security: Ubuntu is known for its robust security features and stable releases, crucial for production environments where uptime and data protection are paramount. Regular security updates help maintain a strong defense against vulnerabilities.
- Ease of Use and Accessibility: While being powerful, Ubuntu offers a user-friendly experience with clear documentation and a thriving community. Its package management system (APT) simplifies software installation and updates.
- Extensive Software Repositories: Ubuntu’s official repositories contain a vast collection of software, making it straightforward to install and manage applications, including MySQL and its dependencies.
- Strong Developer Support: Many development tools and frameworks are primarily designed for or heavily supported on Linux, making Ubuntu a natural choice for developers.
- Cost-Effective: Like MySQL, Ubuntu is free and open-source, aligning with the “Money” aspect by reducing operating system licensing costs.
The synergy between MySQL’s data management capabilities and Ubuntu’s reliable operating environment creates an optimal platform for developing, deploying, and maintaining modern applications, contributing significantly to your Tech capabilities and underpinning any digital Brand strategy.
Preparing Your Ubuntu System for MySQL
Before initiating the MySQL installation, it’s crucial to ensure your Ubuntu system is properly prepared. This involves verifying necessary permissions and updating your system’s package lists to guarantee you’re installing the latest, most stable versions of software.
Essential Prerequisites
To follow this guide, you will need:
- An Ubuntu System: This guide assumes you are running a recent version of Ubuntu (e.g., Ubuntu 20.04 LTS, 22.04 LTS, or a later daily build). While the steps are generally similar across versions, minor differences might occur.
- Sudo Privileges: You must have access to a user account with
sudo(superuser do) privileges. This allows you to execute administrative commands necessary for installing and configuring system-wide software. If you’re logged in as a regular user, you can prefix commands withsudo. If you are logged in as therootuser,sudois not strictly necessary but it’s generally good practice to use a non-root user withsudofor security. - Basic Terminal Knowledge: Familiarity with opening a terminal and executing basic Linux commands will be helpful.
Updating Your Package Lists
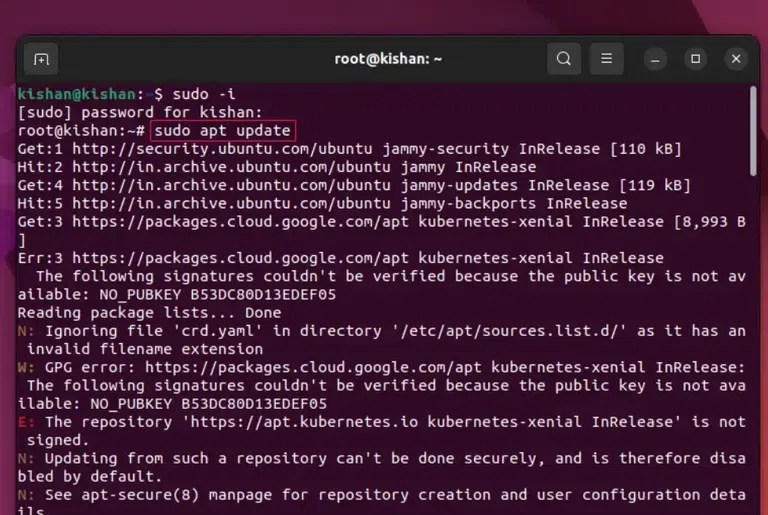
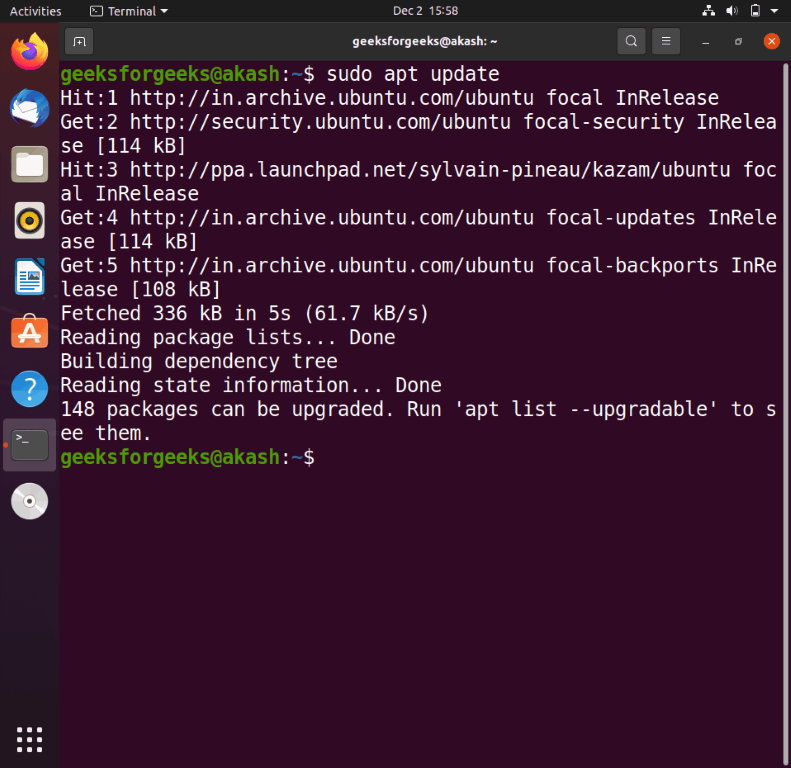
The first and most critical step before installing any new software on a Linux system is to update your local package index. This refreshes the list of available packages and their versions from the Ubuntu repositories, ensuring that you download the latest stable software and security patches. This practice is vital for system stability and security, aligning with best practices in Digital Security.
Open your terminal (you can usually find it in your applications menu or by pressing Ctrl + Alt + T) and execute the following commands:
sudo apt update
sudo apt upgrade -y
sudo apt update: This command fetches the latest package information from all configured sources. It doesn’t install or upgrade any packages but updates the local cache of what’s available.sudo apt upgrade -y: This command then upgrades all currently installed packages on your system to their latest versions based on the information fetched byapt update. The-yflag automatically confirms any prompts, allowing the upgrade to proceed without manual intervention.
Allow these commands to complete. Depending on how long it’s been since your last update, this process might take a few minutes. Once finished, your system is ready for the MySQL installation.
Step-by-Step MySQL Installation
With your Ubuntu system updated and prepared, you can now proceed with installing the MySQL server itself. Ubuntu’s APT package manager makes this process straightforward.
Installing the MySQL Server Package
The primary package for installing MySQL on Ubuntu is mysql-server. This package includes the MySQL database server, client utilities, and necessary libraries.
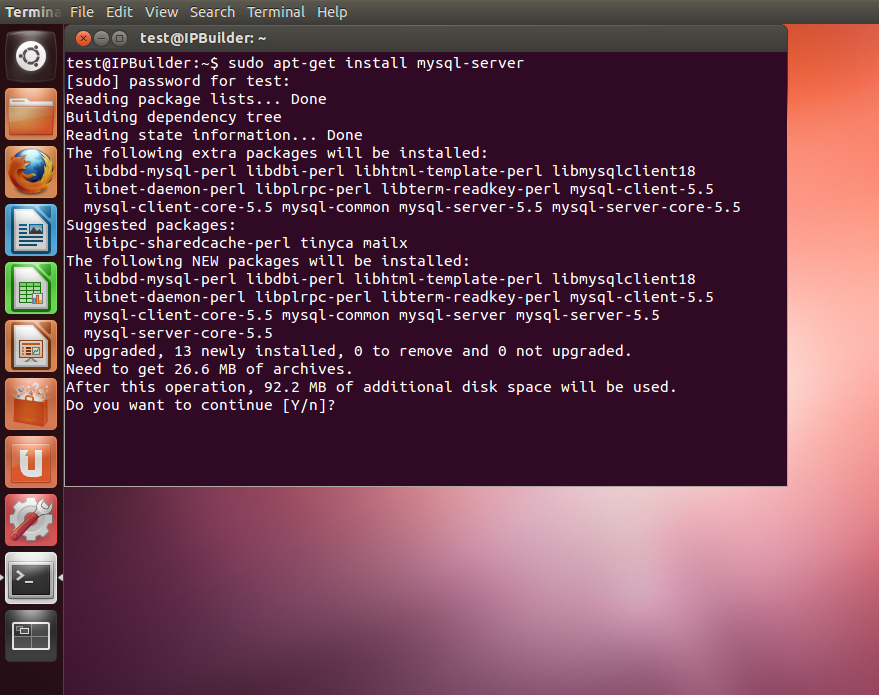
Execute the following command in your terminal:
sudo apt install mysql-server -y
sudo apt install mysql-server: This command instructs APT to download and install themysql-serverpackage and all its dependencies.-y: Again, this flag automatically confirms the installation, so you don’t have to manually type ‘Y’ when prompted.
During the installation process, you might be prompted to set a root password for MySQL. It is highly recommended to set a strong password here. This password will be required to log into the MySQL database as the administrative root user. Make sure to remember this password, as it’s crucial for subsequent configuration and management.
Once the installation completes, the MySQL server will automatically start running in the background.
Verifying the Installation
After the installation, it’s good practice to verify that the MySQL service is running correctly. This ensures that the installation was successful and the database server is operational.
You can check the status of the MySQL service using systemctl, the utility for controlling systemd services:
systemctl status mysql
You should see output similar to this (though specific details might vary):
● mysql.service - MySQL Community Server
     Loaded: loaded (/lib/systemd/system/mysql.service; enabled; vendor preset: enabled)
     Active: active (running) since Thu 2023-10-26 10:00:00 UTC; 5min ago
       Docs: man:mysqld(8)
             http://dev.mysql.com/doc/refman/en/using-systemd.html
   Main PID: 1234 (mysqld)
     Status: "Server is operational"
      Tasks: 39 (limit: 4578)
     Memory: 354.3M
        CPU: 1.123s
     CGroup: /system.slice/mysql.service
             └─1234 /usr/sbin/mysqld
Look for Active: active (running) to confirm that MySQL is up and running. If it’s not running, you can start it with sudo systemctl start mysql.
You can also test the connection to the MySQL server by logging in as the root user:
sudo mysql
This command should open the MySQL shell, indicating a successful connection. You’ll see a mysql> prompt. To exit the shell, type exit; and press Enter.
Securing Your MySQL Deployment
A fresh MySQL installation, by default, comes with certain security vulnerabilities that need to be addressed immediately. This is perhaps the most critical step after installation, especially for any system handling sensitive data or forming part of a public-facing application (Brand, Money). MySQL provides a dedicated script to guide you through hardening your database server.
The mysql_secure_installation Script
The mysql_secure_installation script is designed to help you improve the security of your MySQL installation by performing several essential tasks.
Run the script by typing:
sudo mysql_secure_installation
The script will prompt you through a series of questions. Let’s go through each one in detail.
Navigating Security Prompts
-
VALIDATE PASSWORD COMPONENT? (Press y|Y for Yes, any other key for No):- Recommendation:
Y(Yes). This component can enforce password policies, requiring users to set strong passwords. If you enable it, you’ll be asked to choose a password validation policy level (LOW, MEDIUM, or STRONG). For most production environments, MEDIUM or STRONG is advisable. Choose the level that suits your security requirements. You’ll then be prompted to set a new password for the MySQLrootuser, even if you set one during installation. Ensure it meets the chosen policy.
- Recommendation:
-
Remove anonymous users? (Press y|Y for Yes, any other key for No):- Recommendation:
Y(Yes). Anonymous users are created by default for testing purposes and can allow anyone to log into MySQL without a password. Removing them enhances security by preventing unauthorized access.
- Recommendation:
-
Disallow root login remotely? (Press y|Y for Yes, any other key for No):- Recommendation:
Y(Yes). Therootuser should ideally only connect fromlocalhost(the server itself). Allowing remote root login is a major security risk, as an attacker gaining access to your root password could gain full control over your database from anywhere. If you need to access the database remotely for specific applications, create a dedicated user with specific, limited privileges for that purpose.
- Recommendation:
-
Remove test database and access to it? (Press y|Y for Yes, any other key for No):- Recommendation:
Y(Yes). Thetestdatabase is also created by default for testing purposes. It can be accessed by all users, including anonymous users (if they weren’t removed). Removing it eliminates a potential attack vector.
- Recommendation:
-
Reload privilege tables now? (Press y|Y for Yes, any other key for No):- Recommendation:
Y(Yes). This command reloads the grant tables, ensuring that all the changes you’ve made (like removing anonymous users or disallowing remote root login) are immediately applied by the MySQL server.
- Recommendation:
After successfully completing these steps, your MySQL installation will be significantly more secure, reducing risks related to data breaches and unauthorized access, which is paramount for both Digital Security and Brand reputation.
Managing MySQL Service and Basic Operations
With MySQL installed and secured, the next logical step is to understand how to manage its service and perform fundamental database operations, such as creating new users and databases. These are essential skills for anyone developing applications or managing data.
Controlling the MySQL Service
As a systemd service, MySQL can be managed using the systemctl command. Here are the most common operations:
-
To check the status of MySQL:
sudo systemctl status mysqlThis command, as seen before, shows whether the service is active and running.
-
To start the MySQL service:
sudo systemctl start mysqlIf MySQL is not running for any reason, this command will initiate it.
-
To stop the MySQL service:
sudo systemctl stop mysqlThis will gracefully shut down the MySQL server. You might do this before performing maintenance or significant configuration changes.
-
To restart the MySQL service:
sudo systemctl restart mysqlThis command will stop and then start the MySQL service. It’s often used after modifying MySQL configuration files (e.g.,
/etc/mysql/mysql.conf.d/mysqld.cnf) to apply the changes. -
To enable MySQL to start on boot:
sudo systemctl enable mysqlBy default,
mysql-serveris usually enabled to start on boot during installation. However, if it ever gets disabled, this command ensures MySQL automatically launches whenever your server reboots. -
To disable MySQL from starting on boot:
bash

sudo systemctl disable mysql
If you only need MySQL for specific, infrequent tasks and want to conserve resources, you might choose to disable it from starting automatically.
Creating Users and Databases: The Gateway to Application Data
While the root user has full administrative privileges, it’s a security best practice not to use the root user for your applications. Instead, you should create dedicated users for each application or service, granting them only the necessary permissions to their specific databases. This principle of least privilege is fundamental to robust Digital Security.
First, log in to the MySQL shell as the root user:
sudo mysql -u root -p
You will be prompted for the MySQL root password you set during the installation or during mysql_secure_installation.
Once inside the mysql> prompt, you can proceed:
-
Create a New Database:
Let’s say you’re building a blog application. You might want a database namedblog_db.CREATE DATABASE blog_db;You should see
Query OK, 1 row affected (0.00 sec). -
Create a New User:
Next, create a user who will manage this database. Let’s name the userblog_userand assign a strong password. Replace'your_strong_password'with an actual strong password.CREATE USER 'blog_user'@'localhost' IDENTIFIED BY 'your_strong_password';'blog_user': This is the username.'localhost': This specifies that the user can only connect from the local machine where MySQL is running. If your application needs to connect from a different server, you would replacelocalhostwith the specific IP address or a wildcard'%(use'%with extreme caution and proper firewall rules).'your_strong_password': The password for this user.
-
Grant Permissions to the User:
Now, grant theblog_userall necessary privileges on theblog_dbdatabase.GRANT ALL PRIVILEGES ON blog_db.* TO 'blog_user'@'localhost';ALL PRIVILEGES: Grants all permissions (SELECT, INSERT, UPDATE, DELETE, CREATE, DROP, etc.). For production, you might want to grant more specific permissions based on the application’s needs.ON blog_db.*: Specifies that these privileges apply to all tables (*) within theblog_dbdatabase.TO 'blog_user'@'localhost': Specifies the user and host to whom the privileges are granted.
-
Flush Privileges:
After making changes to user permissions, it’s essential to reload the grant tables to ensure the new privileges are active.FLUSH PRIVILEGES; -
Exit the MySQL Shell:
sql

exit;
You can now test the new user by logging in:
mysql -u blog_user -p
Enter blog_user‘s password when prompted. If successful, you’ll be at the mysql> prompt. You can then try to use the blog_db:
USE blog_db;
If this succeeds, your user and database are correctly configured.
Beyond Installation: Best Practices and Advanced Considerations
A successful installation is just the beginning. To truly harness the power of MySQL for your Tech projects, secure your Brand’s data, and optimize for efficient Money management, it’s vital to consider ongoing best practices, maintenance, and advanced configurations.
Enabling Remote Access (with Caution)
By default, MySQL is configured to only accept connections from the localhost (the server it’s installed on). While this is a good security measure, some applications, especially those running on a separate web server or requiring remote administration tools, might need to connect to MySQL from a different machine.
Warning: Enabling remote access significantly increases your database’s attack surface. Proceed with extreme caution and implement additional security measures.
To enable remote access:
-
Edit the MySQL Configuration File:
Open the MySQL configuration file, typicallymysqld.cnfor a file withinmysql.conf.d/:sudo nano /etc/mysql/mysql.conf.d/mysqld.cnfLook for the line
bind-address = 127.0.0.1.
Change127.0.0.1(which meanslocalhost) to0.0.0.0(to listen on all network interfaces) or to the specific IP address of the remote server you want to allow.bind-address = 0.0.0.0Save and close the file (
Ctrl+X, thenY, thenEnterfor Nano). -
Restart MySQL Service:
sudo systemctl restart mysql -
Configure Firewall (UFW):
If you are usingUFW(Uncomplicated Firewall) on Ubuntu, you must allow incoming connections on MySQL’s default port (3306).sudo ufw allow 3306/tcp sudo ufw reloadFor tighter security, you can specify an IP address:
sudo ufw allow from <remote_server_ip> to any port 3306. -
Create a User for Remote Access:
Remember the principle of least privilege. Create a new MySQL user that can connect from a specific remote host:
sql

CREATE USER 'remote_user'@'your_remote_ip_address' IDENTIFIED BY 'your_strong_password';

GRANT ALL PRIVILEGES ON your_database.* TO 'remote_user'@'your_remote_ip_address';

FLUSH PRIVILEGES;
Database Backup and Recovery Strategies
Data is the lifeblood of any application. Implementing a robust backup and recovery strategy is non-negotiable for business continuity and protecting your Brand. Even minor data loss can have significant financial implications (Money).
-
mysqldump: This command-line utility is the standard way to create logical backups of MySQL databases.
To back up a single database:mysqldump -u username -p your_database_name > backup.sqlTo back up all databases:
mysqldump -u username -p --all-databases > all_databases_backup.sqlSchedule these backups regularly using cron jobs and store them securely, ideally off-site.
-
Recovery: To restore a database from a
mysqldumpfile:
bash

mysql -u username -p your_database_name < backup.sql
Ensure you have tested your restore process. A backup is only as good as its restore capability.
Monitoring and Performance Tuning
As your application grows, monitoring MySQL’s performance becomes crucial for maintaining responsiveness and optimizing resource utilization.
mysqladmin: A command-line client for performing administrative operations.mysqladmin statusshows uptime, threads, questions, slow queries, etc.mysqladmin extended-statusprovides a wealth of variables.- MySQL Workbench / phpMyAdmin: Graphical tools for easier administration, monitoring, and query execution.
- Third-party Monitoring Tools: Solutions like Prometheus with MySQL Exporter, Datadog, or New Relic can provide in-depth insights into database health and performance trends.
Performance tuning often involves optimizing queries, indexing tables correctly, configuring MySQL server variables (e.g., innodb_buffer_pool_size, query_cache_size) in mysqld.cnf, and ensuring your hardware resources are adequate.
Integrating MySQL with Your Tech Stack
MySQL’s strength lies in its ability to integrate seamlessly with virtually any programming language or framework. This makes it an invaluable asset for developers working on various Tech projects:
- Web Development (LAMP/LEMP Stack): MySQL is the ‘M’ in LAMP (Linux, Apache, MySQL, PHP/Python/Perl) and LEMP (Linux, Nginx, MySQL, PHP/Python/Perl), the most popular stacks for web applications.
- Python: Libraries like
mysql-connector-pythonor SQLAlchemy allow Python applications to interact with MySQL databases. - Node.js: The
mysqlnpm package or ORMs like Sequelize provide interfaces for Node.js applications. - Java: JDBC drivers are used to connect Java applications to MySQL.
- Data Analytics and AI Tools: MySQL can serve as a reliable data source for various analytical tools and machine learning models, feeding insights that can drive Brand strategy and financial decisions (Money).
Understanding these integration points is key to building comprehensive and functional applications that leverage MySQL’s data management capabilities effectively.
Troubleshooting Common Installation Issues
While the installation process is generally smooth, you might occasionally encounter issues. Here are a few common problems and their solutions:
- MySQL Service Fails to Start:
- Check logs:
sudo journalctl -xe | grep mysqlorsudo tail -f /var/log/mysql/error.logfor error messages. - Check for conflicting services or port conflicts.
- Verify available disk space.
- Check logs:
- Cannot Log in to MySQL:
- Double-check your root password.
- If you forgot the root password, you might need to reset it. This involves stopping MySQL, starting it in safe mode, changing the password, and then restarting normally (a detailed process usually found in MySQL documentation).
- Ensure the user and host are correct (e.g.,
'username'@'localhost').
- Remote Connection Issues:
- Verify
bind-addressinmysqld.cnf. - Check firewall rules (
sudo ufw status). - Ensure the remote user has appropriate permissions from the correct host IP.
- Verify
For more complex issues, the MySQL documentation, Ubuntu forums, and the vast developer community are excellent resources.
Conclusion: Empowering Your Digital Projects with MySQL on Ubuntu
Installing MySQL on Ubuntu is a foundational step for countless tech projects, from personal websites and innovative apps to robust enterprise solutions. By following this comprehensive guide, you’ve not only learned the commands but also gained a deeper understanding of the “why” behind each step, embracing best practices for security, management, and scalability.
MySQL’s power, combined with Ubuntu’s stability and open-source nature, provides a cost-effective and highly capable platform for managing your data. Whether your focus is on developing cutting-edge Technology, building a strong digital Brand, or optimizing operations to improve your financial standing (Money), a well-configured and secure MySQL database is an invaluable asset.
As you continue your journey, remember that ongoing learning, regular maintenance, and a proactive approach to security are key to maximizing your database’s potential. With MySQL firmly in place, you’re now well-equipped to embark on creating data-driven applications that stand the test of time and scale with your ambitions.
aViewFromTheCave is a participant in the Amazon Services LLC Associates Program, an affiliate advertising program designed to provide a means for sites to earn advertising fees by advertising and linking to Amazon.com. Amazon, the Amazon logo, AmazonSupply, and the AmazonSupply logo are trademarks of Amazon.com, Inc. or its affiliates. As an Amazon Associate we earn affiliate commissions from qualifying purchases.