
In the dynamic world of technology, Java stands as an undisputed titan, powering everything from enterprise-grade applications and Android devices to cloud computing platforms and big data solutions. For MacBook Air users, installing Java isn’t just a technical prerequisite; it’s a gateway to unlocking a vast ecosystem of development tools, enhancing productivity, and staying competitive in the rapidly evolving digital landscape. Whether you’re an aspiring developer looking to build a robust portfolio, a seasoned professional managing critical applications, or simply need to run specific software, having Java correctly configured on your MacBook Air is an essential step.

This guide will provide a detailed, step-by-step walkthrough, ensuring you can confidently install and manage Java on your MacBook Air. We’ll cover two primary methods: the traditional approach using the Oracle JDK installer and the more developer-friendly route via Homebrew, highlighting the nuances and benefits of each. Throughout, we’ll also touch upon how this fundamental skill contributes to your professional brand and potentially impacts your financial growth in the tech industry.
The Essential Role of Java in Modern Computing
Java’s enduring presence in the tech world is no accident. Its core philosophy of “Write Once, Run Anywhere” (WORA) has made it a darling of enterprises and developers alike, offering unparalleled cross-platform compatibility and scalability. For anyone serious about technology, understanding and working with Java is often a non-negotiable skill.
Why Your MacBook Air Needs Java
Your MacBook Air, renowned for its sleek design, portability, and powerful performance, serves as an excellent platform for development and application execution. However, without Java, you might find yourself limited in the software you can run or the projects you can undertake. Many mission-critical applications across various industries, from financial services to scientific research, rely on Java. For developers, a functioning Java Development Kit (JDK) is the bedrock for building Android apps, deploying web services using frameworks like Spring Boot, or engaging with data processing tools such as Apache Kafka or Spark.
Moreover, mastering core development tools like Java enhances your professional brand. In a competitive job market, proficiency in widely adopted languages demonstrates versatility and a foundational understanding of software architecture, directly contributing to career advancement and potentially higher earning potential. Companies invest heavily in Java-based solutions, recognizing its reliability and scalability, which in turn fuels a constant demand for skilled Java professionals.
Navigating the JDK Landscape: Oracle vs. OpenJDK
Before diving into installation, it’s crucial to understand the distinction between the two primary flavors of Java Development Kits (JDKs) you’re likely to encounter: Oracle JDK and OpenJDK.
- Oracle JDK: This is the commercial version of Java, historically distributed by Oracle. While it used to be free for development and production use, Oracle changed its licensing terms for newer versions (post-Java 8), making it primarily free for personal use and requiring a subscription for commercial use. It often includes proprietary components and commercial support options.
- OpenJDK: This is the open-source reference implementation of Java. It’s completely free to use for any purpose, including commercial. Various vendors like Adoptium (formerly AdoptOpenJDK), Amazon Corretto, Azul Zulu, and Red Hat distribute their own builds of OpenJDK, offering different support models but all based on the same open-source codebase. For most developers and businesses, OpenJDK is the preferred choice due to its open-source nature and cost-effectiveness, aligning with the “money” aspect of making smart software choices.
For the purposes of this guide, we’ll demonstrate how to install both an Oracle JDK (for those who prefer the traditional path or need specific Oracle features) and an OpenJDK distribution (recommended for its open-source benefits and ease of management, especially via Homebrew).
Step-by-Step Java Installation Methods
Choosing the right installation method often depends on your comfort level with the command line and your long-term plans for managing multiple Java versions. Both methods presented here are robust and widely adopted.
Option 1: The Direct Approach with Oracle JDK
This method involves downloading the installer directly from Oracle’s website and running it like any other macOS application. It’s straightforward for users who prefer graphical interfaces.
Downloading and Running the Oracle JDK Installer
- Access the Oracle JDK Download Page: Open your web browser and navigate to the official Oracle JDK download page. A quick search for “Oracle JDK download” will lead you there.
- Select Your macOS Version and Architecture: Oracle provides different installers based on your macOS version and your MacBook Air’s processor architecture (Intel or Apple Silicon, i.e., ARM).
- For newer MacBook Air models with Apple M1, M2, or M3 chips, select the ARM64 DMG Installer.
- For older MacBook Air models with Intel processors, select the x64 DMG Installer.
Carefully choose the correct version (e.g., JDK 21, JDK 17, or JDK 11, depending on your project requirements).
- Download the DMG File: Click the download link. You might be prompted to accept Oracle’s license agreement and potentially log in with an Oracle account (if you don’t have one, you can create a free account).
- Open the DMG File: Once the
.dmgfile is downloaded, locate it in yourDownloadsfolder and double-click to open it. This will mount a virtual disk image on your desktop. - Execute the Installer Package: Inside the mounted disk image, you’ll find a
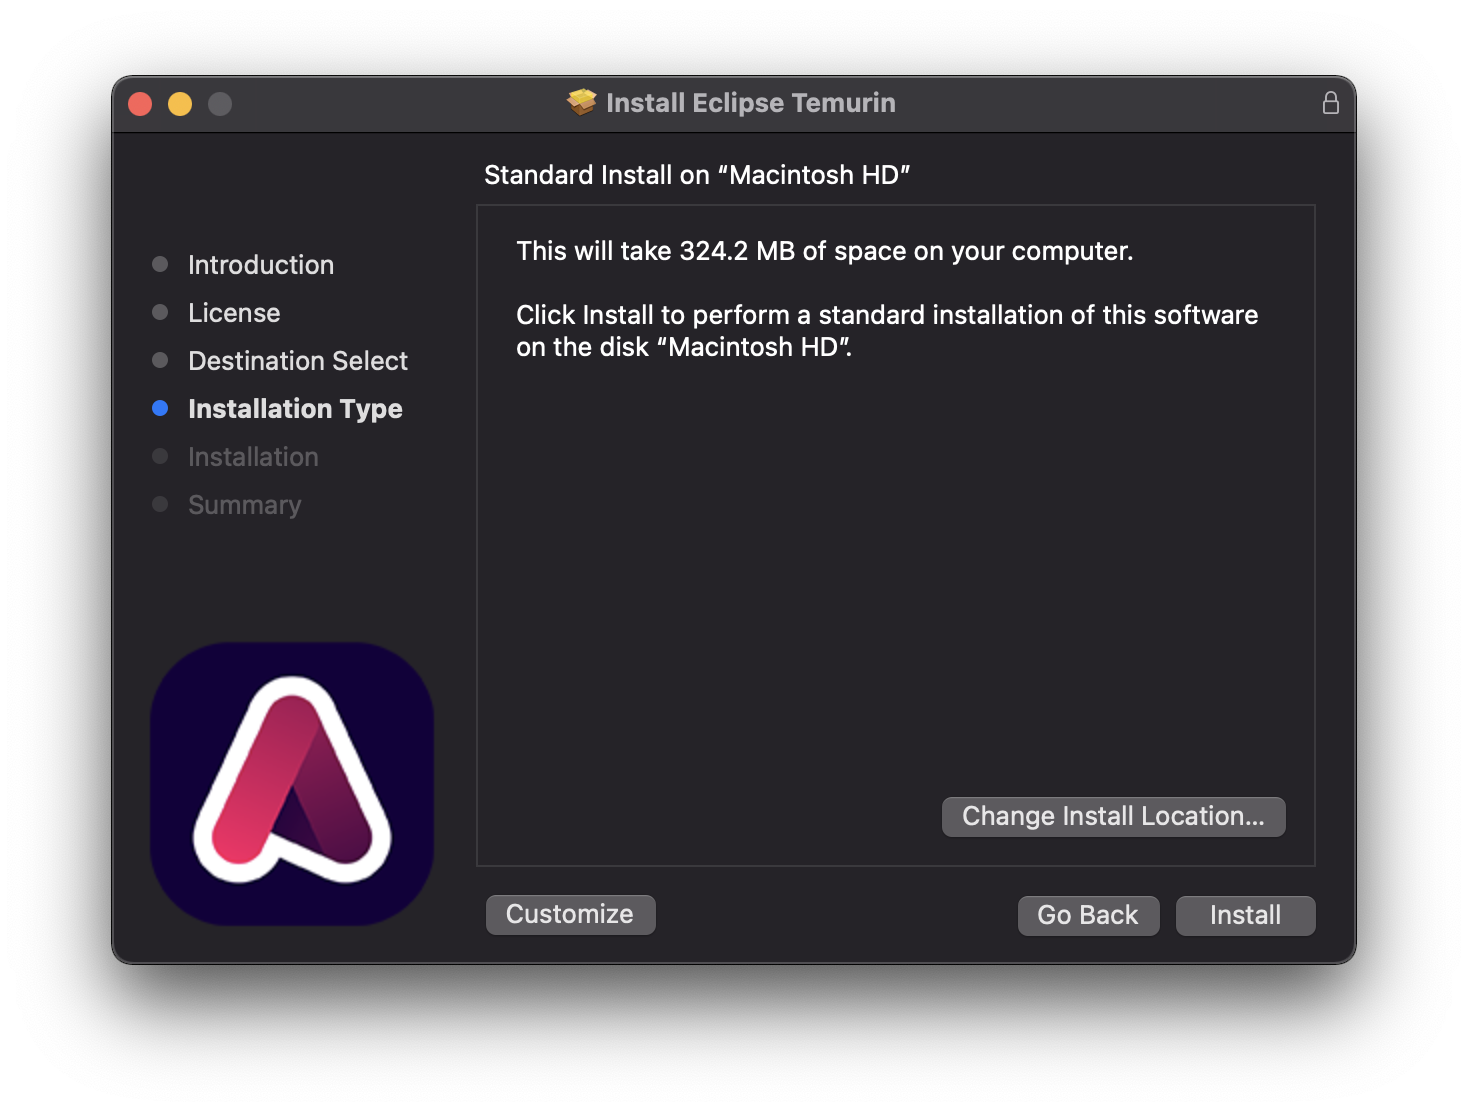
.pkginstaller file. Double-click this file to start the installation wizard. - Follow the Installation Prompts: The installer will guide you through a series of steps. Click “Continue,” “Agree” to any terms, and provide your administrator password when prompted. The JDK will be installed in the default macOS location:
/Library/Java/JavaVirtualMachines/. - Complete Installation: Once the installation is finished, you can close the installer and unmount the
.dmgfile (drag it to the Trash or right-click and eject).
Configuring Your Java Environment: Setting JAVA_HOME
While the Oracle JDK installer places Java in a standard location, many development tools and scripts rely on the JAVA_HOME environment variable to locate your Java installation. Manually setting this variable is a crucial step for developers.
-
Open Terminal: You can find Terminal in
Applications/Utilities/or by searching with Spotlight (Command + Space, then type “Terminal”). -
Identify Your JDK Path: The default installation path for Oracle JDK is typically
/Library/Java/JavaVirtualMachines/jdk-<version>.jdk/Contents/Home. For example, for JDK 21, it might be/Library/Java/JavaVirtualMachines/jdk-21.jdk/Contents/Home. You can verify this path by listing the contents of theJavaVirtualMachinesdirectory:
bash

ls /Library/Java/JavaVirtualMachines/
-
Set JAVA_HOME and Update PATH: The most robust way to set
JAVA_HOMEfor your user profile is by adding it to your shell configuration file. For modern macOS, the default shell iszsh, so you’ll edit~/.zshrc. If you’re usingbash, you’d edit~/.bash_profileor~/.bashrc.Open your shell configuration file using a text editor (e.g.,
nanoorvim):nano ~/.zshrcAdd the following lines to the end of the file, replacing
<version>with your actual JDK version (e.g.,21):export JAVA_HOME="/Library/Java/JavaVirtualMachines/jdk-<version>.jdk/Contents/Home" export PATH="$JAVA_HOME/bin:$PATH"Save the file (Ctrl+O, Enter, Ctrl+X for nano).
-
Apply Changes: To make the changes effective in your current Terminal session, source the configuration file:
bash

source ~/.zshrc
(If you edited.bash_profile, usesource ~/.bash_profile).
This configuration ensures that any command-line tool or IDE that looks for JAVA_HOME will find your Java installation, streamlining your development workflow and preventing “command not found” errors.
Option 2: The Developer-Friendly Way with Homebrew

For many macOS developers, Homebrew is the preferred method for installing and managing software. It simplifies the process of installing OpenJDK distributions, offering easy updates and version management. Embracing Homebrew is often a hallmark of an efficient developer, contributing to their professional brand by demonstrating a savvy approach to tool management.
Introducing Homebrew: macOS’s Missing Package Manager
Homebrew is a free and open-source software package management system that simplifies the installation of software on Apple’s macOS operating system. It’s essentially a command-line tool that allows you to install thousands of open-source packages (known as “formulae”) with a single command. Think of it as an app store for command-line tools and development dependencies.
Installing Homebrew
If you don’t already have Homebrew installed, it’s a quick process:
- Open Terminal:
- Run the Installation Command: Paste the following command into your Terminal and press Enter:
bash

/bin/bash -c "$(curl -fsSL https://raw.githubusercontent.com/Homebrew/install/HEAD/install.sh)"
This script will download and run the Homebrew installer. You’ll be prompted to enter your administrator password and might need to install Apple’s Command Line Tools if they’re not already present. - Follow On-Screen Instructions: The installer will provide instructions. Once complete, Homebrew will be ready to use. It’s good practice to run
brew doctorafterwards to check for any potential issues.
Installing OpenJDK and Managing Versions with Homebrew
With Homebrew installed, installing OpenJDK becomes incredibly simple. We’ll use Adoptium’s OpenJDK builds, which are robust and widely used.
- Install OpenJDK (e.g., OpenJDK 17): To install a specific version of OpenJDK, use the
brew installcommand. For instance, to install OpenJDK 17:
bash

brew install openjdk@17
Homebrew will download and install OpenJDK 17. By default, it places installations in/opt/homebrew/for Apple Silicon Macs or/usr/local/for Intel Macs. - Link Java (if necessary): Homebrew often automatically symlinks the newly installed Java version. However, if you need to ensure it’s the default or link a specific version, you can use the
sudo ln -sfncommand. For OpenJDK 17 on an Apple Silicon Mac:
bash

sudo ln -sfn /opt/homebrew/opt/openjdk@17/libexec/openjdk.jdk /Library/Java/JavaVirtualMachines/openjdk-17.jdk
(For Intel Macs, the path would typically be/usr/local/opt/openjdk@17/libexec/openjdk.jdk).
This creates a symbolic link in the standard JavaVirtualMachines directory, making it easier for macOS and other tools to discover it. - Set JAVA_HOME for Homebrew Installed Java: Similar to the Oracle JDK, setting
JAVA_HOMEis vital. Homebrew provides a convenient way to get the correct path. Add the following to your~/.zshrc(or~/.bash_profile):
bash

export JAVA_HOME=$(/usr/libexec/java_home -v 17) # Adjust '17' to your desired version

export PATH="$JAVA_HOME/bin:$PATH"
This command usesjava_home, a macOS utility, to dynamically find the path for the specified Java version. It’s particularly useful if you manage multiple Java versions. - Apply Changes:
bash

source ~/.zshrc
This ensures your Terminal session recognizes the newJAVA_HOMEandPATHsettings.
This method streamlines updates (brew upgrade), allows for easy installation of other Java versions (e.g., brew install openjdk@11), and centralizes your development environment management, which is a key aspect of productivity and efficient financial resource management in a project.
Verifying Your Java Environment and Beyond
After any Java installation, verifying that it’s correctly set up is crucial. This step confirms that your system can locate and execute Java commands, ensuring your development efforts won’t be hampered by configuration issues.
Confirming a Successful Installation
- Open Terminal:
- Check Java Runtime Version: Type the following command and press Enter:
bash

java -version
You should see output similar to this, indicating the installed Java version:
openjdk version "17.0.9" 2023-10-17

OpenJDK Runtime Environment (build 17.0.9+9-Homebrew)

OpenJDK 64-Bit Server VM (build 17.0.9+9-Homebrew, mixed mode, sharing)
or for an Oracle JDK:
java version "21.0.1" 2023-10-17 LTS

Java(TM) SE Runtime Environment (build 21.0.1+12-LTS-29)

Java HotSpot(TM) 64-Bit Server VM (build 21.0.1+12-LTS-29, mixed mode, sharing)
- Confirm Java Compiler Functionality: For developers, having the Java compiler (
javac) is just as important. Verify its presence and version:
bash

javac -version
You should see output matching yourjava -version, for example:
javac 17.0.9
If these commands return the expected output, congratulations! Java is successfully installed and configured on your MacBook Air.
Managing Multiple Java Versions (and Why It Matters)
In professional development, it’s common to work on projects that require different Java versions. For instance, an older enterprise application might need Java 8, while a new microservice uses Java 17. Efficiently switching between these versions is a critical skill that enhances a developer’s productivity and value (impacting their “money” aspect through efficiency).
- Manual Switching: You can manually update your
JAVA_HOMEenvironment variable in your~/.zshrc(or~/.bash_profile) and thensourcethe file whenever you need to switch. - Using
java_homeutility: As shown in the Homebrew section,/usr/libexec/java_home -v <version>is a handy macOS utility to quickly find the path for a specific JDK version. - Version Managers (Recommended for Complexity): For more complex multi-version setups, tools like
jenvorSDKMAN!are highly recommended. These tools provide command-line interfaces to install, uninstall, and switch between multiple SDKs (including different Java versions) with ease, allowing you to set global, local (per-project), or shell-specific versions. Mastering such tools is a testament to a developer’s efficiency and dedication to best practices, further bolstering their professional brand.
Common Troubleshooting Tips for Java on macOS
Even with detailed instructions, sometimes issues arise. Here are solutions to common problems:
- “command not found: java” or “command not found: javac”:
- Check
PATHandJAVA_HOME: EnsureJAVA_HOMEis correctly set to the root directory of your JDK and that$JAVA_HOME/binis included in yourPATHvariable. - Source your shell file: After making changes to
~/.zshrcor~/.bash_profile, always runsource ~/.zshrc(orsource ~/.bash_profile) to apply them to your current Terminal session. - Verify file existence: Double-check that the path specified in
JAVA_HOMEactually exists and contains thebindirectory withjavaandjavacexecutables.
- Check
- Incorrect Java Version Reported:
- This usually means your
PATHvariable is picking up another Java installation before your desired one. Check the order of directories in yourPATH. - Use
which javato see exactly whichjavaexecutable is being run. - If using
java_homeforJAVA_HOME, ensure the version number matches what you want.
- This usually means your
- Installation Failed / Permissions Issues:
- Ensure you have administrator privileges when running installers or using
sudowith Homebrew commands. - Sometimes, a system restart can resolve lingering path or environment variable issues, though it’s rarely necessary for Java installation itself.
- Ensure you have administrator privileges when running installers or using
Conclusion: Empowering Your MacBook Air for Innovation
Installing Java on your MacBook Air is more than just a technical chore; it’s an investment in your productivity, your professional development, and ultimately, your financial future in the tech industry. By carefully following the steps outlined in this guide, you’ve equipped your MacBook Air with a powerful, versatile programming language that underpins countless modern applications.
Whether you chose the direct Oracle JDK route or the streamlined Homebrew method, you now have a functional Java environment ready for coding, running existing applications, or diving into cutting-edge projects. Remember to keep your JDK updated and consider adopting tools like jenv or SDKMAN! for managing multiple versions as your development needs evolve.
The ability to set up and manage your development environment efficiently is a cornerstone of a strong personal brand in tech. It demonstrates technical acumen, problem-solving skills, and a commitment to leveraging the right tools for the job. As Java continues to be a cornerstone of enterprise software, cloud services, and mobile development, your proficiency with it directly translates into valuable opportunities and a competitive edge in a global marketplace that consistently rewards technical mastery. Your MacBook Air is now ready to be a hub of innovation, powered by Java.
aViewFromTheCave is a participant in the Amazon Services LLC Associates Program, an affiliate advertising program designed to provide a means for sites to earn advertising fees by advertising and linking to Amazon.com. Amazon, the Amazon logo, AmazonSupply, and the AmazonSupply logo are trademarks of Amazon.com, Inc. or its affiliates. As an Amazon Associate we earn affiliate commissions from qualifying purchases.