Java, a cornerstone of modern software development, powers a vast array of applications, from enterprise-grade server software and Android mobile apps to desktop applications and embedded systems. Its “write once, run anywhere” philosophy, coupled with a robust ecosystem and extensive community support, makes it an indispensable tool for developers and a critical runtime environment for many user-facing applications. For Linux users, whether you’re a seasoned developer, a system administrator, or simply someone needing to run a specific Java-dependent application, installing Java correctly is a fundamental skill.

This comprehensive guide will walk you through the process of installing Java on various Linux distributions. We’ll explore the distinctions between different Java Development Kit (JDK) versions, delve into installation methods using popular package managers, and cover the more advanced manual installation from source. By the end of this article, you’ll have a solid understanding of how to set up and manage Java on your Linux system, ensuring your environment is ready for development, deployment, or simply running your favorite Java-powered tools.
Understanding the Java Ecosystem and Pre-installation Steps
Before diving into the installation process, it’s crucial to understand the different flavors of Java available and perform some preliminary checks on your system. This foundational knowledge will help you choose the right Java version for your needs and ensure a smoother installation experience.
OpenJDK vs. Oracle JDK: Choosing the Right Version
The Java ecosystem primarily revolves around two main distributions: OpenJDK and Oracle JDK. While both are implementations of the Java Platform Standard Edition (Java SE) specification, they come with key differences:
- OpenJDK (Open Java Development Kit): This is the official open-source reference implementation of the Java SE platform. It’s free to use, distribute, and modify under the GNU General Public License (GPL) with a classpath exception. OpenJDK is the default Java development and runtime environment provided by most Linux distributions through their package managers. It’s community-driven, highly stable, and receives regular updates. For the vast majority of users and developers, OpenJDK is the recommended choice due to its open-source nature, ease of installation, and robust performance. Many organizations and individual developers rely solely on OpenJDK for their projects.
- Oracle JDK: This is Oracle’s commercial build of the Java Development Kit. Historically, Oracle JDK was widely used due to its perceived stability and the fact that it included certain proprietary features (like better font rendering or specific garbage collectors) that weren’t always immediately available in OpenJDK. However, since Java 11, Oracle changed its licensing model for the Oracle JDK, making commercial use subject to a subscription fee. While Oracle JDK and OpenJDK have largely converged in terms of features, the licensing implications make OpenJDK (or other community-driven builds like Adoptium/Temurin, Amazon Corretto, Azul Zulu) a more attractive and straightforward option for most users.
Recommendation: Unless you have a specific requirement or an enterprise support contract with Oracle, OpenJDK is generally the preferred choice for Linux users. It’s readily available, free, and fully capable for most development and runtime needs. This guide will primarily focus on OpenJDK installation via package managers.
Checking for Existing Java Installations
It’s good practice to check if Java is already installed on your system before proceeding. You might have an older version, or a different distribution, that you need to be aware of.
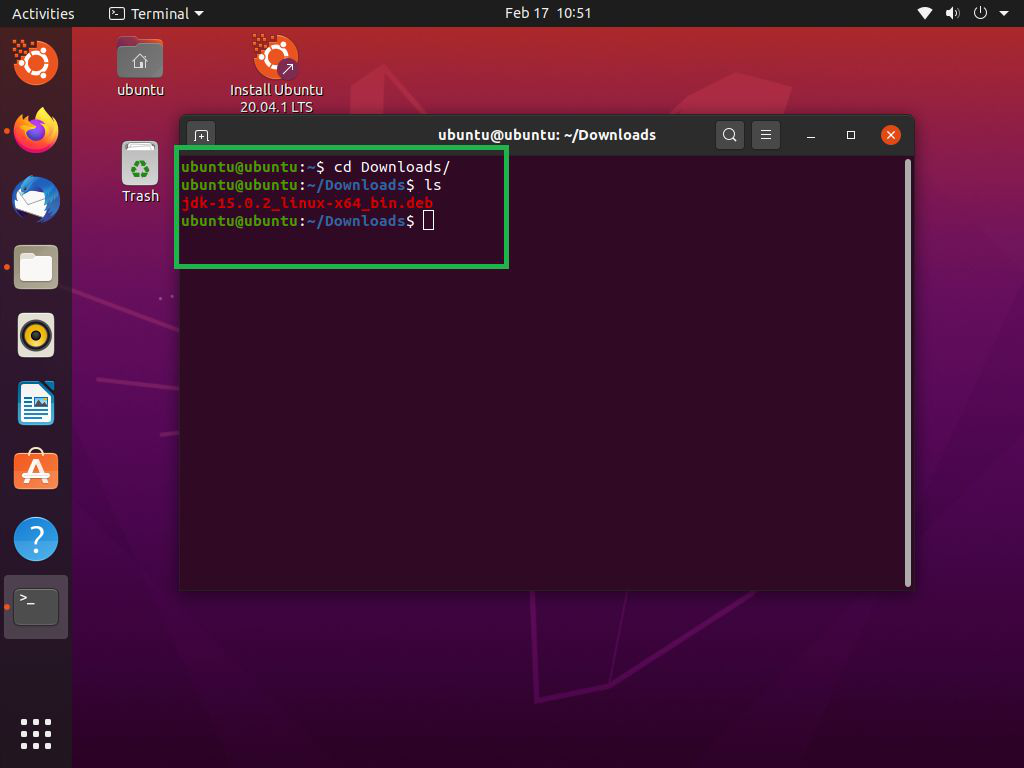
Open your terminal and run the following commands:
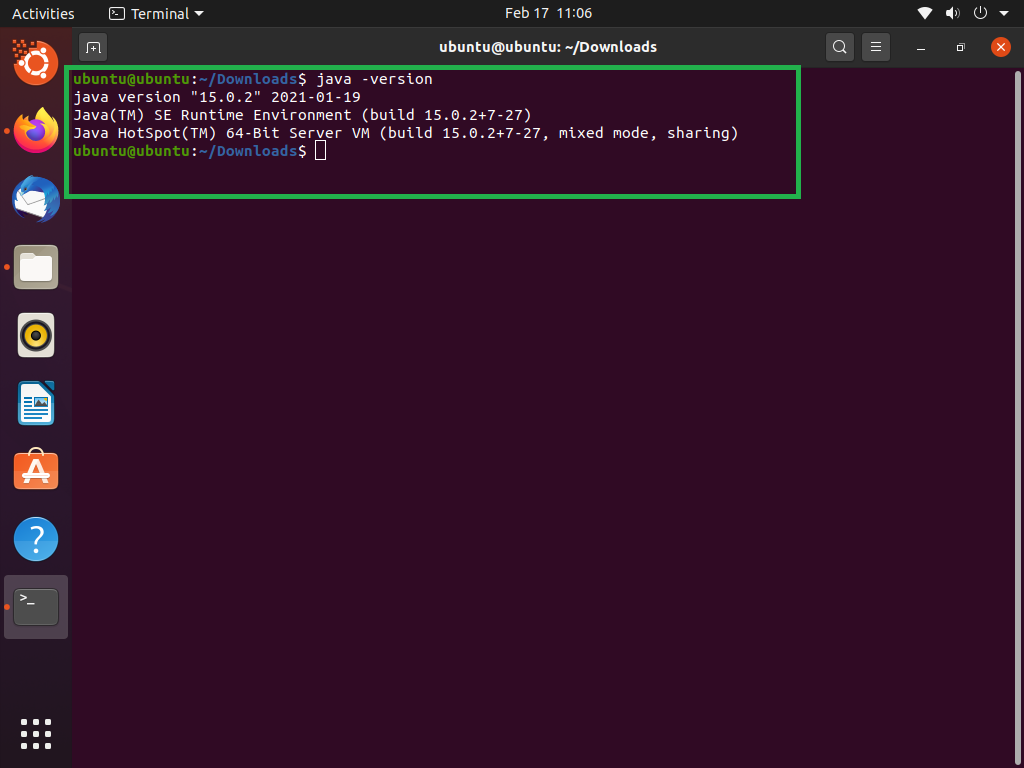
java -version
This command will display the installed Java Runtime Environment (JRE) version, if any. You might see output similar to:
openjdk version "11.0.12" 2021-07-20
OpenJDK Runtime Environment (build 11.0.12+7-Ubuntu-0ubuntu2.20.04)
OpenJDK 64-Bit Server VM (build 11.0.12+7-Ubuntu-0ubuntu2.20.04, mixed mode, sharing)
If you only see command not found or similar messages, Java is likely not installed, or not correctly configured in your PATH.
To check for the Java Development Kit (JDK) compiler, run:
javac -version
If a JDK is installed, you’ll see its version:
javac 11.0.12
On Debian/Ubuntu-based systems, you can also check which Java alternatives are configured:
update-alternatives --display java
This command will list all available Java installations and which one is currently set as the default. This is particularly useful if you need to manage multiple Java versions.
System Requirements and Best Practices
Before installing, ensure your system is up to date. This minimizes potential dependency conflicts and ensures you’re getting the latest security patches.
# For Debian/Ubuntu-based systems
sudo apt update
sudo apt upgrade

# For RHEL/CentOS/Fedora-based systems
sudo dnf update # or sudo yum update for older CentOS/RHEL
While Java itself doesn’t have extremely demanding hardware requirements for basic usage, having sufficient RAM (at least 2GB, preferably 4GB+) and disk space (a few GBs for the JDK and potential project files) is advisable, especially for development purposes.
Installing Java Using Package Managers (Recommended for Most Users)
The easiest and most recommended way to install Java on Linux is by using your distribution’s native package manager. This method ensures that Java is properly integrated with your system, dependencies are handled automatically, and updates are managed efficiently. We’ll cover the most common Linux distributions.
Debian/Ubuntu-based Systems (APT)
Debian, Ubuntu, Linux Mint, and other derivatives use the apt package manager. You can install OpenJDK easily through the official repositories.
-
Update your package list:
sudo apt updateThis command refreshes the list of available packages and their versions from the repositories.
-
Install the Default OpenJDK (LTS Version):
For most users, installing the latest Long-Term Support (LTS) version of OpenJDK is sufficient. Java 11 and Java 17 are current LTS versions. You can install the JDK (which includes the JRE and development tools) as follows:sudo apt install openjdk-11-jdkIf you prefer Java 17 (the latest LTS at the time of writing), simply replace
11with17:sudo apt install openjdk-17-jdkIf you only need the Java Runtime Environment (JRE) to run Java applications but not compile them, you can install
openjdk-11-jreoropenjdk-17-jre. However, installing the JDK is generally recommended as it includes the JRE and all development tools. -
Verify the installation:
java -version
javac -version
You should see the installed Java version.
-
Managing multiple Java versions (if applicable):
If you have multiple Java versions installed, you can useupdate-alternativesto switch between them:
bash

sudo update-alternatives --config java
You’ll see a list of installed Java versions and can select the desired default by entering its corresponding number. Repeat forjavac:
bash

sudo update-alternatives --config javac
RHEL/CentOS/Fedora-based Systems (YUM/DNF)
Red Hat Enterprise Linux (RHEL), CentOS, Fedora, and their derivatives use dnf (or yum for older RHEL/CentOS versions) as their package manager.
-
Update your package list:
sudo dnf update # For Fedora, CentOS Stream, RHEL 8+ # For older CentOS/RHEL 7 # sudo yum update -
Install the Default OpenJDK (LTS Version):
To install OpenJDK 11 JDK:sudo dnf install java-11-openjdk-develFor OpenJDK 17 JDK:
sudo dnf install java-17-openjdk-develThe
-develsuffix indicates the full JDK, including development tools. If you only need the JRE, you can installjava-11-openjdkorjava-17-openjdk. -
Verify the installation:
java -version javac -version -
Managing multiple Java versions (if applicable):
RHEL/CentOS/Fedora systems also use thealternativescommand for managing different versions of the same command.
bash

sudo alternatives --config java
This will allow you to choose your default Java installation. Similarly, forjavac:
bash

sudo alternatives --config javac
Other Distributions (Arch Linux, openSUSE, etc.)
While specific commands may vary, the general principle of using the native package manager remains the same:
- Arch Linux: Uses
pacman.
bash

sudo pacman -Syu

sudo pacman -S jdk11-openjdk # or jdk17-openjdk
- openSUSE: Uses
zypper.
bash

sudo zypper update

sudo zypper install java-11-openjdk-devel # or java-17-openjdk-devel
For these and other distributions, consult your distribution’s documentation for the exact package names and installation commands. The common theme is searching for “openjdk” or “jdk” in your package manager.
Manual Installation of Java from Tarball (Advanced Users)
While package managers are convenient, there are situations where manual installation from a tarball (a compressed archive file) is necessary:
- You need a very specific Java version not available in your distribution’s repositories.
- You’re installing Oracle JDK (due to licensing, it’s not typically in standard repos).
- You’re installing on a system without internet access, and you’ve pre-downloaded the tarball.
- You don’t have root privileges and need to install Java in your home directory.
- You are deploying to a production environment where fine-grained control over Java installations is preferred, or using a specific vendor’s OpenJDK build (like Adoptium/Temurin, Amazon Corretto, Azul Zulu).
This method gives you more control but requires manual configuration of environment variables.
Downloading the JDK Tarball
-
Choose your JDK provider:
- OpenJDK (various distributions): For open-source, production-ready builds, consider Adoptium (formerly AdoptOpenJDK, now under Eclipse Foundation, providing Temurin builds) or other vendors like Amazon Corretto, Azul Zulu, or Red Hat’s OpenJDK builds. These are generally preferred for production use over directly downloading from Oracle if you need a specific version not in your distro’s repo. Visit their official websites (e.g.,
adoptium.net) to download. - Oracle JDK: If you absolutely need Oracle JDK, download it from the official Oracle Java website (
oracle.com/java/technologies/downloads/). Be aware of the licensing implications for commercial use.
- OpenJDK (various distributions): For open-source, production-ready builds, consider Adoptium (formerly AdoptOpenJDK, now under Eclipse Foundation, providing Temurin builds) or other vendors like Amazon Corretto, Azul Zulu, or Red Hat’s OpenJDK builds. These are generally preferred for production use over directly downloading from Oracle if you need a specific version not in your distro’s repo. Visit their official websites (e.g.,
-
Select the correct version and architecture:
Ensure you download the.tar.gzfile corresponding to your Linux architecture (usuallyx64oraarch64for ARM-based systems) and the desired Java version (e.g., JDK 11, JDK 17). -
Download the file:
You can download it directly using your browser or usewgetin the terminal if you have a direct link:
bash

wget [download_link_to_tar.gz]
Example (hypothetical link for OpenJDK 17 from Adoptium):
bash

wget https://github.com/adoptium/temurin17-binaries/releases/download/jdk-17.0.9%2B9/OpenJDK17U-jdk_x64_linux_hotspot_17.0.9_9.tar.gz
Extracting and Moving the JDK
-
Create a directory for Java installations:
It’s common practice to store manually installed JDKs in/opt/java/or/usr/local/java/. Create this directory if it doesn’t exist:sudo mkdir -p /opt/java/If you don’t have root access, create a
javadirectory in your home folder:mkdir -p ~/java/ -
Extract the tarball:
Navigate to the directory where you downloaded the.tar.gzfile and extract it. The extracted folder usually has a name likejdk-17.0.9.tar -xf OpenJDK17U-jdk_x64_linux_hotspot_17.0.9_9.tar.gz -
Move the extracted JDK to the chosen location:
bash

sudo mv jdk-17.0.9 /opt/java/
If installing in your home directory:
bash

mv jdk-17.0.9 ~/java/
Setting Environment Variables
For your system to find and use the manually installed Java, you need to set the JAVA_HOME and update the PATH environment variables. This is crucial for Java applications and development tools to locate the JDK.
-
Determine the Java installation path:
This will be the path to the extracted JDK directory (e.g.,/opt/java/jdk-17.0.9or~/java/jdk-17.0.9). -
Edit your shell’s profile file:
You’ll typically edit~/.bashrc(for Bash shell, affects only the current user) or~/.profile. For system-wide changes, you could edit/etc/profileor create a new file in/etc/profile.d/(requires root privileges).
Open the file with a text editor:nano ~/.bashrc # or nano ~/.profile -
Add the following lines to the end of the file:
Replace/opt/java/jdk-17.0.9with your actual Java installation path.# Set JAVA_HOME export JAVA_HOME=/opt/java/jdk-17.0.9 # Add JAVA_HOME/bin to PATH export PATH=$JAVA_HOME/bin:$PATH -
Save the file and exit the editor.
-
Apply the changes:
For the changes to take effect without logging out and back in, source the file:source ~/.bashrc # or source ~/.profile -
Verify environment variables:
bash

echo $JAVA_HOME

echo $PATH
You should see theJAVA_HOMEpath andJAVA_HOME/binat the beginning of yourPATH.
Updating System Alternatives (for system-wide use if desired)
If you want the manually installed JDK to be recognized by the system’s update-alternatives (Debian/Ubuntu) or alternatives (RHEL/CentOS/Fedora) system, you can register it. This allows you to easily switch between it and other package-manager-installed versions. This step requires root privileges.
For Debian/Ubuntu-based systems:
sudo update-alternatives --install "/usr/bin/java" "java" "/opt/java/jdk-17.0.9/bin/java" 1
sudo update-alternatives --install "/usr/bin/javac" "javac" "/opt/java/jdk-17.0.9/bin/javac" 1
# Optionally, add other tools like javadoc, jar, etc.
# sudo update-alternatives --install "/usr/bin/jar" "jar" "/opt/java/jdk-17.0.9/bin/jar" 1
# sudo update-alternatives --install "/usr/bin/javadoc" "javadoc" "/opt/java/jdk-17.0.9/bin/javadoc" 1
The “1” at the end is the priority. Higher numbers indicate higher priority. After adding, you can select it using sudo update-alternatives --config java.
For RHEL/CentOS/Fedora-based systems:
sudo alternatives --install "/usr/bin/java" "java" "/opt/java/jdk-17.0.9/bin/java" 1
sudo alternatives --install "/usr/bin/javac" "javac" "/opt/java/jdk-17.0.9/bin/javac" 1
# Optionally, add other tools like javadoc, jar, etc.
# sudo alternatives --install "/usr/bin/jar" "jar" "/opt/java/jdk-17.0.9/bin/jar" 1
# sudo alternatives --install "/usr/bin/javadoc" "javadoc" "/opt/java/jdk-17.0.9/bin/javadoc" 1
Then use sudo alternatives --config java to select it.
Post-Installation Verification and Management
Once Java is installed, whether via a package manager or manually, it’s essential to verify its functionality and understand how to manage it going forward.
Verifying Your Java Installation
Beyond checking java -version and javac -version, running a simple “Hello World” program is the definitive way to confirm your Java environment is correctly set up.
-
Create a Java file:
Open a text editor and save the following code asHelloWorld.java:public class HelloWorld { public static void main(String[] args) { System.out.println("Hello, Java on Linux!"); } } -
Compile the Java file:
javac HelloWorld.javaIf this command executes without errors, it means your
javac(Java compiler) is working correctly. It will create aHelloWorld.classfile in the same directory. -
Run the Java program:
bash

java HelloWorld
You should see the output:Hello, Java on Linux!
If you encounter any errors during compilation or execution, double-check yourJAVA_HOMEandPATHenvironment variables, or ensure you’ve selected the correct Java version usingupdate-alternativesoralternatives.
Switching Between Multiple Java Versions
In a development environment, you might need to work with different Java versions for various projects. Linux provides robust mechanisms for managing this.
-
Using
update-alternatives(Debian/Ubuntu) oralternatives(RHEL/CentOS/Fedora):
As shown earlier, these commands allow you to set the system-wide default Java version interactively.sudo update-alternatives --config java # For Debian/Ubuntu sudo alternatives --config java # For RHEL/CentOS/FedoraYou can similarly configure
javac,jar,javadoc, etc. -
Per-project or per-shell Java versions:
If you need to use a specific Java version for a particular project without changing the system-wide default, you can temporarily setJAVA_HOMEandPATHwithin your current terminal session or a project-specific script.
bash

export JAVA_HOME=/opt/java/jdk-17.0.9 # Or path to any installed JDK

export PATH=$JAVA_HOME/bin:$PATH

java -version # Verify it's the correct version
This approach is often used with tools likesdkman(SDK Manager) which automates the setting of these environment variables for different SDKs, including Java.
Keeping Java Updated and Secure
Maintaining your Java installation is crucial for security and performance.
-
For package-manager installations:
Regularly update your system packages.sudo apt update && sudo apt upgrade # Debian/Ubuntu sudo dnf update # RHEL/CentOS/FedoraThis ensures you receive the latest security patches and minor version updates for your installed OpenJDK.
-
For manual installations:
You are responsible for downloading and installing new versions or security updates. Keep an eye on the release cycles of your chosen JDK vendor (e.g., Adoptium, Oracle) and periodically check for new releases. When a new version is available, download the new tarball, extract it, and update yourJAVA_HOMEandPATHenvironment variables to point to the new installation. You might want to keep older versions for compatibility testing but ensure your defaultJAVA_HOMEpoints to the latest and most secure one.
Security Considerations: Always download JDKs from trusted sources. Using out-of-date Java versions with known vulnerabilities can expose your system and applications to security risks. Staying current with LTS releases or frequently updated versions is a robust security practice.
Conclusion
Installing Java on Linux is a foundational step for anyone working with Java-based technologies. Whether you opt for the simplicity and open-source nature of OpenJDK through your distribution’s package manager or choose the manual installation method for more control over specific versions, this guide has equipped you with the knowledge and steps to confidently set up your Java environment.
By understanding the distinctions between OpenJDK and Oracle JDK, performing necessary pre-installation checks, and mastering both automated and manual installation techniques, you can ensure your Linux system is always ready to compile, run, and develop powerful Java applications. Remember to keep your Java installation updated and secure to leverage the full potential of this versatile programming language.
aViewFromTheCave is a participant in the Amazon Services LLC Associates Program, an affiliate advertising program designed to provide a means for sites to earn advertising fees by advertising and linking to Amazon.com. Amazon, the Amazon logo, AmazonSupply, and the AmazonSupply logo are trademarks of Amazon.com, Inc. or its affiliates. As an Amazon Associate we earn affiliate commissions from qualifying purchases.