
In the intricate world of computing, where operating systems seamlessly spring to life with a press of the power button, there’s a crucial, often unsung hero working behind the scenes: the bootloader. For many Linux users, and even those navigating multi-boot systems, this hero is GRUB (GRand Unified Bootloader). GRUB is more than just a piece of software; it’s the gatekeeper, the initial program that runs when your computer starts, responsible for loading the operating system kernel into memory. Without a properly functioning GRUB, your computer becomes an expensive paperweight, unable to find its way to the vibrant desktop environments we’ve come to rely on.
This comprehensive guide delves into the essential process of installing and reinstalling GRUB. Whether you’re setting up a new Linux distribution, rescuing a system after a failed update, or dealing with a Windows installation that has overwritten your bootloader, understanding GRUB is a fundamental skill for anyone serious about digital security and system stability. We’ll explore why GRUB is so vital, the common scenarios that necessitate its intervention, and provide step-by-step instructions to get your system booting flawlessly again. Embrace this journey into the heart of your computer’s startup sequence, and empower yourself with the knowledge to maintain control over your digital environment.
Understanding GRUB: Your System’s Bootloader
Before diving into the practical steps of installation, it’s crucial to grasp what GRUB is and why it holds such a pivotal role in the operation of your computer. This foundational understanding will not only make the installation process clearer but also help you troubleshoot future boot-related issues with greater confidence.
What is GRUB and Why is it Essential?
GRUB stands for GRand Unified Bootloader, and it is the standard bootloader for most Linux distributions. In essence, a bootloader is a small program stored in a specific location on your hard drive (traditionally the Master Boot Record or MBR for BIOS systems, or a dedicated EFI System Partition for UEFI systems). Its primary function is to initialize the system, load the operating system kernel into your computer’s RAM, and then pass control to it. Without a bootloader, your computer wouldn’t know where to find the operating system files on your disk, resulting in a blank screen or a “no boot device found” error.
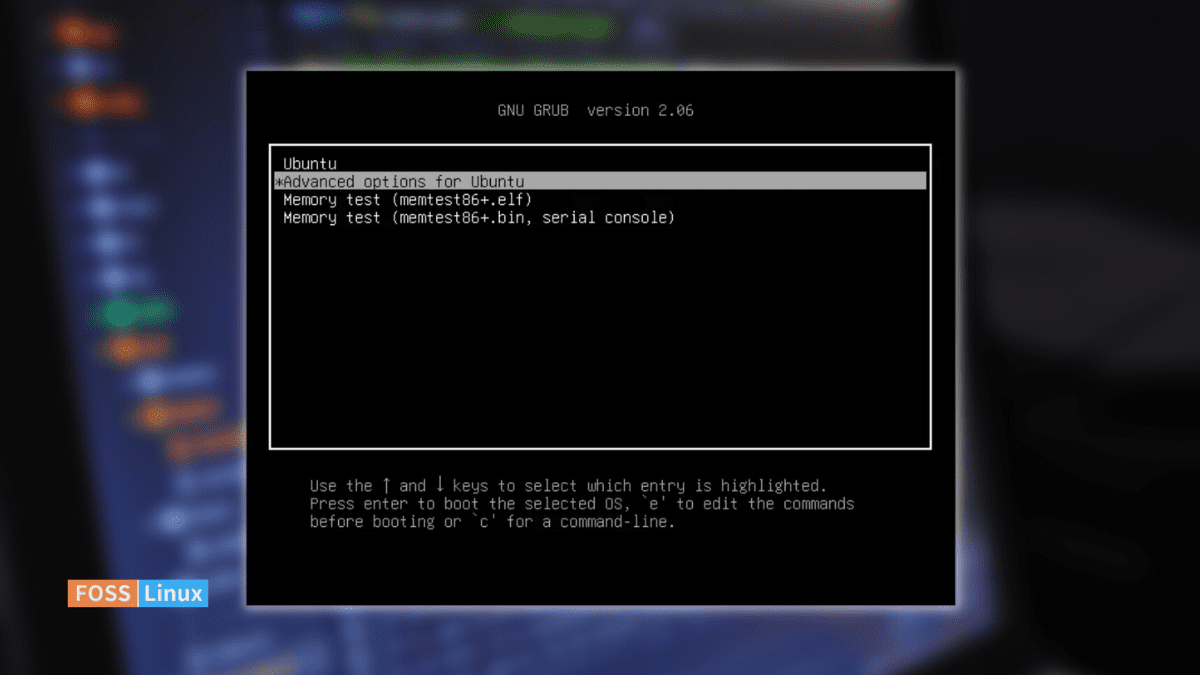
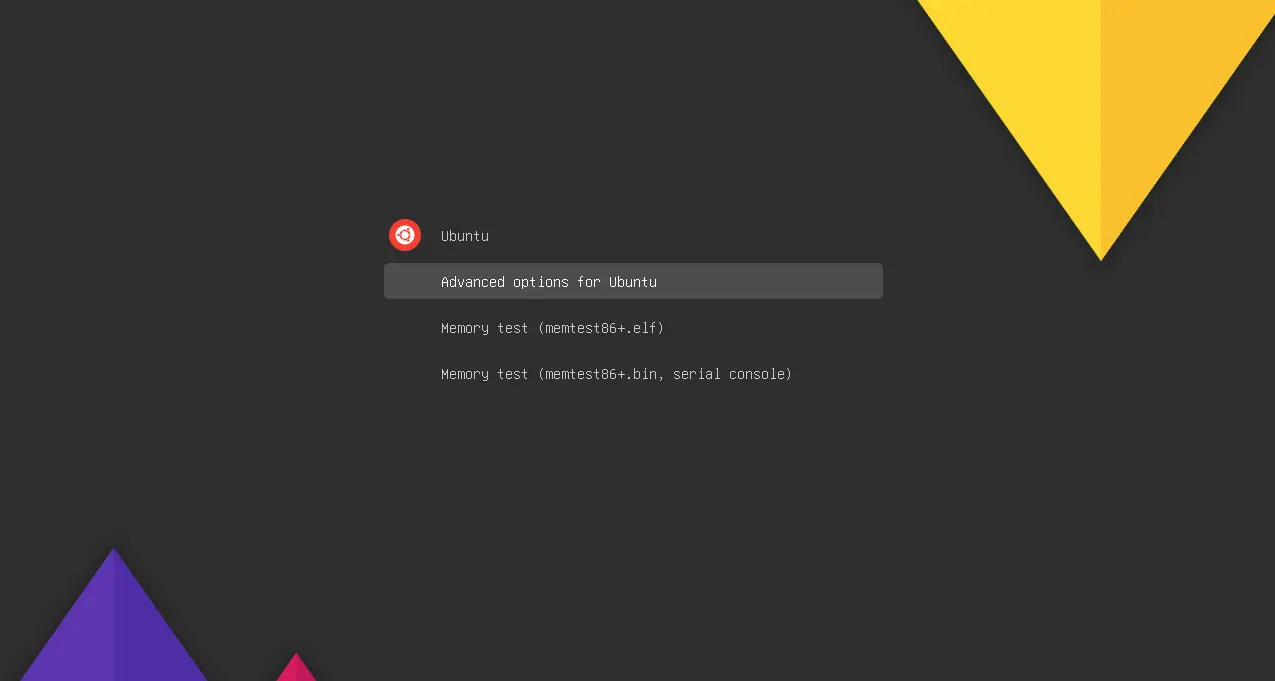
GRUB’s power lies in its versatility and robust feature set. It can boot a wide array of operating systems, including multiple Linux distributions, Windows, and macOS, making it indispensable for dual-boot or multi-boot setups. When you power on your computer, GRUB presents you with a menu (the GRUB menu) allowing you to choose which operating system or kernel version to load. This flexibility is a cornerstone of productivity and digital security for users who require access to different environments for various tasks, from development work to specialized software applications. Beyond simple booting, GRUB also offers a command-line interface for advanced users to manually load kernels, pass boot parameters, or even recover a damaged system, providing a safety net against common boot failures.
Common Scenarios for GRUB Installation or Repair
Understanding when and why you might need to install or repair GRUB is as important as knowing how to do it. Several common situations necessitate GRUB intervention, each presenting its own set of challenges and requiring specific approaches.
One of the most frequent scenarios occurs during a dual-boot setup. If you install Windows after installing a Linux distribution, Windows typically overwrites the GRUB bootloader in the MBR or EFI System Partition, making your Linux installation inaccessible. Reinstalling GRUB in this context restores the ability to boot into both operating systems. Similarly, installing multiple Linux distributions might lead to one distribution’s GRUB overwriting another’s, necessitating a repair to consolidate boot entries.
Another common reason is a corrupted boot sector or EFI partition. This can happen due to disk errors, power outages during updates, or even malware. A corrupted GRUB can manifest as a “GRUB rescue” prompt, a black screen, or an inability to find your operating system. In such cases, GRUB needs to be reinstalled or repaired to point to the correct kernel and root filesystem.
Furthermore, upgrading or reinstalling an operating system can sometimes inadvertently remove or damage GRUB. While most modern installers are adept at managing GRUB, unexpected issues can arise. Even migrating your system to a new hard drive or motherboard might necessitate a GRUB reinstallation if the boot information doesn’t align with the new hardware configuration. Finally, manual modifications to GRUB configuration files that go awry can also lead to boot failures, requiring a fresh installation to restore functionality. Recognizing these scenarios will empower you to react effectively and leverage this guide to restore your system’s bootability.
Preparing for GRUB Installation or Repair
Before embarking on the actual installation or repair of GRUB, proper preparation is key. Rushing into the process without the necessary tools or understanding can lead to further complications. This section outlines the essential prerequisites and the crucial first step of booting into a live environment, which serves as your rescue toolkit.
Essential Prerequisites and Tools
To successfully install or repair GRUB, you’ll need a few vital components. The primary tool is a live Linux distribution on a bootable USB drive or DVD. This live environment allows you to boot your computer into a fully functional operating system without touching your installed system’s hard drive. Popular choices include Ubuntu, Mint, Fedora, or any other distribution that provides a “Try without installing” option. Ensure that the live environment you choose is compatible with your system’s architecture (e.g., 64-bit for a 64-bit system).
To create this bootable media, you’ll need an ISO image of your chosen Linux distribution, which can be downloaded from its official website. Additionally, you’ll require a USB drive (at least 4GB) and a utility to write the ISO image to the USB drive. Tools like Etcher (Balena Etcher), Rufus (for Windows), or dd command (for Linux) are excellent for this purpose. It’s recommended to verify the integrity of the downloaded ISO using checksums (MD5 or SHA256) to prevent issues during the process.
Beyond the bootable media, having a reliable internet connection can be beneficial, especially if you need to install additional packages or update repositories within the live environment. Access to another working computer or a smartphone can also be invaluable for consulting guides, looking up commands, or troubleshooting unexpected errors if your primary system is non-bootable. Finally, make sure you back up any critical data if possible, even if your system isn’t booting. While GRUB repair is generally safe, unexpected issues can always arise, and having backups is the ultimate safeguard for your digital assets and productivity.
Booting into a Live Environment
The first and most critical step in repairing or installing GRUB is to boot your computer into a live Linux environment. This acts as your temporary operating system, providing the necessary tools and a safe space to work on your primary disk without affecting its current state.
To do this, insert your prepared bootable USB drive or DVD into your computer. Then, power on or restart your computer and immediately enter your BIOS/UEFI settings. The key to access these settings varies by manufacturer but is commonly F2, F10, F12, DEL, or ESC. Look for an option related to “Boot Options” or “Boot Menu” within the BIOS/UEFI interface. Here, you need to change the boot order to prioritize your USB drive or DVD drive over your internal hard drive.
Once you’ve selected your bootable media, save the changes and exit the BIOS/UEFI. Your computer should now boot from the USB/DVD. You will typically be presented with a GRUB menu for the live environment itself, offering options like “Try Ubuntu without installing,” “Install Ubuntu,” or other diagnostic tools. Select the “Try without installing” or equivalent option to launch the live desktop environment. This will load a full-featured operating system directly into your computer’s RAM, giving you access to a terminal, file manager, and all the necessary utilities without making any permanent changes to your hard drive.
It’s crucial to confirm that you have network access within the live environment if you anticipate needing to download packages. Open a web browser to verify connectivity. Once you’re successfully booted into the live environment and have access to the desktop, you’re ready to proceed with the GRUB installation or repair steps. This live session is your command center for bringing your non-bootable system back to life.
Step-by-Step GRUB Installation and Reinstallation Methods
With your live environment successfully booted, you’re now ready to tackle the core task of installing or reinstalling GRUB. This section outlines the most common and effective methods, starting with the recommended approach for most users and moving towards more advanced techniques, along with specific considerations for different system types.
Method 1: Repairing GRUB Using a Live Linux Distribution (Recommended)
This method is the most widely applicable and recommended approach for repairing or reinstalling GRUB on systems running Linux, especially when dual-booting with Windows. It involves using the chroot command to temporarily change the root directory of your live system to your installed Linux partition, allowing you to run GRUB commands as if you were booted into your damaged system.
-
Identify Your Linux Partitions:
Open a terminal in the live environment (usuallyCtrl+Alt+T). Use thelsblkcommand orsudo fdisk -lto identify your main Linux root partition (e.g.,/dev/sda1,/dev/nvme0n1p2) and, if applicable, your separate/bootpartition or EFI System Partition (ESP). The root partition is where your/directory is located. The ESP (usually FAT32 formatted) is typically mounted at/boot/efion UEFI systems.Example output from
lsblk:NAME MAJ:MIN RM SIZE RO TYPE MOUNTPOINTS sda 8:0 0 931.5G 0 disk ├─sda1 8:1 0 512M 0 part /boot/efi (EFI System Partition) ├─sda2 8:2 0 1G 0 part └─sda3 8:3 0 200G 0 part / (Linux root partition)In this example,
/dev/sda3is the root partition and/dev/sda1is the EFI System Partition. -
Mount Your Partitions:
Mount your Linux root partition to a temporary directory, for example,/mnt:sudo mount /dev/sda3 /mnt(Replace
/dev/sda3with your actual root partition.)If you have a separate
/bootpartition, mount it:sudo mount /dev/sda2 /mnt/boot(Replace
/dev/sda2with your actual boot partition.)If you are on a UEFI system and have an EFI System Partition (ESP), mount it:
sudo mount /dev/sda1 /mnt/boot/efi(Replace
/dev/sda1with your actual ESP. If/mnt/boot/efidoesn’t exist, create it first:sudo mkdir -p /mnt/boot/efi). -
Bind Mount Essential Directories:
These commands make critical system directories from the live environment available within yourchrootenvironment:sudo mount --bind /dev /mnt/dev sudo mount --bind /proc /mnt/proc sudo mount --bind /sys /mnt/sys -
Chroot into Your Installed System:
Now, change the root directory to your mounted Linux installation:sudo chroot /mntYou’ll notice your terminal prompt changes, indicating you are now operating within your installed Linux system.
-
Install GRUB:
Inside thechrootenvironment, install GRUB to the correct disk (not a partition). This is usually/dev/sdafor BIOS systems or/dev/nvme0n1for NVMe drives, or/dev/sdbifsdais your live USB. Do not specify a partition number here.
bash

grub-install /dev/sda
(Replace/dev/sdawith the correct disk identifier for your main hard drive where Linux is installed).

For UEFI systems, `grub-install` usually detects the EFI partition automatically. If not, you might need to specify the EFI directory:
```bash
grub-install --efi-directory=/boot/efi /dev/sda
```
-
Update GRUB Configuration:
After installing GRUB, you need to update its configuration to detect all installed operating systems and kernels:update-grubThis command scans your system for operating systems and generates the
grub.cfgfile, which defines the GRUB boot menu entries. -
Exit Chroot and Unmount:
Once GRUB is installed and updated, exit thechrootenvironment:exitThen, unmount the partitions in reverse order:
sudo umount /mnt/boot/efi
sudo umount /mnt/boot
sudo umount /mnt/dev
sudo umount /mnt/proc
sudo umount /mnt/sys
sudo umount /mnt
(Adjust
umountcommands based on what you mounted). -
Reboot:
Remove your live USB/DVD and reboot your computer:
bash

sudo reboot
Your system should now boot into the GRUB menu, allowing you to select your operating system.
Method 2: Manual GRUB Installation via Chroot (Advanced)
While Method 1 is generally sufficient, there might be scenarios where more granular control is needed, or if grub-install fails for specific reasons. This method follows a similar chroot process but allows for more explicit control over the GRUB installation steps.
The initial steps (identifying partitions, mounting, bind mounting, and chroot into your system) are identical to Method 1. Once inside the chroot environment:
-
Install GRUB Core Files:
Instead of directly runninggrub-installfor the entire disk, you might need to first install the GRUB core image to a specific directory.grub-install --recheck --no-floppy --boot-directory=/boot /dev/sdaThis command explicitly tells GRUB where to put its core files and where to install the boot sector. The
--recheckoption makes GRUB probe for devices again, and--no-floppyavoids looking for a floppy drive.For UEFI systems, if
grub-installis problematic, you might need to installgrub-efi-amd64(or your architecture’s equivalent) first:apt-get install grub-efi-amd64 # For Debian/Ubuntu based systems # or dnf install grub2-efi-x64 # For Fedora/RHEL based systemsThen, ensure the EFI System Partition is mounted correctly (e.g., at
/boot/efi) and run:grub-install --target=x86_64-efi --efi-directory=/boot/efi --bootloader-id=grub_uefi --recheckReplace
grub_uefiwith a suitable identifier for your bootloader entry in the UEFI firmware. -
Generate
grub.cfg:
After installing the core components, generate the GRUB configuration file:update-grubThis step is crucial for GRUB to detect all your installed operating systems and create the boot menu.
-
Exit and Reboot:
exitthechrootenvironment,umountall partitions, andrebootyour system as described in Method 1. This advanced method gives you more control over the specific architecture and location of the GRUB installation, which can be beneficial in complex multi-boot or non-standard setups.
Handling UEFI vs. BIOS Systems
The way GRUB interacts with your hardware differs significantly between legacy BIOS (Basic Input/Output System) and modern UEFI (Unified Extensible Firmware Interface) systems. Understanding these differences is crucial for a successful installation.
BIOS Systems:
On BIOS-based systems, GRUB is typically installed to the Master Boot Record (MBR) of the primary hard drive (e.g., /dev/sda). The MBR is the very first sector of the disk and contains a small piece of code (the first stage of GRUB) that points to the rest of the bootloader. The grub-install /dev/sda command in Method 1 directly writes to the MBR, assuming the rest of GRUB’s files are on a partition GRUB can find.
UEFI Systems:
UEFI systems, which have largely replaced BIOS, use a different booting mechanism. Instead of an MBR, they rely on an EFI System Partition (ESP), which is a FAT32-formatted partition containing .efi boot files. GRUB for UEFI (grub-efi) installs its files into a directory within the ESP (e.g., /boot/efi/EFI/ubuntu/grubx64.efi). The UEFI firmware then reads these files to present boot options.
When repairing GRUB on a UEFI system, it’s paramount to:
- Boot the Live USB in UEFI mode: If your live USB boots in legacy BIOS mode on a UEFI system, you might install the wrong GRUB version, leading to further boot issues. Check your motherboard’s boot menu to ensure you select the “UEFI” entry for your USB drive.
- Mount the ESP correctly: As demonstrated in Method 1, the ESP must be mounted at
/mnt/boot/efibefore runningchrootandgrub-install. - Use the correct
grub-installtarget: Ensuregrub-installis run with the appropriate flags for UEFI, such as--target=x86_64-efias shown in Method 2, althoughupdate-gruboften handles this intelligently.
The update-grub command is vital for both BIOS and UEFI systems as it ensures that the GRUB configuration file (/boot/grub/grub.cfg) correctly lists all available operating systems, regardless of the underlying firmware. Missteps in distinguishing between BIOS and UEFI can lead to a non-bootable system even after reinstallation, making careful attention to these details critical for digital security and system uptime.
Advanced GRUB Configuration and Troubleshooting
Beyond the initial installation, GRUB offers extensive customization options and can sometimes present challenging troubleshooting scenarios. Mastering these aspects allows for a more personalized and resilient boot experience.
Updating and Customizing GRUB Settings
Once GRUB is successfully installed, you might want to update its configuration or customize its behavior to better suit your needs.
Updating GRUB:
The most common reason to update GRUB is after installing a new kernel, adding a new operating system, or making significant changes to your disk partitions. The command to do this is simple:
sudo update-grub
This command scans your system for all detectable operating systems and kernels, then regenerates the /boot/grub/grub.cfg file. It’s good practice to run this after any major system change that might affect boot entries.
Customizing GRUB:
GRUB’s appearance and default behavior can be customized by editing the /etc/default/grub file. Always back up this file before making changes.
sudo cp /etc/default/grub /etc/default/grub.bak
sudo nano /etc/default/grub
Some common parameters you might want to adjust include:
GRUB_DEFAULT=0: This sets the default boot entry.0refers to the first entry in the GRUB menu. You can change it to a specific number orsavedto remember the last chosen entry.GRUB_TIMEOUT=5: This defines the number of seconds GRUB waits before automatically booting the default entry. Setting it to-1will make GRUB wait indefinitely, requiring a manual selection.GRUB_HIDDEN_TIMEOUT=0: If set to0, the GRUB menu will not be shown by default unless you pressShiftorEscduring boot.GRUB_CMDLINE_LINUX_DEFAULT="quiet splash": These are kernel boot parameters.quietsuppresses most boot messages, andsplashshows a splash screen. You can add parameters likenomodesetfor graphics troubleshooting orinit=/bin/bashfor single-user mode recovery.GRUB_BACKGROUND="/path/to/image.png": Sets a custom background image for the GRUB menu. The image must be in a specific format (e.g., PNG, TGA, JPG) and resolution.
After making any changes to /etc/default/grub, you must run sudo update-grub for the changes to take effect. This regenerates grub.cfg with your new settings. Customizing GRUB can enhance the user experience and, in some cases, simplify system recovery by providing specific boot options directly at startup, contributing to a better overall digital security posture by ensuring reliable boot sequences.
Common GRUB Issues and Their Solutions
Even with proper installation and configuration, you might encounter issues with GRUB. Knowing how to diagnose and address these can save significant time and frustration.
-
“GRUB rescue>” Prompt:
This is a common error indicating that GRUB’s core files are loaded, but it can’t find its configuration file (grub.cfg) or the necessary modules.- Solution: This typically means GRUB needs to be reinstalled or pointed to the correct partition. Boot into a live environment and follow Method 1 or 2 to reinstall GRUB. In some cases, you might manually locate the
grub.cfgandlinuxandinitrdfiles from thegrub rescue>prompt using commands likels,set prefix=(hd0,msdos1)/boot/grub,set root=(hd0,msdos1),insmod normal,normal, but this is more complex and often temporary.
- Solution: This typically means GRUB needs to be reinstalled or pointed to the correct partition. Boot into a live environment and follow Method 1 or 2 to reinstall GRUB. In some cases, you might manually locate the
-
“No such device: UUID…” Error:
This error occurs when GRUB’s configuration file refers to a partition by its UUID (Universally Unique Identifier) that no longer exists or has changed. This can happen after resizing partitions or moving disks.- Solution: Boot into a live environment,
chrootinto your system, and runsudo update-grub. This will regenerategrub.cfgwith the correct UUIDs. If the error persists, manually check the UUIDs withlsblk -fand compare them against/boot/grub/grub.cfg.
- Solution: Boot into a live environment,
-
Windows Overwrites GRUB:
As mentioned, installing Windows after Linux will typically overwrite GRUB.- Solution: Follow Method 1 (reinstalling GRUB via a live Linux distribution) to restore the GRUB bootloader and enable dual-booting.
-
GRUB Menu Not Showing / Default Booting into Windows:
This can happen if GRUB is installed correctly but the BIOS/UEFI boot order is still set to prioritize Windows Boot Manager.- Solution: Enter your BIOS/UEFI settings and change the boot order to prioritize the Linux GRUB entry (e.g., “ubuntu” or “GRUB”).
-
Kernel Panic After Selecting OS in GRUB:
This indicates that GRUB loaded the kernel, but the kernel itself failed to initialize. This is usually not a GRUB issue but a problem with the kernel or its initial ramdisk (initrd).- Solution: Try booting an older kernel version from the GRUB menu (if available). If that works, you might need to troubleshoot the newer kernel installation or graphics drivers. You can also try adding
nomodesetto the kernel boot parameters in GRUB (by pressingeto edit during boot) to rule out graphics issues.
- Solution: Try booting an older kernel version from the GRUB menu (if available). If that works, you might need to troubleshoot the newer kernel installation or graphics drivers. You can also try adding
Troubleshooting GRUB issues often requires patience, logical deduction, and a systematic approach. The ability to effectively diagnose and resolve these problems is a valuable skill in maintaining the integrity and availability of your computing systems, contributing significantly to your overall digital security and productivity. With the knowledge from this guide, you are well-equipped to manage GRUB and ensure your systems boot reliably.
Conclusion
The GRand Unified Bootloader, or GRUB, might operate beneath the surface of our daily computing experience, but its role is undeniably foundational. As we’ve explored in this comprehensive guide, GRUB is not merely a technical component; it’s the gateway to your operating systems, a critical element in the digital security of your boot process, and a powerful tool for managing complex multi-boot environments. From the initial spark of power to the vibrant desktop, GRUB orchestrates the crucial handoff that brings your system to life.
Understanding how to install, reinstall, and troubleshoot GRUB is an indispensable skill for anyone deeply engaged with Linux or running multiple operating systems. We’ve navigated through its core functionalities, identified common scenarios necessitating its intervention, and provided detailed, step-by-step methods for both standard and advanced installation techniques, all while addressing the nuances of BIOS and UEFI systems. Furthermore, we’ve touched upon customizing GRUB for a more personalized boot experience and equipped you with strategies to tackle common GRUB-related issues.
In an era where digital security and system stability are paramount, the ability to control and repair your bootloader empowers you. It safeguards against data loss, ensures continuous productivity, and grants you the confidence to experiment with different operating systems without fear of losing access to your critical data or preferred environments. By mastering GRUB, you’re not just fixing a technical problem; you’re taking charge of your computing destiny, reinforcing your system’s resilience, and enhancing your overall technological literacy. Keep these insights at hand, and may your systems always boot smoothly.
aViewFromTheCave is a participant in the Amazon Services LLC Associates Program, an affiliate advertising program designed to provide a means for sites to earn advertising fees by advertising and linking to Amazon.com. Amazon, the Amazon logo, AmazonSupply, and the AmazonSupply logo are trademarks of Amazon.com, Inc. or its affiliates. As an Amazon Associate we earn affiliate commissions from qualifying purchases.