
In an increasingly digital world, live streaming has emerged as a powerful tool for connection, community building, and real-time content delivery. YouTube, as the undisputed titan of online video, stands at the forefront of this revolution, offering robust capabilities for creators to broadcast live to a global audience. Whether you’re a gamer sharing your latest conquest, an educator conducting a virtual class, a musician performing a live set, or a professional presenting a webinar, mastering the art of streaming to YouTube opens up a myriad of opportunities. This comprehensive guide will demystify the technical process, equipping you with the knowledge and steps required to confidently go live, ensuring your message reaches its intended viewers with clarity and professionalism.
Understanding the Fundamentals of YouTube Live Streaming
Before diving into the intricate details of hardware and software, it’s crucial to grasp the foundational concepts behind YouTube Live. Live streaming, at its core, involves transmitting real-time video and audio signals from your device to YouTube’s servers, which then distribute it to your viewers. This process demands a stable internet connection, suitable equipment, and an understanding of YouTube’s platform mechanics.
The Allure of Live Content on YouTube
The appeal of live content is multifaceted. For viewers, it offers immediacy, interactivity, and a sense of shared experience. They can engage directly with creators through live chat, influencing the content in real-time. For creators, live streaming fosters deeper engagement, allows for spontaneous content creation, and provides a direct conduit for feedback. It’s a dynamic medium that transcends the polished, pre-recorded video format, offering a raw and authentic connection that resonates deeply with audiences. Furthermore, live streams can be archived and repurposed, extending their value long after the initial broadcast. Understanding this intrinsic value drives the motivation to navigate the technical landscape and leverage YouTube’s powerful streaming capabilities.
Basic Technical Prerequisites for Streaming
To initiate a live stream on YouTube, certain fundamental technical requirements must be met. Foremost among these is a reliable internet connection, ideally a wired Ethernet connection to minimize latency and dropped frames. While upload speeds can vary based on stream quality, a minimum sustained upload speed of 3-5 Mbps is generally recommended for standard definition, with higher speeds (10+ Mbps) necessary for HD and 4K streaming. Your computer or mobile device must also possess sufficient processing power to handle video encoding without stuttering. Most modern desktops and laptops will suffice, but older machines might struggle. Finally, a functioning webcam (built-in or external) and a microphone are essential for capturing your audio and video. While basic setups can be surprisingly effective, investing in quality peripherals significantly enhances the viewer experience.
Choosing Your Streaming Setup: Hardware and Software Essentials
The quality of your live stream is heavily dependent on the hardware you employ and the software you use to manage the broadcast. A well-chosen setup ensures smooth delivery, high-fidelity audio, and crisp video, distinguishing your content in a crowded digital landscape.
Essential Hardware Components: Cameras, Microphones, and Connectivity
Your camera is the eye of your stream. While a built-in laptop webcam can get you started, an external webcam (e.g., Logitech C920, Razer Kiyo) offers superior image quality, better low-light performance, and often wider field-of-view options. For more professional productions, a DSLR or mirrorless camera, connected via a capture card (e.g., Elgato Cam Link), can provide cinema-quality visuals with excellent depth of field.
Audio is arguably even more critical than video; poor audio can quickly deter viewers. Avoid relying solely on built-in microphones. USB microphones (e.g., Blue Yeti, Rode NT-USB Mini) are excellent entry-level options, offering clear voice capture without complex setups. For greater flexibility and sound quality, XLR microphones (e.g., Shure SM7B, Rode Procaster) paired with an audio interface or mixer provide broadcast-quality sound, allowing for fine-tuned control over levels and effects.
Beyond cameras and microphones, consider your connectivity. As mentioned, a wired Ethernet connection is paramount for stability. If Wi-Fi is your only option, ensure it’s a strong, dedicated connection close to your router. Additionally, a secondary monitor can be invaluable for monitoring your chat, stream analytics, and OBS interface simultaneously, without obscuring your main content.
Decoding Streaming Software: OBS Studio, Streamlabs OBS, and More
Streaming software, also known as encoders, takes your raw audio and video feeds, processes them, and sends them to YouTube. This is where you compose your scene, add overlays, manage alerts, and control the overall look and feel of your broadcast.
OBS Studio (Open Broadcaster Software) is the gold standard for many streamers. It’s free, open-source, highly customizable, and compatible with Windows, macOS, and Linux. OBS allows you to create multiple scenes with various sources (webcam, game capture, screen share, images, text, browser sources), set up audio mixing, and configure advanced encoding settings. While its interface might seem daunting initially, countless tutorials are available to guide new users.
Streamlabs OBS (SLOBS) is built on top of OBS Studio but offers a more user-friendly interface with integrated features specifically designed for streamers, such as built-in alerts, widgets, and themes. It’s often preferred by beginners due to its streamlined setup process and intuitive design. However, it can be more resource-intensive than vanilla OBS Studio.
Other options include XSplit Broadcaster (a paid alternative with professional features) and platform-specific mobile apps like the YouTube app itself, which offers basic direct-from-phone streaming capabilities. For advanced users, dedicated hardware encoders exist, providing maximum performance and reliability, but they come with a significant cost.
Internet Connection: The Unsung Hero of Live Streams
The quality and stability of your internet connection directly dictate the quality and reliability of your stream. Your upload speed is far more important than your download speed for live broadcasting. A general rule of thumb is to have an upload speed that is at least 1.5 to 2 times higher than the bitrate you plan to stream at. For instance, if you aim for a 4500 kbps (4.5 Mbps) stream, you’ll ideally want a sustained upload speed of at least 7-9 Mbps.
To minimize buffering and dropped frames, always opt for a wired Ethernet connection over Wi-Fi whenever possible. Wi-Fi is susceptible to interference and fluctuations, which can lead to frustrating stream interruptions. Before every stream, it’s wise to perform a speed test (e.g., Speedtest.net) to confirm your connection’s performance. Also, ensure that other devices on your network aren’t consuming excessive bandwidth during your broadcast, as this can significantly impact your upload stability.
Configuring Your YouTube Channel for Live Streaming
Once your hardware is set up and your encoder software is installed, the next step involves preparing your YouTube channel to go live. This includes enabling the feature, understanding key settings, and preparing your event details.
Enabling Live Streaming on Your YouTube Account
Before you can stream, you must enable the live streaming feature on your YouTube channel. This is typically a one-time process and requires verification.
- Verify Your Account: Go to youtube.com/verify and follow the prompts to verify your account using a phone number.
- Enable Live Streaming: After verification, go to YouTube Studio (studio.youtube.com). In the left sidebar, click on “Go live” or navigate to “Settings” -> “Channel” -> “Feature eligibility” and ensure “Live streaming” is enabled. Note that it can take up to 24 hours for live streaming to be activated after initial verification.
- No Copyright Strikes: Your channel must not have any live streaming restrictions in the last 90 days.
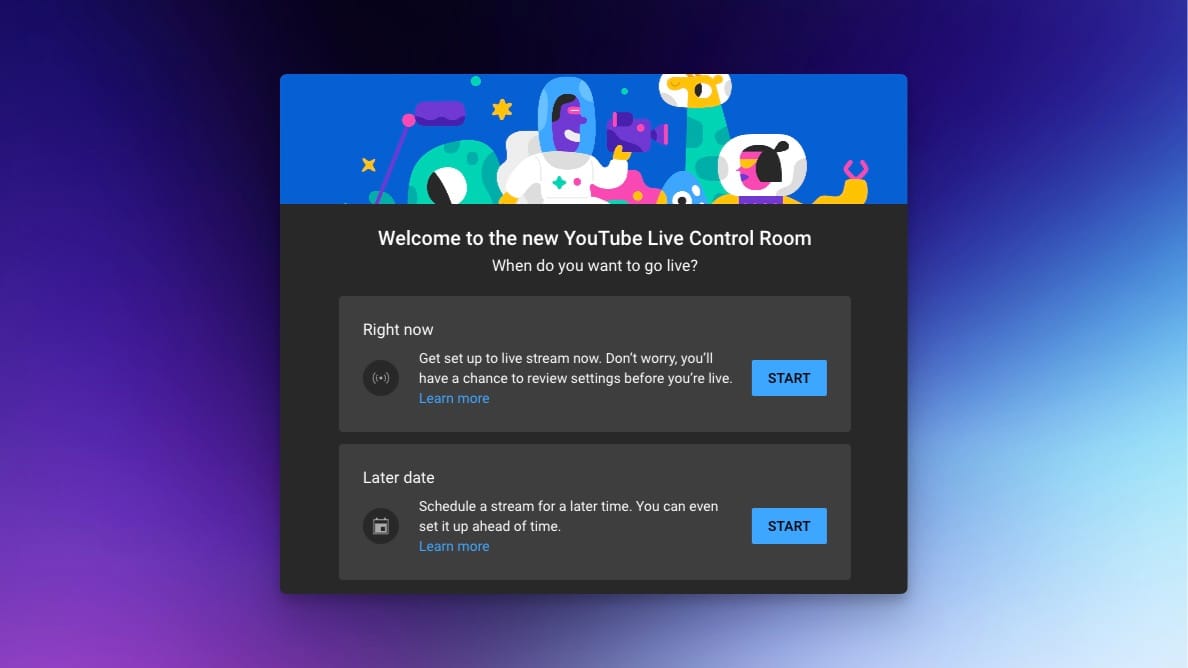
Once enabled, you’ll be able to access the live control room within YouTube Studio, which is your hub for managing streams.
Navigating YouTube Studio: Stream Settings and Stream Key Management
The YouTube Live Control Room in YouTube Studio is where you manage all aspects of your live broadcast.
- Schedule a Stream (or Go Live Now): You can either “Stream now” for an instant broadcast or “Schedule stream” for a planned event. Scheduling is recommended as it allows you to promote the event beforehand.
- Stream Key: This is a unique code that connects your encoder software (like OBS) to your specific YouTube stream. You’ll find it under the “Stream settings” tab in the Live Control Room. Keep your Stream Key private! Anyone with your stream key can stream to your channel. You can generate a new stream key if you suspect it has been compromised.
- Stream Latency: YouTube offers different latency options (Normal, Low, Ultra-low). Ultra-low latency is best for interactive streams (e.g., Q&A, gaming) where quick audience response is desired, but it might require more stable internet. Normal latency offers the most reliability.
- Automatic DVR: This setting allows viewers to rewind during a live stream. It’s generally recommended to keep it enabled.
- Monetization: If your channel is part of the YouTube Partner Program, you can enable monetization options like Super Chat and Super Stickers here.
Crafting Your Live Event: Title, Description, and Thumbnails
Just like with pre-recorded videos, the metadata for your live stream is crucial for discoverability and viewer engagement.
- Title: Create a compelling and descriptive title that accurately reflects your content and includes relevant keywords.
- Description: Provide a detailed description of what viewers can expect. Include links to social media, relevant resources, or any specific topics you plan to cover. Use keywords naturally to help YouTube’s algorithm understand your content.
- Thumbnail: Design an eye-catching custom thumbnail. This is the first visual impression potential viewers get of your stream before they click. Ensure it’s high-resolution and visually distinct.
- Audience: Specify if your content is “Made for Kids” or not, as this impacts features and compliance.
- Category: Select the appropriate category for your stream (e.g., Gaming, Education, People & Blogs) to help YouTube surface it to relevant audiences.
- Tags: Add relevant tags to further aid discoverability.
- Visibility: Choose between Public, Unlisted, or Private. Public means anyone can see it; Unlisted means only those with the link can see it; Private means only you and specific invited users can see it.
Executing Your Live Stream: Best Practices and Troubleshooting
With your setup ready and channel configured, the next phase is going live. This involves a critical pre-stream checklist, monitoring during the broadcast, and knowing how to address common issues efficiently.
Pre-Stream Checklist: Ensuring a Smooth Launch
A thorough pre-stream checklist can prevent many common problems and ensure a professional broadcast.
- Internet Check: Run a speed test to confirm sufficient upload bandwidth.
- Audio Check: Do a sound test. Speak into your microphone and monitor the levels in your encoder software and YouTube’s Live Control Room to ensure your voice is clear and not peaking.
- Video Check: Confirm your camera is working, properly framed, and well-lit. Check for any visual artifacts or lag.
- Scene Review: Double-check all elements in your encoder’s scene(s) – overlays, text, images, browser sources – are correctly positioned and active.
- Encoder Settings: Verify your bitrate, resolution, and frame rate settings in OBS/Streamlabs match YouTube’s recommendations for your desired quality.
- YouTube Live Control Room: Open the Live Control Room in YouTube Studio. Ensure the preview is visible (it might take a few moments after starting your encoder) and everything looks correct before hitting “Go Live.”
- Notifications: Inform your audience on social media about your upcoming stream, even if it’s scheduled.
Monitoring Your Live Stream: Audio, Video, and Chat Management
Once you’re live, continuous monitoring is key to maintaining a high-quality broadcast.
- YouTube Live Control Room Dashboard: This dashboard provides vital real-time information:
- Stream Health: Look for “Good,” “Fair,” or “Bad.” A “Bad” status indicates issues with your internet or encoder settings.
- Bitrate: Monitor your current upload bitrate to ensure it’s stable and within your target range.
- Dropped Frames: A high number of dropped frames often points to internet instability or an overloaded CPU.
- Live Chat: Keep an eye on the live chat for viewer questions, feedback, or reports of technical issues. Assign moderators if necessary to help manage chat and spam.
- Encoder Software: Keep your encoder software open on a second monitor if possible. Monitor your CPU usage to ensure it’s not maxing out, which can lead to dropped frames or stream stuttering. Check audio levels constantly.
- Self-Monitoring (on a separate device): Watch your own stream on a separate device (e.g., phone, tablet, another computer) as a viewer would. This helps catch any audio/video sync issues, quality drops, or other viewer-facing problems. Mute the stream on your monitoring device to avoid echo.
Common Streaming Issues and Quick Fixes
Even with the best preparation, issues can arise. Knowing common problems and their solutions can save your stream.
- “Stream Health: Bad” / High Dropped Frames:
- Cause: Internet instability, insufficient upload speed, or an overloaded CPU.
- Fix: Check your internet connection (reboot router). Lower your output bitrate in OBS. Close unnecessary programs to free up CPU resources. If using Wi-Fi, switch to Ethernet.
- Audio Issues (Too Low/High, Echo, No Sound):
- Cause: Incorrect microphone selection, improper gain settings, audio routing conflicts.
- Fix: In OBS mixer, ensure the correct microphone is selected and its levels are in the “green” range. Check Windows/macOS sound settings. If using headphones, ensure they are not bleeding sound into the microphone (echo).
- Video Issues (Pixelated, Blurry, Lagging):
- Cause: Too low a bitrate for the resolution, high CPU usage, network issues.
- Fix: Increase bitrate (if internet allows), lower resolution/frame rate, check CPU usage. Update graphics drivers.
- Stream Not Going Live (in YouTube Studio):
- Cause: Incorrect stream key, YouTube’s processing delay, account restrictions.
- Fix: Double-check the stream key in OBS matches the one in YouTube Studio. Wait a few minutes (sometimes there’s a delay). Ensure your account is verified and has no live streaming strikes.
- Encoder Crashing:
- Cause: Outdated drivers, software conflicts, insufficient system resources.
- Fix: Update graphics drivers. Close other demanding applications. Try running OBS/Streamlabs as administrator.
Elevating Your Live Streams: Advanced Features and Optimization
Once you’ve mastered the basics, YouTube offers a suite of advanced features and optimization strategies to enhance your live streams, deepen audience engagement, and leverage the platform’s full potential.
Leveraging YouTube’s Built-in Features: Super Chat, Polls, and Clips
YouTube integrates several features directly into its live platform to boost interactivity and provide additional value.
- Super Chat and Super Stickers: These monetization features allow viewers to pay to highlight their messages in chat or send animated stickers. For creators, it’s a direct way to generate income during a live stream. To enable them, your channel must be part of the YouTube Partner Program, and you can activate them in the Live Control Room’s monetization tab. Technically, ensure your chat is visible and accessible to viewers.
- Polls: Engage your audience by creating real-time polls. This feature is accessible directly from the Live Control Room. It’s a great way to get immediate feedback, guide content direction, or simply add a fun interactive element.
- Clips: Viewers can create and share 5-60 second clips from your live stream (or VODs), promoting your content organically. As a creator, you don’t need to enable this; it’s a viewer-side feature, but knowing it exists can influence how you interact with your content.
- Chapters and Timestamps (Post-Stream): While not live features, after your stream is archived, you can add chapters and timestamps in the description, making it easier for viewers to navigate long broadcasts.
Post-Stream Analysis: Understanding Your Audience with Analytics
The technical journey doesn’t end when you hit “End Stream.” YouTube Studio’s analytics provide invaluable data to help you understand your performance and optimize future broadcasts.
- Real-time Report: During the stream, this shows concurrent viewers, chat rate, and other immediate metrics.
- Post-Stream Analytics: After the stream, delve into metrics like:
- Peak Concurrent Viewers: The highest number of viewers at any given moment.
- Average View Duration: How long viewers typically stayed.
- Impressions and Click-Through Rate (CTR): How many people saw your thumbnail and how many clicked.
- Viewer Demographics: Age, gender, geography of your audience.
- Traffic Sources: How viewers found your stream.
These technical insights help you fine-tune your streaming schedule, content topics, promotion strategies, and even your thumbnail design for better future engagement.
Archiving and Repurposing Your Live Content
One of the greatest advantages of YouTube Live is the automatic archiving of your streams. By default, your live streams are saved as public or unlisted videos on your channel, accessible for replay.
- Automatic Archive: Ensure the “Make video public when stream ends” option is checked in your stream settings if you want it immediately available. Otherwise, you can set it to unlisted or private and publish it later.
- Editing the Archive: After the stream ends, you can go into YouTube Studio’s “Content” section, find your live stream, and edit it. This includes trimming the beginning or end (e.g., cutting out dead air), adding end screens, cards, and updating the title/description/tags based on the actual content covered.
- Repurposing: Don’t let your live stream content sit idle. Download the full stream and break it down into shorter, thematic clips for separate uploads. Create highlight reels, Q&A segments, or tutorials derived from the broader broadcast. This maximizes the return on your effort and provides fresh content for your audience across various formats. This technical capability allows for a comprehensive content strategy rooted in live interaction.
In conclusion, streaming to YouTube, while seemingly complex, is a highly accessible and rewarding endeavor with the right technical understanding. By meticulously planning your hardware and software setup, configuring your channel settings, adhering to pre-stream checklists, and leveraging YouTube’s robust analytical and interactive features, you can establish a professional, engaging, and technically sound live presence. Embrace the real-time connection, troubleshoot with confidence, and continuously optimize your approach to build a thriving community around your live content on the world’s largest video platform.
aViewFromTheCave is a participant in the Amazon Services LLC Associates Program, an affiliate advertising program designed to provide a means for sites to earn advertising fees by advertising and linking to Amazon.com. Amazon, the Amazon logo, AmazonSupply, and the AmazonSupply logo are trademarks of Amazon.com, Inc. or its affiliates. As an Amazon Associate we earn affiliate commissions from qualifying purchases.