
In the rapidly evolving landscape of digital commerce, establishing an online presence is no longer a luxury but a necessity for businesses of all sizes. Shopify stands out as a leading e-commerce platform, empowering entrepreneurs to build, manage, and scale their online stores with remarkable ease and powerful functionality. This comprehensive guide will walk you through the technical intricacies and strategic steps involved in creating a Shopify website, from initial setup to launching a fully operational digital storefront. We’ll delve into the platform’s features, tools, and best practices, focusing strictly on the technological aspects that underpin a successful online venture.
The Foundation: Setting Up Your Shopify Account
The journey to building your Shopify website begins with establishing your foundational account and familiarizing yourself with the platform’s core interface. This initial phase is crucial for laying the groundwork for all subsequent development.
Signing Up and Initial Setup
To begin, you’ll need to sign up for a Shopify account. Shopify offers a free trial period, typically 3 or 14 days, which provides full access to its features, allowing you to build and test your store without immediate financial commitment. The process is straightforward: visit the Shopify website, enter your email address, create a password, and provide a store name. Shopify will then ask a few questions about your business to tailor your initial experience, though these can be skipped or adjusted later. Once registered, your Shopify admin dashboard, the central control panel for your store, will be ready for exploration.
Navigating the Shopify Admin Dashboard
The admin dashboard is the nerve center of your Shopify website. It’s designed to be intuitive, presenting a sidebar menu on the left that categorizes various store management functions. Key sections include:
- Home: Provides an overview of your store’s performance, tasks, and recent activity.
- Orders: Manages all customer orders, including fulfillment and refunds.
- Products: Where you add, organize, and manage your inventory.
- Customers: A database of all your customer information.
- Analytics: Detailed reports on sales, traffic, and customer behavior.
- Marketing: Tools for creating campaigns and managing discounts.
- Discounts: For creating promotional codes and automatic discounts.
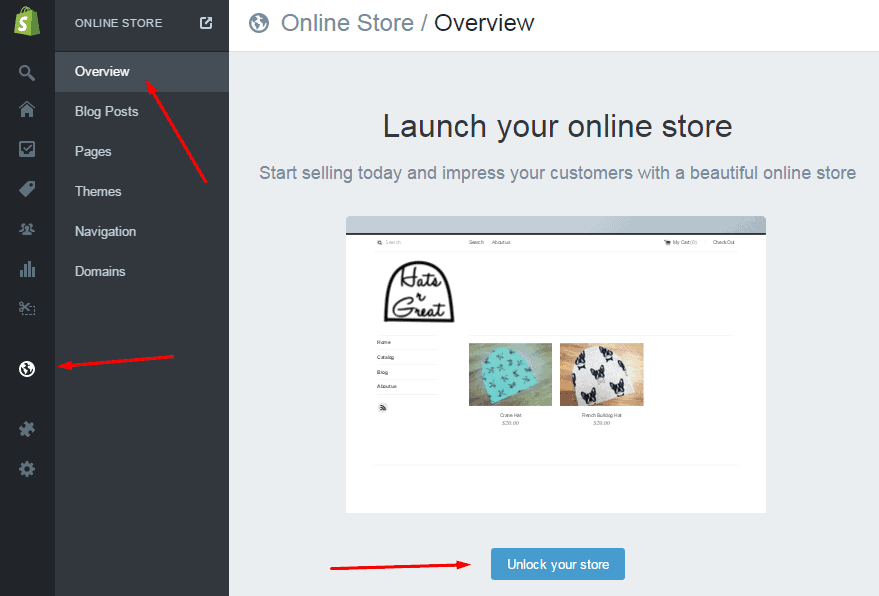
- Online Store: This is where the bulk of your website design and content management takes place, including themes, pages, navigation, and blog posts.
- Apps: Integrations to extend your store’s functionality.
- Settings: Global configurations for your store, such as payments, shipping, taxes, and legal policies.
Familiarizing yourself with these sections is paramount for efficient store management. Each section is designed to be self-explanatory, often with tooltips and contextual help available to guide you.
Understanding Core Shopify Features
Beyond navigation, it’s essential to grasp the fundamental features Shopify offers. The platform is built around a robust content management system (CMS) that allows you to manage not just products, but also static pages (About Us, Contact), blog posts, and dynamic collections. Its integrated e-commerce capabilities include secure payment processing, inventory tracking, order fulfillment management, and comprehensive analytics. Shopify’s cloud-based nature means you don’t need to worry about hosting, server maintenance, or security updates; these are all handled by the platform, allowing you to focus purely on your business and website content. Understanding these underlying features helps leverage the platform’s full potential.
Designing Your Digital Storefront
Once your account is set up, the next critical phase involves bringing your brand vision to life through the design and layout of your Shopify website. This isn’t just about aesthetics; it’s about creating an intuitive and engaging user experience (UX) that guides visitors towards making a purchase.
Choosing and Customizing Your Theme
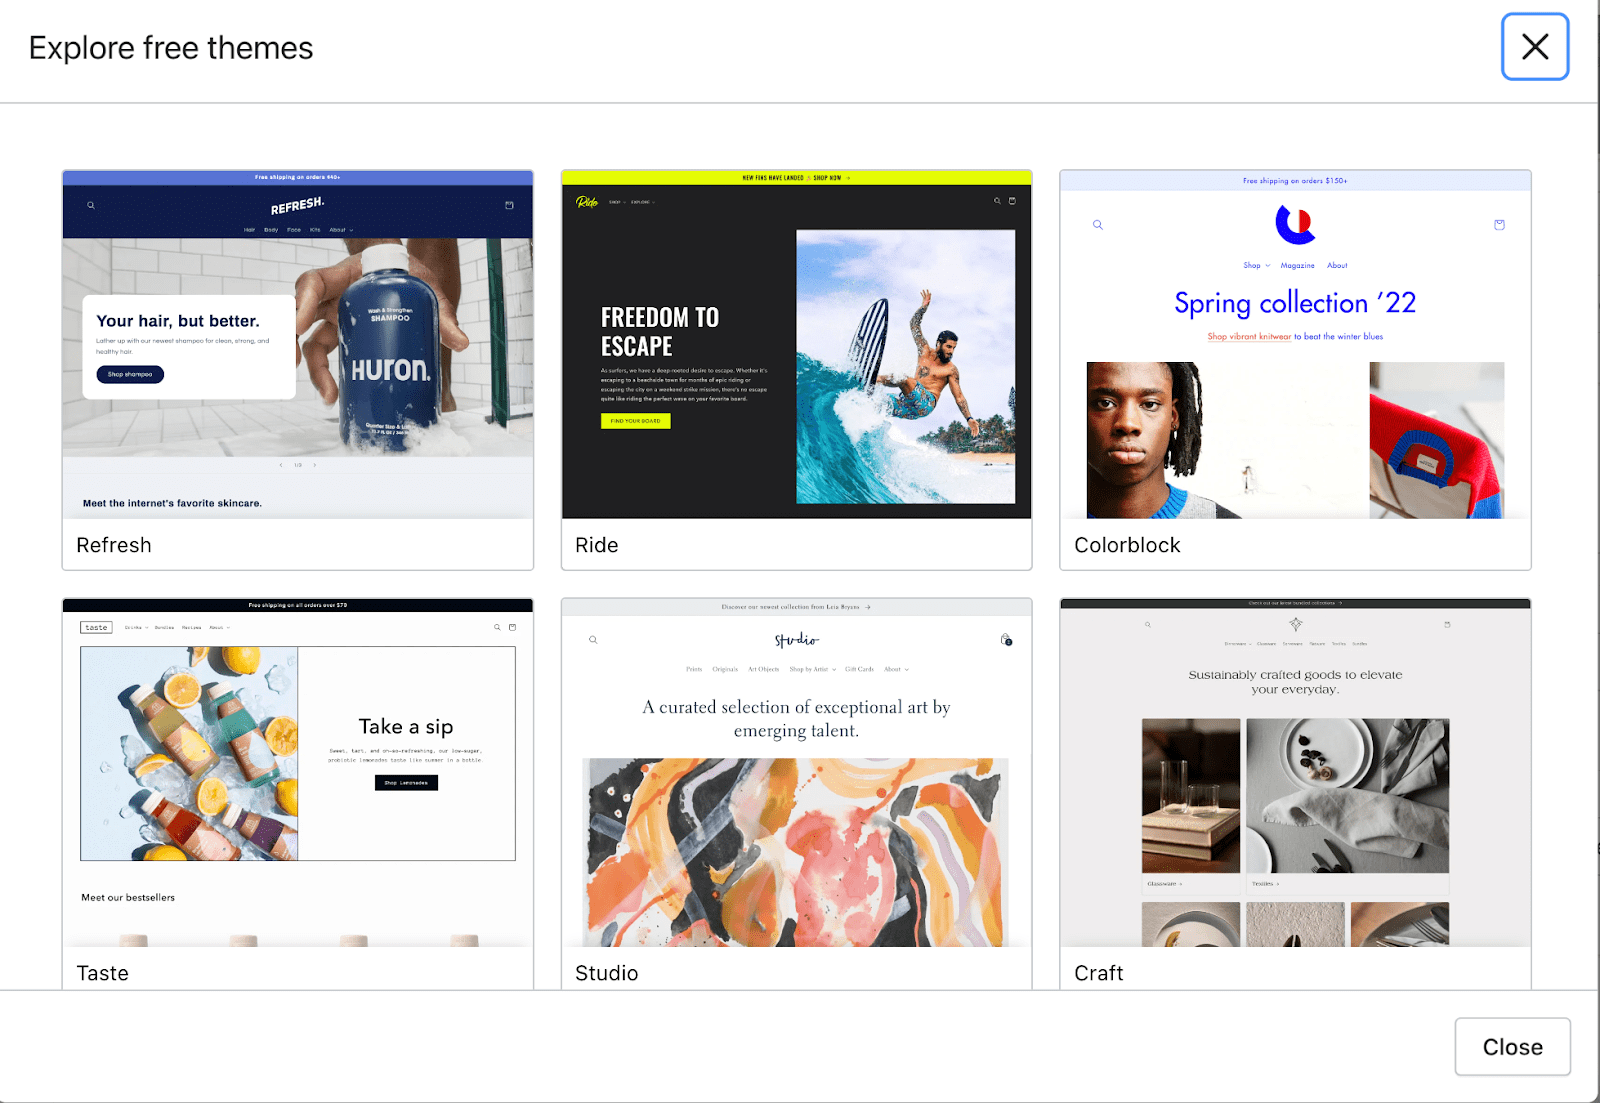
Shopify offers a vast library of themes, both free and paid, which serve as the foundational design templates for your store. Themes are essentially pre-built website layouts, complete with styling, fonts, and structural elements. When selecting a theme, consider its responsiveness across different devices (desktop, tablet, mobile), its suitability for your product catalog size, and its alignment with your brand’s aesthetic.
Once chosen, themes are highly customizable via the theme editor, accessible under Online Store > Themes > Customize. This visual drag-and-drop interface allows you to modify sections, colors, typography, imagery, and layout elements without writing a single line of code. You can add or remove sections like image banners, product grids, testimonials, and blog posts to create a unique page structure. Spend time experimenting with different configurations to achieve a professional and user-friendly look.
Structuring Your Pages and Navigation
Effective website navigation is paramount for a positive user experience. Your main menu should clearly guide visitors to key areas like product categories, new arrivals, sales, and essential information pages. Shopify allows you to create and manage menus under Online Store > Navigation. You can build multiple menus for different areas of your site (e.g., main menu, footer menu, secondary menus).
Beyond navigation, you’ll need to create various static pages. Under Online Store > Pages, you can add content such as:
- About Us: Tell your brand story.
- Contact Us: Provide contact information and a contact form.
- FAQ: Address common customer questions.
- Policies: Essential legal pages like Privacy Policy, Terms of Service, Refund Policy, and Shipping Policy (Shopify provides templates for these).
Carefully planning your page structure and logical flow ensures that customers can easily find the information they need, building trust and facilitating purchases.
Essential Design Elements: Imagery and Typography
High-quality visuals are non-negotiable for an e-commerce website. Product images should be professional, consistent in style, and showcase items from multiple angles. Shopify supports various image formats and automatically optimizes them for web performance. Beyond product shots, consider hero images, banner graphics, and lifestyle imagery to convey your brand’s message and create an inviting atmosphere.
Typography plays a significant role in readability and brand identity. Your chosen theme will have default fonts, but you can typically customize them within the theme editor. Select fonts that are legible, reflect your brand personality, and maintain consistency across your site. Use a limited palette of 2-3 fonts (one for headings, one for body text, and an optional accent font) to maintain visual harmony. Optimizing image sizes and font loading through your theme settings is also a technical consideration to ensure fast page load times, which is crucial for SEO and user retention.
Populating Your Store with Products
With the design framework in place, the next crucial step is to populate your Shopify store with the products you intend to sell. This involves not just adding items, but meticulously detailing them and organizing your inventory for efficient management.
Adding Products: Details, Images, and Variants
Under the Products section of your Shopify admin, you can begin adding individual product listings. Each product requires a comprehensive set of data points:
- Title and Description: Clear, concise, and descriptive titles are essential. Product descriptions should highlight features, benefits, and specifications, often incorporating rich text, bullet points, and images.
- Media: Upload high-resolution images and videos that accurately represent your product. Shopify allows for multiple images per product, and you can rearrange their order.
- Pricing: Set your product price, compare-at price (for displaying sales), and cost per item (for tracking profitability).
- Inventory: Enter your SKU (Stock Keeping Unit) and barcode (ISBN, UPC, GTIN) if applicable. Crucially, specify your inventory quantity and decide whether Shopify should track inventory for you.
- Shipping: Define the weight of the product, which is vital for calculating shipping rates.
- Variants: If a product comes in different sizes, colors, or materials, you’ll use variants. Each variant can have its own price, SKU, quantity, and even unique image.
- Search Engine Listing Preview: Optimize your product’s title and description for search engines directly within the product editor, improving its discoverability.
Accuracy in entering these details is critical for both customer satisfaction and efficient operations.
Organizing Products with Collections
As your product catalog grows, organizing items into logical categories becomes indispensable. In Shopify, these categories are called “Collections.” Under Products > Collections, you can create collections that group similar products. Collections can be:
- Manual: You manually add and remove products from the collection.
- Automated: Products are automatically added to a collection based on predefined conditions, such as product tags, title keywords, vendor, type, or price. For example, a collection called “Summer Sale” could automatically include all products tagged with “summer-sale.”
Well-structured collections not only make it easier for customers to browse but also streamline your website navigation and enhance the overall user experience. You can then link these collections directly from your main menu.
Inventory Management and Shipping Settings
Effective inventory management is a cornerstone of e-commerce operations. Shopify provides tools to track stock levels, receive low-stock alerts, and even integrate with inventory management apps for more advanced needs. When adding products, you specify the initial quantity and whether Shopify should track inventory. When an order is placed, Shopify automatically deducts the item from your stock.
For shipping, accurate product weights are crucial. You’ll later configure shipping zones and rates based on these weights (or price/number of items). The product setup phase is where the foundational data for shipping calculations is entered. Regularly auditing your product data ensures smooth operations and accurate fulfillment.
Configuring Essential E-commerce Functionality
Beyond the visual appeal and product listings, a fully functional e-commerce store requires robust backend configurations for transactions, logistics, and legal compliance. This section focuses on the technical setup of these critical functionalities.
Setting Up Payment Gateways
The ability to securely accept payments is the most fundamental aspect of any online store. Shopify integrates with a wide array of payment gateways, allowing customers to pay using credit cards, PayPal, Apple Pay, Google Pay, and other local payment methods.
- Shopify Payments: This is Shopify’s native payment gateway, often the default and most straightforward option. It integrates seamlessly with your store, offers competitive rates, and allows you to manage all transactions directly within your Shopify admin.
- Third-Party Providers: You can also integrate with external gateways like PayPal, Stripe, Authorize.net, or specific regional payment providers. Each gateway requires its own setup process, typically involving creating an account with the provider and then connecting it to your Shopify store via API keys or specific integration instructions found in
Settings > Payments.
It’s crucial to select gateways that cater to your target audience and ensure compliance with PCI DSS standards for secure credit card processing. Offering multiple trusted payment options can significantly reduce cart abandonment rates.
Configuring Shipping Rates and Zones
Shipping is often a complex area, but Shopify provides flexible tools to manage it. Under Settings > Shipping and delivery, you’ll configure your shipping profiles, zones, and rates.
- Shipping Zones: Define geographic regions where you will ship your products. You can create zones for specific countries, states, or even continents.
- Shipping Rates: Within each zone, you can set up various shipping rates based on:
- Price-based: Free shipping over a certain order value, or tiered rates (e.g., $5 for orders under $50, $10 for orders over $50).
- Weight-based: Rates tied to the total weight of the products in an order. This is why accurate product weights are critical during product setup.
- Flat rate: A fixed cost for shipping, regardless of order value or weight.
- Carrier Calculated Rates: Integrate with major shipping carriers (e.g., UPS, FedEx, USPS) to display real-time shipping costs to your customers at checkout. This typically requires a specific Shopify plan or an app.
Careful configuration of shipping rates is vital to avoid unexpected costs for your business or customers, which can lead to abandoned carts.
Tax Settings and Legal Pages
Navigating sales tax regulations can be daunting, but Shopify simplifies the process. Under Settings > Taxes and duties, you can configure your store’s tax settings. Shopify automatically calculates sales tax based on your store’s location, your customer’s location, and the products being sold. You can override these defaults or set specific tax rates for certain products or regions if needed. For businesses operating internationally, understanding customs duties and import taxes is also important, which Shopify helps manage through its tax settings and potentially through dedicated apps.
In addition to tax settings, legal compliance requires specific pages on your website. Under Settings > Legal, Shopify provides templates for generating:
- Refund Policy: Outlines your return and refund procedures.
- Privacy Policy: Explains how customer data is collected, used, and protected.
- Terms of Service: Sets the rules and conditions for using your website and purchasing products.
- Shipping Policy: Details your shipping methods, delivery times, and costs.
These pages are not just legal requirements but also build customer trust by clearly communicating your business practices. Ensure they are easily accessible, typically linked in the footer of your website.
Launching and Beyond: Optimizing Your Shopify Store
The final stage involves preparing your Shopify website for public access and implementing strategies for continuous improvement and extended functionality. This ensures your store is not only operational but also optimized for growth.
Pre-Launch Checklist and Domain Connection
Before taking your store live, a meticulous pre-launch checklist is essential to catch any potential issues. This includes:
- Testing Checkout Process: Place test orders with different payment methods to ensure everything works flawlessly.
- Reviewing Content: Proofread all product descriptions, page content, and policy documents for typos and accuracy.
- Mobile Responsiveness: Verify that your store looks and functions perfectly on various mobile devices.
- Loading Speed: Check page load times and optimize images if necessary.
- Broken Links: Use a link checker to identify and fix any broken internal or external links.
- Favicon: Ensure your store has a branded favicon.
Connecting your custom domain name (e.g., yourstore.com) is a crucial technical step. Under Settings > Domains, you can either buy a new domain through Shopify or connect an existing one from a third-party registrar. This typically involves updating DNS records (A record and CNAME record) to point to Shopify’s servers. Shopify provides detailed instructions for this process, ensuring your store is accessible via a professional and memorable URL.
Utilizing Shopify Apps for Enhanced Functionality
One of Shopify’s most powerful features is its App Store, a vast marketplace of third-party integrations that extend your store’s capabilities beyond its core functionality. These apps cover a wide spectrum of needs, from marketing and sales to customer service and operations.
- Marketing Apps: Email marketing (Klaviyo, Mailchimp), social media integration, SEO optimization, loyalty programs.
- Sales Apps: Upsell/cross-sell recommendations, product reviews (Loox, Judge.me), scarcity timers, abandoned cart recovery.
- Customer Service Apps: Live chat, help desks, FAQ builders.
- Reporting Apps: Advanced analytics, profit tracking.
- Shipping & Fulfillment Apps: Dropshipping integrations (Oberlo, Printful), advanced shipping calculators, label printing.
Carefully select apps that genuinely add value and align with your business goals. While apps can significantly enhance your store, avoid over-installing, as too many can sometimes impact site performance. Review app ratings and functionality thoroughly before installation.

Basic SEO Setup within Shopify
Search Engine Optimization (SEO) is crucial for driving organic traffic to your new Shopify website. While advanced SEO often requires specialized tools and ongoing effort, Shopify provides built-in features for fundamental optimization.
- Editable Meta Titles and Descriptions: For every product, page, and blog post, you can customize the meta title and description, which appear in search engine results. Craft compelling, keyword-rich snippets to attract clicks.
- Clean URLs: Shopify automatically generates clean, readable URLs, but you can edit them for better keyword inclusion (e.g.,
yourstore.com/products/blue-widgetinstead ofyourstore.com/products/12345). - Image Alt Text: Add descriptive alt text to all your images. This helps search engines understand image content and improves accessibility for visually impaired users.
- Blog Functionality: Utilize Shopify’s integrated blog to create relevant content that targets keywords and provides value to your audience, helping to establish authority and drive traffic.
- Mobile Responsiveness: As mentioned earlier, Shopify themes are generally mobile-responsive, which is a significant factor in search engine rankings.
Implementing these basic SEO practices from the outset will give your Shopify website a strong foundation for long-term visibility and success in search engine rankings.
Creating a Shopify website is a journey that blends technical setup with strategic design and ongoing optimization. By meticulously following these steps, understanding the platform’s robust features, and continuously refining your digital storefront, you can establish a powerful online presence capable of driving sales and fostering business growth in the competitive e-commerce landscape.
aViewFromTheCave is a participant in the Amazon Services LLC Associates Program, an affiliate advertising program designed to provide a means for sites to earn advertising fees by advertising and linking to Amazon.com. Amazon, the Amazon logo, AmazonSupply, and the AmazonSupply logo are trademarks of Amazon.com, Inc. or its affiliates. As an Amazon Associate we earn affiliate commissions from qualifying purchases.