In the intricate symphony of modern computing, where hardware and software dance in delicate synchronicity, drivers serve as the crucial choreographers. For users of NVIDIA graphics cards, these drivers are particularly vital, acting as the primary conduit through which the operating system and applications communicate with the powerful Graphics Processing Unit (GPU). Understanding how to manage, and specifically, how to reinstall these drivers, is an indispensable skill for anyone looking to maintain optimal performance, troubleshoot persistent issues, or simply ensure their system is running at its peak. This comprehensive guide will demystify the process of reinstalling NVIDIA drivers, transforming a potentially daunting task into a straightforward procedure.
Understanding NVIDIA Drivers and Their Importance
At the core of every modern computer’s visual output lies a dedicated graphics processor, and for millions worldwide, that processor is an NVIDIA GPU. The software that enables your operating system, games, and professional applications to fully utilize the immense power of this hardware is known as a display driver.
What are Display Drivers?
Display drivers are specialized pieces of software that translate the high-level commands from your operating system and applications into low-level instructions that your graphics card can understand and execute. Without the correct drivers, your GPU would be largely inert, unable to render complex graphics, display high resolutions, or even interface properly with your monitor. They are the essential bridge, ensuring seamless communication and optimal performance.
Why NVIDIA Drivers are Crucial for Performance
NVIDIA drivers are not just about basic functionality; they are meticulously engineered to unlock the full potential of your GeForce, Quadro, or Tesla GPU. Each new driver release often brings:
- Performance Optimizations: Significant frame rate improvements in new and existing games, faster rendering times in professional applications (like video editing or 3D modeling), and more efficient power management.
- Bug Fixes: Addressing graphical glitches, stability issues, or compatibility problems that might have existed in previous driver versions.
- New Features: Support for cutting-edge technologies like DLSS (Deep Learning Super Sampling), Ray Tracing, Reflex, or new display standards.
- Security Patches: Protecting your system from potential vulnerabilities associated with graphics processing.
Running outdated or corrupted drivers can lead to a litany of problems, including stuttering gameplay, low frame rates, visual artifacts, application crashes, and even system instability.
Common Scenarios Requiring Reinstallation
While regular updates are encouraged, a full reinstallation is often necessary in specific circumstances:
- Troubleshooting Graphical Glitches: Persistent visual artifacts, screen tearing, flickering, black screens, or game crashes often point to a driver issue.
- Resolving Performance Drops: If your system’s performance suddenly degrades, especially in graphics-intensive tasks, a clean driver reinstallation can often resolve the underlying conflict.
- After a Major Windows Update: Windows updates can sometimes interfere with existing drivers, leading to instability.
- Upgrading or Downgng Your GPU: A fresh installation is critical to ensure compatibility and optimal performance with new hardware.
- Fixing Corrupt Installations: Sometimes, a driver installation might not complete correctly, leading to a “half-baked” state that requires a clean slate.
- “Clean Slate” for Optimal Performance: Many enthusiasts perform a clean reinstallation periodically to eliminate any potential driver residue or conflicts that may have accumulated over time.
Preparing for a Seamless Driver Reinstallation
Before diving into the reinstallation process, a little preparation goes a long way. These preliminary steps ensure a smoother, safer, and more effective outcome.
Backing Up Important Data (Optional but Recommended)
While driver reinstallation is generally safe, it’s always prudent to be prepared for the unexpected. Consider creating a system restore point, which allows you to revert your system to a previous state if something goes awry. For critical data, ensure you have recent backups of your files, just in case.
Gathering Necessary Tools and Information
Accuracy is key in this step to avoid downloading incorrect drivers.
- Identify Your NVIDIA GPU Model:
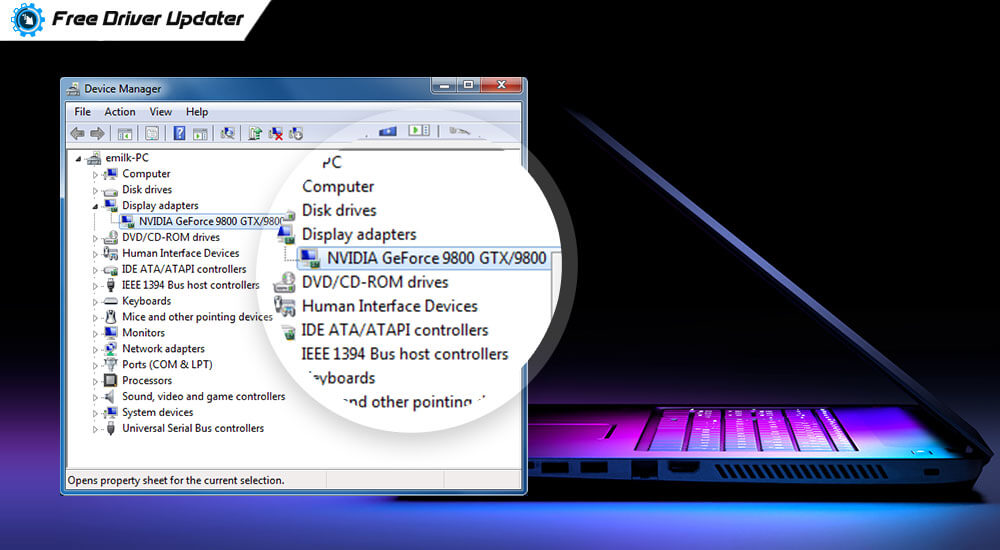
- Device Manager: Right-click the Start button, select “Device Manager,” expand “Display adapters,” and note your NVIDIA card’s name.
- NVIDIA Control Panel: Right-click on your desktop, select “NVIDIA Control Panel,” and then click “System Information” in the bottom left.
- Physical Inspection: If your PC is custom-built or accessible, you can visually check the GPU for its model number.
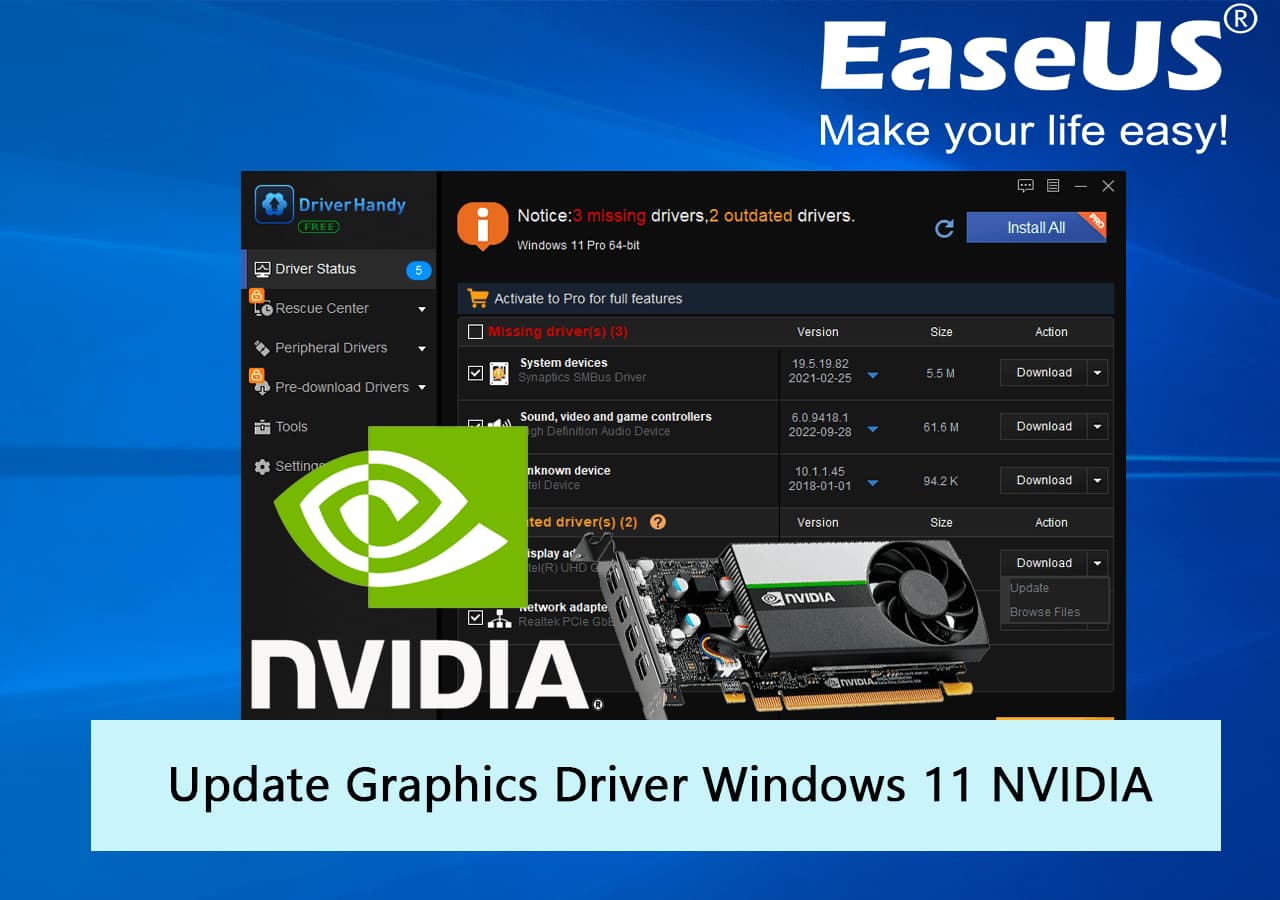
- Determine Your Operating System: Know your Windows version (e.g., Windows 10, Windows 11) and whether it’s 32-bit or 64-bit. Right-click the Start button, select “System,” and look under “System type.”
- Download the Correct, Latest Drivers:
- Navigate to the official NVIDIA driver download page:
www.nvidia.com/drivers. - Use the “Manual Driver Search” to input your GPU series, product, operating system, and preferred language.
- Download the latest “Game Ready Driver” (GRD) or “Studio Driver” (SD) depending on your usage (gaming vs. professional content creation). Save it to an easily accessible location like your desktop.
- Navigate to the official NVIDIA driver download page:
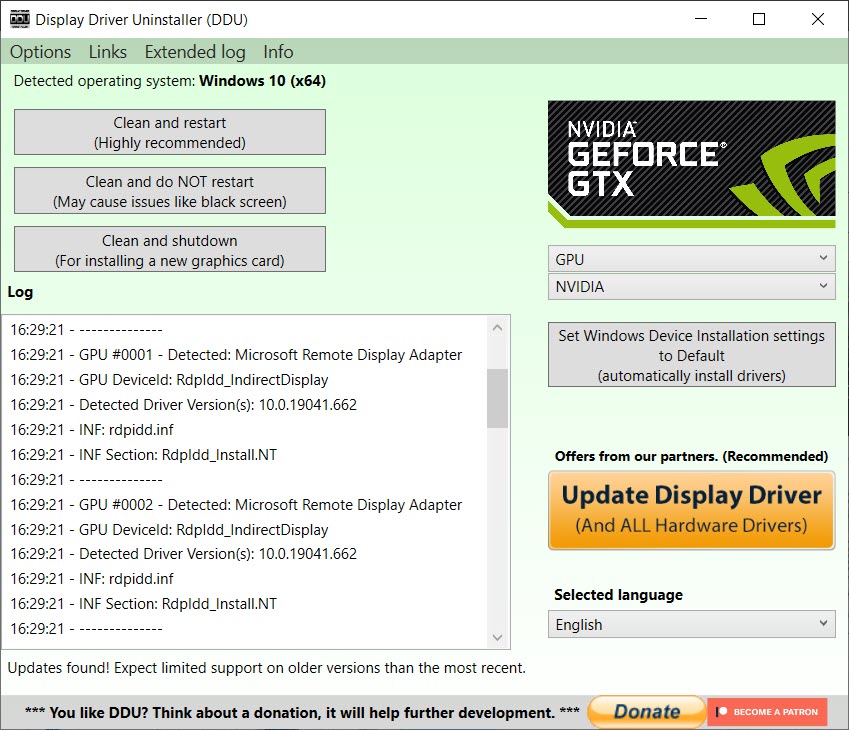
- Download Display Driver Uninstaller (DDU): This is a critical tool for a truly clean reinstallation. DDU is a free, third-party utility designed to thoroughly remove all traces of display drivers (NVIDIA, AMD, Intel) from your system.
- Search online for “Display Driver Uninstaller Guru3D” to find the official download source.
- Download the executable and extract its contents to a folder.
Disconnecting from the Internet
This step is crucial to prevent Windows Update from automatically installing a generic or older NVIDIA driver once the existing drivers have been removed. Unplug your Ethernet cable or disable your Wi-Fi connection immediately before starting the uninstallation process.
The Step-by-Step Reinstallation Process
With preparations complete, you’re ready to proceed with the core reinstallation steps. Follow these instructions carefully for a comprehensive and effective driver refresh.
Step 1: Entering Safe Mode
Safe Mode is a diagnostic startup mode that loads only essential system programs and services, preventing your NVIDIA drivers from loading. This is vital for DDU to perform a thorough cleanup without interference.
- For Windows 10/11:
- Go to Start > Settings > System > Recovery.
- Under “Recovery options,” next to “Advanced startup,” click “Restart now.”
- Your PC will restart into the Advanced Startup environment.
- Select “Troubleshoot” > “Advanced options” > “Startup Settings” > “Restart.”
- After the restart, you’ll see a list of options. Press
4orF4for “Enable Safe Mode” or5orF5for “Enable Safe Mode with Networking” (though networking is not strictly necessary for DDU).
Step 2: Using Display Driver Uninstaller (DDU)
Now that you’re in Safe Mode, you can use DDU to meticulously remove all previous driver components.
- Navigate to the folder where you extracted DDU and run
Display Driver Uninstaller.exe. - DDU might warn you about not being in Safe Mode. Ignore this if you’ve already successfully entered Safe Mode.
- In the DDU window, from the “Select device type” dropdown, choose “GPU.”
- From the “Select GPU” dropdown, choose “NVIDIA.”
- Click the “Clean and restart (Recommended)” button.
- DDU will now work its magic, systematically removing all traces of NVIDIA drivers and associated files. This process can take a few minutes. Your screen might flicker or go black momentarily as drivers are removed.
- Once finished, your system will automatically restart into normal Windows mode.
Step 3: Installing the New NVIDIA Drivers
After the system restarts from DDU, your display might be running at a low resolution, which is normal. Do not reconnect to the internet yet.
- Locate the NVIDIA driver installer file you downloaded earlier.
- Right-click on the installer and select “Run as administrator.”
- The installer will prompt you for an extraction path. You can use the default or choose your own.
- Once extracted, the installer will launch. Agree to the NVIDIA software license agreement.
- On the “Installation options” screen, select “Custom (Advanced)” and click “Next.” This is crucial for a clean installation.
- On the “Custom installation options” screen, ensure that “Perform a clean installation” is checked. This option will remove any existing profiles and settings, ensuring a truly fresh start.
- Select the components you wish to install. Typically, you’ll want the “Graphics Driver” and “HD Audio Driver.” “GeForce Experience” is optional but recommended for most users. Click “Next.”
- The installation process will begin. Your screen might flicker or temporarily go black multiple times during this phase – this is normal.
- Once the installation is complete, click “Restart now” if prompted, or simply click “Close.”
Step 4: Post-Installation Checks
After your system has restarted, you can perform a few checks and reconnect to the internet.
- Verify Driver Installation:
- Open “Device Manager” again and check “Display adapters” to confirm your NVIDIA GPU is recognized with the newly installed driver version.
- Right-click on your desktop and select “NVIDIA Control Panel” to ensure it opens correctly and displays your GPU information.
- Reconnect to the Internet: Plug back your Ethernet cable or re-enable your Wi-Fi.
- Test System Performance and Stability: Launch some of your most graphics-intensive applications or games to confirm that performance has improved or issues have been resolved. Check for any unexpected behavior or errors.
Common Issues and Troubleshooting Tips
Even with a meticulous process, issues can occasionally arise. Here’s how to tackle some common problems.
Installation Failures
- “Driver package not found” or similar errors: This usually means the downloaded driver file is corrupted or incomplete. Re-download the driver package from the NVIDIA website.
- Incompatible hardware/OS: Double-check that you downloaded the correct driver for your exact GPU model and operating system version (32-bit vs. 64-bit).
- Antivirus interference: Temporarily disable your antivirus software during the installation process, then re-enable it afterwards.
- Running the installer from a compressed folder: Ensure the installer is extracted to a regular folder before running it.
Performance Problems After Reinstallation
- Ensure “Clean Installation” was performed: If you skipped the “Custom (Advanced)” and “Perform a clean installation” steps, redo the entire process.
- Check background processes: Ensure no other applications are hogging resources.
- Update Windows: Sometimes, a missing Windows update can cause performance bottlenecks even with the latest drivers.
- Re-optimize game settings: If you used GeForce Experience, re-scan and optimize your games.
Black Screen or No Display
- Reboot into Safe Mode: If you get a black screen after a driver removal or installation attempt, reboot your PC into Safe Mode (as described in Step 1) and attempt to run DDU again, or try installing an older, known-stable driver.
- Connect to integrated graphics: If your CPU has integrated graphics (e.g., Intel iGPU), connect your monitor to the motherboard’s video output to get a display while troubleshooting the dedicated NVIDIA card.
- Check monitor cables: A simple oversight could be the culprit. Ensure all cables are securely connected.
GeForce Experience Not Working
- Reinstall GeForce Experience separately: If the driver installed but GFE didn’t, download the GFE installer directly from NVIDIA’s website and run it.
- Check network connectivity: GFE requires an internet connection for many of its features.
- Firewall/Antivirus: Ensure your firewall or antivirus isn’t blocking GFE.
Best Practices for Driver Management
Maintaining a healthy GPU environment extends beyond a one-time reinstallation. Adopting good driver management practices can prevent future headaches.
Regular Driver Updates vs. “If It Ain’t Broke…”
The adage “if it ain’t broke, don’t fix it” has some merit, but for NVIDIA drivers, a balanced approach is best.
- Stay updated for new game releases: New Game Ready Drivers often provide significant performance boosts and stability fixes for the latest titles.
- Update for new features or critical bug fixes: If a new driver introduces a feature you want or fixes a specific bug you’re experiencing, update.
- Avoid updating purely for the sake of it: If your system is perfectly stable and performing well on an older driver, especially for professional work, there’s no immediate rush to update. Always check user feedback and release notes before updating.
The Role of GeForce Experience
GeForce Experience is more than just an updater; it’s a valuable companion tool for NVIDIA GPU owners.
- One-click optimization: Automatically optimizes game settings for your specific hardware.
- Game filters (Ansel, Freestyle): Enhance visuals and capture stunning screenshots.
- ShadowPlay/Highlights: Record and share gameplay moments.
- Automatic driver update notifications: While convenient, remember the “Custom (Advanced)” and “Clean Installation” steps if you choose to update through GFE, as it might default to an express installation.
Keeping Your System Healthy
A holistic approach to PC maintenance supports optimal GPU performance:
- Regular Windows updates: Keep your operating system updated to ensure compatibility and security.
- Monitor GPU temperatures: Use tools like MSI Afterburner or HWMonitor to keep an eye on your GPU temps, especially under load. Excessive heat can lead to throttling and instability.
- Clean dust from PC: Dust accumulation in fans and heatsinks is a primary cause of overheating. Regular cleaning is essential.
Conclusion
Reinstalling NVIDIA drivers, while seeming complex initially, is a fundamental maintenance task that empowers users to troubleshoot, optimize, and extend the lifespan of their graphics hardware. By understanding the ‘why’ behind each step, meticulously following the preparation and installation guidelines, and knowing how to troubleshoot common issues, you can ensure your NVIDIA GPU continues to deliver the powerful, stable, and visually stunning performance it was designed for. A well-managed driver system is the bedrock of a robust computing experience, allowing you to focus on your games, creative projects, or professional tasks without interruption.
aViewFromTheCave is a participant in the Amazon Services LLC Associates Program, an affiliate advertising program designed to provide a means for sites to earn advertising fees by advertising and linking to Amazon.com. Amazon, the Amazon logo, AmazonSupply, and the AmazonSupply logo are trademarks of Amazon.com, Inc. or its affiliates. As an Amazon Associate we earn affiliate commissions from qualifying purchases.