In an increasingly digital world, peer-to-peer (P2P) payment applications have revolutionized how we transfer money, making splitting bills, paying friends, and handling everyday transactions simpler and faster than ever before. Among these innovative platforms, Venmo stands out as a household name, known for its user-friendly interface and integrated social features. If you’re looking to dive into the convenience of digital payments and wondering how to get started with Venmo, this comprehensive guide will walk you through the entire signup process. We’ll explore the technical requirements, detailed steps, and essential security considerations, ensuring a smooth and secure onboarding experience into the world of instant digital transactions.
Understanding Venmo’s Role in Modern Digital Payments
Before we delve into the mechanics of signing up, it’s beneficial to grasp what Venmo is and why it has become such a prominent application in the tech landscape of personal finance. From a technological standpoint, Venmo is more than just a money transfer service; it’s an intricately designed mobile application leveraging robust backend systems to facilitate secure and instantaneous financial exchanges.
What is Venmo?
At its core, Venmo is a mobile payment service owned by PayPal. It allows users to send and receive money from each other with ease, typically without transaction fees for standard transfers. What sets Venmo apart from traditional banking apps or even some other P2P services is its distinctive blend of financial functionality with social networking elements. Transactions can include notes, emojis, and even be made public, shared with friends, or kept private, akin to a social media feed for money. This integration of social interaction within a financial application was a novel concept that significantly contributed to its rapid adoption, particularly among younger demographics. The app’s design prioritability focuses on reducing friction in small, frequent transactions, making it a go-to tool for everything from splitting dinner checks to paying rent.
Why Venmo? The Technological Edge for Everyday Use
Venmo’s appeal stems from several technological advantages and design choices that prioritize user experience and convenience. Firstly, its mobile-first approach ensures that the entire service is optimized for smartphone interaction, from initial signup to daily use. The app boasts an intuitive interface, designed for quick navigation and minimal steps to complete a transaction. Underlying this simplicity is a complex architecture that handles real-time data processing, encryption for financial details, and instant notifications.
From a user perspective, Venmo offers:
- Instant Transfers: While standard transfers to a linked bank account might take 1-3 business days, Venmo offers an “Instant Transfer” option (for a small fee) that deposits funds directly to your debit card within minutes, leveraging modern banking APIs for rapid settlement.
- Security Protocols: The app employs advanced encryption and fraud detection technologies to protect user data and transactions. Multi-factor authentication, PIN protection, and biometric login options (fingerprint/face ID) are standard features, reinforcing its digital security posture.
- Integration with Merchant Services: Beyond P2P, Venmo has expanded to allow users to pay at select online and physical retailers, seamlessly integrating into various digital commerce ecosystems and enhancing its utility as a comprehensive digital wallet.
- Social Connectivity: The optional social feed, while not for everyone, allows users to see aggregated, anonymized public transactions, fostering a sense of community around financial interactions—a unique technological and sociological experiment in the financial tech space.
These combined aspects highlight Venmo not just as a financial tool, but as a robust piece of software designed for the demands of modern, mobile-centric life.
Pre-Registration Checklist: Getting Ready to Join
Embarking on your Venmo journey requires a few prerequisites to ensure a smooth and successful registration process. Having these items ready beforehand will significantly streamline your setup and prevent potential technical hiccups.
Essential Requirements for Account Creation
To comply with financial regulations and ensure the security of your account, Venmo requires specific pieces of information and access to certain services. These are standard for most financial technology (FinTech) applications and are crucial for identity verification and fraud prevention.
- A Smartphone: Venmo is fundamentally a mobile application. You’ll need an iOS or Android smartphone capable of downloading and running the latest version of the Venmo app. Tablet support may be available but is not the primary focus.
- A Valid U.S. Phone Number: This is critical for account verification and security. Venmo uses your phone number for SMS verification (multi-factor authentication) and as a primary identifier.
- An Active Email Address: Your email will be linked to your account for notifications, password resets, and additional verification steps.
- A Valid Bank Account or Debit Card: To fully utilize Venmo and be able to send and receive money beyond the initial balance loaded from friends, you’ll need to link a funding source. A U.S.-based bank account (checking or savings) or a major debit card (Visa, MasterCard, American Express, Discover) is typically required. While credit cards can be linked, they usually incur a 3% fee for sending money.
- U.S. Citizenship or Residency: Venmo is primarily designed for use within the United States. You must be 18 years or older and reside in the U.S. to create an account. For higher transaction limits and certain features, Venmo may also require your Social Security Number (SSN) for identity verification, a standard procedure for financial institutions to comply with Know Your Customer (KYC) regulations.
Device Compatibility and App Download
Ensuring your device is compatible and correctly downloading the app is the first tangible step in the technical onboarding process.
- Operating System Compatibility: Check that your smartphone runs a supported version of iOS (for iPhones) or Android. While Venmo aims for broad compatibility, older operating system versions may not support the latest app features or security updates. Refer to the official Venmo website or your app store listing for minimum OS requirements.
- Downloading the App:
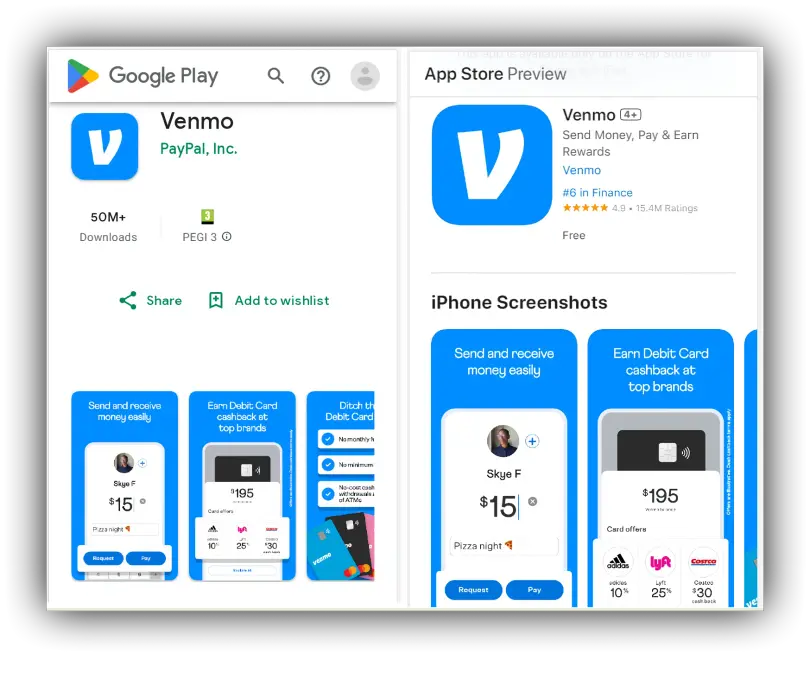
- For iOS Devices: Open the Apple App Store, search for “Venmo,” and tap “Get” to download and install the application.
- For Android Devices: Open the Google Play Store, search for “Venmo,” and tap “Install” to download and install the application.
- Always download the app from official app stores to avoid malicious or counterfeit applications that could compromise your personal and financial data. Once downloaded, the Venmo icon will appear on your home screen or app drawer, ready for you to begin the signup process.
A Step-by-Step Guide to Venmo Registration
With your prerequisites in order and the app installed, you’re ready to navigate the core registration process. This sequence of steps is designed to securely establish your identity and link your financial instruments within Venmo’s digital framework.
Initial App Setup and Signup Method Selection
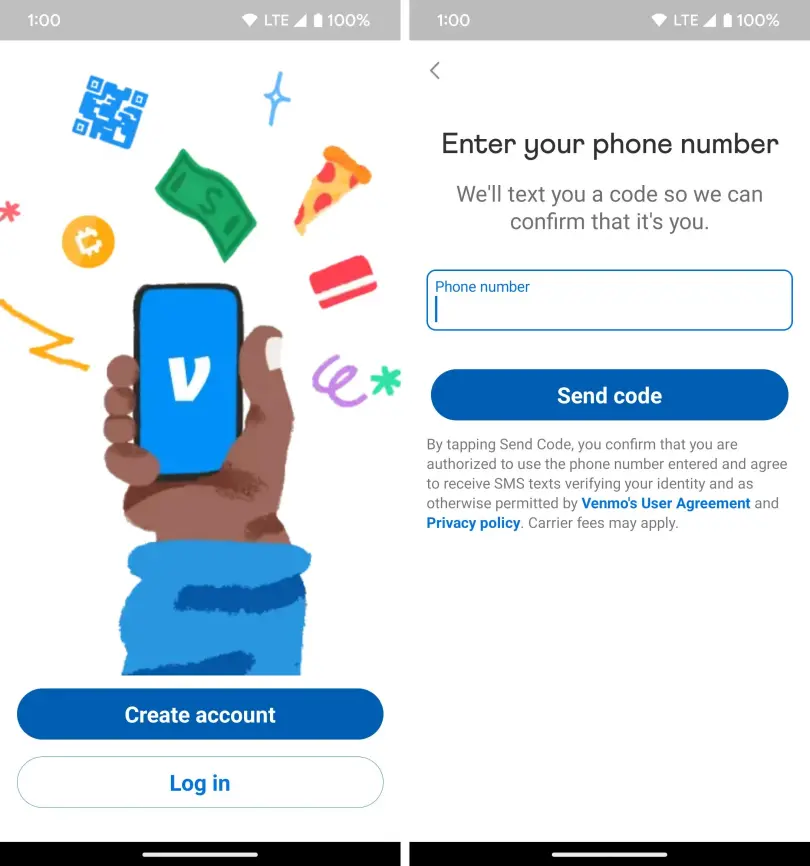
Upon launching the Venmo app for the first time, you’ll be greeted with an option to “Sign up” or “Log In.” Since this is your first time, select “Sign up.”
- Choosing Your Signup Method: Venmo typically offers a few ways to initiate signup:
- Sign up with Facebook: This option can expedite the process by pulling some basic information from your Facebook profile, but you will still need to verify your phone number and email.
- Sign up with Google: Similar to Facebook, using your Google account can pre-fill some details.
- Sign up with Email/Phone: This is the most direct method, allowing you to manually enter all your details. For privacy-conscious users, this might be preferred.
- Select the method that best suits your preference. For this guide, we’ll assume a direct email/phone signup, as it covers all necessary manual entries.
Personal Information and Verification
The next phase involves providing your personal details and verifying your contact information. This is critical for identity assurance and communication.
- Enter Your Basic Information: You will be prompted to enter your full legal name (first and last), email address, and a strong password. Choose a password that is unique and complex, combining uppercase and lowercase letters, numbers, and symbols.
- Phone Number Verification: Enter your U.S. phone number. Venmo will send a one-time passcode (OTP) via SMS to this number. Enter the OTP into the app to verify your phone number. This step is a crucial component of multi-factor authentication, preventing unauthorized access.
- Date of Birth: You’ll need to confirm that you are at least 18 years old by entering your date of birth.
- Social Security Number (SSN) for Full Verification: While not always immediately required for basic functionality, Venmo will eventually ask for the last four digits of your SSN, and potentially the full SSN, to verify your identity. This is part of its regulatory compliance and is necessary for increasing transaction limits, accessing direct deposit features, or linking certain bank accounts. This data is encrypted and handled with the utmost security.
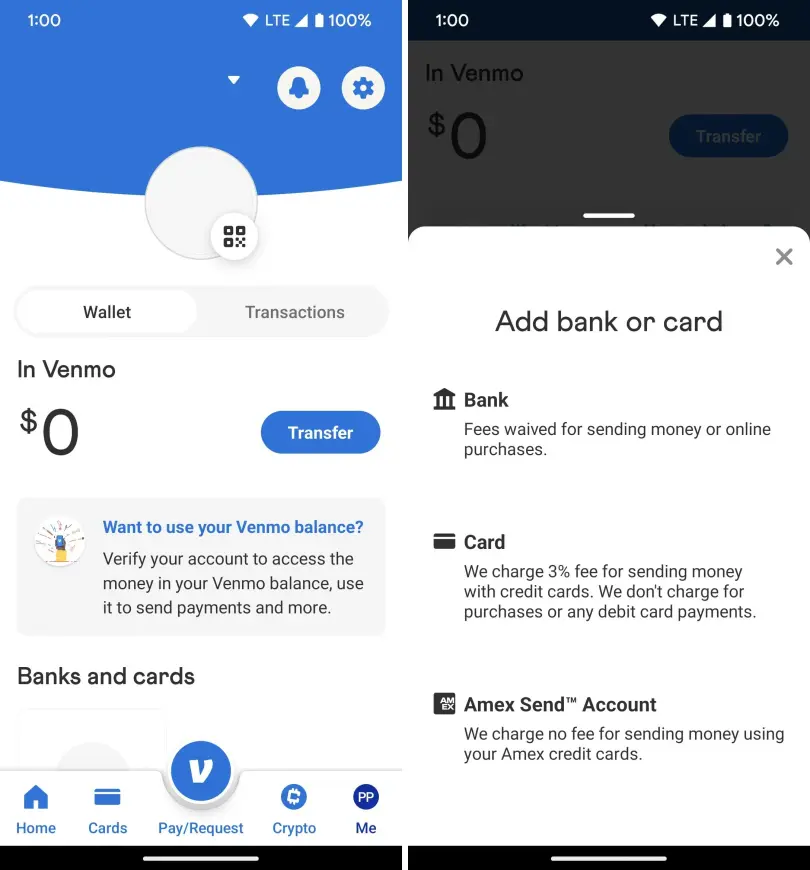
Linking Your Financial Institution
To send and receive money beyond a theoretical balance, you must link a funding source. This connects your Venmo account to your real-world financial ecosystem.
- Debit Card or Bank Account: You’ll be given the option to link a debit card or a bank account.
- Linking a Debit Card: This is often faster. Enter your debit card number, expiration date, and CVV. Venmo may perform a micro-transaction (a small charge and refund) to verify the card. Debit cards are generally preferred for quick, fee-free payments.
- Linking a Bank Account: This typically involves a secure login process through Venmo’s integration with Plaid or similar services. You’ll log in to your bank’s online portal directly through the Venmo app (or Plaid’s secure pop-up) to authorize the connection. Alternatively, you might verify through micro-deposits, where Venmo sends two small deposits to your bank account, and you confirm the amounts in the app a few days later. Linking a bank account allows for higher transaction limits and enables direct transfers to your bank.
- Security Considerations: When linking financial accounts, ensure you are in a secure environment. Venmo encrypts all financial information, and reputable services like Plaid use bank-level security measures to protect your credentials. Never share your bank login details directly with anyone.
Creating a Secure Username and Privacy Settings
Finally, you’ll finalize your digital identity within Venmo and set your initial privacy preferences.
- Choose a Unique Username: This is how friends will find and identify you on Venmo. It should be unique and ideally professional or easily recognizable to your contacts.
- Set Initial Privacy Defaults: Venmo prompts you to set the default privacy for your future transactions. You can choose:
- Public: Anyone on Venmo can see your transactions (but not the amounts).
- Friends: Only your Venmo friends can see your transactions.
- Private: Only you and the other party involved in the transaction can see it.
- It’s generally recommended to start with “Friends” or “Private” and adjust as you become more comfortable with the platform. You can always change the privacy setting for individual transactions later.
Navigating Your New Venmo Account
Once your account is successfully created and verified, you’re ready to explore its features and begin utilizing its payment capabilities. Understanding the app’s layout and security settings is crucial for a productive and safe experience.
Exploring the User Interface
Venmo’s design prioritizes ease of use, making its interface relatively straightforward to navigate.
- Home Screen/Feed: This is often the first screen you see. It displays a stream of recent transactions, depending on your privacy settings and whether you have public or friend transactions enabled. It’s designed to mimic a social media feed.
- Pay/Request Button: Typically located prominently (often in the center bottom of the screen), this is where you initiate all money transfers. Tapping it allows you to select recipients from your contacts or search for Venmo users, enter an amount, and add a note.
- Profile Tab: Here you can access your personal information, linked payment methods, transaction history, and adjust various settings. This is also where you can find your unique QR code for easy payments.
- Me Tab: This section often combines elements of your profile with your balance, transaction history, and options to manage your payment methods and settings.
- Search Function: Located at the top, allowing you to find friends, businesses, or past transactions quickly.
Understanding these key areas will empower you to efficiently send and receive money, manage your account, and track your financial activity within the app.
Enhancing Security and Privacy Settings
While Venmo provides inherent security, proactively adjusting your settings can further bolster your account’s protection and privacy.
- Two-Factor Authentication (2FA): Ensure 2FA is enabled. Beyond SMS verification during signup, you can often add an authenticator app (like Google Authenticator) for an extra layer of security. This means that even if someone gets your password, they can’t access your account without the second factor.
- PIN/Biometric Lock: Set up a PIN, fingerprint lock, or Face ID (depending on your device) for opening the Venmo app. This prevents unauthorized access to your funds if your phone is lost or stolen.
- Default Privacy Settings: Revisit your default transaction privacy settings. While the social feed is unique, many users prefer “Private” for all transactions to avoid sharing their financial activity. Remember, you can change the privacy for individual transactions as needed.
- Notification Settings: Customize notifications to alert you to payments received, sent, and other critical account activities. This helps you monitor your account for any suspicious activity.
- Review Authorized Devices: Periodically check the “Security” section within your settings to see which devices are logged into your Venmo account. Remove any unrecognized or old devices.
Initial Transactions and Best Practices
With your account secured and understood, you’re ready to make your first transaction.
- Sending Money:
- Tap the “Pay/Request” button.
- Select the recipient from your contacts or search for their Venmo username.
- Enter the amount and a clear, descriptive note (e.g., “Dinner last night,” “Rent for May”).
- Choose your funding source (bank account, debit card, or Venmo balance).
- Confirm the transaction.
- Receiving Money: Funds sent to you will appear in your Venmo balance. You can leave them there to send to others, or transfer them to your linked bank account.
- Transferring to Bank: From your “Me” tab, select “Transfer Balance” and choose your linked bank account. You can opt for a standard (free, 1-3 business days) or instant (small fee, minutes) transfer.
- Avoiding Common Pitfalls:
- Double-check Recipient: Always verify the username, photo, and potentially the last four digits of the phone number of the person you’re sending money to. It’s difficult to reverse Venmo payments once sent to the wrong person.
- Understand Fees: Be aware of fees for instant transfers, credit card payments, or certain business transactions.
- Only Send to Trusted Individuals: Treat Venmo like cash. Only send money to people you know and trust. Be wary of requests from unknown individuals or for items sold on marketplaces where Venmo is not the recommended payment method.
Troubleshooting and Further Assistance
Despite Venmo’s streamlined design, users may occasionally encounter issues during signup or account management. Knowing how to troubleshoot common problems and access support is key to a seamless experience.
Common Signup Issues and Solutions
While the Venmo registration process is generally smooth, specific technical or verification hurdles can arise.
- Verification Code Not Received: If you don’t receive the SMS verification code, first check your phone number for typos during entry. Ensure you have a strong cellular signal. Sometimes, simply restarting your phone can resolve temporary network glitches. If problems persist, try requesting the code again after a short waiting period, or contact your mobile carrier to ensure no SMS blocking is in place.
- Bank Account/Debit Card Linking Errors:
- Incorrect Information: Double-check all card numbers, expiration dates, CVVs, and bank login credentials. Even a single digit error can prevent linking.
- Unsupported Bank/Card: While Venmo supports most major U.S. banks and debit cards, a rare few might not be directly compatible. Ensure your card is a debit card, not a prepaid card, as these often have limitations.
- Micro-Deposit Issues: If using micro-deposits, ensure you wait the full 1-3 business days for them to appear in your bank statement before attempting to verify. Entering incorrect amounts will lead to further delays.
- Identity Verification Problems: If Venmo cannot verify your identity based on the information provided (especially with SSN), it might be due to a discrepancy between your provided details and official records. Ensure your name matches government-issued IDs precisely. In such cases, direct contact with Venmo support is necessary.
- App Freezing/Crashing: Ensure your Venmo app is updated to the latest version. Clear the app’s cache (in your phone’s settings) or reinstall the app if it continues to malfunction. A stable internet connection (Wi-Fi or strong cellular data) is also essential for app stability.
Venmo Support Resources
If you encounter persistent issues that cannot be resolved through basic troubleshooting, Venmo provides several avenues for assistance.
- Venmo Help Center: The official Venmo Help Center (accessible via the app’s settings or the Venmo website) is an extensive knowledge base containing articles, FAQs, and step-by-step guides on almost every aspect of using the service, from signup to advanced features. This is often the quickest way to find solutions to common problems.
- In-App Support: Within the Venmo app, navigate to “Settings” > “Get Help” or “Contact Us.” This usually provides options to chat with a support agent, submit a ticket, or find a phone number.
- Email Support: You can typically email Venmo support directly through a form on their website or within the app. Be detailed in your description of the issue, including screenshots if applicable, to help them understand and resolve your problem efficiently.
- Phone Support: For urgent issues, Venmo offers phone support during business hours. The phone number can usually be found in the Help Center or by initiating a contact request through the app.
By understanding the process, being prepared with the necessary information, and knowing where to turn for help, signing up for Venmo becomes a simple and secure step into the future of digital payments. Embrace the convenience and connectivity it offers, making everyday transactions effortlessly smooth.
aViewFromTheCave is a participant in the Amazon Services LLC Associates Program, an affiliate advertising program designed to provide a means for sites to earn advertising fees by advertising and linking to Amazon.com. Amazon, the Amazon logo, AmazonSupply, and the AmazonSupply logo are trademarks of Amazon.com, Inc. or its affiliates. As an Amazon Associate we earn affiliate commissions from qualifying purchases.