Achieving a professional, polished look for interior trim work hinges on many factors, but none are quite as critical as selecting the right fastening tool. A nail gun, often seen as a staple in any serious DIYer’s or professional carpenter’s arsenal, is specifically designed to sink fasteners quickly and efficiently, leaving minimal evidence of its work. However, the world of nail guns is diverse, with various types engineered for different applications. For the intricate and often delicate task of installing trim – be it baseboards, crown molding, door casings, or intricate paneling – choosing the correct nail gun isn’t just about convenience; it’s about ensuring the integrity of the installation, minimizing wood splitting, and achieving that sought-after seamless finish.
This guide delves into the technological nuances of various nail guns suitable for trim work, dissecting their features, power sources, and ideal applications. We’ll explore how each type addresses specific challenges in trim installation, empowering you to make an informed decision that elevates your craftsmanship and delivers truly flawless results.
The Essential Criteria for Trim Nailers: Precision and Power
When it comes to trim, the stakes are higher than, say, framing. Visible nail holes, split wood, or fasteners that don’t sit flush can mar an otherwise perfect installation. Therefore, the selection of a trim nailer is dictated by a unique set of criteria that prioritize precision, control, and minimal impact on the material.
Nail Gauge and Fastener Type: The Foundation of Finish Quality
The most fundamental characteristic defining a nail gun’s suitability for trim is the gauge of the nails it fires. Nail gauge refers to the thickness of the nail wire, with a higher gauge number indicating a thinner nail. Thinner nails create smaller holes, which are less noticeable and easier to fill, a crucial consideration for finish work.
- 15-Gauge Finish Nailers: These fire thicker, sturdier nails, offering superior holding power. They are ideal for larger, heavier trim pieces like substantial baseboards, thick crown molding, or door casings where significant structural integrity is needed. The larger nail hole is a trade-off, but for heavier trim, the enhanced holding power is often worth the extra effort in filling.
- 16-Gauge Finish Nailers: A common choice, 16-gauge nails strike a balance between holding power and a manageable hole size. They are highly versatile, suitable for a wide range of trim applications, including standard baseboards, crown molding, window casings, and chair rails. Many professionals consider the 16-gauge finish nailer their primary trim tool due to its adaptability.
- 18-Gauge Brad Nailers: Firing thinner “brad” nails, these tools create significantly smaller holes, making them perfect for delicate and smaller trim pieces. Applications include shoe molding, quarter round, small decorative trim, and cabinet assembly. While offering less holding power than finish nailers, the minimal aesthetic impact of an 18-gauge brad nail is often preferred for visible, lighter trim.
- 23-Gauge Pin Nailers: The ultimate in discreet fastening, pin nailers shoot tiny, headless pins that are virtually invisible. They offer minimal holding power on their own and are typically used in conjunction with wood glue. Their primary purpose is to hold delicate pieces in place while adhesive dries, or to secure very thin veneers and small decorative elements where any visible fastener would be unacceptable. Pin nailers are invaluable for intricate, high-end finishing work.
Beyond gauge, the type of nail head (e.g., clipped head, full round head, headless) also influences holding power and appearance, but for trim, the focus is generally on “finish” nails designed to be inconspicuous.
Power Source and Portability: Tailoring Technology to Your Workflow
The technology driving a nail gun directly impacts its performance, weight, and operational logistics. For trim work, which often involves moving around rooms and working at various angles, portability and consistent power are paramount.
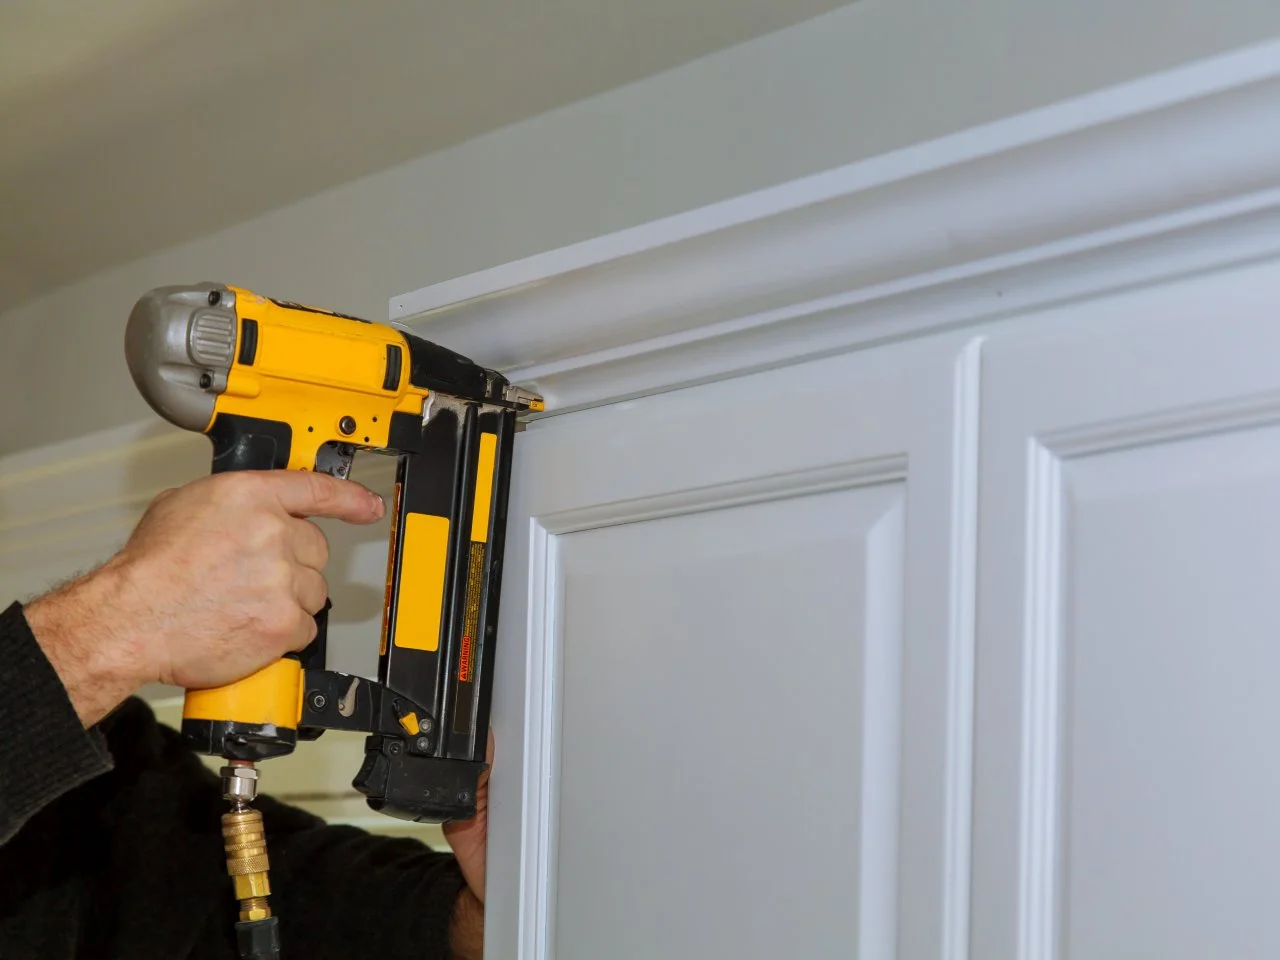
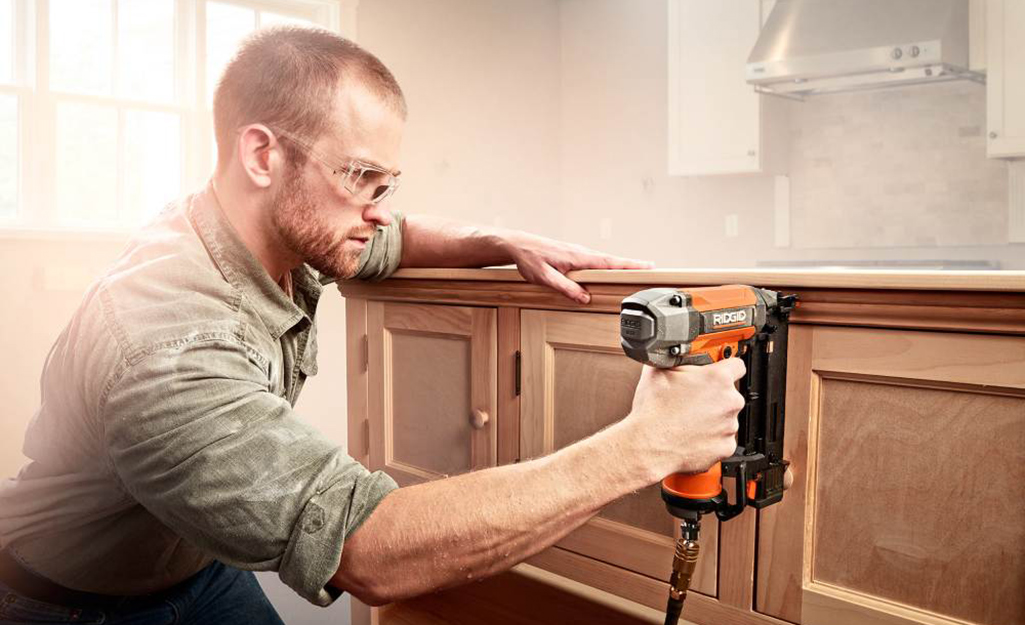
- Pneumatic Nail Guns: These are powered by compressed air, requiring an air compressor and a hose.
- Pros: Generally lighter and more compact than cordless models due to the absence of a battery, offering consistent power without battery drain. They are often less expensive to purchase initially.
- Cons: The need for a compressor and air hose introduces bulk and limits mobility, with the hose potentially snagging or marring finished surfaces. Compressors can also be noisy.
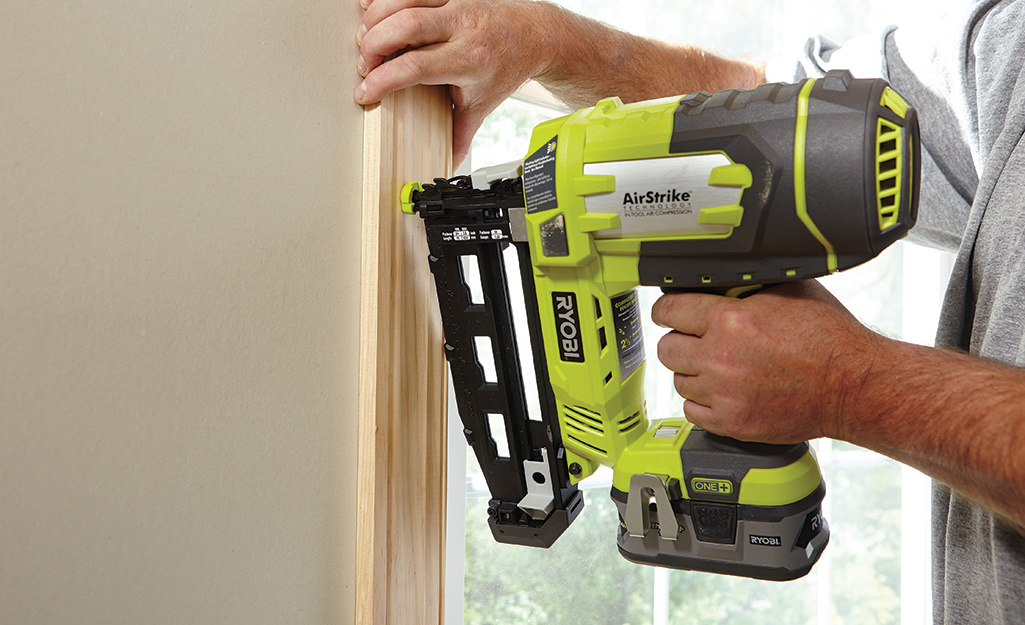
- Cordless (Battery-Powered) Nail Guns: Utilizing rechargeable lithium-ion batteries, these tools offer unmatched freedom of movement.
- Pros: Supreme portability – no hoses, no compressors, just grab and go. Ideal for smaller jobs, punch lists, or working in areas without easy access to power. Rapid deployment is a significant advantage.
- Cons: Heavier than pneumatic counterparts due to the battery, and battery life can be a concern on large projects. They typically have a higher initial cost. Performance can sometimes be slightly less consistent than pneumatic, especially for larger nails, though modern cordless technology has significantly closed this gap.
- Fuel-Cell Powered Nail Guns: A hybrid technology, these use a small fuel cell (often butane or propane) to ignite and drive a piston, supplemented by a small battery for ignition and fan operation.
- Pros: Offer excellent power-to-weight ratio, often comparable to pneumatic guns without the hose. Highly portable.
- Cons: Requires both fuel cells and batteries, adding to operational cost and requiring management of consumables. Can have a distinct odor.
- Corded Electric Nail Guns: Less common for dedicated trim work, these plug directly into an electrical outlet.
- Pros: Consistent power without reliance on batteries or compressors.
- Cons: Limited by the length of the cord, making them less agile for multi-room trim installations.
Key Features for Optimal Trim Work: Enhancing Precision and User Experience
Beyond the fundamental power source and nail gauge, several technological features significantly enhance the usability and precision of a trim nailer:
- Depth Adjustment: Absolutely critical for trim. This feature allows the user to precisely control how deep the nail is driven, ensuring it sits perfectly flush or slightly countersunk without marring the wood. Both tool-free and wrench-adjustable options exist.
- No-Mar Tips: These non-damaging tips are essential for protecting delicate wood surfaces from indentations or scratches caused by the tool’s nose. Most trim nailers come with interchangeable no-mar tips.
- Jam Clearing Mechanism: Trim work requires efficiency. A tool-free or easy-access jam clearing latch allows for quick resolution of nail jams, minimizing downtime.
- Swivel Air Connector (Pneumatic): A 360-degree swivel connector on pneumatic guns prevents the air hose from tangling and makes maneuvering the tool much easier in tight spaces.
- LED Lights: Integrated LED lights illuminate the work surface, which is invaluable when working in dimly lit areas or shadows, ensuring accurate nail placement.
- Dry-Fire Lockout: This safety feature prevents the gun from firing when the magazine is empty, protecting the tool from damage and preventing unnecessary wear on the work surface.
- Sequential vs. Contact Firing: Sequential firing (trigger must be depressed, then nose pressed against surface) offers greater precision and safety for finish work. Contact firing (nose pressed, then trigger depressed, or vice-versa, allowing rapid firing) is generally avoided for delicate trim.
A Deep Dive into Specific Nail Gun Types for Trim
Understanding the general criteria sets the stage for exploring the specific nail gun categories most relevant to trim installation. Each type represents a specialized technological solution tailored to different aspects of finish carpentry.
Finish Nailers (15- and 16-Gauge): The Workhorses of Trim
Finish nailers are often the first choice for professionals and serious DIYers tackling larger trim projects. Their ability to drive longer, thicker nails provides substantial holding power, making them ideal for securing structural trim components.
- 15-Gauge Finish Nailers: These are often angled (e.g., 20 or 25 degrees) to allow better access into tight corners. They are the top choice for heavy-duty trim applications such as substantial crown molding, thick door and window casings, and wide baseboards. The holding power is exceptional, ensuring these larger elements stay firmly in place for years. While the nail holes are more noticeable, they are easily filled with wood putty and sanded smooth before painting or staining.
- 16-Gauge Finish Nailers: Often straight-magazine models, 16-gauge nailers are the quintessential all-rounder for general trim work. They offer a fantastic balance of holding power for medium-to-large trim and smaller nail holes than their 15-gauge counterparts. They excel at securing standard-sized baseboards, chair rails, paneling, and general decorative trim. Their versatility makes them a popular first finish nailer for many users.
The technology behind finish nailers focuses on delivering consistent, powerful strikes to sink robust nails deeply and precisely. Depth adjustment mechanisms are particularly critical here to prevent over-driving into the trim or under-driving, leaving proud nails.
Brad Nailers (18-Gauge): The Versatile All-Rounder
Brad nailers represent the sweet spot for many DIY homeowners and those working on smaller, more delicate trim pieces. Their 18-gauge brad nails are significantly thinner than finish nails, making them almost disappear into the wood.
- Applications: Brad nailers shine when installing delicate shoe molding, quarter round, small decorative strips, thin battens, picture frame molding, and even light cabinet work. They are also excellent for holding components in place temporarily while glue dries, similar to pin nailers but with slightly more holding power.
- Advantages: The primary advantage is the incredibly small hole left behind, which often requires only a minimal touch of wood filler or paint to become invisible. This is particularly beneficial on pre-finished trim where extensive filling would be problematic. Brad nailers are also typically lighter and more maneuverable than finish nailers, making them less fatiguing for extended use.
- Limitations: Their thinner nails offer less sheer strength and holding power compared to finish nails, making them less suitable for securing heavy, load-bearing trim or for applications where structural integrity is paramount. For such cases, brads are best used in conjunction with wood adhesive.
Pin Nailers (23-Gauge): The Precision Specialists
Pin nailers are the ultimate precision tool for the most delicate and high-end trim applications. Firing tiny, headless 23-gauge pins, these tools leave holes that are practically invisible to the naked eye, earning them the nickname “headless nailers.”
- Applications: Pin nailers are indispensable for securing very thin veneers, delicate custom moldings, small decorative elements, small returns on crown molding, and any situation where fasteners must be absolutely imperceptible. They are also fantastic for holding intricate assemblies together while glue sets, providing a temporary clamp that leaves no mark.
- Advantages: The primary benefit is the near-invisible fastening. This eliminates the need for filling nail holes, which is a massive time-saver and aesthetic advantage, especially on stained wood or pre-finished materials. The small pins also greatly reduce the risk of splitting delicate or thin wood.
- Limitations: Pin nails offer minimal holding power on their own. They are not designed for structural fastening but rather for discreet attachment and temporary clamping. For permanent installations, they must be used in conjunction with a strong adhesive. The small size of the pins also means that if removed incorrectly, they can be difficult to extract without damaging the wood.
Beyond the Tool: Accessories and Best Practices for Trim Fastening
The technology of the nail gun itself is only one part of the equation. To truly achieve a flawless finish, it’s crucial to consider the accompanying accessories and adopt best practices for installation.
Essential Accessories for a Seamless Workflow
- Air Compressor (for Pneumatic): The right compressor is vital. For trim, you don’t necessarily need a huge, noisy framing compressor. Look for models with a smaller tank (e.g., 2-6 gallons) and a higher CFM (Cubic Feet per Minute) rating at 90 PSI to ensure it can keep up with the nail gun without constantly cycling. Quieter “silent” compressors are a significant advantage for indoor work.
- Air Hose (for Pneumatic): A flexible, lightweight hose (e.g., polyurethane or hybrid material) is preferable to heavy rubber, which can be cumbersome and mark finished surfaces. Ensure the hose is long enough to cover your work area without needing constant repositioning of the compressor.
- Nails: Always use the correct gauge and length for your specific nail gun and trim material. Stainless steel or galvanized nails are available for exterior trim to prevent rust. Ensure you have a good supply to avoid mid-project interruptions.
- Safety Glasses and Hearing Protection: Non-negotiable for any power tool operation. Flying debris and the noise from nail guns (especially pneumatic ones) can cause permanent damage.
- Nail Punch: While a good nail gun should sink nails flush, occasional proud nails happen. A nail punch allows you to countersink these manually for a perfect finish.
- Wood Putty/Filler: Essential for filling any visible nail holes before sanding and finishing. Choose a filler that matches the wood species or accepts paint/stain well.
Mastering Trim Installation Techniques
Even with the best technology, technique matters.
- Pre-Drilling (for Hardwoods): For very dense or brittle hardwoods, pre-drilling a pilot hole (smaller than the nail’s diameter) can prevent wood splitting, especially when nailing close to edges.
- Nailing Angles (Toe-Nailing): When greater holding power is needed (e.g., for heavy crown molding), driving nails at opposing angles (“toe-nailing”) can create a stronger mechanical lock in the wood.
- Consistent Spacing: Maintain even spacing of fasteners for both aesthetic appeal and consistent holding power. Typically, nails are spaced 12-16 inches apart along the length of the trim, with additional nails near ends and corners.
- Using Construction Adhesive: For critical trim pieces, especially those prone to movement or requiring maximum adhesion (like baseboards over uneven walls), a bead of construction adhesive on the back before nailing drastically improves the long-term integrity of the installation. For pin nailers, adhesive is almost always a necessity.
- Practicing on Scrap Wood: Before tackling your finished trim, practice firing nails into scrap pieces of similar wood to perfect your depth adjustment and ensure the tool is operating correctly.
Making the Right Choice: Matching Your Needs to the Technology
The “best” nail gun for trim isn’t a universal answer; it’s the one that best suits your specific projects, budget, and work style.
Project Scale and Frequency
- Occasional DIYer: An 18-gauge brad nailer (cordless for convenience, or pneumatic if you already own a compressor) is often the most versatile and cost-effective starting point for general household trim.
- Frequent DIYer/Renovator: A combination of an 18-gauge brad nailer and a 16-gauge finish nailer (either pneumatic or a quality cordless set) will cover the vast majority of trim projects.
- Professional Carpenter/Contractor: A full suite including 15-gauge finish, 16-gauge finish, 18-gauge brad, and 23-gauge pin nailers (often cordless for ultimate portability and pneumatic for heavy-duty, consistent work) provides maximum versatility and efficiency on diverse job sites.
Budget Considerations
Initial purchase price is just one factor. For pneumatic setups, you’ll need to factor in the cost of a compressor and hose. For cordless, consider the cost of extra batteries and chargers. Fuel-cell nailers have ongoing costs for fuel cells. While a quality tool is an investment, it will save time and frustration in the long run.
Ergonomics and User Comfort
Consider the weight and balance of the tool, especially if you’ll be using it for extended periods or in overhead applications (like crown molding). Cordless tools, while offering freedom, can be heavier. Pneumatic tools are often lighter but come with the hassle of a hose. Test out different models if possible to see how they feel in your hand.
In conclusion, the decision of “what kind of nail gun for trim” ultimately boils down to a thoughtful assessment of your specific needs and the technical demands of your projects. Whether you prioritize the raw power and consistency of pneumatic systems, the unparalleled freedom of cordless technology, or the surgical precision of a pin nailer, understanding the nuanced capabilities of each tool ensures that your investment translates into beautifully finished trim, time saved, and a deeply satisfying sense of accomplishment. Invest wisely, prioritize safety, and let the right technology empower your craftsmanship.
aViewFromTheCave is a participant in the Amazon Services LLC Associates Program, an affiliate advertising program designed to provide a means for sites to earn advertising fees by advertising and linking to Amazon.com. Amazon, the Amazon logo, AmazonSupply, and the AmazonSupply logo are trademarks of Amazon.com, Inc. or its affiliates. As an Amazon Associate we earn affiliate commissions from qualifying purchases.